|
|
PBP Commentary |
Coming up we have a super heavyweight MMA rules bout between William Barker (ranked 0 p4p, 0 weight class) and Oakley Bark (ranked 0 p4p, 0 weight class). Barker kept the crowd waiting but all that was forgotten when his ring entrance music started. The incomparable musical genius that is The Way of the Fist - Five Finger Death Punch. Bark has chosen RUN DMC its like that as his entrance music. Buckle up people - heeeeeeeeeere we go!
 |
|
 |
| 180 cm
36
182 lbs
29 - 16 - 0 |
|
190 cm
41
235 lbs
42 - 22 - 0 |
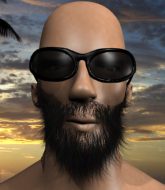
Abu Dhabi Champ
Lethal high kicks
Very quick |
|
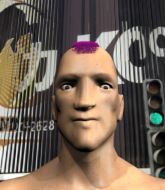
Excellent grappler
Excellent boxer
Good gas tank |
|
| |
|
Ladies and gentlemen. This fight is 5 rounds, for the super heavyweight championship of the world!
Introducing the champion to my left, fighting out of the red corner.
With a record of
29 - 16 - 0, fighting out of Tokyo, William Barker!
And introducing the challenger to my right, fighting out of the blue corner.
With a record of
42 - 22 - 0, fighting out of Tokyo, Oakley Bark!
The judges for this bout are Shigeki Sano, Hirohito Nitta and Taro Takaoka.

The bell rings for round one and we are underway!

Bark dives in and scores a takedown into Barker's guard.
We must be close to a standup if these guys don't pick up the pace.
Bark trying to control the position from guard on top but Barker is wriggling around, looking for whatever he can.
Bark is looking to pass into half guard but Barker pushes him away with his feet and jumps on top - now Barker is in guard.

Bark had isolated an arm as going for a kimura. Barker defends it easily.
Barker won't allow Bark to get back to his feet.
Barker with a flurry of punches that miss.
Bark not looking particularly offensive just at the moment.
Barker wants to control from the top but Bark keeps moving.
Bark is active off his back here, looking for submissions.
Barker is sitting in guard, working some ground and pound.
Barker lands a couple of elbows.
We've seen a great period of action over the last minute or so - credit to both fighters for going all out!
Barker pressing down on his opponent's thigh, looking to pass guard. Bark is keeping the position for now.

That's one minute gone in the round.
Barker wants to control from the top but Bark keeps moving.
Bark has his foot on Barker's thigh. He's trying to push off and get in position for a triangle, I think. Barker works his way back into a safe position though.
Barker connects with a couple of short punches.
Bark looking for a guillotine here but Barker defends easily.
Barker loading up with the ground and pound but he's missing more than he's landing in this flurry.
Barker won't allow Bark to sweep him here.
Bark wants to stand up but Barker is controlling him.
Bark keeping moving, preventing Barker from controlling successfully.
Barker in full guard, throwing the ground and pound. No damage this time.

That's two minutes gone in the round.
Barker wants to pass the guard but Bark is keeping the position.
Barker distracts Bark with his right hand and drops a big elbow with his other arm.
Barker tries to free his leg and advance position but Bark is retaining full guard.
Bark is working from a closed guard but he's struggling to control his opponent.
Barker throwing elbows and punches but not connecting, as Bark works some decent striking defense from the bottom.
We've seen a great period of action over the last minute or so - credit to both fighters for going all out!
Barker working some ground and pound from guard but it's not doing any damage.
Barker trying to control the position from guard on top but Bark is wriggling around, looking for whatever he can.
Barker postures up to throw the ground and pound strikes but they don't connect.

That's three minutes gone in the round.
Barker wants to pass the guard but Bark is keeping the position.
Barker trying to land body shots but he keeps hitting the mat.
Bark looking to control.
Barker working some ground and pound from guard but it's not doing any damage.
Barker throws a big right hand that misses.
Barker lands a couple of elbows.
Bark is looking to stand up but Barker isn't so interested in that idea.
Barker looking to sit in guard and control but Bark gets the butterfly guard and sweeps. He's now in the guard on the top.

Barker working for a triangle but Bark defends it easily.
Bark drops back looking for a heel hook - he quickly realises he's not going to get it but Barker manages to dive on top of him before he can escape and now Bark has Barker in his guard.

That's four minutes gone in the round.
Barker is working Bark over from the guard. He should look to pass the guard and do a little more damage with these strikes.
Barker throwing shots from guard but he's hitting more mat than opponent.
Bark is working an open guard here, looking to improve his position. No doubt that will leave him open to counters but at least he's being more offensive.
Barker avoids a guillotine attempt easily.
The fans in attendance giving it up for the two fighters, who have really let it all hang out in the last minute or so!
Bark wants to sweep here but Barker controlling him for the moment.

That's five minutes gone in the round.
Bark has a loose triangle. He'll be looking to tighten that up but Barker can see exactly what he's planning and manages to posture up and free himself.
Bark working a defensive guard here.
Bark is throwing his legs up, looking for submissions. Barker is aware though and is defending well.
Bark can't keep his opponent in guard - Barker advances to half guard, no doubt looking to mount.
Bark wants to get back to his feet.
Bark is doing well to control the position and prevent Barker from advancing to side control.
The fighters are trapped in the ropes so we're going to have a reposition here. The ref calls for a break and repositions the fighters in the center of the ring.
Bark is trying to control but Barker passes into side control!
Bark is looking to reverse the position.
The fighters are tangled up in the ropes here. We might need a restart if the fighters can't break free themselves.

That's six minutes gone in the round.
Barker working away.
Barker works a knee to the body and follows up with a nice elbow to the head.
Bark manages to work his way to half guard, despite Barker's best efforts.
Bark actively working from the bottom here.
Wooooo! Give it up for these two warriors! They are putting on a show!
Barker sitting in half guard, looking to land shots. Bark defending well though.
Barker thumps the canvas. Not on purpose obviously - he just missed Bark's head.
Bark looking to work for a kimura from the bottom.
Bark actively working from the bottom here.

That's seven minutes gone in the round.
Barker landing with strikes to the body and head, softening up his opponent.
Barker is keeping good posture, landing some ground and pound.
Barker is trying to work for a kimura but Bark is defending well.
Barker trying to control the pace.
Barker throwing punches and elbows but they're not doing any damage.
Bark wants to sweep but Barker has passed to side control!
Barker landing a few strikes.
Barker is trying to get an arm triangle but Bark is defending well.

That's eight minutes gone in the round.
Bark is trying to get back to half guard.
This is a great period of action - very entertaining stuff!
Barker trying to control the action but Bark is working from the bottom.
Barker controls the position.
Barker cracks Bark with a big right hand but Bark just smiles back at him and invites him to have another go.
Check out the look on Barker's face as he threw that strike - that's one determined fighter!
Bark manages to get back to half guard.
Barker missing with the ground and pound from half guard.
Bark is looking to sinch up a guillotine here but Barker pulls his head out easily.
Bark pushes Barker off looking to stand but Barker dives back in and keeps control.

That's nine minutes gone in the round.
Barker is thinking about going for an arm triangle but he can't free his leg.
Barker is trying to work for a kimura but Bark is defending well.
Ground and pound from Barker.
Barker is looking to take a break and control but Bark is keeping him honest, looking to work from the bottom.
As the round comes to an end the crowd are showing their appreciation for a great round of action.
Barker is thwarting Bark's attempts to control the position.
Barker throwing shots but they're hitting the canvas more than the man.
And that�s the end of the round � the fighters go back to their corners.
William Barker dominated that round.
That's time! Back to the action!

Bark closes the distance and gets a double leg, slamming Barker to the mat! Barker manages to get full guard.
Barker isolates an arm and boxes in a triangle. Bark stacks Barker on his neck as he steps over and passes to the side. He's now in a much more dominant position where he can look to do some serious damage. Nice move by Bark!
Barker regains half guard.
Bark is looking for a kimura here.
Bark looking for a submission but Barker manages to get full guard, putting an end to that submission attempt.
Bark trying to control the position from guard on top but Barker is wriggling around, looking for whatever he can.
That's one minute gone in the round.
Barker keeping full guard, as Bark tries to pass.
Barker looking for submissions from the bottom here. Moving his hips around, possibly looking for an armbar.
Barker keeping moving, preventing Bark from controlling successfully.
Bark preventing the sweep.
Bark looking to pass the guard.
That's two minutes gone in the round.
Bark slips effortlessly into side control - very nice.
Barker is trying to improve his position.
Bark advances to mount.
Bark prevents Barker from getting the reversal.
Barker slips a leg in and gets back to half guard.
Bark is working for an americana but Barker has been sneaky and has managed to get back to half guard, whilst Bark was thinking about the submission.
The crowd cheering loudly, showing their appreciation for the quality fight we're seeing here.
Bark wants to control from the top but Barker keeps moving.
That's three minutes gone in the round.
Barker is looking for a guillotine. You can't force these things though and Bark defends well.
Bark passes easily into side control. Nice work.
Bark is looking to take a break and control but Barker is keeping him honest, looking to work from the bottom.
Bark tries for an arm triangle. That looks pretty tight to me. Is this one over!?! Possibly, maybe, no Bark has let go of the choke. Obviously it wasn't as tight as we thought!
Bark is looking to finish here, going for an Americana. Barker knows the correct defense though, so he's OK.
That's four minutes gone in the round.
Bark is looking to finish here, going for an Americana. Barker knows the correct defense though, so he's OK.
Bark looking for an arm triangle but it's way too loose to do anything.
Barker pushes Bark away and creates a bit of space to escape. He's almost out here... but no, Bark gets a good hold of his legs and remains firmly in side control.
That's five minutes gone in the round.
Bark is looking for a kimura. He might have it! No, Barker has escaped the position, nice work there.
Bark swings around for an armbar but Barker sees it coming a mile off and turns beautifully into Bark's guard.
Bark has his foot on Barker's thigh. He's trying to push off and get in position for a triangle, I think. Barker works his way back into a safe position though.
Bark is trying to control the position but Barker postures up.
Barker trying to control the position from guard on top but Bark is wriggling around, looking for whatever he can.
Barker pressing down on his opponent's thigh, looking to pass guard. Bark is keeping the position for now.
Bark has momentary wrist control but Barker slips an elbow through the middle.
Barker scores with a decent looking elbow strike.
Barker scoring with some ground and pound.
Barker missing there with some ground and pound from the guard.
That's six minutes gone in the round.
Barker drops back looking for a heel hook - he quickly realises he's not going to get it but Bark manages to dive on top of him before he can escape and now Barker has Bark in his guard.
The crowd are loving this. Great action here.
Barker throwing his legs up looking for a triangle.
Bark tries to free his leg and advance position but Barker is retaining full guard.
Bark wants to control from the top but Barker keeps moving.
Barker can't keep his opponent in guard - Bark advances to half guard, no doubt looking to mount.
Bark is trying a forearm choke� I don't think that's going to do much at this level of the game.
That's seven minutes gone in the round.
Barker is looking for a sweep. Bark is wise to his cunning plan and keeps the top position.
Barker looking to work for a kimura from the bottom.
Barker is looking to sinch up a guillotine here but Bark pulls his head out easily.
Bark is looking to advance position but Barker won't allow it.
Bark is sneakily working for an arm triangle but Barker sees it coming and defends easily.
That's eight minutes gone in the round.
Barker is looking to regain full guard. Not this time though.
Bark looking for a kimura but he'll have to free his other leg if he wants to finish that. Perhaps he's just using it as a distraction technique.
Barker pushes Bark off looking to stand but Bark dives back in and keeps control.
Bark trying to work for an americana but Barker has managed to regain full guard.
That's nine minutes gone in the round.
Barker had isolated an arm as going for a kimura. Bark defends it easily.
Bark sneaks a leg through and gets to half guard. That was like a knife through butter how easily he passed Barker's guard.
Bark is working for submissions here but there's nothing on.
Barker looks like he's trying to stand up.
Barker is trying to get back to full guard.
William Barker overall seems to be getting the better of the ground position in the fight so far.
The crowd applaud the fighters efforts here as the round comes to an end.
Bark is working for a submission of some sort.
And that�s the end of the round � the fighters go back to their corners.
A close second round but Oakley Bark will probably get the nod - 10:9.
The corners get their ten second warning. Both fighters stand from their stools and stare eachother down, ready to get back to the action.

Bark drives through with a really nice takedown into side control.
Bark is looking for a kimura. He might have it! No, Barker has escaped the position, nice work there.
Barker manages to get one leg in to regain half guard.
Barker wants to get back to full guard.
Bark tries to pass the half guard into mount. Barker knows what he's doing though and prevents the attempt.
Bark prevents Barker from improving his position.
That's one minute gone in the round.
Bark seems to be working for a kimura but Barker defends the submission attempt.
Barker tries to get to full guard but Bark has control of the leg.
Bark moves nicely into side control.
Bark is looking to finish here, going for an Americana. Barker knows the correct defense though, so he's OK.
Bark tries for a kimura. Not really close to a finish though.
That's two minutes gone in the round.
Bark is looking to finish here, going for an Americana. Barker knows the correct defense though, so he's OK.
Bark wants to control but Barker is keeping him busy.
Barker is positioning himself to get back to half guard.
That's three minutes gone in the round.
Bark tries for an arm triangle. That looks pretty tight to me. Is this one over!?! Possibly, maybe, no Bark has let go of the choke. Obviously it wasn't as tight as we thought!
Bark has knee on belly and moves into mount.
Bark goes for an armbar but he's not got it� Barker turns into him and now he's in Bark's guard.
Bark is working from a closed guard but he's struggling to control his opponent.
That's four minutes gone in the round.
Barker makes a bit of distance and scores with some ground and pound, still in guard.
Bark working the defensive guard well to avoid strikes from Barker.
Barker throwing shots from guard but he's hitting more mat than opponent.
Bark trying to keep a closed guard but Barker is proving a slippery customer.
Bark is looking for a triangle but Barker pushes his legs off easily.
Barker stopping the sweep attempt from Bark.
Bark working for a triangle but Barker defends it easily.
Bark takes a big intake of breath there - he's definitely tired.
Barker is looking to work some ground and pound but Bark has wrist control.
That's five minutes gone in the round.
Barker looking to pass the guard.
Barker preventing the sweep.
Bark manages to land a sweep and now he's in mount on top!
Bark swings around for an armbar but it's a sloppy attempt and Barker is now in Bark's guard. A big mistake from Bark there, giving up the dominant position!
Bark not looking particularly offensive just at the moment.
That's six minutes gone in the round.
Bark tries to land a sweep but no joy.
Barker wants to control from the top but Bark keeps moving.
Bark is trying to control the position from the bottom.
Bark wants to stand but Barker is controlling the position.
Barker wants to control from the top but Bark keeps moving.

Neither fighter is doing enough for the referee's liking and he's decided to stand them back up.
Bark drives through with a takedown into guard.
Bark postures up as if he's going to throw some strikes but drops back for an ankle! Barker is in big trouble! He looks ready to tap! But no, he's escaped and dives on top of Bark, into his guard.
Fantastic stuff here - a very entertaining period of action, which has drawn cheers from the crowd.
Bark is looking for a triangle but Barker pushes his legs off easily.
That's seven minutes gone in the round.
Bark keeping moving, preventing Barker from controlling successfully.
Barker lands a couple of elbows.
Bark wants to stand but Barker is controlling the position.
Bark is pulling down on Barker's head. It's preventing any offense from Barker, at least for the moment.
Barker trying to control but Bark is working from the bottom.
That's eight minutes gone in the round.
Barker cracks Bark with a solid left hand.
Barker trying to pass the guard. He's being very persistent here but Bark manages to land a sweep and now he's on top!
Barker escapes his hips to the side and looks to be working for an armbar. Bark gives him a little smile and shakes his head. No chance.
Bark wants to pass the guard but Barker is keeping the position.
Bark passes Barker's right leg, so he's now in half guard.
That's nine minutes gone in the round.
Bark trying to pass the guard but Barker defending well.
Bark is trying to work for a kimura but Barker is defending well.
Barker tries to roll over but Bark keeps him under control.
Bark is looking for an arm triangle, whilst trying to pass to side control. Barker doesn't seem that keen to cooperate though. No luck this time Bark.
The crowd applaud the fighters efforts here as the round comes to an end.
Bark is looking for a kimura. It's going to be difficult to finish that from half guard though and Barker defends it well.
And that�s the end of the round � the fighters go back to their corners.
Oakley Bark really dominated that round.
OK. That's time! The bell goes and we're back to the action.

Bark shoots in looking for a single leg takedown. Barker is trying to defend but Bark finishes it well and ends up in half guard. Let's see if he can advance position further.
Barker actively working from the bottom here.
Barker tries to get to full guard but Bark has control of the leg.
Bark is trying for a guillotine from the top but the pressure isn't in the right place so Barker is just riding it out for now. Bark eventually gives up the hold.
Barker slips a foot under and gets full guard. Nice work.
That's one minute gone in the round.
Bark trying to control the position from guard on top but Barker is wriggling around, looking for whatever he can.
Bark won't allow Barker to sweep him here.
Barker wants to hit a switch here but Bark passes into full mount! Oh no, disaster for Barker there!
Bark wants to control the pace but Barker is squirming around nicely.
That's two minutes gone in the round.
Bark jumps to the side looking to secure the arm triangle�. Ooooh, that looks tight� Barker is gargling but he's managed to escape! Nice work there by Barker and Bark has given up the dominant position trying to land that submission.
Bark has knee on belly and moves into mount.
Bark can't quite control the action as he would like just now, as Barker is looking to escape.
Bark moves into side control, trying to work for a kimura. That looks painful! Will he finish!!?? No, Barker has worked his arm free - good work by Barker!
Bark has worked his way into a potential kimura here. Barker is trying to get out of the position but his squirming has just got him deeper into trouble. Bark yanks on the arm and Barker is forced to tap due to a very painful looking submission! Nice work by Bark.
Ladies and gentlemen, after 3:57 of round 4, we have a winner by way of Submission (Kimura). Oakley Bark!
Oakley Bark is the new super heavyweight champion!
Oakley Bark made sure to mention his sponsor, Project Mayhem in his post fight interview.
|
|
|
|
|
|
|
|
|
|
|
|
|
|
|
|
|
|
|
|
|
|
|
| S |
C
A |
G |
S |
C
B |
G |
|
S |
C |
G |
|
energy
A | B |
|
hype
A | B |
|
pop
A | B |
|
mgr
A | B |
|
FIGHT
RATING
100% |
|
|
|
|
|
|

