|
|
PBP Commentary |
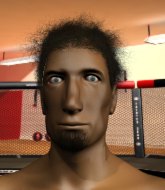
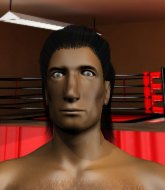
Coming up we have a welterweight MMA rules bout between David Holt (ranked 0 p4p, 0 weight class) and Thomas McKenna (ranked 0 p4p, 0 weight class). David Holt has the edge in experience - let's see if he can make that count tonight.
 |
|
 |
| 164 cm
18
177 lbs
1 - 0 - 0 |
|
197 cm
18
169 lbs
0 - 0 - 0 |
BJJ Blue Belt
Counter fighter
Cuts easily |
|
BJJ Blue Belt
Brawler
Tends to cut |
|
| |
|
Ladies and gentlemen. This fight is 3 rounds, in the welterweight division.
Introducing the fighter to my left, fighting out of the red corner.
With a record of
1 - 0 - 0, fighting out of Los Angeles, David Holt!
And introducing the fighter to my right, fighting out of the blue corner.
With a record of
0 - 0 - 0, fighting out of Los Angeles, Thomas McKenna!
The judges for this bout are Frank Antenori, and Jack Bonds.

The bell rings for round one and we are underway!
McKenna shoots in with a takedown attempt and he has Holt pinned against the cage. Holt gets the underhooks and manages to circle away.
McKenna shoots in with a takedown attempt and he has Holt pinned against the cage. Holt gets the underhooks and manages to circle away.
McKenna moves into range and throws a combination. A nice jab followed by a hook to the body.
McKenna displays good takedown defense there as he swats away a double leg from Holt.
Holt closes the distance and clinches up with McKenna, looking for a takedown. Holt pushes McKenna against the cage but McKenna circles to the side and manages to break the clinch.
Holt shoots in looking for a takedown but McKenna manages to keep the fight standing, pushing Holt's face into the canvas for good measure before circling away.
That's three failed takedown attempts in the round for David Holt. That's going to take a lot out of him.

Holt clinches.

McKenna gets control of Holt's arms and successfully pulls guard. McKenna will no doubt be looking for submissions off his back.
Holt trying to control but McKenna is working from the bottom.
The fighters are pressed up against the cage, both looking to find a bit of space to work.

That's one minute gone in the round.
Holt is really struggling to control McKenna but he's trying to hold on to the position.
Holt showing good wrestling skills to control the position.
Holt might be looking to lock onto one of his opponent's long limbs for a submission, whilst we're on the ground.

The referee decides to stand the fighters back up, due to lack of activity on the part of David Holt.
McKenna shoots and misses
and Holt counters by moving into the clinch. Good anticipation by Holt.
Holt tries to circle away but McKenna has him pinned against the cage.
Holt tries to jump guard but he falls flat on his backside. McKenna smiles and moves away.
McKenna slips in close and lands a nice hook before moving back out of range.
McKenna throws a head kick that misses.

That's two minutes gone in the round.
Holt lands a nice looking body kick.
Holt swats away the attempt to clinch by McKenna.
McKenna is looking to take this fight into the clinch.
McKenna misses with a few strikes there.
Holt goes for a double leg but McKenna avoids the attempt and the two fighters end up clinched against the cage as McKenna continues to drive forward.
McKenna jumps guard.
McKenna looking to control.
Holt working some ground and pound from guard but it's not doing any damage.
Fantastic stuff here - a very entertaining period of action, which has drawn cheers from the crowd.
McKenna controlling Holt's posture.
McKenna is looking to stand up but Holt isn't so interested in that idea.

That's three minutes gone in the round.
Holt trying to control the position from guard on top but McKenna is wriggling around, looking for whatever he can.
Holt throwing strikes but missing.
Holt engaging in some classic timewasting tactics.

McKenna working from the bottom, still in full guard. He's managed to get a loose triangle. Holt doesn't seem to be doing much to defend here, obviously he feels comfortable in the position. Holt manages to throw the legs off his shoulder and he's back into guard - no problem.

That's four minutes gone in the round.
Holt throwing strikes but missing.
Holt is frustrating his opponent with some stalling tactics from top position.
The ref warns both fighters not to hold the cage as they work up against the meshing.
Holt won't allow McKenna to sweep him here.
The crowd applaud the fighters efforts here as the round comes to an end.
Holt content to stall in guard here.
The ref stands the fighters back up because David Holt just wasn't active enough.
The fighters are starting to get sweaty, which will make takedowns a bit more tricky.
Holt shoots in but no luck this time.
And that�s the end of the round � the fighters go back to their corners.
A close round but Thomas McKenna will probably get the nod.
Well, the break between rounds is over. Let's get back to the scrappin!


McKenna moves into range and clinches up with Holt.
Holt on the defensive, avoiding the knees to the body.

Holt breaks the clinch and we're back to striking at distance.
Holt wants to clinch up but McKenna keeps it at a distance.
McKenna goes for a spinning back kick but it misses.
McKenna tries to clinch up

and Holt counters with a nice single leg takedown and he's in McKenna's guard now.
Holt throws a strike but McKenna rolls with it and manages to sweep. Now he's in guard on top.

Holt is looking for a triangle but McKenna pushes his legs off easily.
That's one minute gone in the round.
Holt keeping moving, preventing McKenna from controlling successfully.
Holt lands a beautiful switch and he's in full mount! That could spell trouble for McKenna!
Holt controlling from the full mount.
McKenna wants to control but Holt is having none of it.
That's two minutes gone in the round.
Holt in mount throwing good strikes here, bouncing his opponent's head off the canvas.
McKenna tries to hold on but Holt pushes him away.
Holt looking to ground and pound but McKenna is blocking nicely.
McKenna tries to get back to half guard but can't.
McKenna keeps trying to improve his position.
McKenna bucks up and manages to get a nice reversal! He's in guard on the top - nicely done!
McKenna wants to control from the top but Holt keeps moving.
McKenna wanted to stand there but Holt had control of the position.
David Holt overall seems to be getting the better of the ground position in the fight so far.
That's three minutes gone in the round.

McKenna stands and steps away. Holt gets to his feet too and we're back to the striking game.
Holt tries to close the distance and clinch up against the cage but McKenna paws at him with a jab and circles away.
David Holt is looking to throw some combinations by the looks of things.
McKenna misses with a takedown attempt - Holt sprawls well and throws a nice strike on the way out which just misses.
McKenna is breathing heavily.
Holt circles away from the clinch attempt.
Holt tries to clinch but McKenna is having none of it.
Holt has taken the fight to the clinch.
Holt jumps into guard, dragging McKenna to the mat.
Holt really is a fat lump.
McKenna has decided he wants to stand but the closed guard of Holt is proving hard to escape from.
That's four minutes gone in the round.
Holt tries to land a sweep but no joy.
Holt keeping moving, preventing McKenna from controlling successfully.
Holt wants to get back to his feet but McKenna passes into half guard.
Holt tries to roll over but McKenna keeps him under control.
As the round comes to an end the crowd are showing their appreciation for a great round of action.
McKenna not landing any meaningful shots this time.
And that�s the end of the round � the fighters go back to their corners.
David Holt dominated that second round.
OK. That's time! The bell goes and we're back to the action. This is the final round!

Holt darts in looking for a takedown but McKenna gets double underhooks and turns Holt into the cage.
Holt tries to pull guard but can't drag his opponent to the mat. McKenna just stands there and leans against the cage.
McKenna has Holt pushed against the cage.
Holt jumps guard but McKenna turns him against the cage and keeps the fight standing.
That's three failed takedown attempts in the round for David Holt. That's going to take a lot out of him.
McKenna is trying to pull guard but Holt has him pressed against the cage.
Holt keeps the fight in the clinch, despite McKenna's efforts to push away.
Holt tries to jump guard but he falls flat on his backside. McKenna smiles and moves away.
A right-left combo lands from McKenna.
McKenna tries for a takedown but Holt circles away easily
and Holt counters with a one-two to the body.
That's one minute gone in the round.
McKenna shoots in for a takedown. "I don't think so" says Holt as he avoids it easily.
Holt stuffs the takedown attempt from McKenna. McKenna gets slowly back to his feet.
McKenna takes a big intake of breath there - he's definitely tired.
McKenna tries to close the distance and clinch but Holt swats him to one side with an open hand palm strike and circles away.
McKenna tries to score a power double leg takedown but Holt sees that one coming and sprawls well. That will dishearten McKenna somewhat.
Thomas McKenna seems to be the more aggressive standup fighter in this bout.
Holt fails with an attempt to clinch.
McKenna looks for a takedown but Holt sprawls well.
Holt fails with a takedown attempt.
That's two minutes gone in the round.
McKenna comes forward and lands a shot to the body, then darts back out of range.
Holt bobs and weaves into range and then changes levels and scores with a nice takedown into side control.
Holt trying to control the action but McKenna is working from the bottom.
McKenna trying to remain calm as Holt controls from the top position.
That's three minutes gone in the round.
Holt working the ground and pound.
McKenna is a painfully thin specimen of a man. You do wonder whether a good body kick would snap him clean in two.
McKenna tries to improve position but can't.
McKenna being controlled for a moment.
Holt trying to control the position but McKenna is working away.
McKenna tries to buck Holt off but Holt is having none of it.
That's four minutes gone in the round.
A lull in the action here as Holt stalls from top position.
Holt trying to control the action but McKenna is working from the bottom.
David Holt has forced the referee to step in and bring the fight back to the feet.
Holt drives through with a takedown into guard.
The crowd applaud the fighters efforts here as the round comes to an end.
McKenna looking for submissions off his back, moving his hips, looking for an opening.
Holt tries to free his leg and advance position but McKenna is retaining full guard.
And that's the end of the fight!
David Holt showed his dominance in that final round.
I think Holt has won this one but let's see what the judges have to say. Over to the ring announcer for the scorecards.
Ladies and gentlemen, after 3 rounds of action, we go to the scorecards for a decision.
Judge Frank Antenori scores the fight 30:28
Judge Percy O'Donnell scores the fight 29:28
Judge Jack Bonds scores the fight 29:28
In favor of your winner, by unanimous decision... David Holt!
|
|
|
|
|
|
|
|
|
|
|
|
|
|
|
|
|
|
|
|
|
|
|
| S |
C
A |
G |
S |
C
B |
G |
|
S |
C |
G |
|
energy
A | B |
|
hype
A | B |
|
pop
A | B |
|
mgr
A | B |
|
FIGHT
RATING
43% |
|
|
|
|
|
|
