|
|
PBP Commentary |
Coming up we have a welterweight MMA rules bout between Ken Mckenzie (ranked 0 p4p, 0 weight class) and Johny Hendricks (ranked 0 p4p, 0 weight class). Both fighters look fresh as a daisy as they make their way towards the cage.
 |
|
 |
| 179 cm
20
177 lbs
2 - 3 - 0 |
|
175 cm
25
170 lbs
0 - 0 - 0 |
BJJ Blue Belt
Counter fighter
Cuts easily |
|
BJJ White Belt
Excellent boxer
Granite chin |
|
| |
|
Ladies and gentlemen. This fight is 3 rounds, in the welterweight division.
Introducing the fighter to my left, fighting out of the red corner.
With a record of
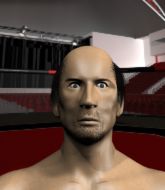
2 - 3 - 0, fighting out of New York, Ken Mckenzie!
And introducing the fighter to my right, fighting out of the blue corner.
With a record of
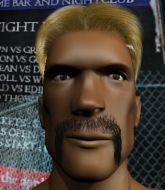
0 - 0 - 0, fighting out of New York, Johny Hendricks!
The judges for this bout are Jorge Garcia, Steve Montenegro and Chad Campbell.

The bell rings for round one and we are underway!
Hendricks fails to land the takedown.
Hendricks fails in his attempt to clinch.
Hendricks shoots in for a takedown - he's clinched up with Mckenzie but Mckenzie pushes him off and we're back to square one.
Hendricks fails with an attempt to clinch.

A momentary lapse in concentration from Hendricks enables Mckenzie to shoot in and score with a neat double leg. Hendricks manages to secure a closed guard as the fighters hit the mat.
Hendricks trying to control the position.

Mckenzie is trying to work a guillotine from the top, or something like that? Don't know how he thinks he's going to get a finish from there.

Mckenzie decides he's had enough of playing guard and decides to stand. Come on Hendricks, up you get!
Hendricks is trying hard to land a takedown here. Mckenzie sprawls well and keeps this one on the feet.
Ken Mckenzie has stuffed three takedown attempts in the round now. That's going to take a lot out of Johny Hendricks.

That's one minute gone in the round.
Mckenzie circles away from the clinch attempt.
Mckenzie manages to get an easy takedown there - catching Hendricks on his heels. He'll look to pass Hendricks's guard now, I'm sure.
Mckenzie chips away with some ground and pound.
Mckenzie stands up from Hendricks's guard - Mckenzie perhaps looking for a knockout.
Hendricks fails to land the takedown.
Hendricks shoots in but no luck this time.
Hendricks throws a looping left and ducks down for a takedown. He's got his arms around Mckenzie's waist but Mckenzie gets an underhook and avoids the takedown by throwing Hendricks off to one side.

That's two minutes gone in the round.
Hendricks is trying hard to land a takedown here. Mckenzie sprawls well and keeps this one on the feet.
Johny Hendricks seems to be the more aggressive standup fighter in this bout.
Mckenzie defends well against a solid takedown attempt from Hendricks.
Hendricks doesn't succeed with the takedown
and Hendricks takes a counter punch right on the button for his troubles.
Hendricks looks winded!
Hendricks with a poor takedown
and Mckenzie counters with a leg kick.
Mckenzie swings away but doesn't land with a series of punches.
Hendricks tries for a takedown but Mckenzie sees it coming a mile off and avoids it easily.
Hendricks just misses with a punch to the body.
We've seen a great period of action over the last minute or so - credit to both fighters for going all out!
Hendricks is looking to take this fight into the clinch.

That's three minutes gone in the round.
Hendricks misses with a head kick.
Hendricks misses the shot to the body.
Mckenzie moves forwards but Hendricks connects with a nice, crisp jab.
Mckenzie blocks a head kick by Hendricks.
Hendricks will need to tighten up his combinations if he doesn't want to gas himself out, swinging at thin air.
Hendricks shoots in for a takedown but Mckenzie shows good takedown defense.
Hendricks fails with the takedown
and Mckenzie counters with a nice body kick.

That's four minutes gone in the round.
Hendricks tries to score a power double leg takedown but Mckenzie sees that one coming and sprawls well. That will dishearten Hendricks somewhat.
Hendricks shoots in looking for a takedown but Mckenzie manages to keep the fight standing, pushing Hendricks's face into the canvas for good measure before circling away.
Hendricks shoots and misses
so Mckenzie counters with a double leg into guard. Good agility.
Hendricks has momentary wrist control but Mckenzie slips an elbow through the middle.
Mckenzie has been looking to land a fair amount of strikes on the ground. He might be looking to soften his opponent up in order to work for a submission.
Wooooo! Give it up for these two warriors! They are putting on a show!
Mckenzie stands up over Hendricks, holding his feet. He dives back in and lands a decent shot to the head.
As the round comes to an end the crowd are showing their appreciation for a great round of action.
Mckenzie distracts Hendricks with his right hand and drops a big elbow with his other arm.
Mckenzie stands up over Hendricks, holding his feet. He dives back in and lands a decent shot to the head.
Mckenzie connects with a couple of short punches.
And that�s the end of the round � the fighters go back to their corners.
Ken Mckenzie dominated that round.
That's the end of the interval. I'm sure that seemed a lot quicker than a minute for our two fighters! Back to the action.

Mckenzie uses good head movement to avoid the hook from Hendricks.
Hendricks stuffs the takedown attempt from Mckenzie. Mckenzie gets slowly back to his feet.
Mckenzie avoids the clinch attempt nicely.
Hendricks lunges in with swinging rights and lefts but Mckenzie circles away quickly and effectively.

Hendricks clinches.
Mckenzie prevents Hendricks from breaking the clinch.
Hendricks wants to take the fight to the mat but Mckenzie manages to get underhooks and keep the fight in the clinch.
Hendricks goes for a takedown attempt but Mckenzie pushes him away and we're back to fighting at a distance.
Hendricks tries for a takedown but Mckenzie circles away easily

and Mckenzie moves into the clinch.
Ken Mckenzie has stuffed three takedown attempts in the round now. That's going to take a lot out of Johny Hendricks.
That's one minute gone in the round.

Hendricks jumps guard and drags Mckenzie to the mat. He's obviously going to be looking for submissions off his back.
Mckenzie drops back looking for a leg! Hendricks is in trouble here! The fighters roll with the hold and Hendricks manages to kick Mckenzie off! Mckenzie jumps back into Hendricks's guard.
Mckenzie works over Hendricks with some ground and pound from guard.
Mckenzie scoring with punches to the head and body.
Ken Mckenzie overall seems to be getting the better of the ground position in the fight so far.
Mckenzie with a flurry of punches that miss.
Hendricks wants to stand up but Mckenzie is controlling him.
Mckenzie missing there with some ground and pound from the guard.
Mckenzie gets to his feet and steps away from his opponent.
That's two minutes gone in the round.
Hendricks closes the distance and presses his opponent up against the cage.
Hendricks tries for a takedown but Mckenzie manages to get underhooks.
Hendricks is breathing heavily.
Mckenzie tries to pull guard but Hendricks won't allow it.
Hendricks throws a vicious knee straight up the middle but Mckenzie blocks it with crossed arms.
Hendricks successfully pulls guard.
Mckenzie gets to his feet and steps away from his opponent.
The crowd cheering loudly, showing their appreciation for the quality fight we're seeing here.
Hendricks tries to clinch up
and Mckenzie counters with a two punch combo.
Mckenzie connects with a leg kick. He turned his hip over nicely there.
That's three minutes gone in the round.
Hendricks shoots in for a takedown but Mckenzie shows good takedown defense.
Mckenzie throws a series of punches but Hendricks moves out of range.
Mckenzie fails to land with a series of punches.
Hendricks scores with a jab to the head.
Hendricks tries to clinch up but Mckenzie circles away and keeps his distance.
Hendricks throws a sloppy head kick and Mckenzie moves out of range easily.
Hendricks fakes high and shoots in for a takedown but Mckenzie avoids it really well and circles away.
Mckenzie defends well against a solid takedown attempt from Hendricks.
That's four minutes gone in the round.
Mckenzie looking to score a takedown here. Hendricks is defending well but Mckenzie drives through and ends up in Hendricks's guard.
Hendricks looking to sweep here. No luck so far.
Hendricks preventing the ground and pound from doing any damage.
Mckenzie working in close now, lands a nice elbow to the side of Hendricks's head.
The fighters are pressed up against the cage, both looking to find a bit of space to work.
Mckenzie drops back for a leg here. A bit of a high risk move... He's looking for a kneebar by the looks of things. Now both of them are looking for submissions. Mckenzie seems to have locked his on tight now - Hendricks screams in pain and taps out furiously! It certainly was a high risk move but it's paid off for Mckenzie, as he picks up the win!
Ladies and gentlemen, after 4:55 of round 2, we have a winner by way of Submission (Kneebar). Ken Mckenzie!
|
|
|
|
|
|
|
|
|
|
|
|
|
|
|
|
|
|
|
|
|
|
|
| S |
C
A |
G |
S |
C
B |
G |
|
S |
C |
G |
|
energy
A | B |
|
hype
A | B |
|
pop
A | B |
|
mgr
A | B |
|
FIGHT
RATING
26% |
|
|
|
|
|
|
