|
|
PBP Commentary |
Coming up we have a light heavyweight MMA rules bout between Lenny Laprise (ranked 0 p4p, 0 weight class) and Maikeru Hyuga (ranked 0 p4p, 0 weight class). Maikeru Hyuga has the better chin. Will he look to stand and bang today?
 |
|
 |
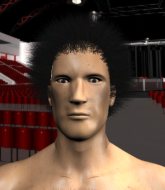
| 195 cm
25
206 lbs
1 - 2 - 0 |
|
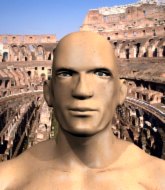
190 cm
25
205 lbs
2 - 0 - 0 |
BJJ White Belt
Excellent boxer
Self confident |
|
BJJ Purple Belt
Brawler
Very confident |
|
| |
|
Ladies and gentlemen. This fight is 3 rounds, in the light heavyweight division.
Introducing the fighter to my left, fighting out of the red corner.
With a record of
1 - 2 - 0, fighting out of Montreal, Lenny Laprise!
And introducing the fighter to my right, fighting out of the blue corner.
With a record of
2 - 0 - 0, fighting out of Montreal, Maikeru Hyuga!
The judges for this bout are Steve Smith, Trevor Gratis and William Peck.

The bell rings for round one and we are underway!
Hyuga closes this distance looking for a takedown but Laprise circles away.
Hyuga takes a body punch that cleary hurt but he's trying not to show any weakness.
Hyuga shoots in for a takedown but Laprise shows good takedown defense.
Laprise stuffs a takedown. It's all about dictating where the fight takes place and Laprise wants it to stay on the feet.
Lenny Laprise has stuffed three takedown attempts in the round now. That's going to take a lot out of Maikeru Hyuga.
Laprise lands a really nice looking cross but Hyuga seems unphased.
Laprise misses with a double jab.
Laprise looks to have improved his striking defense since last time we saw him fight.

Hyuga clinches.

Laprise's corner calls for him to break the clinch, which he does.
Hyuga fails with a rather predictable takedown attempt.
Hyuga clinches up against the cage.
Laprise wants to break the clinch but can't.
Laprise wants to push off and get back to the center of the mat but Hyuga has him pressed against the cage.
Laprise looks like he'd prefer to be striking at range right now.
Hyuga trying to stall but Laprise improves his position.

That's one minute gone in the round.
Laprise tries to break the clinch but Hyuga is controlling the position.
Laprise's corner calls for him to break the clinch, which he does.
Hyuga shoots in but Laprise avoids the takedown attempt easily.
Laprise fails to land with a series of punches.
Laprise moves into range and throws a lovely three punch combination.

Hyuga closes the distance and gets a double leg, slamming Laprise to the mat! Laprise manages to get full guard.
Laprise on his back here. We all know that wrestlers don't like being on their back so let's see if Laprise tries to get out of the position.
Hyuga sitting in guard here, content to control.
Hyuga trying to control but Laprise is working from the bottom.
Laprise wants to stand and escape but Hyuga is having none of it.

That's two minutes gone in the round.

Hyuga stands and steps away. Laprise gets to his feet too and we're back to the striking game.
We've seen a great period of action over the last minute or so - credit to both fighters for going all out!
Hyuga looks frustrated there after his takedown attempt is stuffed easily.
Hyuga pulls out of a head kick attempt.
Hyuga showing good head movement there, avoiding the strikes from Laprise.
Hyuga tries to clinch up.
Hyuga doesn't manage to clinch there - Laprise circles away.
Laprise swings away but doesn't land with a series of punches.
Laprise is breathing heavily.
Laprise keeps the fight standing with a nice sprawl.
Laprise slips a jab and a cross from Hyuga.

That's three minutes gone in the round.
Sloppy strikes from Laprise. Those never looked like landing.
Laprise looks to score with a combo but nothing lands.
Laprise lands three nice shots there - that looked like it hurt!
Laprise tries to keep at a distance but Hyuga has taken the fight into the clinch.
Laprise wants to strike at distance but he can't break free of the clinch.
Hyuga tries to pull guard but Laprise won't allow it.
Laprise breaks the clinch.
Laprise throws a right hand that Hyuga ducks under and follows up with a left that Hyuga also avoids with ease.
Hyuga tries to clinch but Laprise moves out of range.
No luck with that takedown attempt from Hyuga.
Hyuga tries to close the distance and clinch up but Laprise swats him away and circles back towards the center.

That's four minutes gone in the round.
Hyuga tries to close the distance and clinch but Laprise swats him to one side with an open hand palm strike and circles away.
Hyuga looks to score with a combo but nothing lands.
Horrible takedown by Hyuga or perhaps it was just good defense by Laprise which made him look bad.
Hyuga shoots for a takedown but Laprise saw that one coming a mile off and avoided it easily.
Laprise circles away from the clinch attempt.
Jab, cross, leg kick. Nice combination by Laprise!
Hyuga wants to clinch up but Laprise keeps it at a distance.
Hyuga looks for a takedown here. Will he get it? Laprise is fending him off so far but Hyuga persists. Nope, Laprise circles away and we're back to standing.
We've been informed that Hyuga has been working hard on his conditioning in the buildup to the fight.
Laprise misses with the combination.
This has been an exciting period of action!
As the round comes to an end the crowd are showing their appreciation for a great round of action.
Hyuga tries to clinch but is not successful on this occasion.
Hyuga fakes high and shoots in for a takedown but Laprise avoids it really well and circles away.
And thats the end of the round the fighters go back to their corners.
A close round but Maikeru Hyuga will probably get the nod.
OK. That's time! The bell goes and we're back to the action.

Laprise scores with a shot to the body.
Laprise bobs and weaves and unloads with a good uppercut.
Laprise lands a jab, followed by a cross and another cross, as Hyuga backs up against the cage.
A shot to the liver by Laprise. Beautiful body shot.
Hyuga throws a head kick that misses and slips in the process. He scrambles back to his feet and the fighters circle.
Laprise scores with a nice looking left hook and follows it up with an uppercut!
Hyuga throws a sloppy head kick and Laprise moves out of range easily.
A jab from Hyuga misses.
Hyuga avoids the body shot from Laprise.
Laprise dips to his left and cracks Hyuga with an uppercut!
Laprise throws a right and a left that Hyuga avoids nicely.
Both fighters are absolutely exhausted here.
That's one minute gone in the round.
Hyuga avoids a punch combination nicely.
Laprise looks to land a combination. Hyuga sees it coming but can only parry a couple of the shots.
Hyuga shoots in for a takedown. He's persisting with it as Laprise sprawls well. Laprise wins this battle and keeps the fight standing. Hyuga gets slowly back to his feet.
Lenny Laprise is looking to throw some combinations by the looks of things.
Laprise leaves Hyuga with his face pressed against the mat as he sprawls beautifully, defending against a solid takedown attempt.
Lenny Laprise is winning the standup battle so far.
Laprise ducks down and throws a hook to the body but Hyuga moves away.
Laprise is looking to wear down Hyuga with body shots, infact he's throwing more body shots than head shots at the moment.
Laprise goes to the watering hole and comes back with a big thumbs up from the judges as he scores a three punch combo.
Laprise misses with a two punch combination.
Hyuga shoots in for a takedown. "I don't think so" says Laprise as he avoids it easily.
Lenny Laprise has stuffed three takedown attempts in the round now. That's going to take a lot out of Maikeru Hyuga.
An inside leg kick from Hyuga misses.
That's two minutes gone in the round.
Laprise misses with a jab and misses with a cross straight after too.
Horrible takedown by Hyuga or perhaps it was just good defense by Laprise which made him look bad.
Laprise throws a combination but comes up with nothing but fresh air.
Hyuga is looking to clinch but Laprise is avoiding it.
Laprise will need to tighten up his combinations if he doesn't want to gas himself out, swinging at thin air.
Hyuga doesn't manage to clinch there - Laprise circles away.
Hyuga tries to score with an inside leg kick but telegraphs it and Laprise is able to avoid easily.
A really sloppy takedown attempt there from Hyuga.
Laprise throws a nice looking combination but Hyuga bobs and weaves to avoid any damage.
Hyuga throws a head kick but Laprise moves out of range.
That's three minutes gone in the round.
Hyuga dives in for a single leg takedown but Laprise sprawls and the fighters end up clinched against the cage.
Laprise can't break the clinch.
Hyuga is working for takedown but Laprise is calmly controlling the position for now.
Hyuga trying to stall but Laprise improves his position.
Laprise breaks the clinch and we return to the middle of the mat.
A leg kick checked by Laprise.
Hyuga clinches with his opponent.
Hyuga manages to pull guard.
Hyuga bucks up whilst keeping hold of a body lock, managing to reverse the position. Now he's in top in Laprise's guard.
Hyuga is taking a break and basically stalling. The referee will not allow him to do that for long.
Hyuga wants to control from the top but Laprise keeps moving.
That's four minutes gone in the round.
Hyuga sitting in guard, not really doing much.
Hyuga stands and steps away. Laprise gets to his feet too and we're back to the striking game.
Laprise throws a right and a left that both miss.
Hyuga gets to the clinch - let's see what his plan is here.
This is a great period of action - very entertaining stuff!
As the round comes to an end the crowd are showing their appreciation for a great round of action.
Laprise is trying to break free.

Hyuga escapes the clinch and we're back to striking.
Laprise misses with the combination.
And thats the end of the round the fighters go back to their corners.
That was a close second round but I would say that Lenny Laprise will probably get the nod.
OK. That's time! The bell goes and we're back to the action. So, we enter the final round. Let's see if either fighter can bring us a finish, or whether we're going to the judges scorecards.

Laprise stuffs the takedown attempt from Hyuga. Hyuga gets slowly back to his feet.
Hyuga has taken the fight to the clinch.
Laprise is trying to break the clinch but Hyuga is controlling him.
Hyuga is trying to pull guard but Laprise turns him against the cage and we stay in the clinch.
Hyuga jumps guard but Laprise stands there with Hyuga around his waist. Hyuga gives up and drops back to his feet. We remain in the clinch.
Lenny Laprise has stuffed three takedown attempts in the round now. That's going to take a lot out of Maikeru Hyuga.
Hyuga is working for a takedown up against the cage. He can't get it on this occasion though.
Laprise is trying to break the clinch but Hyuga has him pressed against the cage.
Laprise has had enough of the clinch and is looking to separate.
Laprise breaks the clinch and we're back to striking at distance.
Hyuga shoots in looking for a double leg takedown. Laprise defends it nicely.
That's one minute gone in the round.
Hyuga shoots in with a takedown attempt and he has Laprise pinned against the cage. Laprise gets the underhooks and manages to circle away.
Laprise will need to tighten up his combinations if he doesn't want to gas himself out, swinging at thin air.
Both fighters are breathing heavily.
Hyuga tries to clinch there but Laprise circles away.
Laprise jabs Hyuga to the body, keeping him at a distance.
Hyuga throws a sloppy head kick and Laprise moves out of range easily.
Laprise closes the distance and lands a one-two.
Hyuga wants to clinch up but Laprise keeps it at a distance.
That's two minutes gone in the round.
Hyuga changes levels and looks for a double leg takedown. Laprise tries to avoid it but Hyuga manages to keep hold of a leg and drag Laprise to the ground. Laprise escapes though and pops straight back up to his feet.
Lenny Laprise is looking to keep the fight on the feet at all costs.
Laprise lands a head shot.
Hyuga misses with an attempted mid kick.
Laprise connects with a nice looking jab.
Laprise just misses with a punch to the body.
Hyuga shoots in for a takedown. "I don't think so" says Laprise as he avoids it easily.
Laprise scores with a shot to the body.
Laprise throws a combination but comes up with nothing but fresh air.
Hyuga avoids a punch combination nicely.
Hyuga misses with the combination.
Hyuga gets a clinch.
That's three minutes gone in the round.
Laprise prevents a takedown attempt there.
Hyuga has Laprise pressed against the cage, preventing Laprise from circling away and getting back to striking at range.
Hyuga is working for takedown but Laprise is calmly controlling the position for now.
Hyuga breaks from the clinch.
Hyuga fails with the takedown.
Laprise stooping low to avoid any incoming strikes and then lunges in with an uppercut come cross that lands flush.
Hyuga takes a hook to the side of the head. I wonder if that's got his ears ringing.
Hyuga tries to close the distance and clinch but Laprise swats him to one side with an open hand palm strike and circles away.
That's four minutes gone in the round.
Hyuga looks shocked there as he takes a right hand to the temple.
Laprise will need to tighten up his combinations if he doesn't want to gas himself out, swinging at thin air.
Hyuga darts in looking for a takedown but Laprise gets double underhooks and turns Hyuga into the cage.
Laprise's corner calls for him to break the clinch, which he does.
Hyuga closes this distance looking for a takedown but Laprise circles away.
Hyuga looking to shoot here. He's gone for it and he's landed a takedown into side control! Oh, that's bad for Laprise!
Hyuga decides to stand back up. Hyuga steps back and let's Laprise get back to his feet.
This is a great period of action - very entertaining stuff!
As the round comes to an end the crowd are showing their appreciation for a great round of action.
Laprise defends well against a solid takedown attempt from Hyuga.
Hyuga shoots in with a takedown attempt and he has Laprise pinned against the cage. Laprise gets the underhooks and manages to circle away.
Hyuga throws a right hand that Laprise ducks under and follows up with a left that Laprise also avoids with ease.
And that's the end of the fight!
That was a close round. You could make an argument for either fighter but I would give it to Lenny Laprise.
I think Laprise has won this one but let's see what the judges have to say. Over to the ring announcer for the scorecards.
Ladies and gentlemen, after 3 rounds of action, we go to the scorecards for a decision.
Judge Steve Smith scores the fight for Lenny Laprise!
Judge Trevor Gratis scores the fight for Maikeru Hyuga!
Judge William Peck scores the fight for Maikeru Hyuga!
Maikeru Hyuga wins by split decision!
|
|
|
|
|
|
|
|
|
|
|
|
|
|
|
|
|
|
|
|
|
|
|
| S |
C
A |
G |
S |
C
B |
G |
|
S |
C |
G |
|
energy
A | B |
|
hype
A | B |
|
pop
A | B |
|
mgr
A | B |
|
FIGHT
RATING
54% |
|
|
|
|
|
|
