|
|
PBP Commentary |
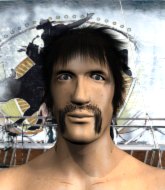
Coming up we have a bantamweight MMA rules bout between Aslak Aas (ranked 0 p4p, 0 weight class) and Tsutomu Miyazaki (ranked 0 p4p, 0 weight class). Aas comes to the cage accompanied by Nunnuka Nunnuka. There are an array of beautiful celebrities at ringside tonight! I wonder if any of them paid for their tickets.
 |
|
 |
| 166 cm
22
140 lbs
8 - 0 - 0 |
|
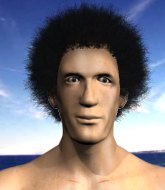
165 cm
23
147 lbs
12 - 3 - 2 |
Good wrestling
Dangerous knees
Cardio machine |
|
Good wrestler
Counter fighter
Granite chin |
|
| |
|
Ladies and gentlemen. This fight is 5 rounds, for the bantamweight championship of the world!
Introducing the champion to my left, fighting out of the red corner.
With a record of
8 - 0 - 0, fighting out of Helsinki, Aslak Aas!
And introducing the challenger to my right, fighting out of the blue corner.
With a record of
12 - 3 - 2, fighting out of Helsinki, Tsutomu Miyazaki!
The judges for this bout are Johanna Lukiainen, Ben Zyskovitsi and Anni Minnem�ki.

The bell rings for round one and we are underway!
Aas keeping his hands up high there, blocking the jab from Miyazaki.
We've been told by Aas's head coaches at Rough House that he's been working on his takedown defense in preparation for this fight.
Aas displays good takedown defense there as he swats away a double leg from Miyazaki.
Aas leaves Miyazaki with his face pressed against the mat as he sprawls beautifully, defending against a solid takedown attempt.
Aslak Aas seems to be the more aggressive standup fighter in this bout.
Aas throws a looping overhand right but Miyazaki ducks down to avoid it.
Miyazaki walks straight into a jab right on the nose. That one stung - he's blinking and trying to clear his head.

Aas takes the fight into the clinch.
The referee is keeping an eye on Aas - much more stalling and he will separate the fighters.
Aas lands a right hand.

That's one minute gone in the round.
Miyazaki tries for a takedown but Aas manages to get underhooks.
Aslak Aas has stuffed three takedown attempts in the round now. That's going to take a lot out of Tsutomu Miyazaki.
Aas lands a right uppercut that snaps the head of Miyazaki backwards.
Aas lands a knee to the head there! That was nasty!
Aas prevents the takedown attempt.
Aas scores with a shot to the side of Miyazaki's head.
A short right from Aas on the inside.
A left hand lands to the body for Aas.
A short right from Aas on the inside.
Miyazaki is working for a takedown up against the cage. He can't get it on this occasion though.
Aas scores with an uppercut up the middle.
Miyazaki goes for a takedown in the clinch but Aas prevents it.
Aas scores a nice knee to the body.
Aas is working Miyazaki over against the cage.
Fantastic stuff here - a very entertaining period of action, which has drawn cheers from the crowd.
Miyazaki has hold of a leg and is looking for a trip takedown. Aas avoids it nicely though and we remain in the clinch.
Miyazaki goes for a takedown in the clinch but Aas prevents it.
Miyazaki looks winded!
Aas prevents a takedown attempt there.
Aas lands with a short shot to the head.
Aas scores with a shot to the side of Miyazaki's head.

That's two minutes gone in the round.
Aas gets underhooks to prevent Miyazaki's takedown attempt.
Miyazaki wants a takedown.
Knees to the body from Aas.
Aas connects with a nasty looking knee right to Miyazaki's face.
The pace slowing considerably in the clinch, as Aas takes a break from that fighting nonsense to think about the finer things in life.

Miyazaki turns his hips and lands a very nice judo throw into side control!
If this pace continues, the referee will definitely step in and force a standup.
Aas wants to control but Miyazaki postures up.
The ref warns both fighters not to hold the cage as they work up against the meshing.
Aas tries to work a leg under to get back to half guard but Miyazaki wriggles his own leg back out and remains in side control.
Miyazaki trying to control the position but Aas is working away.
Sloppy strikes there by Miyazaki.
Aas can't do much from the bottom here.
Aas is looking to reverse the position.
Miyazaki has the superior BJJ but he's also working some ground strikes into his gameplan.
Aas is working hard here to advance position.
Aas manages to get one leg in to regain half guard.
Aas trying to control here.

That's three minutes gone in the round.
Aas keeping hold of Miyazaki's head, controlling as best he can.
Aas keeping his head moving to avoid the ground and pound.
Miyazaki lands with an elbow from half guard - that looked like it hurt.
Aas has no desire to be mounted, so is trying to control. Miyazaki is working away from the top position though.
Miyazaki thows a wild elbow that connects with the canvas.
Aas wants to get back to full guard.
Miyazaki is keeping good posture, landing some ground and pound.
The fighters are pressed up against the cage, both looking to find a bit of space to work.
Aas is looking to improve his position.
Aas controlling the position for now.
Miyazaki thows a wild elbow that connects with the canvas.

That's four minutes gone in the round.
Aas is controlling Miyazaki's position as best he can from this difficult position.
Miyazaki wants to take a breather but Aas is having none of it.
Aas has no desire to be mounted, so is trying to control. Miyazaki is working away from the top position though.
Aas is in a bad position, trying to hold on for dear life but he is really struggling to maintain any sort of control.
We've seen a great period of action over the last minute or so - credit to both fighters for going all out!
Miyazaki not landing any meaningful shots this time.
The two fighters exchange a few words. I couldn't hear what they were saying but maybe it's more fun if you make it up yourself. Miyazaki connects with a nice short shot to Aas's temple.
Miyazaki is looking to advance position but Aas won't allow it.
Miyazaki wants to control but Aas is keeping him busy.
The crowd are going absolutely nuts as the round comes to an end - what a fantastic round of action!
Aas is trying to maintain the position but Miyazaki is very close to passing his half guard.
Aas wants to control but Miyazaki passes into side.
And that�s the end of the round � the fighters go back to their corners.
Aslak Aas dominated that round.
That's the end of the round. The referee orders the cornermen out of the cage so we can get back down to business.

Miyazaki uses decent footwork to sidestep a right hand from Aas.
Miyazaki scores with a big left there. The judges will like that one.
Miyazaki missing with a left hand there. Aas was out of range so wasted energy throwing that one.
Aas takes a swing at Miyazaki's ribcage but misses.
Aas lands with a cross to side of his opponent's head.
Aas misses with a looping right.
Miyazaki shoots in for a takedown - he's clinched up with Aas but Aas pushes him off and we're back to square one.
That's one minute gone in the round.
Aas lands a leg kick and bounces back out of range.
Aas is looking to score with low kicks.
Aas connects with a leg kick. He turned his hip over nicely there.
Aas misses with a low kick.
Aas throws the kick towards the body but Miyazaki avoids it.
Aslak Aas is looking to keep the fight on the feet at all costs.
Aas throws a poor cross that misses
and Miyazaki counters with a nice double leg into guard.
Aas is trying to control the position but Miyazaki postures up.
Tsutomu Miyazaki has got the better of the ground game so far.
That's two minutes gone in the round.
Aas has control of Miyazaki's left arm, preventing Miyazaki from doing any damage.
We've seen a great period of action over the last minute or so - credit to both fighters for going all out!
Aas is working from a closed guard but he's struggling to control his opponent.
We've had a lack of effective grappling in the last minute or so, which could well see a referee standup.
Miyazaki works over Aas with some ground and pound from guard.
Miyazaki trying to land body shots but he keeps hitting the mat.
Aas trying to keep a closed guard but Miyazaki is proving a slippery customer.
Aas pulls Miyazaki in to control the position.

The referee decides to stand the fighters back up, due to lack of activity on the part of Aslak Aas.
Miyazaki stumbles momentarily as he takes a strong leg kick from Aas.
Miyazaki stooping low to avoid any incoming strikes and then lunges in with an uppercut come cross that lands flush.
Aas keeps the fight standing with a nice sprawl.
That's three minutes gone in the round.
Miyazaki connects with a nice looking jab.
Aas swings away with a body shot that misses
and Miyazaki counters with a nice double leg into half guard.
Miyazaki is nestled in close to Aas, controlling him well. He's worked in a nice elbow to the side of the head as well, for good measure.
Aas is refusing to be controlled, as Miyazaki sits in half guard.
Aas wants to control but Miyazaki is keeping busy and won't allow it.

Miyazaki wants to work for an arm triangle but Aas is really keeping half guard well and defending the submission attempt.
Aas controlling the leg, holding on to half guard.
Miyazaki sitting in half guard, looking to land shots. Aas defending well though.
That's four minutes gone in the round.
Aas controlling the leg, holding on to half guard.
The crowd cheering loudly, showing their appreciation for the quality fight we're seeing here.
Miyazaki is nestled in close to Aas, controlling him well. He's worked in a nice elbow to the side of the head as well, for good measure.
Aas controlling the leg, holding on to half guard.
We may be looking at a referee standup if the pace doesn't pick up soon.
Aas moves his hips nicely and gets into full guard.
Miyazaki is working the ground and pound from guard. He might want to try advancing position though to get more of an impact.
A big thud reverberates around the arena there as Miyazaki accidentally thumps the mat. Hopefully he's not broken his hand.
As the round comes to an end the crowd are showing their appreciation for a great round of action.
Aas utilising some decent striking defenses from the guard, preventing the ground and pound.
Miyazaki scores with a decent looking elbow strike.
Miyazaki loading up with the ground and pound but he's missing more than he's landing in this flurry.
Aas wants to control here, rather than go for any submissions from the bottom. At least for now.
And that�s the end of the round � the fighters go back to their corners.
A close second round but Tsutomu Miyazaki will probably get the nod - 10:9.
The minute break is over - no more time for sponges and pep talks - back to the action!

Aas works his jab well there, keeping his opponent at a distance.
Aas swings for the body but Miyazaki moves out of range.
Aas looks to score with a jab to the body but Miyazaki is just out of range.
Aas throws a low kick but it's checked well by Miyazaki.
Aas ducks down and throws a hook to the body.
Miyazaki's hands are dropping dangerously low here and Aas connects clean with a right hook that sends him down to one knee! Miyazaki scrambles back to his feet.
Aas cracks Miyazaki with a good jab.
That's one minute gone in the round.
Aas missing with a left hand there. Miyazaki was out of range so wasted energy throwing that one.
Miyazaki fakes high and shoots in for a takedown but Aas avoids it really well and circles away.
Miyazaki missing with a left hand there. Aas was out of range so wasted energy throwing that one.
Aas looks to land a right hand but Miyazaki moved out of range.
Good standup being displayed there by Miyazaki as he connects with a hook.
That's two minutes gone in the round.
Aas lands a slapping body shot.
Aas looks to land a right hand but Miyazaki moved out of range.
Miyazaki misses the jab.
Aas slips under a jab.
Aslak Aas is winning the standup battle so far.
Miyazaki shoots for a double leg takedown but Aas sprawls well. He's pushed Miyazaki's face into the mat and manages to get back to his feet relatively easily.
Aas lands a nice shot to the body.
Aas fakes a jab and throws a low kick but Miyazaki checks it well.
Aas does a little shimmy and throws a leg kick. The leg kick missed by a considerable margin though, making him look a little bit silly for doing the shimmy.
That's three minutes gone in the round.
Miyazaki keeping a good distance there, avoiding the body shot.
Miyazaki has his front leg slapped to the side - a nice low kick landing there from Aas.
Aas misses with a hook.
A leg kick checked by Miyazaki.
Miyazaki keeping a good distance there, avoiding the body shot.
Aas tries to work over Miyazaki's front leg with a kick but Miyazaki checks it.
Aas misses with a kick to the body.
That's four minutes gone in the round.
Aas pushing out the jab but it's not landing.
A punch combination from Aas misses.
Aas scores with a straight right hand, right through his opponent's guard.
Donk. Miyazaki catches Aas right on the button with a cross.
Miyazaki paws at his opponent with the jab and then lunges in with a straight, right on the button.
Aas swings and misses with a hook to the body.
Miyazaki checks a low kick from Aas.
And that�s the end of the round � the fighters go back to their corners.
Aslak Aas clearly takes that round.
The referee calls time. The cornermen exit stage left and we're back to business.

Miyazaki moves out of range as Aas strikes.
Miyazaki closes the distance and looks for a trip takedown... aaaand he's got it - Miyazaki lands in his opponent's guard.
Miyazaki tries to free his leg and advance position but Aas is retaining full guard.
Aas is pulling down on Miyazaki's head to control his posture.
Miyazaki trying to control but Aas is working from the bottom.
Aas not looking particularly offensive just at the moment.
Miyazaki seems content to control from guard here. He's going to have to remain active though if he doesn't want to get stood back up.

Well, the referee has seen enough. Neither fighter is active enough on the ground so he's stood them back up.
A swing and a miss from Aas.
That's one minute gone in the round.
Miyazaki shoots in for a takedown from distance. He catches Aas napping and manages to drive through into side control!
Miyazaki throwing strikes but missing, from side control.
Miyazaki landing strikes.
Both fighters really going for it on the ground here!
Miyazaki postures up a little and throws a couple of hammerfists but they don't connect properly.
Aas wants to control but Miyazaki postures up.
Aas is holding Miyazaki down, trying to stall.
Miyazaki sitting in side control, looking to soften his opponent up with elbows and hammerfists but Aas is avoiding damage well and looking to escape the position.
You can see the frustration on Aas's face, being in this tough position on the bottom.
Miyazaki is trying to get an arm triangle but Aas is defending well.
Aas tries to improve position but can't.
That's two minutes gone in the round.
Aas is trying to control Miyazaki's posture but Miyazaki avoids it.
Miyazaki misses with the ground and pound.
Aas tries to improve position but can't.
Wooooo! Give it up for these two warriors! They are putting on a show!
Both fighters take a look at the clock.
Aas manages to land a sweep and he's now on top! Lovely Jiu Jitsu!
Aas is looking to take a break and control but Miyazaki is keeping him honest, looking to work from the bottom.
Miyazaki is trying to get back to full guard.
That's three minutes gone in the round.
Aas performing his best blanket impression for a moment.
Aas prevents Miyazaki from improving his position.
Miyazaki keeps trying to improve his position.
Miyazaki is positioning himself well to prevent Aas advancing to mount.
Aas controlling the action here.
Miyazaki gets full guard.
That's four minutes gone in the round.
Aas engaging in some classic timewasting tactics.
Aslak Aas has forced the referee to step in and bring the fight back to the feet.
Aas is looking to clinch but Miyazaki is avoiding it.
Aas stuffs the takedown attempt from Miyazaki. Miyazaki gets slowly back to his feet.
Miyazaki takes a step back and watches a body kick go sailing past his mid section.
The crowd applaud the fighters efforts here as the round comes to an end.
Miyazaki moves out of range of the body kick.
And that�s the end of the round � the fighters go back to their corners.
A close fourth round but Tsutomu Miyazaki will probably get the nod - 10:9.
That's time! Back to the action! This is the final round!

Aas displays some good footwork, moving neatly out of range as Miyazaki throws out the jab.
Aas is looking to land body kicks.
Miyazaki might want to mix his strikes up a bit more. He's just going for head shots at the moment and that can become a bit predictable.
A jab from Aas misses.
A jab from Miyazaki finds it's way through Aas's defenses.
Aas tries to score with an inside leg kick but telegraphs it and Miyazaki is able to avoid easily.
We've had a slow start to the round here - hopefully the action picks up.
Aas fakes high and swings low for a body shot but Miyazaki manages to avoid it.
Aas jabbing away but nothing is landing.
A punch combination from Aas misses.
That's one minute gone in the round.
Aas shapes like he's going to throw a leg kick but settles back down.
A slow jab from Aas misses its intended target.
Aas throws a big shot that misses.
Aas clinches up with Miyazaki and pushes him back against the cage.
Aas lands a short shot on the inside that snaps the head of Miyazaki backwards.
Miyazaki is trying to trip Aas. He has hold of a leg but Aas is hopping around, keeping his balance for the moment. Miyazaki persists though and gets the takedown into guard.
Aas looking to control the pace of the fight rather than finish it.
That's two minutes gone in the round.
Aas not looking particularly offensive just at the moment.
The ref stands the fighters back up because Aslak Aas just wasn't active enough.
Aas buckles his opponent's knee momentarily with a nice leg kick.
Aas connects with the punch.
Miyazaki closes the distance and looks for a trip takedown... aaaand he's got it - Miyazaki lands in his opponent's guard.
We've seen a great period of action over the last minute or so - credit to both fighters for going all out!
Aas trying to keep a closed guard but Miyazaki is proving a slippery customer.
Miyazaki postures up to throw the ground and pound strikes but they don't connect.
That's three minutes gone in the round.
Aas utilising some decent striking defenses from the guard, preventing the ground and pound.
Aas pulls Miyazaki in close to prevent any damage.
Aas trying to control the position.
Aas is adopting a defensive guard.
The ref stands the fighters back up because Aslak Aas just wasn't active enough.
Good work by Miyazaki as he checks the leg kick.
Aas tries to land a leg kick but Miyazaki saw it coming and moves away.
Aas lands a straight punch to the body, keeping Miyazaki at a distance.
That's four minutes gone in the round.
Aas lands with a good body shot.
Aas throws a body kick that misses.
Miyazaki fails with the takedown
and Aas counters by moving into the clinch. Good anticipation by Aas.
Aas is defending well against a takedown attempt.
The crowd applaud the fighters efforts here as the round comes to an end.
Miyazaki takes a shot to the head.
Miyazaki changes levels and goes for a takedown here. Aas fights it off and pushes away nicely.
Aslak Aas has stuffed three takedown attempts in the round now. That's going to take a lot out of Tsutomu Miyazaki.
Aas moves out of range of the strikes.
And that's the end of the fight!
Aslak Aas showed his dominance in that final round.
I think Aas has won this one but let's see what the judges have to say. Over to the ring announcer for the scorecards.
Ladies and gentlemen, after 5 rounds of action, we go to the scorecards for a decision.
Judge Johanna Lukiainen scores the fight 49:47
Judge Ben Zyskovitsi scores the fight 48:47
Judge Anni Minnem�ki scores the fight 49:47
In favor of your winner, by unanimous decision... Aslak Aas!
Aslak Aas retains his bantamweight title!
A relieved looking Aslak Aas thanked the fans for their support and gave the usual line about them being amazing. They seemed to believe that he actually meant it.
|
|
|
|
|
|
|
|
|
|
|
|
|
|
|
|
|
|
|
|
|
|
|
| S |
C
A |
G |
S |
C
B |
G |
|
S |
C |
G |
|
energy
A | B |
|
hype
A | B |
|
pop
A | B |
|
mgr
A | B |
|
FIGHT
RATING
74% |
|
|
|
|
|
|
