|
|
PBP Commentary |
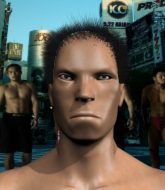
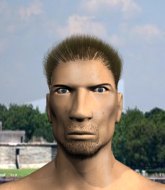
Coming up we have a bantamweight MMA rules bout between Truc Jerome (ranked 0 p4p, 0 weight class) and Kyler Aleshire (ranked 0 p4p, 0 weight class). Kyler Aleshire has the power to score a knockout today if he connects clean with Truc Jerome's chin.
 |
|
 |
| 165 cm
20
139 lbs
1 - 0 - 0 |
|
170 cm
20
137 lbs
1 - 0 - 0 |
BJJ Blue Belt
Brawler
Big heart |
|
BJJ Purple Belt
Brawler
Very confident |
|
| |
|
Ladies and gentlemen. This fight is 3 rounds, in the bantamweight division.
Introducing the fighter to my left, fighting out of the red corner.
With a record of
1 - 0 - 0, fighting out of Amsterdam, Truc Jerome!
And introducing the fighter to my right, fighting out of the blue corner.
With a record of
1 - 0 - 0, fighting out of Amsterdam, Kyler Aleshire!
The judges for this bout are Paul Aken, Aafke Stam and Radbod Blank.

The bell rings for round one and we are underway!
Aleshire pulls out of a head kick attempt.
Jerome doesn't manage to clinch there - Aleshire circles away.
Aleshire tries to close the distance and clinch but Jerome swats him to one side with an open hand palm strike and circles away.
Jerome is trying hard to land a takedown here. Aleshire sprawls well and keeps this one on the feet.
Aleshire tries to close the distance and clinch up against the cage but Jerome paws at him with a jab and circles away.

Aleshire shoots in looking for a single leg takedown. Jerome is trying to defend but Aleshire finishes it well and ends up in half guard. Let's see if he can advance position further.
Aleshire is trying to control the action in half guard but Jerome is working away on the bottom, looking perhaps to get back to full guard.
Jerome tries to roll over but Aleshire keeps him under control.
Jerome blocking the ground and pound attempt from Aleshire.
Aleshire tries to pass to full mount but Jerome defends it.
Aleshire thows a huge punch but Jerome dodges it nicely.

That's one minute gone in the round.
Aleshire wants to take a breather but Jerome is having none of it.
Jerome is looking for a sweep. Aleshire is wise to his cunning plan and keeps the top position.

Aleshire is looking for an arm triangle, whilst trying to pass to side control. Jerome doesn't seem that keen to cooperate though. No luck this time Aleshire.
Aleshire keeping composed on the top, looking to control the action.
Jerome wants to control but Aleshire is keeping busy.
Aleshire tries to pass to full mount but Jerome defends it.
The fighters are pressed up against the cage, both looking to find a bit of space to work.

That's two minutes gone in the round.
Jerome wants to improve his position but Aleshire is controlling well.
Jerome has no desire to be mounted, so is trying to control. Aleshire is working away from the top position though.

It looks like we're going to have a standup here. Neither fighter is doing enough on the ground.
Aleshire fails to land the takedown.
Aleshire goes for a spinning back kick but it misses.
Aleshire stuffs the takedown.

Jerome drives through and clinches with Aleshire against the cage.
Jerome controlling the action here for a moment.

That's three minutes gone in the round.

Jerome pushes off and circles away, back to the middle of the mat.
Jerome jabs at Aleshire's body.
Aleshire closes the distance and gets a trip takedown into side control. Jerome quickly recovers to half guard.

Jerome actively working from the bottom here.
Jerome is breathing heavily.
Aleshire keeping composed on the top, looking to control the action.
Aleshire lands with an elbow from half guard - that looked like it hurt.
Jerome trying to control from the bottom.

That's four minutes gone in the round.
Aleshire is just sitting in half guard, waiting for something to happen.
Aleshire is keen to just control but Jerome is a slippery customer.
Aleshire might have to switch it up a bit here because his efforts to control Jerome haven't been going to plan, at least at the current moment in time.

OK we're going to have a standup here. Kyler Aleshire hasn't been effective enough on the ground and the referee wants a restart.
Jerome throws a body kick that digs right into the meat.
The crowd applaud the fighters efforts here as the round comes to an end.
Jerome moves into range and clinches up with Aleshire.
Wooooo! Give it up for these two warriors! They are putting on a show!
Jerome fails to pull guard.
That's three failed takedown attempts in the round for Truc Jerome. That's going to take a lot out of him.
Jerome is defending well against a takedown attempt.
And thats the end of the round the fighters go back to their corners.
Kyler Aleshire dominated that round.
OK. That's time! The bell goes and we're back to the action.

Aleshire shoots for a double leg takedown but Jerome sprawls well. He's pushed Aleshire's face into the mat and manages to get back to his feet relatively easily.
Jerome looks frustrated there after his takedown attempt is stuffed easily.
Jerome moves into the clinch.
Aleshire tries to score a body lock takedown but Jerome shows good agility there to stay on his feet.
Jerome is trying to work for a single leg takedown but Aleshire pulls him back up using the underhooks.
Jerome has Aleshire pressed against the cage, preventing Aleshire from circling away and getting back to striking at range.
Both guys are working to get underhooks.
Jerome's corner calls for him to break the clinch, which he does.
Jerome throws a body kick but he was well out of range there.
Aleshire shoots in looking for a takedown. Jerome tries to sprawl out of it but Aleshire keeps driving through. The fighters are pinned against the cage. Jerome manages to get underhooks and after a bit of a struggle, circles away and we're back to standing.
Truc Jerome has stuffed three takedown attempts in the round now. That's going to take a lot out of Kyler Aleshire.
Jerome closes the distance and clinches up with Aleshire, looking for a takedown. Jerome pushes Aleshire against the cage but Aleshire circles to the side and manages to break the clinch.
That's one minute gone in the round.
Jerome moves into the clinch successfully.
Aleshire taking a breather.
Aleshire wants to break free but Jerome has control.

Aleshire escapes the clinch and we're back to striking.
Jerome shoots in with a takedown attempt and he has Aleshire pinned against the cage. Aleshire gets the underhooks and manages to circle away.
Aleshire throws a wild body kick that Jerome sees coming a mile off.
Jerome moves out of range of the body kick.
Jerome slaps away a takedown attempt from Aleshire, before circling back to the center of the mat.
Aleshire shoots in but Jerome avoids the takedown attempt easily.
Aleshire is breathing heavily.
That's two minutes gone in the round.
Jerome misses with a wild combination.
Aleshire tries to score a power double leg takedown but Jerome sees that one coming and sprawls well. That will dishearten Aleshire somewhat.
Jerome throws a right and a left that both miss.
Jerome looks frustrated there after his takedown attempt is stuffed easily.
Jerome throws a looping left and ducks down for a takedown. He's got his arms around Aleshire's waist but Aleshire gets an underhook and avoids the takedown by throwing Jerome off to one side.
That's three minutes gone in the round.
Jerome closes the distance looking to clinch
and Aleshire counters with a single leg into guard. Jerome didn't expect that.
Aleshire trying to control the position from guard on top but Jerome is wriggling around, looking for whatever he can.
Aleshire wanted to stand there but Jerome had control of the position.
Jerome trying to control the position.
Aleshire trying to control the position from guard on top but Jerome is wriggling around, looking for whatever he can.
The referee must be thinking about standing these guys back up.
Aleshire throwing shots from guard but he's hitting more mat than opponent.
That's four minutes gone in the round.
Jerome controls Aleshire momentarily but Aleshire frees himself.
OK we're going to have a standup here. Kyler Aleshire hasn't been effective enough on the ground and the referee wants a restart.
Jerome tries to grapple but his opponent circles
and Aleshire counters with a takedown into side control! That could mean trouble for Jerome!
The crowd are loving this. Great action here.
You can see the frustration on Jerome's face as Aleshire controls the position.
Jerome tries to buck Aleshire off but Aleshire is having none of it.
Aleshire has knee on belly and now moves to full mount! Trouble for Jerome!
As the round comes to an end the crowd are showing their appreciation for a great round of action.
Aleshire fakes a shot to the body and cracks his opponent in the head. Nice ground and pound there!
Aleshire pushing the pace here, looking to move to his opponents back and work for a finish.
And thats the end of the round the fighters go back to their corners.
Kyler Aleshire showed his class in that round. I'd imagine he'll take it on all the scorecards.
That's time! Back to the action! Let's get this one finished - here comes the final round!

Aleshire gets a double leg takedown into Jerome's guard.
Aleshire advances position into side control!
Aleshire in side control lands a nice looking series of punches and elbows.

Aleshire decides to stand back up.
Aleshire tries to clinch
and Jerome counters with a big head kick but Aleshire shrugs it off.
Aleshire throws a series of punches but Jerome moves out of range.
Aleshire changes levels and looks for a double leg takedown. Jerome tries to avoid it but Aleshire manages to keep hold of a leg and drag Jerome to the ground. Jerome escapes though and pops straight back up to his feet.
Aleshire shoots in for a takedown - he's clinched up with Jerome but Jerome pushes him off and we're back to square one.
Truc Jerome is looking to throw some combinations by the looks of things.
Aleshire takes a big intake of breath there - he's definitely tired.
Jerome shoots in but Aleshire avoids the takedown attempt easily.
That's one minute gone in the round.
Aleshire on the receiving end of a decent leg kick there by Jerome. Jerome obviously looking to wear him down.
Jerome connects with a leg kick. Aleshire looked like he was expecting something else and didn't defend it.
Jerome fails with a rather predictable takedown attempt.
Jerome shoots in but no luck this time.
That's three failed takedown attempts in the round for Truc Jerome. That's going to take a lot out of him.
Aleshire fails with a rather predictable takedown attempt.
Aleshire takes a head kick and keeps coming.
Aleshire throws a combination but it was largely blocked by Jerome.
Aleshire scores with a nice takedown into half guard. Let's see what he's got on the ground.
That's two minutes gone in the round.
Jerome is looking to improve his position.
Aleshire works his way into full mount!
Aleshire has isolated one of Jerome's arms. Jerome looking to fight him off but Aleshire twists into an armbar. It's tight... Will he tap?? YES, he's tapped! This one is all over!
Ladies and gentlemen, after 2:42 of round 3, we have a winner by way of Submission (Armbar). Kyler Aleshire!
|
|
|
|
|
|
|
|
|
|
|
|
|
|
|
|
|
|
|
|
|
|
|
| S |
C
A |
G |
S |
C
B |
G |
|
S |
C |
G |
|
energy
A | B |
|
hype
A | B |
|
pop
A | B |
|
mgr
A | B |
|
FIGHT
RATING
75% |
|
|
|
|
|
|
