|
|
PBP Commentary |
Coming up we have a bantamweight MMA rules bout between Burer Mutant (ranked 0 p4p, 0 weight class) and Liam Ward (ranked 0 p4p, 0 weight class). Over to our ring announcer for the fighter introductions!
 |
|
 |
| 178 cm
29
135 lbs
9 - 5 - 0 |
|
159 cm
21
146 lbs
5 - 3 - 0 |
Decent wrestler
Excellent boxer
Good chin |
|
Excellent grappler
Decent boxing
Good gas tank |
|
| |
|
Ladies and gentlemen. This fight is 3 rounds, in the bantamweight division.
Introducing the fighter to my left, fighting out of the red corner.
With a record of
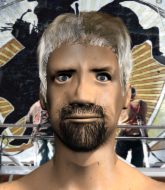
9 - 5 - 0, fighting out of Hilo, Burer Mutant!
And introducing the fighter to my right, fighting out of the blue corner.
With a record of
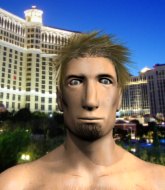
5 - 3 - 0, fighting out of Los Angeles, Liam Ward!
The judges for this bout are Don Winkell, Frank Antenori and Jack Bonds.

The bell rings for round one and we are underway!
Mutant misses with the combination.
Mutant takes a body punch that cleary hurt but he's trying not to show any weakness.
Ward throws a hook but Mutant blocks it.
Mutant dips to his left and cracks Ward with an uppercut!
Ward cracks Mutant with a right hand to the side of the head.
Ward blocks a jab.
Ward has done a lot of speed work in the buildup to this fight.
Mutant really does look like a pencil wearing a pair of gloves. Let's hope he has a gameplan to suit that ridiculous body shape.
Mutant scores with a jab to the jaw of his opponent.
Mutant swings wildly with a couple of big hooks
and Ward counters with a left to the body.
Nice straight punches there by Ward. You know Roy Jones Jr respects the hands of Ward.

The fight moves into the clinch position.
Ward throws a head punch that misses.
Ward lands with a good tight uppercut to the head.
Ward misses with a punch to the body.
Ward tries a body shot but Mutant blocks it.
An uppercut on the inside fails to land for Mutant.
Ward stays in close to his opponent and throws a right hand to the body.
Mutant tries to land a shot to the body but it's blocked.

That's one minute gone in the round.
Ward is trying to slow down the pace of the fight but Mutant is keeping busy.
Ward seems frustrated at his inability to get double underhooks.
Ward misses with the head strike.
Ward lands a shoulder strike.
Ward goes for a takedown attempt but Mutant pushes him away and we're back to fighting at a distance.
Mutant throws a jab, cross combination which is slipped
and Ward cracks him with a counter punch right on the button.
Mutant swinging wildly here.
Ward lands a jab to Mutant's midsection.
Ward misses the jab.
Ward swings away but doesn't land with a series of punches.
A combination from Mutant does no damage.
Mutant fails to land with a series of punches.
A looping hook to the body misses from Mutant. Ward does a little dance to reset his feet.
Ward slips a jab and a cross from Mutant.

That's two minutes gone in the round.
Ward dives in for a single leg takedown but Mutant sprawls and the fighters end up clinched against the cage.
Our sources have told us that Mutant has been working on his knees in the buildup to the fight.
A real battle for position is taking place between these two warriors.
Mutant presses Ward against the cage and delivers a mid-strength body shot.
An uppercut on the inside fails to land for Ward.
Ward drops down for a takedown but doesn't get it.
Burer Mutant has stuffed three takedown attempts in the round now. That's going to take a lot out of Liam Ward.
A head punch blocked on the inside by Mutant.
Ward trying to stall but Mutant improves his position.
A right hook to the body lands for Mutant.
Mutant blocks a punch to the side of the head.
Ward swings wildly with an uppercut but Mutant uses good head movement to avoid it.
We've seen a great period of action over the last minute or so - credit to both fighters for going all out!
Mutant misses with a shot to the kidneys.
Mutant gets double underhooks to prevent a takedown attempt from Ward.
Mutant tries to work over Ward's body with a swooping hook but it only glances the target.

That's three minutes gone in the round.
Ward blocks a body shot from Mutant.
Mutant misses with a punch on the inside.
Ward swings away with an uppercut that misses.
Ward blocks a couple of punches on the inside.
Mutant working aggressively here.
A head punch on the inside from Mutant fails to land.
Mutant tries a body shot but Ward blocks it.
A head punch blocked on the inside by Ward.
Ward presses Mutant against the cage and delivers a mid-strength body shot.
Mutant has a couple of punches blocked by Ward.
With the fighters clinched against the cage, Mutant creates a bit of distance for himself and scores with a nice uppercut.
Ward tries a shoulder strike but it doesn't do any damage.
A head punch blocked on the inside by Ward.
Ward misses with a punch to the body.
Mutant struggles to land a body shot inside as Ward controls his hands.
Ward swings away with an uppercut that misses.
Ward blocks a couple of punches on the inside.
Ward drops down looking for an ankle pick but Mutant pulls his leg out and moves away.

That's four minutes gone in the round.
Mutant throws a combination but it was largely blocked by Ward.
Mutant fakes with an overhand right and moves in to clinch with Ward, pushing him back against the cage.
Ward prevents a body shot from Mutant.
A short left from Ward.
The fans in attendance giving it up for the two fighters, who have really let it all hang out in the last minute or so!
Ward throws a head punch that misses.

Ward breaks the clinch.
A lazy left from Mutant finds it's target.
Ward is moving around nicely and scores here with a single head shot.
Burer Mutant is looking to keep the fight on the feet at all costs.
A telegraphed right hand from Ward misses the target.
Ward throws a big shot that misses.
As the round comes to an end the crowd are showing their appreciation for a great round of action.
Mutant uses some good footwork to avoid the body shot by Ward.
Ward thows a body shot but no joy.
Ward throws an overhand right that lands on Mutant's shoulder, as Mutant tries to avoid the shot.
Ward throws an uppercut from half a mile away. Mutant sees it coming and avoids it easily.
And that�s the end of the round � the fighters go back to their corners.
A close round but Liam Ward will probably get the nod.
That's the end of the interval. I'm sure that seemed a lot quicker than a minute for our two fighters! Back to the action.

Mutant misses with a wild body shot.
Mutant slips under a jab.
Ward ducks under a wild hook from Mutant.
Mutant takes a solid shot to the body. That one hurt him but he's trying not to show it.
Mutant rushes forward with a series of wild hooks but Ward moves out of range and avoids them all easily.
Mutant throws a left and a right that both miss
and Ward counters with a lovely straight right hand!

Ward looking to score a takedown here. Mutant is defending well but Ward drives through and ends up in Mutant's guard.
It looks like the ref is thinking about a standup.
Ward is fighting to break Mutant's control of his arms but Mutant is doing a good job of controlling the position at the moment.
Ward won't allow Mutant to sweep him here.
Ward lands a couple of decent looking shots.
Ward stands up and looks to throw the legs aside to pass to side control. Mutant swivels though and keeps the full guard.
Ward in full guard, throwing the ground and pound. No damage this time.
Ward has the superior BJJ but he's also working some ground strikes into his gameplan.
Mutant seems keen to control rather than go for a submission, at least for now.
Mutant keeping moving, preventing Ward from controlling successfully.
That's one minute gone in the round.
Ward postures up in Mutant's guard and throws a big left but Mutant blocks it.
Ward is intent on slowing down the pace of the fight, simply looking to control.
Mutant utilising some decent striking defenses from the guard, preventing the ground and pound.
Mutant pulls Ward in close to prevent any damage.

The referee decides to stand the fighters back up.
Mutant checks a leg kick nicely.
Ward throws a body punch but Mutant moves out of range.
Mutant rushes forward with a series of wild hooks but Ward moves out of range and avoids them all easily.
Danga de danga de dang - Ward scores with a four punch combination!
Ward feints a straight left to the body, then turns around with a flashy move and hits Mutants jaw with a dramatic spinning back fist!
Mutant closes the distance and presses his opponent up against the cage.
Mutant goes for a body shot but it's blocked.
A head punch blocked on the inside by Mutant.
That's two minutes gone in the round.
Ward lands a right hand.
Ward blocking some punches.
Ward blocking some punches.
Ward lands a hook to the side of the head.
Liam Ward seems to be working more effectively in the clinch in the fight so far.
Ward drops down looking for an ankle pick but Mutant pulls his leg out and moves away.
The crowd cheering loudly, showing their appreciation for the quality fight we're seeing here.
Ward avoids a punch combination nicely.
Mutant has closed the distance and engaged Ward in a clinch.
A short right from Mutant on the inside.
Ward lands with a short head shot on the inside.
Mutant blocks an uppercut.
Mutant fails to land with a short punch on the inside.
Mutant lands a right uppercut that snaps the head of Ward backwards.
Ward tries to pull guard but Mutant won't allow it.
Mutant swings wildly with an uppercut but Ward uses good head movement to avoid it.
That's three minutes gone in the round.
Mutant tries a body shot but Ward blocks it.
A head punch blocked on the inside by Ward.
Ward tries to pull guard but Mutant holds him up against the cage and eventually Ward drops back down to his feet.
Burer Mutant has stuffed three takedown attempts in the round now. That's going to take a lot out of Liam Ward.
Ward lands on the inside with an uppercut.
Ward is trying to slow down the pace of the fight but Mutant is keeping busy.
Mutant misses with a hook to the ribs.
Mutant misses with a hook from the clinch.
Ward jumps guard but his hands slip and he falls flat on his back. Well, he's made himself look a right mug there, as Mutant walks away with a smile on his face. Ward gets slowly back to his feet and shakes his head.
A punch combination from Mutant misses.
Ward ducks down and throws a hook to the body but Mutant moves away.
Mutant misses with a few strikes there.
Nice straight punches there by Mutant. You know Roy Jones Jr respects the hands of Mutant.
Ward bobs and weaves into range and then changes levels and scores with a nice takedown into side control.
That's four minutes gone in the round.

Ward is looking to finish here, going for an Americana. Mutant knows the correct defense though, so he's OK.
Mutant holds on tight, trying to prevent any damage.
Mutant can't do much from the bottom here.
The fighters are pressed up against the cage, both looking to find a bit of space to work.
Fantastic stuff here - a very entertaining period of action, which has drawn cheers from the crowd.
Ward wants to control but Mutant is keeping him busy.
Ward connects with a decent looking elbow from side control that caused Mutant some visible discomfort.
Ward is looking for a kimura. He might have it! No, Mutant has escaped the position, nice work there.
Ward in side control lands a decent elbow.
As the round comes to an end the crowd are showing their appreciation for a great round of action.
Mutant can't do much from the bottom here.
Ward moves into full mount!
And that�s the end of the round � the fighters go back to their corners.
Liam Ward showed his class in that round. I'd imagine he'll take it on all the scorecards.
OK. That's time! The bell goes and we're back to the action. This is the final round!

No joy there for Mutant, who threw a few shots but didn't land.
Mutant misses with a wild combination.
Burer Mutant is looking to throw some combinations by the looks of things.
Mutant connects with a slap. Keep your fist closed son.
Mutant has his hands up protecting his head but a hook from Ward finds it's way round the side to connect with Mutant's head.
Mutant is using his height advantage well here, landing a good percentage of his punches.
Mutant misses with a double jab
and Ward counters with a crisp hook to the side of the head.
Ward scores with a nice takedown into half guard. Let's see what he's got on the ground.
Ward is working for a submission of some sort.
Ward lands with an elbow from half guard - that looked like it hurt.
Ward is controlling the pace.
That's one minute gone in the round.
Mutant taking some punishment here, with Ward in his half guard.
Mutant tries to roll over but Ward keeps him under control.
Ward thumps the canvas. Not on purpose obviously - he just missed Mutant's head.
Ward wants to lay and pray for a moment but Mutant keeps working.
Mutant on his back here. We all know that wrestlers don't like being on their back so let's see if Mutant tries to get out of the position.
Ward is looking for a kimura. It's going to be difficult to finish that from half guard though and Mutant defends it well.
Liam Ward has got the better of the ground game so far.
Ward prevents Mutant from improving his position.
Ward is controlling the pace.
That's two minutes gone in the round.
Mutant has no desire to be mounted, so is trying to control. Ward is working away from the top position though.
Ward is thinking about going for an arm triangle but he can't free his leg.
Mutant is trying to get back to full guard.
Ward missing with some ground and pound from the half guard.
Ward is pressing down on Mutant's thigh, looking to free his foot. Mutant is holding on for now.
Ward is looking for a kimura but Mutant is holding onto that half guard position, so it's hard for Ward to get the leverage.
The ref warns both fighters not to hold the cage as they work up against the meshing.
That's three minutes gone in the round.
Ward is keeping good posture, landing some ground and pound.
Ward wants to work for an arm triangle but Mutant is really keeping half guard well and defending the submission attempt.
Ward is working for a submission of some sort.
Ward trying to control the action but Mutant is working from the bottom.
Mutant gets back to full guard.
Ward won't allow Mutant to sweep him here.
Mutant is trying to control the position but Ward postures up.
Mutant avoiding any damage from the ground and pound.
That's four minutes gone in the round.
Mutant keeping moving, preventing Ward from controlling successfully.
Mutant is trying to control the position from the bottom.
Ward with a flurry of punches that miss.
Mutant will need to keep those long limbs tucked in whilst he's on the ground, to prevent any submissions.
Mutant keeping moving, preventing Ward from controlling successfully.
Burer Mutant has stepped it up - he knows he needs a finish here!
Mutant is working from a closed guard but he's struggling to control his opponent.
The referee decides to stand the fighters back up.
Ward dips down and scores with a jab to the body.
Mutant takes a shot right to the liver - Bas would have been proud of that punch.
Mutant misses with a jab, cross combination.
As the round comes to an end the crowd are showing their appreciation for a great round of action.
Sloppy strikes from Mutant. Those never looked like landing.
Both fighters are breathing heavily.
The crowd are loving this. Great action here.
Mutant tries to bum rush Ward with a series of wild strikes but Ward uses good footwork to avoid the assault.
Liam Ward is fighting for a decision - hopefully he's judged it right and he's actually winning the fight.
Mutant takes a shot to the body in his stride.
And that's the end of the fight!
Liam Ward comfortably won the final round on my scorecard.
Well Ward has outworked and out performed his opponent in all aspects of the game today. He was simply too good and the decision should be no more than a formality. Over to the ring announcer for the scorecards.
Ladies and gentlemen, after 3 rounds of action, we go to the scorecards for a decision.
Judge Don Winkell scores the fight 27:30
Judge Frank Antenori scores the fight 27:30
Judge Jack Bonds scores the fight 27:30
In favor of your winner, by unanimous decision... Liam Ward!
|
|
|
|
|
|
|
|
|
|
|
|
|
|
|
|
|
|
|
|
|
|
|
| S |
C
A |
G |
S |
C
B |
G |
|
S |
C |
G |
|
energy
A | B |
|
hype
A | B |
|
pop
A | B |
|
mgr
A | B |
|
FIGHT
RATING
78% |
|
|
|
|
|
|
