|
|
PBP Commentary |
Coming up we have a welterweight MMA rules bout between Mick Ward (ranked 0 p4p, 0 weight class) and Nick Gray (ranked 0 p4p, 0 weight class). Gray has chosen Skindred - Warning as his entrance music. The key to victory for Mick Ward has got to be keeping the fight on the feet.
 |
|
 |
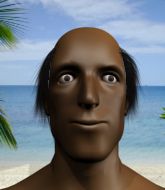
| 178 cm
25
180 lbs
4 - 1 - 0 |
|
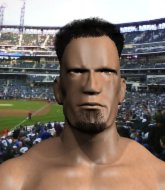
194 cm
25
180 lbs
2 - 1 - 0 |
BJJ Blue Belt
Excellent boxer
Prefers standup |
|
BJJ Purple Belt
Brawler
Very confident |
|
| |
|
Ladies and gentlemen. This fight is 3 rounds, in the welterweight division.
Introducing the fighter to my left, fighting out of the red corner.
With a record of
4 - 1 - 0, fighting out of The Island, Mick Ward!
And introducing the fighter to my right, fighting out of the blue corner.
With a record of
2 - 1 - 0, fighting out of The Island, Nick Gray!
The judges for this bout are Michael Johnstone, Sandra Marshall and Peter Branson.

The bell rings for round one and we are underway!

Gray clinches.
Ward is defending well against a takedown attempt.
Ward tries to land a shot to the body but it's blocked.

Ward's corner calls for him to break the clinch, which he does.
Mick Ward seems to be the more aggressive standup fighter in this bout.
Ward fails in his attempt to clinch.
Ward throws a two punch combo that lands nicely.
Ward cracks Gray with a hook to the jaw. Both fighters smile at eachother and high-five before getting back down to business.
Ward wings a very wild body shot but it does the job and lands to the midsection.
Ward tries to clinch there but Gray circles away.
Ward fakes high and swings low for a body shot but Gray manages to avoid it.
Ward misses with a jab and misses with a cross straight after too.
Gray is a painfully thin specimen of a man. You do wonder whether a good body kick would snap him clean in two.
Gray swats away the attempt to clinch by Ward.
Ward tries to clinch there but Gray circles away.
Ward gets tackled into the cage by Gray. Gray maintains the clinch.
Ward lands a right uppercut that snaps the head of Gray backwards.
Ward lands a short shot on the inside that snaps the head of Gray backwards.

Gray turns his hips and lands a very nice judo throw into side control!
The crowd are loving this. Great action here.
Ward prevents Gray from moving into mount.
Ward manages to work his way to half guard, despite Gray's best efforts.

That's one minute gone in the round.
Gray is trying to control. Ward wants to improve his position but can't escape this time.
Gray working over Ward with some ground and pound. Ward looks like he wants out of this position, which is understandable.
Gray sitting and controlling from the half guard.
Ward trying to hold on to Gray's head to control him but Gray postures up.
Ward slips a foot under and gets full guard. Nice work.
Ward is trying to control the position from the bottom.
The ref warns both fighters not to hold the cage as they work up against the meshing.
Gray trying to control the position from guard on top but Ward is wriggling around, looking for whatever he can.

That's two minutes gone in the round.
Gray postures up in Ward's guard and throws a big left but Ward blocks it.
Ward keeping moving, preventing Gray from controlling successfully.
Gray stands up over Ward, holding his feet. He dives back in and lands a decent shot to the head.
Gray stands up and looks to throw the legs aside to pass to side control. Ward swivels though and keeps the full guard.
A big thud reverberates around the arena there as Gray accidentally thumps the mat. Hopefully he's not broken his hand.
Gray scores with a decent looking elbow strike.
This has been an exciting period of action!
The fighters are starting to get a bit slippery now, which will make submissions a bit more difficult.
Gray is in close to Ward's body, working some short punches and elbows.
Ward seems to have improved his submission grappling technique since last time we saw him. Let's see if he can pull off a submission.
Gray trying to control the position from guard on top but Ward is wriggling around, looking for whatever he can.
Ward tries to land a sweep but no joy.

That's three minutes gone in the round.
Gray wants to pass the guard but Ward is keeping the position.
Gray postures up in Ward's guard and throws a big left but Ward blocks it.
Gray looking to sit in guard and control but Ward gets the butterfly guard and sweeps. He's now in the guard on the top.
Ward has to be careful here, sitting in the guard of a superior BJJ player.
Gray pulls Ward in close to prevent any damage.

Gray working from the bottom, still in full guard. He's managed to get a loose triangle. Ward doesn't seem to be doing much to defend here, obviously he feels comfortable in the position. Ward manages to throw the legs off his shoulder and he's back into guard - no problem.
Ward throwing strikes from guard but Gray blocks nicely.
Ward in full guard, throwing the ground and pound. No damage this time.
Ward would like to get this fight back to the feet but can't get free from the closed guard.

That's four minutes gone in the round.
Ward got a little sloppy there for a moment and Gray has worked his way into a loose triangle - can he finish it?! No, Ward has managed to get both his arms back between Gray's legs - danger averted.
Gray trying to keep a closed guard but Ward is proving a slippery customer.
Both fighters really going for it on the ground here!
Gray preventing the ground and pound from doing any damage.
Ward is in close to Gray's body, working some short punches and elbows.
Gray has the superior BJJ but he's also working some ground strikes into his gameplan.
Ward got a little sloppy there for a moment and Gray has worked his way into a loose triangle - can he finish it?! No, Ward has managed to get both his arms back between Gray's legs - danger averted.
We've seen a great period of action over the last minute or so - credit to both fighters for going all out!
Gray is trying to keep Ward in close.
Ward preventing the sweep.
As the round comes to an end the crowd are showing their appreciation for a great round of action.
Gray looking to control.
Gray is working actively off his back, looking to secure an arm or perhaps work for a triangle.
Gray looking to sweep here. No luck so far.
And that�s the end of the round � the fighters go back to their corners.
Nick Gray dominated that round.
That's the end of the round. The referee orders the cornermen out of the cage so we can get back down to business.

Ward defending well as Gray loads up on a big left hand.
Gray shoots in looking for a single leg takedown. Ward is trying to defend but Gray finishes it well and ends up in half guard. Let's see if he can advance position further.
Gray is thwarting Ward's attempts to control the position.
Gray thumps the canvas. Not on purpose obviously - he just missed Ward's head.
Gray works his way into side control.
Ward is not content to let Gray control the position.
Gray is trying to get an arm triangle but Ward is defending well.
Gray advances to full mount.
That's one minute gone in the round.
Ward in a bad spot here, taking shots to the head.
Ward is trying to escape the mount.
Gray with good strikes from the mount here!
Ward tries to hold on but Gray postures up.
Gray scoring with strikes but Ward is staying in there.
Gray prevents Ward from getting the reversal.
Gray landing strikes from the mount and Ward is in trouble!
Gray landing strikes, looking to finish!
The fighters are pressed up against the cage, both looking to find a bit of space to work.
Gray has his opponent pinned against the cage, landing some nasty ground and pound that is really making a bit of a mess out of Ward's face.
Wooooo! Give it up for these two warriors! They are putting on a show!
A nice elbow there by Gray.
Gray can't quite control the action as he would like just now, as Ward is looking to escape.
Gray landing strikes from the mount.
That's two minutes gone in the round.
Gray prevents Ward from getting the reversal.
Gray landing shots from mount.
Ward taking shots to the head.
Gray is working on an americana here. Ooh, that looks pretty nasty! Nope, Ward has managed to escape the submission attempt.
Gray has control of Ward's right arm, working for a kimura. It's a bit of a token attempt though and Ward regains control of the situation pretty easily.
Ward is desperately trying to get back to half guard.
That's three minutes gone in the round.
Gray working to secure an arm triangle but it's not happening for him just yet.
Gray raining down hammerfists from mount.
Ward is looking to get to half guard.
BOOM! Gray connects with a massive shot to the dome!
Gray postures up and cracks his opponent a couple of times before moving back into close ground control. Ward looks a forlorn figure.
Gray lands with some strikes.
Gray can't quite control the action as he would like just now, as Ward is looking to escape.
Gray prevents Ward from getting the reversal.
That's four minutes gone in the round.
Gray landing punches.
Fantastic stuff here - a very entertaining period of action, which has drawn cheers from the crowd.
Gray can't quite control the action as he would like just now, as Ward is looking to escape.
Gray looking to finish Ward with some ground and pound. This is bad for Ward!
Gray working away from the top, dropping strikes.
The crowd are going absolutely nuts as the round comes to an end - what a fantastic round of action!
Gray controlling the pace for now.
Gray lands a couple of nice shots there from mount.
And that�s the end of the round � the fighters go back to their corners.
Nick Gray showed his class in that round. I'd imagine he'll take it on all the scorecards.
The fighters' corners scream their final instructions, as the referee calls time. Here we go, back to the action! This is the final round!

Some wild striking there from Ward.
Ward lands a nice shot to the body.
Gray takes a big uppercut there. He seems a bit wobbly but no, he's OK.
Ward wants to clinch up but Gray keeps it at a distance.
Gray dodges the punch combination from Ward.
Ward wants to clinch up but Gray keeps it at a distance.
Ward looks to land a combination but Gray avoids it well.
Ward connects nicely with a jab. Noted by the judges no doubt.
Ward fails to land with a series of punches.
Ward is looking to clinch but Gray is avoiding it.
Gray ducks down and throws a hook to the body but Ward moves away.
Ward cracks a nice hook into Gray's ribs.
Gray avoids the body shot from Ward.
Ward keeps the fight standing with a nice sprawl.
Gray closes the distance and presses his opponent up against the cage.
That's one minute gone in the round.
Gray wants to take the fight to the mat but Ward manages to get underhooks and keep the fight in the clinch.
Ward breaks the clinch and we're back to striking at distance.
Ward lands a two punch combo.

Ward forces Gray back against the cage and clinches.
Ward lands with a short punch from the clinch.
Ward gets underhooks to prevent Gray's takedown attempt.
Mick Ward has stuffed three takedown attempts in the round now. That's going to take a lot out of Nick Gray.
Ward breaks the clinch and we return to the middle of the mat.
Gray fails with the takedown.
Gray takes a big intake of breath there - he's definitely tired.
Gray has taken the fight to the clinch.
Good body shot from Ward.
Ward prevents a takedown attempt there.
Ward pushes off and circles away, back to the middle of the mat.
Ward is looking to clinch.
Gray takes the fight into the clinch.
That's two minutes gone in the round.
Gray jumps guard but Ward stands there with Gray around his waist. Gray gives up and drops back to his feet. We remain in the clinch.
This is a great period of action - very entertaining stuff!
Ward breaks the clinch and we return to the middle of the mat.
Ward is looking to clinch but Gray is avoiding it.
Gray pulls out of a head kick attempt.
Ward rushes forward with a series of wild hooks but Gray moves out of range and avoids them all easily.
Ward slips under a jab from Gray.
Ward wings a very wild body shot but it does the job and lands to the midsection.
Gray circles away from the clinch attempt.
Gray circles away from the clinch attempt.
Gray moves forwards but Ward connects with a nice, crisp jab.
A right-left combo lands from Ward.
Ward tries to clinch but Gray moves out of range.
Gray is trying hard to land a takedown here. Ward sprawls well and keeps this one on the feet.
Gray throws a right and a left that Ward avoids nicely.
That's three minutes gone in the round.
Gray takes a punch right to his stomach. That took the wind out of him momentarily.
Ward scores with a nice one two combo and darts back out of range to avoid anything coming in the opposite direction.

Gray is rocked!
Ward fakes a head punch and goes low to the body. Nicely done.
Gray walks into a straight right hand from Ward.
Gray is still on wobbly legs! Can Ward finish him?
Ward connects with a nice cross there... Gray is looking wobbly and Ward recognises it - he's rushed in and lands two more brutal shots that send Gray to the canvas, out cold! A brutal finish to the fight - Ward jumps onto the cage to celebrate with the crowd!
Ladies and gentlemen, after 3:21 of round 3, we have a winner by way of KO (Punches). Mick Ward!
Mick Ward decided to hype himself up post fight. It was going well but he went on about it a bit too long and the crowd turned on him a little.
|
|
|
|
|
|
|
|
|
|
|
|
|
|
|
|
|
|
|
|
|
|
|
| S |
C
A |
G |
S |
C
B |
G |
|
S |
C |
G |
|
energy
A | B |
|
hype
A | B |
|
pop
A | B |
|
mgr
A | B |
|
FIGHT
RATING
100% |
|
|
|
|
|
|

