|
|
PBP Commentary |
Coming up we have a bantamweight MMA rules bout between Jack Hammer (ranked 0 p4p, 0 weight class) and Haywood Badger (ranked 0 p4p, 0 weight class). Hammer comes to the cage accompanied by Slippin. Both fighters look fresh as a daisy as they make their way towards the cage.
 |
|
 |
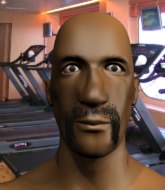
| 173 cm
23
145 lbs
12 - 2 - 1 |
|
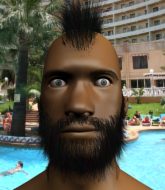
161 cm
24
134 lbs
1 - 0 - 0 |
Good wrestling
Solid boxing
Cardio machine |
|
Good wrestler
Lethal high kicks
Granite chin |
|
| |
|
Ladies and gentlemen. This fight is 3 rounds, for the bantamweight championship of the world!
Introducing the champion to my left, fighting out of the red corner.
With a record of
12 - 2 - 1, fighting out of Montreal, Jack Hammer!
And introducing the challenger to my right, fighting out of the blue corner.
With a record of
1 - 0 - 0, fighting out of Las Vegas, Haywood Badger!
The judges for this bout are Chris Downing, Tiny Johnson and Alan Glass.

The bell rings for round one and we are underway!
Hammer fails miserably with a takedown attempt.
Oooooooooooh, not good. A low kick from Badger lands where it shouldn't have, right in the... well, you know what he did? He kicked him in the penis. He's injured, injured bad. The referee sends both fighters to their corners and Hammer has 5 minutes to recover. He's OK now though... a thumbs up from Hammer and we're back underway with a touch of gloves.
Badger fakes high and swings low for a body shot but Hammer manages to avoid it.
Badger lands with a nice low kick. That'll leave a bruise.
Badger lands with a thumping leg kick.
A telegraphed right hand from Hammer misses the target.
Hammer blocks a jab.
Badger feints and then cracks Hammer's leading leg with a nice low kick. He's obviously looking to slow Hammer down.
Hammer waving his hands out in front of him, looking to distract Badger.

Badger closes the distance and presses his opponent up against the cage.
Badger lands a nice looking hook to the body, against the cage.
Badger goes for a body shot but it's blocked.

Badger breaks the clinch.
Badger comes forward and lands a shot to the body, then darts back out of range.
Hammer swinging wildly here.
Wooooo! Give it up for these two warriors! They are putting on a show!
Good work by Hammer as he checks the leg kick.
Hammer has his head snapped back a nice jab. A little nod from Hammer there as he acknowledges the shot.

That's one minute gone in the round.
Hammer throws out a token jab with nothing on it.
Hammer takes a swing at Badger's ribcage but misses.
Hammer tries to check the leg kick but that clearly hurt him.
Hammer dives in and grabs Badger's left leg, looking for a takedown. Badger pushes down on Hammer's head and hops out.
Hammer takes a shot to the eye socket. That's gotta hurt.
A big right from Hammer misses.
Badger moves into range and connects with a jab.
Hammer thows a body shot but no joy.

Badger scores with a takedown into Hammer's guard.
Badger wants to control from the top but Hammer keeps moving.

Hammer is looking for a triangle but Badger pushes his legs off easily.
Badger must be cautious of submissions here, given that his opponent has the superior Jiu Jitsu.
This has been an exciting period of action!
Hammer can't keep his opponent in guard - Badger advances to half guard, no doubt looking to mount.

That's two minutes gone in the round.
Badger wants to lay and pray for a moment but Hammer keeps working.

Badger is looking for a kimura but Hammer is holding onto that half guard position, so it's hard for Badger to get the leverage.
The ref warns both fighters not to hold the cage as they work up against the meshing.
Badger is figuring out what he wants to do next.
The fighters are pressed up against the cage, both looking to find a bit of space to work.
Hammer wants to get back to full guard but Badger has passed into side control.
Badger slows the pace down.
Badger is trying to land an Americana. He has the arm isolated but Hammer is keeping cool and he's avoided the danger for now.
Hammer is looking to regain half guard here but Badger keeps moving and retains side control.

That's three minutes gone in the round.
Hammer manages to land a sweep and he's now on top! Lovely Jiu Jitsu!
Hammer is trying a forearm choke� I don't think that's going to do much at this level of the game.
Badger moves into full guard.
Hammer's corner is telling him to maintain position.
Badger not looking particularly offensive just at the moment.
Hammer missing there with some ground and pound from the guard.
Hammer advances to half guard.
Badger punching from the bottom.
Hammer will need to keep those long limbs tucked in whilst he's on the ground, to prevent any submissions.
Hammer is working for submissions here but there's nothing on.

That's four minutes gone in the round.
Hammer trying to pass the guard but Badger defending well.
Badger tries to roll over but Hammer keeps him under control.
Badger is doing well to control the position and prevent Hammer from advancing to side control.
Hammer with a momentary lay and pray from half guard.
Hammer trying to pass the guard but Badger defending well.
Badger is defending against the submission attempts here by Hammer.
This has been an exciting period of action!
As the round comes to an end the crowd are showing their appreciation for a great round of action.
Badger tries to get to full guard but Hammer has control of the leg.
And that�s the end of the round � the fighters go back to their corners.
Haywood Badger dominated that round.
The minute break is over - no more time for sponges and pep talks - back to the action!

Hammer throws an uppercut from half a mile away. Badger sees it coming and avoids it easily.
No luck for Hammer with that takedown attempt.
Hammer connects with a lovely jab that went straight through the gap between Badger's hands.
Hammer throws a series of punches but Badger avoids them all with ease.
Hammer shoots in for a takedown but doesn't get it.
Badger closes the distance and clinches up, looking for a takedown. He shifts his weight and gets a nice trip into half guard.
Badger is trying to control. Hammer wants to improve his position but can't escape this time.
Badger working over Hammer with some ground and pound. Hammer looks like he wants out of this position, which is understandable.
Badger is sneakily working for an arm triangle but Hammer sees it coming and defends easily.
Badger is sneakily working for an arm triangle but Hammer sees it coming and defends easily.
Badger prevents Hammer from improving his position.
That's one minute gone in the round.
Badger works his way into side control.
Hammer is sneaking out the side here. He's bucked Badger off and has taken his back!
Badger looks to control his opponent's hands but he's not mananging it at the moment.
Hammer has the hooks in. Badger is trying to push off one leg but he has to do so cautiously to avoid being submitted.
Hammer avoiding Badger 's attempts to control his hands.
Badger takes a big shot to the side of the head.
Badger is trying to break free.
Hammer throwing wild punches that miss their target.
That's two minutes gone in the round.
Hammer looking to break Badger's wrist control so he can sink in the choke. Badger remaining controlled and patient though - he really has to keep calm otherwise Hammer will wrap this one up with the rear naked choke!
Badger is staying cool under pressure, defending well against the rear naked choke attempt from his opponent.
The crowd are loving this. Great action here.
Hammer is hanging on to Badger's back as he tries to escape.
Hammer tightening his grip on Badger, looking for the choke.
Hammer has good solid back control here.
Badger is in bad spot here.
That's three minutes gone in the round.
Badger tries to escape the position - he's now mounted. Is that better or worse? Hard to tell!
Hammer scores with a couple of good head shots there.
Badger is looking to improve his position but Hammer isn't that keen on the idea.
Badger tries to hold on but Hammer postures up.
Badger is in all sorts of trouble here.
Hammer scoring with strikes but Badger is staying in there.
The referee warns Badger that he has to improve his position here as he takes two more clean shots to the head.
Hammer can't quite control the action as he would like just now, as Badger is looking to escape.
Badger is trying desperately to improve position.
That's four minutes gone in the round.
The crowd growing excited in anticipation of a finish here! Right on cue, Hammer cracks his opponent with a massive right hand that draws loud cheers!
This is a great period of action - very entertaining stuff!
Hammer controlling the pace for now.
Hammer landing strikes from the mount.
Hammer lands a big elbow.
Badger defends a decent attempt at a guillotine from Hammer.
Hammer in mount throwing good strikes here, bouncing his opponent's head off the canvas.
The crowd are going absolutely nuts as the round comes to an end - what a fantastic round of action!
Badger tries to hold on but Hammer pushes him away.
And that�s the end of the round � the fighters go back to their corners.
Jack Hammer dominated that second round.
The fighters' corners scream their final instructions, as the referee calls time. Here we go, back to the action! This is the final round!

Hammer avoids the body shot from Badger.
Hammer moves into range and connects with a jab.
Badger throws out a token jab with nothing on it.
Hammer scores with a hook.
Hammer scores with the left hand. Badger knows he should have avoided that one.
Hammer misses with a combination
and Badger makes the exchange count by landing a cracking kick to the body. Hammer really felt that one!
Hammer misses with a looping right.
Badger fakes a strike and closes the distance, dragging Hammer to the ground. Badger is now in Hammer's guard.
Hammer is looking for a triangle here but Badger uses the submission attempt to pass into side control.
Sloppy strikes there by Badger.
This is a great period of action - very entertaining stuff!

Badger stands up.
Hammer thows a left - swing and a miss!
That's one minute gone in the round.
Badger lands a straight punch to the body, keeping Hammer at a distance.
Hammer throws a shot from downtown. Badger moves away and avoids it.
Badger connects with a lovely right hand, straight down the pipe.
Hammer on the wrong end of an overhand right that came out of nowhere.
Badger keeping his hands up high there, blocking the jab from Hammer.
Hammer takes a shot right to the bread basket.
Hammer looks to score with a jab to the body but Badger is just out of range.
Badger staying out of range there.
Badger lands a leg kick that knocks Hammer off balance momentarily.
The fighters circle momentarily. Badger darts into range and connects with a nice straight punch.
Hammer misses with a jab to the body
and he gets countered with a snapping leg kick.
Jack Hammer seems to be the more aggressive standup fighter in this bout.
Both fighters are breathing heavily.
We've seen a great period of action over the last minute or so - credit to both fighters for going all out!
Nice body punch from Badger.
That's two minutes gone in the round.
Badger attempts a low kick but it misses it's target.
A solid leg kick lands there for Badger.
Badger throws a nice inside leg kick.
We've been told by Hammer's head coaches at Rush Training Facility that he's been working on his takedown defense in preparation for this fight.
Hammer cracks a nice hook into Badger's ribs.
Hammer scores with a shot to the body.
Badger paws at his opponent with the jab and then lunges in with a straight, right on the button.
A telegraphed takedown attempt from Hammer is defended easily by Badger.
Badger turns his hip over beautifully as he lands a nice leg kick.
Badger scores with a body shot.
Hammer checks a leg kick.
Good shot there by Badger.
Hammer shoots in for a takedown. "I don't think so" says Badger as he avoids it easily.
That's three minutes gone in the round.
Badger throws the overhand right but ducks down into a quick takedown attempt. Hammer was covering up waiting for the punch and Badger finishes the takedown easily into guard.
Badger trying to control the position from guard on top but Hammer is wriggling around, looking for whatever he can.
Badger stands up and looks to throw the legs aside to pass to side control. Hammer swivels though and keeps the full guard.
Hammer is active off his back here, looking for submissions.
Badger passes easily into side control. Nice work.
Badger wants to take a breather but Hammer manages to regain guard - a lesson learnt for Badger.
Hammer escapes his hips to the side and looks to be working for an armbar. Badger gives him a little smile and shakes his head. No chance.
That's four minutes gone in the round.
Hammer has momentary wrist control but Badger slips an elbow through the middle.
Badger preventing the sweep.
Hammer is looking for a triangle but Badger pushes his legs off easily.
Hammer is working actively off his back, looking to secure an arm or perhaps work for a triangle.
Wooooo! Give it up for these two warriors! They are putting on a show!
The crowd are going absolutely nuts as the round comes to an end - what a fantastic round of action!
Badger is taking a break and basically stalling. The referee will not allow him to do that for long.
Badger wants to control from the top but Hammer keeps moving.
And that's the end of the fight!
Haywood Badger comfortably won the final round on my scorecard.
Well Badger has outworked and out performed his opponent in all aspects of the game today. He was simply too good and the decision should be no more than a formality. Over to the ring announcer for the scorecards.
Ladies and gentlemen, after 3 rounds of action, we go to the scorecards for a decision.
Judge Chris Downing scores the fight 28:29
Judge Tiny Johnson scores the fight 28:29
Judge Alan Glass scores the fight 28:29
In favor of your winner, by unanimous decision... Haywood Badger!
Haywood Badger is the new bantamweight champion!
|
|
|
|
|
|
|
|
|
|
|
|
|
|
|
|
|
|
|
|
|
|
|
| S |
C
A |
G |
S |
C
B |
G |
|
S |
C |
G |
|
energy
A | B |
|
hype
A | B |
|
pop
A | B |
|
mgr
A | B |
|
FIGHT
RATING
87% |
|
|
|
|
|
|
