|
|
PBP Commentary |
Coming up we have a middleweight MMA rules bout between Ken Hordeen (ranked 0 p4p, 0 weight class) and Roland Dawson (ranked 0 p4p, 0 weight class). Ken Hordeen has the better chin. Will he look to stand and bang today?
 |
|
 |
| 180 cm
25
193 lbs
1 - 3 - 0 |
|
193 cm
25
194 lbs
1 - 5 - 0 |
BJJ Blue Belt
Brawler
Self confident |
|
BJJ Blue Belt
Brawler
Determined |
|
| |
|
Ladies and gentlemen. This fight is 3 rounds, in the middleweight division.
Introducing the fighter to my left, fighting out of the red corner.
With a record of
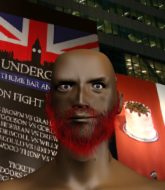
1 - 3 - 0, fighting out of The Island, Ken Hordeen!
And introducing the fighter to my right, fighting out of the blue corner.
With a record of
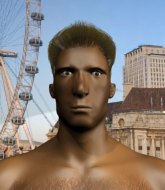
1 - 5 - 0, fighting out of The Island, Roland Dawson!
The judges for this bout are David Hoff, Winston Alpacca and Dirk Anderson.

The bell rings for round one and we are underway!

Excellent takedown into side control there by Hordeen.
Dawson regains half guard, as Hordeen was trying to land strikes.
Dawson wants to improve his position but Hordeen is controlling well.
Dawson gets full guard.
Dawson pulls Hordeen in close to prevent any damage.
Dawson is trying to control the position but Hordeen postures up.
Hordeen trying to control the position from guard on top but Dawson is wriggling around, looking for whatever he can.
Dawson tries to land a sweep but no joy.

That's one minute gone in the round.
Dawson is still trying to improve position.

Dawson is throwing his legs up, looking for submissions. Hordeen is aware though and is defending well.
Dawson looking for submissions from the bottom but instead Hordeen passes into half guard.

Hordeen is working for submissions here but there's nothing on.
Hordeen wants to control but Dawson is keeping him busy.
The ref warns both fighters not to hold the cage as they work up against the meshing.
Hordeen seems content to maintain position for now, rather than mounting any offense.
Hordeen thows a huge punch but Dawson dodges it nicely.

That's two minutes gone in the round.
Dawson is not content to let Hordeen control the position.
The fighters are pressed up against the cage, both looking to find a bit of space to work.
Dawson is looking to improve his position.

Hordeen decides to return to a standing position.
Dawson misses with a head kick.
A head kick misses from Hordeen.

That's three minutes gone in the round.
Ooooh, nice body kick lands from Dawson. Hordeen shrugs it off though.
Hordeen shoots in for a takedown. "Ole!" shouts Dawson as he jumps to the side.
Hordeen takes a thudding leg kick, right into the meat of the thigh.
Dawson buckles his opponent's knee momentarily with a nice leg kick.
Dawson defending well as Hordeen loads up on a big left hand.
Dawson gets caught flat footed, as Hordeen shoots in with a quick takedown into guard.
Hordeen is breathing heavily.
Dawson will have to put a bit more behind his punches if he's going to do any damage from this position.
Dawson keeping moving, preventing Hordeen from controlling successfully.
Hordeen is looking to work some ground and pound but Dawson has wrist control.

That's four minutes gone in the round.
Hordeen trying to control the position from guard on top but Dawson is wriggling around, looking for whatever he can.
The referee is asking the fighters to pick up the pace.
Dawson manages to land a sweep and now he's in mount on top!
We've seen a great period of action over the last minute or so - credit to both fighters for going all out!
Dawson lands with some vicious ground and pound - can Hordeen hang on?
Dawson moves into side control, trying to work for a kimura. That looks painful! Will he finish!!?? No, Hordeen has worked his arm free - good work by Hordeen!
As the round comes to an end the crowd are showing their appreciation for a great round of action.
Hordeen wants to control but Dawson postures up.
And that�s the end of the round � the fighters go back to their corners.
That was a close round but I would say that Ken Hordeen will probably get the nod.
That's time! Back to the action!

Hordeen tries to close the distance and clinch up against the cage but Dawson paws at him with a jab and circles away.
Hordeen fails in his attempt to clinch.
Dawson misses with a jab, cross combination.
Dawson shoots in but no luck this time.
Hordeen throws a head kick that half lands.
Dawson tries to close the distance and clinch up but Hordeen swats him away and circles back towards the center.
Hordeen slaps away a takedown attempt from Dawson, before circling back to the center of the mat.
Hordeen stuffs the takedown attempt from Dawson. Dawson gets slowly back to his feet.
Ken Hordeen has stuffed three takedown attempts in the round now. That's going to take a lot out of Roland Dawson.
Dawson tries to clinch there but Hordeen circles away.

Hordeen clinches up with Dawson and pushes him back against the cage.
Dawson is trying to pull guard but Hordeen has him pressed against the cage.
That's one minute gone in the round.

Hordeen escapes the clinch and we're back to striking.
Hordeen misses with a half-hearted attempt at a head kick.
Hordeen misses with a wild combination.
Hordeen shoots in for a double leg but Dawson sprawls well. That's going to sap some energy.
Hordeen looks for the body kick but Dawson saw that one coming.
Dawson tries to clinch but Hordeen is having none of it.

Dawson clinches with his opponent.
Hordeen has Dawson pushed against the cage.
Dawson is trying to pull guard but Hordeen has him pressed against the cage.

Dawson breaks the clinch.
That's two minutes gone in the round.
Dawson tries to clinch up but Hordeen circles away and keeps his distance.
Hordeen moves out of range of the body kick.
Dawson shoots in for a takedown - he's clinched up with Hordeen but Hordeen pushes him off and we're back to square one.
Dawson fails with a takedown attempt from distance.
Dawson is breathing heavily.
Dawson has managed to clinch.
Dawson wants a takedown but no success here.
Both guys are working to get underhooks.
Dawson is trying to drag Hordeen to the mat but Hordeen just about manages to keep his footing. He used the cage to his advantage there.
Hordeen fails to pull the fight into his guard.
That's three minutes gone in the round.
Dawson tries to pull guard but Hordeen forces him back to his feet, against the cage.
Hordeen keeps control of Dawson as he tries to wriggle out of the double underhooks.
Hordeen drags the fight down to the ground.
Dawson prevents Hordeen from getting back to his feet.
Dawson postures up.
Hordeen wants to control here, rather than go for any submissions from the bottom. At least for now.
Hordeen has a loose triangle. He'll be looking to tighten that up but Dawson can see exactly what he's planning and manages to posture up and free himself.
Hordeen looking for submissions from the bottom but instead Dawson passes into half guard.
That's four minutes gone in the round.
Hordeen is defending against the submission attempts here by Dawson.
Dawson is looking for a kimura. It's pretty deep but Hordeen still has the half guard so he's probably OK. Oh, Hordeen has exploded into a beautiful escape there and after a quick scramble, he's ended up in side control on top! Nice work!
The crowd applaud the fighters efforts here as the round comes to an end.
Hordeen wants to lay and pray for a moment but Dawson keeps working.
And that�s the end of the round � the fighters go back to their corners.
That was a close second round but I would say that Ken Hordeen will probably get the nod.
That's time! Back to the action! So, we enter the final round. Let's see if either fighter can bring us a finish, or whether we're going to the judges scorecards.

Hordeen fails with a takedown attempt.
Hordeen has closed the distance and engaged Dawson in a clinch.
The fighters are pressed against the cage, as the pace of the fight slows.
Dawson fails to pull guard.
Hordeen is trying to pull guard but Dawson has him pressed against the cage.
Dawson is pressed up against the cage. Hordeen has hold of a leg and is looking to drag Dawson down to the mat. Dawson avoids the attempt though and has circled away. We're back to striking at a distance.
That's three failed takedown attempts in the round for Ken Hordeen. That's going to take a lot out of him.
Dawson keeping his hands up high there, blocking the jab from Hordeen.
Hordeen misses with a jab, cross combination.
Ken Hordeen is looking to throw some combinations by the looks of things.
That's one minute gone in the round.
Hordeen throws a looping left and ducks down for a takedown. He's got his arms around Dawson's waist but Dawson gets an underhook and avoids the takedown by throwing Hordeen off to one side.
Both fighters are breathing heavily.
Nice takedown defense from Hordeen. No joy for Dawson on that attempt.
Hordeen closes the distance and gets a trip takedown into side control. Dawson quickly recovers to half guard.
Dawson wants to control but Hordeen is keeping busy and won't allow it.
Dawson tries to roll over but Hordeen keeps him under control.
Dawson punching from the bottom.
Dawson is trying to get back to full guard.
Hordeen not doing much here.
Dawson is trying to control but can't.
That's two minutes gone in the round.
Hordeen tries to pass to full mount but Dawson defends it.
Ken Hordeen overall seems to be getting the better of the ground position in the fight so far.
Dawson manages to get to full guard.
Dawson thows some rabbit punches from the bottom but they don't do any damage.
Dawson trying to control the position.
That's three minutes gone in the round.
Dawson managing to control the position.

Well, the referee has seen enough. Neither fighter is active enough on the ground so he's stood them back up.
Hordeen misses with a jab and misses with a cross straight after too.
Dawson tries a head kick but it misses.
Hordeen throws a nice looking combination but Dawson bobs and weaves to avoid any damage.
Dawson blocks a jab.
Hordeen avoids the clinch attempt nicely.
That's four minutes gone in the round.
Dawson is looking to clinch.

Dawson drives through with a really nice takedown into side control.
Hordeen is positioning himself to get back to half guard.
Hordeen is looking to slip a leg under and get half guard but Dawson is one step ahead and moves to full mount!
Dawson lands a shot to the body, followed up by a shot to the exposed head of his trapped opponent.
The crowd applaud the fighters efforts here as the round comes to an end.
Hordeen tries to get back to half guard but can't.
Dawson scoring with strikes but Hordeen is staying in there.
And that's the end of the fight!
I would just about give that final round to Roland Dawson.
I think Hordeen has won this one but let's see what the judges have to say. Over to the ring announcer for the scorecards.
Ladies and gentlemen, after 3 rounds of action, we go to the scorecards for a decision.
Judge David Hoff scores the fight 29:28
Judge Winston Alpacca scores the fight 29:28
Judge Dirk Anderson scores the fight 29:28
In favor of your winner, by unanimous decision... Ken Hordeen!
|
|
|
|
|
|
|
|
|
|
|
|
|
|
|
|
|
|
|
|
|
|
|
| S |
C
A |
G |
S |
C
B |
G |
|
S |
C |
G |
|
energy
A | B |
|
hype
A | B |
|
pop
A | B |
|
mgr
A | B |
|
FIGHT
RATING
50% |
|
|
|
|
|
|

