|
|
PBP Commentary |
Coming up we have a bantamweight MMA rules bout between Vacilo Ai (ranked 0 p4p, 0 weight class) and Kenji Yomata (ranked 0 p4p, 0 weight class). Vacilo Ai could well score a knockout today. He has the power to get to Kenji Yomata's chin.
 |
|
 |
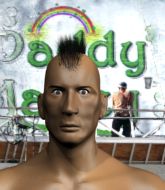
| 172 cm
26
139 lbs
9 - 3 - 0 |
|
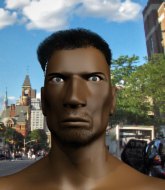
166 cm
26
147 lbs
9 - 7 - 0 |
Good takedowns
Counter fighter
Experienced |
|
BJJ Brown Belt
Brawler
Determined |
|
| |
|
Ladies and gentlemen. This fight is 3 rounds, in the bantamweight division.
Introducing the fighter to my left, fighting out of the red corner.
With a record of
9 - 3 - 0, fighting out of The Island, Vacilo Ai!
And introducing the fighter to my right, fighting out of the blue corner.
With a record of
9 - 7 - 0, fighting out of The Island, Kenji Yomata!
The judges for this bout are Dirk Anderson, Michael Johnstone and Bart Greer.

The bell rings for round one and we are underway!
Yomata paws at his opponent with the jab and then lunges in with a straight, right on the button.
Ai moves out of range as Yomata strikes.
A punch combination from Yomata misses.
Ai ducks under a wild hook from Yomata.
Ai is looking to take this fight into the clinch.
Yomata misses with a body shot. Nice footwork from Ai.
Ai slips under a jab from Yomata.
The fighters circling - Yomata throws out the jab but it was never going to land.
Yomata lands with a nice combination. Ai backs away looking to recover.

It looks like Vacilo Ai has been cut.
Yomata misses with a jab, cross combination.
Yomata throws the left hand but Ai avoids the punch easily.
Yomata throws a monster uppercut resembling something out of street fighter but it doesn't land.

That's one minute gone in the round.

Ai fakes with an overhand right and moves in to clinch with Yomata, pushing him back against the cage.
Ai tries to jump guard but he falls flat on his backside. Yomata smiles and moves away.
Yomata misses with a two punch combination.
Ai showing good head movement there, avoiding the strikes from Yomata.
Kenji Yomata is looking to keep the fight on the feet at all costs.
Yomata lands with a good body shot.
Yomata misses with an uppercut. Ai saw that one coming.
Yomata lunges in with swinging rights and lefts but Ai circles away quickly and effectively.
Ai tries to clinch but Yomata is having none of it.

That's two minutes gone in the round.
Yomata misses with a straight left.
Yomata looks to throw the jab but Ai is out of range.
Yomata misses with a double jab.
Yomata fails to land with the punch combination there - jab, cross, hook, miss, miss, miss.
Yomata looks to land a combination but Ai avoids it well.
Yomata tries to keep at a distance but Ai has taken the fight into the clinch.
Ai tries to take the fight to the ground by pulling guard but can't manage it.

Yomata pushes off and circles away, back to the middle of the mat.
Yomata lands a nice looking body shot.
Yomata throws a wild combination but nothing lands.
Yomata swings wildly with a right hand that was never going to find it's target.
Yomata has been working on his striking defense in training and it's paying off as Ai is landing a low percentage of strikes.

That's three minutes gone in the round.
Ai tries to clinch up.
Ai slips under a jab.
Ai keeping a good distance there, avoiding the body shot.
Kenji Yomata seems to be the more aggressive standup fighter in this bout.
Yomata throws out a loose jab but Ai uses good head movement to avoid it.
Yomata cracks Ai with a good shot that sees him stumbling back into the cage.
Ai checks a leg kick.
Yomata throws a series of punches but Ai moves out of range.
Yomata throws a shot from downtown. Ai moves away and avoids it.
Nice defenses there by Ai.
Yomata throws a right and a left that Ai avoids nicely.
Ai displays some good footwork, moving neatly out of range as Yomata throws out the jab.

That's four minutes gone in the round.
Ai fails in his attempt to clinch.
Yomata throws a wild combination but nothing lands.
A swing and a miss from Yomata.
Yomata throws out a token jab with nothing on it.
Yomata misses with a hook. Ai ducked under it nicely.
Ai steps to the side to avoid the strikes from Yomata.
Sloppy strikes from Yomata. Those never looked like landing.
Ai tries to clinch up.
The crowd applaud the fighters efforts here as the round comes to an end.
A looping hook to the body misses from Yomata. Ai does a little dance to reset his feet.
Ai looks to clinch
and Yomata counters with a nice body shot.
Yomata ducks down and throws a hook to the body but Ai moves away.
And that�s the end of the round � the fighters go back to their corners.
Kenji Yomata dominated that round.
The cut man is working on Vacilo Ai's cut.
The referee calls time. The cornermen exit stage left and we're back to business.

Yomata swings for the body but Ai moves out of range.
Yomata throws a series of punches but Ai avoids them all with ease.
Ai tries to clinch up.
A punch lands to the side of Ai 's head but he takes it in his stride.
Yomata looks to throw the jab but Ai is out of range.
Yomata throws a right and a left that Ai avoids nicely.
Ai showing good head movement there, avoiding the strikes from Yomata.
Yomata misses with a two punch combination.
Yomata throws the left hand but Ai avoids the punch easily.
Ai avoids a punch combination nicely.
That's one minute gone in the round.
Ai slips a jab and a cross from Yomata.
Yomata pushing out the jab but it's not landing.
Yomata tries to land with a swinging hook to the body but Ai was well out of range. Poor timing from Yomata.
Ai tries to clinch but Yomata moves out of range.
Yomata misses with a jab, cross combination.
Ai tries to score a power double leg takedown but Yomata sees that one coming and sprawls well. That will dishearten Ai somewhat.
Yomata connects with a body shot.
Yomata pushing out the jab but it's not landing.
That's two minutes gone in the round.
Yomata ducks down and throws a hook to the body but Ai moves away.
Yomata misses the shot to the body.
Yomata throws a big shot that misses.
Ai has his head snapped back a nice jab. A little nod from Ai there as he acknowledges the shot.
Yomata feints a jab promting Ai to slip. Yomata then demonstrates his capabilities by jabbing again. Ai slips again and ducks right into an uppercut.
Yomata ducks down and throws a hook to the body but Ai moves away.
Yomata swings and misses with a hook to the body.
Yomata takes a swing at Ai's ribcage but misses.
Yomata misses with a double jab.
Yomata will need to tighten up his combinations if he doesn't want to gas himself out, swinging at thin air.
Yomata is breathing heavily.
That's three minutes gone in the round.
A big right from Yomata misses.
Yomata misses with a few strikes there.
Ai steps to the side to avoid the strikes from Yomata.
Yomata throws a nice looking combination but Ai bobs and weaves to avoid any damage.
Ai drives through and clinches with Yomata against the cage.
Ai jumps guard but Yomata stands there with Ai around his waist. Ai gives up and drops back to his feet. We remain in the clinch.
Ai tries to jump guard but he falls flat on his backside. Yomata smiles and moves away.
That's three failed takedown attempts in the round for Vacilo Ai. That's going to take a lot out of him.
Ai moves away from the strike by Yomata.
That's four minutes gone in the round.
Yomata misses the shot to the body.
Ai uses good footwork to avoid the strikes from Yomata.
A looping hook to the body misses from Yomata. Ai does a little dance to reset his feet.
A slow jab from Yomata misses its intended target.
Yomata throws a hook but Ai blocks it.
Nice body punch from Yomata.
Yomata misses with a double jab.
Yomata takes a swing at Ai's ribcage but misses.
The crowd applaud the fighters efforts here as the round comes to an end.
A punch combination from Yomata misses.
Yomata rushes forward with a series of wild hooks but Ai moves out of range and avoids them all easily.
And that�s the end of the round � the fighters go back to their corners.
Kenji Yomata showed his class in that round. I'd imagine he'll take it on all the scorecards.
The cut man is working on Vacilo Ai's cut.
The corners get their ten second warning. Both fighters stand from their stools and stare eachother down, ready to get back to the action. This is the final round!

Yomata pushing out the jab but it's not landing.
Ai thows a left - swing and a miss!
Ai gets cracked there but stands up to it.
Yomata misses with a straight right.
Yomata misses with the combination.
Some wild striking there from Yomata.

Ai feints and as Yomata raises his hands in defense, Ai changes levels and drives through with a takedown into guard.
It looks like the ref is thinking about a standup.
Ai pressing down on his opponent's thigh, looking to pass guard. Yomata is keeping the position for now.
Ai stopping the sweep attempt from Yomata.
Yomata takes a big intake of breath there - he's definitely tired.
That's one minute gone in the round.

Ai drops back looking for a leg! Yomata is in trouble here! The fighters roll with the hold and Yomata manages to kick Ai off! Ai jumps back into Yomata's guard.
The ref warns both fighters not to hold the cage as they work up against the meshing.
Ai advances position into side control!
Yomata sneaks a leg under to get back to half guard.
Ai passes the guard and advances to mount!
Ai is working for a guillotine from mount but Yomata frees his head quite easily.
Ai can't quite control the action as he would like just now, as Yomata is looking to escape.
Yomata is in all sorts of trouble here.
That's two minutes gone in the round.
Ai can't quite control the action as he would like just now, as Yomata is looking to escape.
Ai is stalling here but it's allowed Yomata to get half guard.
Ai works his way into side control.
Ai tries for a kimura. Not really close to a finish though.
This is a great period of action - very entertaining stuff!
Ai is trying to land an Americana. He has the arm isolated but Yomata is keeping cool and he's avoided the danger for now.
Both fighters really going for it on the ground here!
Ai tries to move into full mount but can't pass Yomata's legs.
That's three minutes gone in the round.
Yomata is trying to improve his position.
Ai tries for a kimura. Not really close to a finish though.
Yomata is looking to reverse the position.
Ai working hard here to secure a kimura but he's not really in the right position for it.
The fighters are pressed up against the cage, both looking to find a bit of space to work.
Ai has knee on belly and moves into mount.
Ai misses with a series of strikes from mount. He'll no doubt be working on his ground and pound when he gets back to the gym.
Yomata is in all sorts of trouble here.
That's four minutes gone in the round.
Ai forces the positional change into back control.
Ai working for a RNC but it's not happening just yet.
Yomata wants to control his opponent's hands but Ai gets his hands free.
We've seen a great period of action over the last minute or so - credit to both fighters for going all out!
Yomata defends a rear naked choke attempt by controlling one of Ai's arms.
Ai tries to keep control of the position but Yomata is staying busy.
Ai working for the choke.
Yomata just trying to survive but Ai is wriggling into a better position, looking to finish.
As the round comes to an end the crowd are showing their appreciation for a great round of action.
Ai is looking to finish the fight by rear naked choke. Yomata knows exactly what he's got planned though, so he's defending well. Maybe a few strikes would soften Yomata for a finish.
And that's the end of the fight!
Vacilo Ai showed his dominance in that final round.
I think Yomata has won this one but let's see whether the judges agree with me. Over to the ring announcer for the scorecards.
Ladies and gentlemen, after 3 rounds of action, we go to the scorecards for a decision.
Judge Dirk Anderson scores the fight for Kenji Yomata!
Judge Michael Johnstone scores the fight for Kenji Yomata!
Judge Bart Greer scores the fight for Kenji Yomata!
Kenji Yomata wins by unanimous decision!
|
|
|
|
|
|
|
|
|
|
|
|
|
|
|
|
|
|
|
|
|
|
|
| S |
C
A |
G |
S |
C
B |
G |
|
S |
C |
G |
|
energy
A | B |
|
hype
A | B |
|
pop
A | B |
|
mgr
A | B |
|
FIGHT
RATING
53% |
|
|
|
|
|
|
