|
|
PBP Commentary |
Coming up we have a heavyweight MMA rules bout between Michael Gleiser (ranked 0 p4p, 0 weight class) and Turo Hamara (ranked 0 p4p, 0 weight class). This should be fireworks!
 |
|
 |
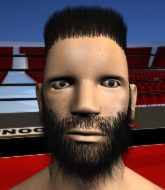
| 190 cm
39
230 lbs
15 - 19 - 1 |
|
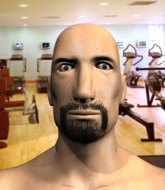
201 cm
31
286 lbs
15 - 16 - 0 |
Abu Dhabi Champ
World class boxer
Insanely flexible |
|
Good wrestler
World class boxer
Good gas tank |
|
| |
|
Ladies and gentlemen. This fight is 5 rounds, in the heavyweight division.
Introducing the fighter to my left, fighting out of the red corner.
With a record of
15 - 19 - 1, fighting out of London, Michael Gleiser!
And introducing the fighter to my right, fighting out of the blue corner.
With a record of
15 - 16 - 0, fighting out of Las Vegas, Turo Hamara!
The judges for this bout are Jack Bonds, and Timothy Bukovac.

The bell rings for round one and we are underway!
Gleiser circles away from the clinch attempt.

Hamara gets in close and instigates a clinch.
Hamara pushes off and fires off an elbow that misses, before clinching up again, against the cage.
Hamara blocks the elbow strike.
Gleiser tries to break free but Hamara pushes him back against the cage.
Gleiser with the Thai clinch. He's looking to land a big knee but he's not managed it this time.
Hamara effectively controlling the action here.
Hamara misses with a body punch.
Hamara drops down for a takedown but doesn't get it.
Gleiser gets underhooks to prevent Hamara's takedown attempt.
Gleiser tries to land a knee to the head but misses.
Gleiser using the Thai plumb to throw knees but Hamara has his back arched nicely, preventing the strike.
Hamara throws an elbow but it misses.
Hamara takes an elbow to the forehead.
Hamara trying to land knees to the body.
Gleiser tries to stall but Hamara uses the opportunity to gain a better position.
Hamara tries to throw a body punch but Gleiser avoids it by throwing Hamara back against the cage.
A bit of stalling here from Gleiser.
Hamara blocks the elbow strike.
Gleiser lands an elbow just above Hamara 's eye.

That's one minute gone in the round.
Hamara blocks the elbow strike.
Gleiser misses with an elbow over the top.
Gleiser misses with a body punch.
Gleiser gets an overhook and lands an elbow to the side of the head.
Hamara missing with knees to the body.
Hamara tries to land a knee to the body but he is off balance and Gleiser avoids it.
Gleiser tries to circle away but Hamara has him pinned against the cage.
Gleiser managing to block the knees to the body from Hamara.
Hamara blocks an elbow strike.
Hamara blocks an elbow strike.
Gleiser prevents a takedown attempt there.
Michael Gleiser has stuffed three takedown attempts in the round now. That's going to take a lot out of Turo Hamara.
Gleiser avoids a wild elbow strike from Hamara.
Gleiser looking to slow down the pace here.
Gleiser lands a hook that snaps the head of Hamara backwards.
Still in the clinch, Hamara scores with a nice short uppercut.
Hamara tries to land knees in the clinch but Gleiser avoids the damage to the body.
Gleiser prevents a body shot from Hamara.
Our sources have told us that Gleiser has been working on his elbows in the gym.

Gleiser breaks the clinch and we return to the middle of the mat.
Hamara forces Gleiser back against the cage and clinches.

That's two minutes gone in the round.
Gleiser breaks the clinch and we return to the middle of the mat.
Gleiser shoots in for a takedown but Hamara shows good takedown defense there and keeps this one on the feet.
Fantastic stuff here - a very entertaining period of action, which has drawn cheers from the crowd.
Gleiser is looking to clinch but Hamara is avoiding it.
Gleiser takes a jab right on the nose. That must have hurt but he shrugs his shoulders and looks to return the favor.

It looks like Michael Gleiser has been cut.

Hamara drives through with a really nice takedown into side control.
Hamara throwing shots but missing, from side control.
Hamara tries to land with some ground and pound but misses.
Gleiser tries to buck Hamara off but Hamara is having none of it.
The ref warns both fighters not to hold the cage as they work up against the meshing.
Hamara scoring with punches from side control.
Gleiser dodges the ground and pound from Hamara.
Gleiser is looking for a sweep.
The fighters are pressed up against the cage, both looking to find a bit of space to work.
Gleiser regains half guard.
Hamara thows a wild elbow that connects with the canvas.
Gleiser tries to roll over but Hamara keeps him under control.

That's three minutes gone in the round.
Gleiser is trying to stand.
Hamara lands with a punch from half guard.

The fighters are starting to perspire pretty heavily.
Hamara seems to be working for a kimura but Gleiser defends the submission attempt.
Gleiser might be looking to lock onto one of his opponent's long limbs for a submission, whilst we're on the ground.

Gleiser looking for submissions off his back.
Hamara is looking for a kimura here.
Gleiser is looking to improve his position.
Hamara is looking for a kimura but he's never going to get it from there.
Hamara throwing shots but Gleiser is blocking nicely.

That's four minutes gone in the round.
Gleiser looking for submissions off his back.
Gleiser wants to get back to full guard.
Gleiser looking for submissions from an awkward position here.
Gleiser trying to control but Hamara postures up.
Gleiser is trying to get back to full guard.
Hamara is trying to control. Gleiser wants to improve his position but can't escape this time.
The crowd are going absolutely nuts as the round comes to an end - what a fantastic round of action!
Gleiser works his way to full guard. Good work.
We've seen a great period of action over the last minute or so - credit to both fighters for going all out!
Hamara wants to stand but Gleiser is controlling his posture from full guard.
Hamara missing there with some ground and pound from the guard.
And that�s the end of the round � the fighters go back to their corners.
Turo Hamara dominated that round.
The cut man is working on Michael Gleiser's cut.
The minute break is over - no more time for sponges and pep talks - back to the action!

Hamara rushes Gleiser and presses him up against the cage.
Hamara being controlled against the cage.
Hamara tries to land a knee to the body but he is off balance and Gleiser avoids it.
Gleiser lands an elbow inside.

It looks like Turo Hamara has been cut.
Hamara blocks an elbow strike from Gleiser.
With the two fighters working up against the cage, Gleiser just misses with a elbow thrown towards Hamara's brow.
Gleiser is trying to push Hamara away but Hamara has him pressed against the cage, so he's going nowhere.
Michael Gleiser has scored more points in the clinch so far.
Hamara avoids a wild elbow strike from Gleiser.
Hamara tries for a takedown but Gleiser manages to get underhooks.
Gleiser fails to land with a short punch on the inside.
Hamara is working on a leg, looking for a takedown but Gleiser is defending well.
An uppercut to the body lands inside from Gleiser.

Hamara breaks the clinch and we're back to striking at distance.
Gleiser looks for a takedown but Hamara sprawls well.
Gleiser shoots in looking for a takedown. Hamara tries to sprawl out of it but Gleiser keeps driving through. The fighters are pinned against the cage. Hamara manages to get underhooks and after a bit of a struggle, circles away and we're back to standing.
Gleiser looks for a takedown but Hamara sprawls well.
That's three failed takedown attempts in the round for Michael Gleiser. That's going to take a lot out of him.
That's one minute gone in the round.

Gleiser gets to the clinch - let's see what his plan is here.
Hamara goes for a takedown attempt but Gleiser pushes him away and we're back to fighting at a distance.
Gleiser closes the distance and pushes Hamara back into the cage.
Hamara misses with a shot to the kidneys.
Hamara's corner calls for him to break the clinch, which he does.
Gleiser moves in looking to clinch but Hamara pushes him off.
Hamara tries to close the distance and clinch but Gleiser swats him to one side with an open hand palm strike and circles away.
A combination from Hamara does no damage.
Hamara showing good head movement there, avoiding the strikes from Gleiser.
Gleiser throws a looping left and ducks down for a takedown. He's got his arms around Hamara's waist but Hamara gets an underhook and avoids the takedown by throwing Gleiser off to one side.
Wow, both these guys are really going for it!
Gleiser misses with a takedown attempt - Hamara sprawls well and throws a nice strike on the way out which just misses.
Hamara tries to clinch but is not successful on this occasion.
Hamara closes the distance and pushes Gleiser back into the cage.
That's two minutes gone in the round.
Gleiser can't find room to land a body shot as Hamara controls the action.
Hamara avoids the elbow strike from Gleiser, against the cage.
Gleiser takes an elbow to the temple.
A head punch blocked on the inside by Gleiser.
Hamara wants a takedown.
Wooooo! Give it up for these two warriors! They are putting on a show!
Gleiser misses with an elbow strike.
Hamara is looking for a takedown up against the cage. Gleiser gets underhooks though and prevents the takedown attempt.
The referee is keeping an eye on Gleiser - much more stalling and he will separate the fighters.
Gleiser avoiding damage as Hamara throws knees to the body.
Gleiser avoiding damage as Hamara throws knees to the body.
Gleiser lands a nice elbow from the clinch.
Gleiser is looking to control Hamara's arms but Hamara gets an underhook and turns him. Now Gleiser has his back to the cage.
Hamara doesn't land with the attempted body shot.
Gleiser prevents the takedown attempt.
Hamara is trying to break free.
Gleiser managing to block the knees to the body from Hamara.
Hamara is working hard here but doesn't seem to be able to control effectively, up against the cage.
Hamara avoids a wild elbow strike from Gleiser.
That's three minutes gone in the round.
Gleiser on the defensive, avoiding the knees to the body.
Hamara goes for a body shot but it's blocked.
Gleiser breaks from the clinch.
Hamara swinging wildly here.
Gleiser misses with a takedown attempt. He shot from a bit too far out.
A head kick from Hamara lands but Gleiser takes it in his stride.
Hamara has taken the fight to the clinch.
Gleiser avoiding damage as Hamara throws knees to the body.
Hamara tries to work over Gleiser's body with a swooping hook but it only glances the target.
Gleiser prevents the takedown attempt.
Gleiser misses with an elbow strike.
A right hand to the body from Gleiser.
Hamara is breathing heavily.
Gleiser is trying to break the clinch but Hamara is controlling him.
Wooooo! Give it up for these two warriors! They are putting on a show!
Hamara tries to score a body lock takedown but Gleiser shows good agility there to stay on his feet.
Nice elbow from Gleiser.
With the fighters up against the cage, Hamara throws an elbow but misses.
Gleiser misses with a knee to the head.
That's four minutes gone in the round.
Gleiser lands an elbow inside.
Hamara has a body lock and is looking for a takedown. Gleiser is bouncing around trying to prevent the takedown and somehow he has indeed managed to stay on his feet.
Hamara is trying to work for a single leg takedown but Gleiser pulls him back up using the underhooks.
Gleiser breaks the clinch and we return to the middle of the mat.
Gleiser shoots in for a double leg but Hamara sprawls well. That's going to sap some energy.
Hamara wants to clinch.
Hamara is looking to clinch.
Gleiser rushes forward with a series of wild hooks but Hamara moves out of range and avoids them all easily.
Gleiser tries to drive through with a takedown attempt but Hamara defends well and Gleiser ends up having to push Hamara into the cage where they will battle it out in the clinch.
Gleiser with the Thai clinch. He's looking to land a big knee but he's not managed it this time.
Hamara creates a bit of space for himself and sneaks an elbow through Gleiser's defenses.
The crowd are going absolutely nuts as the round comes to an end - what a fantastic round of action!
Hamara doesn't land with the attempted body shot.
Hamara drops down looking for an ankle pick but Gleiser pulls his leg out and moves away.
Gleiser gets to the clinch - let's see what his plan is here.
And that�s the end of the round � the fighters go back to their corners.
That was a close second round but I would say that Michael Gleiser will probably get the nod.
Both fighters have cut men working on them during the interval.
That's time! Back to the action!

Hamara is looking to clinch but Gleiser is avoiding it.
Gleiser throws a series of punches but Hamara avoids them all with ease.
Gleiser has Hamara up against the cage in a clinch.
Hamara blocks the elbow strike.
Gleiser tries a body shot but Hamara blocks it.
A nice right hand lands inside from Hamara.
Hamara is looking to control Gleiser's arms but Gleiser gets an underhook and turns him. Now Hamara has his back to the cage.
Hamara takes an elbow to the forehead.
Gleiser lands a damaging elbow.
Hamara missing with knees to the body.
Gleiser blocks a knee to the body. He'll have a nicely bruised forearm in the morning.
Hamara takes an elbow to the forehead.
Hamara lands an elbow inside.
We've seen a great period of action over the last minute or so - credit to both fighters for going all out!
Gleiser lands a shot to the body.
Hamara takes a big intake of breath there - he's definitely tired.
Gleiser's corner calls for him to break the clinch, which he does.
Gleiser closes this distance looking for a takedown but Hamara circles away.
Hamara tries to close the distance and clinch up against the cage but Gleiser paws at him with a jab and circles away.
Gleiser keeps the fight on the outside.
That's one minute gone in the round.
Hamara dodges the punch combination from Gleiser.
Gleiser darts in looking for a takedown but Hamara gets double underhooks and turns Gleiser into the cage.
Hamara struggles to land a body shot inside as Gleiser controls his hands.
Hamara breaks the clinch.
Gleiser avoids the clinch attempt nicely.
Gleiser shoots in and drives through. Hamara sprawls well.
That's three failed takedown attempts in the round for Michael Gleiser. That's going to take a lot out of him.
Hamara gets to the clinch - let's see what his plan is here.
Gleiser throws an elbow that misses.
Gleiser avoiding damage as Hamara throws knees to the body.
Hamara tries to land knees in the clinch but Gleiser avoids the damage to the body.
Gleiser misses with an elbow strike.
Hamara dodges an elbow strike from Gleiser.
Hamara breaks the clinch and we're back to striking at distance.
Hamara moves in looking to clinch but Gleiser pushes him off.
Gleiser darts in looking for a takedown but Hamara gets double underhooks and turns Gleiser into the cage.
A left hand lands to the body for Hamara.
Gleiser avoiding damage as Hamara throws knees to the body.
That's two minutes gone in the round.
Hamara missing with knees to the body.
Gleiser creates a bit of space for himself and sneaks an elbow through Hamara's defenses.
This has been an exciting period of action!
Gleiser escapes the clinch and we're back to striking.
Hamara throws a wild combination but nothing lands.
Gleiser shoots in but Hamara avoids the takedown attempt easily.
Gleiser fails with a takedown attempt.
Hamara tries to clinch there but Gleiser circles away.
Michael Gleiser is looking to throw some combinations by the looks of things.
Hamara tries to clinch there but Gleiser circles away.
Gleiser darts in looking for a takedown but Hamara gets double underhooks and turns Gleiser into the cage.
Hamara takes an elbow to the temple.
Hamara looks to throw an elbow but misses.
Gleiser pushes off and fires off an elbow that misses, before clinching up again, against the cage.
Gleiser lands a nice elbow from the clinch.
Hamara missing with knees to the body.
Gleiser lands a glancing elbow in the clinch.
That's three minutes gone in the round.
Gleiser breaks the clinch and we're back to striking at distance.
Hamara moves in looking to clinch but Gleiser pushes him off.
Gleiser gets tackled into the cage by Hamara. Hamara maintains the clinch.
Hamara's head jolts backwards as he takes an uppercut right on the button!
Hamara trying to land knees to the body.
Hamara tries a body shot but Gleiser blocks it.
Hamara trying to land knees to the body.
A nice left hand lands by Gleiser.
Hamara breaks the clinch and we return to the middle of the mat.
Hamara pushes Gleiser up against the cage in a clinch.
Gleiser lands an elbow just above Hamara 's eye.
Hamara lands an elbow inside that Gleiser shrugs off.
Michael Gleiser's cut is getting worse.
The crowd are loving this. Great action here.
Hamara can't get the takedown.
Gleiser with an attempt at a knee that misses.
Gleiser lands an elbow just above Hamara 's eye.
Gleiser lands a glancing elbow in the clinch.
Gleiser comes over the top with an elbow. That landed flush.
Gleiser blocks a knee to the body. He'll have a nicely bruised forearm in the morning.
That's four minutes gone in the round.
A nice glancing elbow lands by Gleiser.
Hamara tried to land a shot to the body but connects with Gleiser's elbow.
Gleiser pushes off an throws an elbow but Hamara leans to the side and avoids it. We're back to clinching against the cage.
Gleiser avoiding damage as Hamara throws knees to the body.
Gleiser on the defensive, avoiding the knees to the body.
Hamara looking for a takedown.
Gleiser escapes the clinch and we're back to striking.
Gleiser avoids the head kick by Hamara.
Gleiser pushes Hamara up against the cage in a clinch.
Hamara dodges an elbow strike from Gleiser.
Gleiser avoiding damage as Hamara throws knees to the body.
Gleiser creates a bit of distance and throws an elbow that only just misses.
Gleiser comes over the top with an elbow. That landed flush.
The crowd are going absolutely nuts as the round comes to an end - what a fantastic round of action!
Gleiser gets an overhook and lands an elbow to the side of the head.
Gleiser will no doubt start fighting again in a minute but for now he's just having a little rest, leaning Hamara up against the cage.
Gleiser managing to block the knees to the body from Hamara.
And that�s the end of the round � the fighters go back to their corners.
Michael Gleiser clearly takes that round.
Both fighters have cut men working on them during the interval.
Well, the break between rounds is over. Let's get back to the scrappin!

Gleiser tries to close the distance and clinch but Hamara swats him to one side with an open hand palm strike and circles away.
Hamara shoots in but Gleiser avoids the takedown attempt easily.
Hamara tries to close the distance and clinch up but Gleiser swats him away and circles back towards the center.
Hamara tries to clinch up.
Hamara is looking to clinch.
Hamara tries to close the distance and clinch but Gleiser swats him to one side with an open hand palm strike and circles away.

Gleiser closes the distance and gets a double leg, slamming Hamara to the mat! Hamara manages to get full guard.
Gleiser wants to stand but Hamara is controlling his posture from full guard.
Hamara is working an open guard here, looking to improve his position. No doubt that will leave him open to counters but at least he's being more offensive.
Gleiser trying to control but Hamara is working from the bottom.
That's one minute gone in the round.
We must be close to a standup if these guys don't pick up the pace.

Michael Gleiser has forced the referee to step in and bring the fight back to the feet.
Gleiser scores with a jab to the head.
Hamara lands with a nice body punch.
Gleiser shoots in for a takedown but Hamara shows good takedown defense there and keeps this one on the feet.
Hamara tries to clinch up but Gleiser circles away and keeps his distance.
Gleiser throws a right and a left that both miss.
It's got to the stage where if one of these guys blows hard enough, the other might fall over.
Hamara fails to land with the punch combination there - jab, cross, hook, miss, miss, miss.
Turo Hamara seems to be getting the better of the standup.
Hamara moves in looking to clinch but Gleiser pushes him off.
Hamara buckles his opponent's knee momentarily with a nice leg kick.
A really sloppy takedown attempt there from Gleiser.
A head kick misses from Hamara.
Hamara doesn't manage to clinch there - Gleiser circles away.
Hamara wants to clinch up but Gleiser keeps it at a distance.
Hamara changes levels and looks for a double leg takedown. Gleiser tries to avoid it but Hamara manages to keep hold of a leg and drag Gleiser to the ground. Gleiser escapes though and pops straight back up to his feet.
Hamara throws a leg kick which misses Gleiser's front leg but catches the back leg as Gleiser tries to avoid it.
Hamara closes the distance looking to clinch
and Gleiser counters with a quick right hand to the jaw.
That's two minutes gone in the round.
This has been an exciting period of action!
Gleiser shoots in with a takedown attempt and he has Hamara pinned against the cage. Hamara gets the underhooks and manages to circle away.
That's three failed takedown attempts in the round for Michael Gleiser. That's going to take a lot out of him.
Hamara rushes Gleiser and pushes him back against the cage in a clinch.
Hamara cracks Gleiser with a nice body shot.
Hamara tries to throw a body punch but Gleiser avoids it by throwing Hamara back against the cage.
Hamara trying to land knees to the body.
Hamara tries to land a shot to the body but it's blocked.
Gleiser is trying to work out of this bad position, with his back against the cage.
Hamara pushes off an throws an elbow but Gleiser leans to the side and avoids it. We're back to clinching against the cage.
Gleiser tries a shoulder strike but it doesn't do any damage.
Hamara blocks an elbow strike.
Gleiser on the defensive, avoiding the knees to the body.
Gleiser working aggressively here.
Gleiser managing to block the knees to the body from Hamara.
That's three minutes gone in the round.
Gleiser gets underhooks to prevent Hamara's takedown attempt.
With the two fighters working up against the cage, Gleiser just misses with a elbow thrown towards Hamara's brow.
Gleiser avoids a wild elbow strike from Hamara.
Hamara escapes the clinch and we're back to striking.
Hamara misses with a head kick.
Sloppy strikes from Gleiser. Those never looked like landing.
Gleiser shoots in for a takedown but doesn't get it.
Hamara wants to slow Gleiser down by chopping away at his legs.
Hamara tries to clinch there but Gleiser circles away.
Gleiser avoids the head kick by Hamara.
Gleiser lands a right hook to the body.
A head kick misses from Hamara.
Gleiser closes the distance and clinches up with Hamara, looking for a takedown. Gleiser pushes Hamara against the cage but Hamara circles to the side and manages to break the clinch.
Gleiser shoots in for a takedown but Hamara shows good takedown defense there and keeps this one on the feet.
Gleiser shoots for a takedown but Hamara saw that one coming a mile off and avoided it easily.
Michael Gleiser seems to be the more aggressive standup fighter in this bout.
Hamara clinches with his opponent.
Hamara lands an elbow that stopped Gleiser in his tracks for a moment.
That's four minutes gone in the round.
This is a great period of action - very entertaining stuff!
Hamara throws an elbow but it's blocked.
It really doesn't seem like the step up in weight is hurting Gleiser here at all. He's more than holding his own against the bigger man.
Hamara avoids the elbow strike from Gleiser, against the cage.
Hamara taking a breather.
Gleiser avoids a wild elbow strike from Hamara.
A real battle for position is taking place between these two warriors.
Hamara avoids a wild elbow strike from Gleiser.
Hamara scores a nice knee to the body.
Gleiser misses with an elbow over the top.
Gleiser is clearly stalling here... Pick up the pace son.
Hamara missing with knees to the body.
The crowd are going absolutely nuts as the round comes to an end - what a fantastic round of action!
Gleiser tries to stall but Hamara uses the opportunity to gain a better position.
Gleiser pushes off and fires off an elbow that misses, before clinching up again, against the cage.
Hamara throws an elbow but it's blocked.
And that�s the end of the round � the fighters go back to their corners.
A close fourth round but Turo Hamara will probably get the nod - 10:9.
Both fighters have cut men working on them during the interval.
That's the end of the round. The referee orders the cornermen out of the cage so we can get back down to business. This is the final round!

Gleiser shoots in but no luck this time.
Hamara has closed the distance and engaged Gleiser in a clinch.
Hamara tries to land knees in the clinch but Gleiser avoids the damage to the body.
Gleiser managing to block the knees to the body from Hamara.
Gleiser doesn't land with the attempted body shot.
Gleiser blocking some punches.
Nice elbow from Gleiser.
Hamara goes for a takedown in the clinch but Gleiser prevents it.
A quick uppercut on the inside from Hamara.
Gleiser breaks the clinch and we're back to striking at distance.
Gleiser tries to clinch but is not successful on this occasion.
Hamara tries to clinch
and Gleiser counters with a series of strikes. Hamara will be more careful next time no doubt.
This is a great period of action - very entertaining stuff!
Gleiser changes levels and looks for a double leg takedown. Hamara tries to avoid it but Gleiser manages to keep hold of a leg and drag Hamara to the ground. Hamara escapes though and pops straight back up to his feet.
Hamara misses with a takedown attempt. He shot from a bit too far out.
Gleiser tries to clinch up against the cage, rushing in to close the distance. Hamara manages to break the clinch and circles back to the middle of the mat.
Gleiser fails in his attempt to clinch.
That's one minute gone in the round.
Hamara fails with an attempt to clinch.
Hamara tries to close the distance and clinch up against the cage but Gleiser paws at him with a jab and circles away.
Hamara lands a leg kick. The shin dug right into the meat of the thigh.
Hamara fails with an attempt to clinch.
Gleiser wants to clinch up but Hamara keeps it at a distance.
Gleiser tries to close the distance and clinch up but Hamara swats him away and circles back towards the center.
Hamara has taken the fight to the clinch.
Gleiser escapes the clinch and we're back to striking.
Gleiser shoots for a takedown but Hamara saw that one coming a mile off and avoided it easily.
That's three failed takedown attempts in the round for Michael Gleiser. That's going to take a lot out of him.
Both of our modern day gladiators look out of it here - a gruelling 5 rounds of action taking it's toll on them, no doubt.
Hamara looking to take his opponent's legs away with the low kicks.
Hamara looks frustrated there after his takedown attempt is stuffed easily.
Hamara tries to clinch there but Gleiser circles away.
Hamara is looking to clinch but Gleiser is avoiding it.
Hamara moves into the clinch.
Hamara misses the knee to the body. Nice hip positioning from Gleiser.
Wooooo! Give it up for these two warriors! They are putting on a show!
Gleiser misses with an elbow over the top.
That's two minutes gone in the round.
Hamara unloads a knee to the mid-section. Gleiser lets out a prehistoric sounding urrrrgh.
Gleiser is working Hamara over against the cage.
Hamara tries to land a knee to the body but he is off balance and Gleiser avoids it.
Gleiser avoiding damage as Hamara throws knees to the body.
Gleiser blocks a knee to the body. He'll have a nicely bruised forearm in the morning.
Hamara landing some nice looking knees to the body.
A nice left hand lands by Gleiser.
Gleiser keeps control of Hamara as he tries to wriggle out of the double underhooks.
Hamara cracks Gleiser with a nice body shot.
Hamara throws an elbow but it misses.
Hamara blocks an elbow strike.
Hamara takes an elbow to the temple.
Hamara tries to land knees in the clinch but Gleiser avoids the damage to the body.
Hamara trying to land knees to the body.
Gleiser looks to throw an elbow but misses.
Gleiser wants to stall.
Gleiser blocks an elbow strike.
That's three minutes gone in the round.
Gleiser is leaning against Hamara and scores with a nice uppercut to the body.
Hamara on the defensive, avoiding the knees to the body.
Hamara pushes off and fires off an elbow that misses, before clinching up again, against the cage.
Gleiser is trying to maintain a safe position but Hamara gets an underhook and turns Gleiser into the cage.
Good anti-grappling being displayed by Gleiser as Hamara tries to tie him up.
Hamara misses the knee to the body. Nice hip positioning from Gleiser.
Hamara dodges an elbow strike from Gleiser.
Hamara blocks an elbow strike.
Gleiser avoids the elbow strike from Hamara, against the cage.
Gleiser's corner calls for him to break the clinch, which he does.
Hamara avoids the clinch attempt nicely.
Gleiser gets tackled into the cage by Hamara. Hamara maintains the clinch.
Gleiser throws a nice elbow but it doesn't land.
Gleiser blocks a knee to the body. He'll have a nicely bruised forearm in the morning.
Gleiser breaks the clinch.
Gleiser fails with the takedown.
That's four minutes gone in the round.
Gleiser fails with an attempt to clinch.
Gleiser checks a low kick. Bone on bone - not my idea of a good time.
Gleiser shoots in for a takedown. "I don't think so" says Hamara as he avoids it easily.
Gleiser misses with an uppercut.
Gleiser throws a combination but it was largely blocked by Hamara.
Hamara misses with a head kick.
We've seen a great period of action over the last minute or so - credit to both fighters for going all out!
Gleiser tries to clinch but is not successful on this occasion.
Gleiser fails with a takedown attempt.
Hamara fakes with an overhand right and moves in to clinch with Gleiser, pushing him back against the cage.
Gleiser comes over the top with an elbow. That landed flush.
The crowd are going absolutely nuts as the round comes to an end - what a fantastic round of action!
Hamara tries for a takedown. No joy.
Hamara trying to land knees to the body.
Gleiser wants to push off and get back to the center of the mat but Hamara has him pressed against the cage.
Hamara's corner calls for him to break the clinch, which he does.
And that's the end of the fight!
I would just about give that final round to Turo Hamara.
I think Hamara has won this one but let's see whether the judges agree with me. Over to the ring announcer for the scorecards.
Ladies and gentlemen, after 5 rounds of action, we go to the scorecards for a decision.
Judge Jack Bonds scores the fight for Michael Gleiser!
Judge Percy O'Donnell scores the fight for Michael Gleiser!
Judge Timothy Bukovac scores the fight for Michael Gleiser!
Michael Gleiser wins by unanimous decision!
Michael Gleiser gave a mention to HGH Nutrients Q160 Tycoons Best Quality supps in his post fight interview. That will please them (and hopefully generate some sales).
In defeat, Turo Hamara stepped up to the mic, saying 'Losing... It's what I do.'.
|
|
|
|
|
|
|
|
|
|
|
|
|
|
|
|
|
|
|
|
|
|
|
| S |
C
A |
G |
S |
C
B |
G |
|
S |
C |
G |
|
energy
A | B |
|
hype
A | B |
|
pop
A | B |
|
mgr
A | B |
|
FIGHT
RATING
100% |
|
|
|
|
|
|
