|
|
PBP Commentary |
Coming up we have a lightweight MMA rules bout between Teodoro Sawyer (ranked 0 p4p, 0 weight class) and Ken Ken (ranked 0 p4p, 0 weight class). We have two fighters making their debuts here, so let's see who comes out of this one with their first professional victory.
 |
|
 |
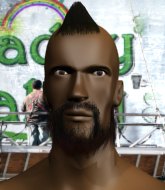
| 184 cm
18
161 lbs
0 - 0 - 0 |
|
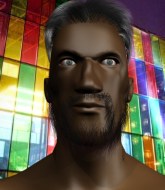
175 cm
18
160 lbs
0 - 0 - 0 |
BJJ Blue Belt
Counter fighter
Cuts easily |
|
BJJ Blue Belt
Brawler
Very confident |
|
| |
|
Ladies and gentlemen. This fight is 3 rounds, in the lightweight division.
Introducing the fighter to my left, fighting out of the red corner.
With a record of
0 - 0 - 0, fighting out of New York, Teodoro Sawyer!
And introducing the fighter to my right, fighting out of the blue corner.
With a record of
0 - 0 - 0, fighting out of New York, Ken Ken!
The judges for this bout are John Kavanagh, Bruno Lombardi and Eddie Farnsworth.

The bell rings for round one and we are underway!
A looping hook to the body misses from Ken. Sawyer does a little dance to reset his feet.
Sawyer looks for a takedown but Ken sprawls well.

Sawyer closes the distance and looks for a trip takedown... aaaand he's got it - Sawyer lands in his opponent's guard.
Ken looking to control.
The ref warns both fighters not to hold the cage as they work up against the meshing.
Sawyer not doing a lot at the moment. He'll have to show some more aggression or the fight will get stood up.
Ken looking to control.
We've had a slow start to the round here - hopefully the action picks up.
Ken manages to sweep nicely, so he's now on top. Sawyer manages to get himself to full guard.

Ken is frustrating his opponent with some stalling tactics from top position.

That's one minute gone in the round.

Sawyer has scooted to the edge of the canvas and used the cage to get back to his feet. Ken has stuck on his opponent and is forcing him back against the cage.
Sawyer has picked Ken up - he's going for a ride! Sawyer dumps his opponent to the mat with a thud and settles into half guard.
Sawyer thumps the canvas. Not on purpose obviously - he just missed Ken's head.
Sawyer works his way into full mount!
Sawyer controlling the position easily from mount.
Ken keeping his composure momentarily, calmly looking to get back to half guard.

That's two minutes gone in the round.
Sawyer content just to control the position here.
Sawyer trying to control but Ken is having none of it.
Ken takes a big shot to the head but keeps on trying to improve his position.
The fighters are pressed up against the cage, both looking to find a bit of space to work.
Sawyer content just to control the position here.

That's three minutes gone in the round.
Sawyer wants to control the pace but Ken is squirming around nicely.
Ken regains half guard.
Sawyer is taking a breather. Ken says something to him but it's hard to make out. Perhaps he's telling him to get on with it and actually do something.
Sawyer is keen to just control but Ken is a slippery customer.
Sawyer perhaps working for something from half guard, or maybe not. It looks like he's just sitting there.
Ken wants to control but Sawyer is keeping busy.

That's four minutes gone in the round.
The crowd are hurling abuse towards the fighters... You can hardly blame them though because there isn't a lot going on in the fight.
Ken trying to keep hold of his opponent's head but Sawyer manages to pass to mount!
Ken really trying hard to get back to half guard here.
Sawyer looking to ground and pound his opponent to a finish here.
The crowd thankful this round is nearly over.
Ken tries to get back to half guard but can't.
And that�s the end of the round � the fighters go back to their corners.
Teodoro Sawyer dominated that round.
That's the end of the interval. I'm sure that seemed a lot quicker than a minute for our two fighters! Back to the action.

Ken fails in his attempt to clinch.
Sawyer shoots in with a takedown attempt and he has Ken pinned against the cage. Ken gets the underhooks and manages to circle away.

Ken shoots in for a takedown and gets it. Let's see what he's got on the mat.
Sawyer wants to hit a switch here but Ken passes into full mount! Oh no, disaster for Sawyer there!
Sawyer is trying desperately to improve position.
We've had a slow start to the round here - hopefully the action picks up.
Ken manages to capitalize on a mistake by Sawyer to take his back!
Sawyer covering up well under a barage of strikes.
That's one minute gone in the round.
Sawyer wants to get back to his feet.
Good control from Ken.
Ken really doesn't want to stay on the ground with Sawyer. If he can't get it back to his feet, it's only a matter of time before he'll be tapping out.
Sawyer is trying to get back to his feet but Ken has full control of the position and if anything, Sawyer has just worked his way into a worse spot.
The crowd hopeful of a finish here - Ken's supporters are on their feet, screaming for him to go for the rear naked choke.

Ken looking for the choke but no joy.
Sawyer defends a rear naked choke attempt by controlling one of Ken's arms.
That's two minutes gone in the round.
The crowd are hurling abuse towards the fighters... You can hardly blame them though because there isn't a lot going on in the fight.
Ken missing with strikes.
The crowd hopeful of a finish here - Ken's supporters are on their feet, screaming for him to go for the rear naked choke.
Sawyer wants to escape the position.
That's three minutes gone in the round.
Sawyer tries to escape the position - he's now mounted. Is that better or worse? Hard to tell!
Sawyer is working to get back to half guard.
Sawyer gets back to half guard.
Sawyer is working for an escape here. He's hooked one of Ken's legs and he's managed to sneak out and take Ken's back!
Sawyer trying to secure his dominant position for a moment - making sure Ken doesn't escape.
Ken is in bad spot here.
Sawyer biding his time, controlling Ken.
Ken tries to break free.
That's four minutes gone in the round.
Sawyer trying desperately to keep hold of the dominant position.
A bit of a pause in the action here. Sawyer controlling the positon.
Ken tries to escape the position - he's now mounted. Is that better or worse? Hard to tell!
And that�s the end of the round � the fighters go back to their corners.
Ken Ken showed his class in that round. I'd imagine he'll take it on all the scorecards.
Well, the break between rounds is over. Let's get back to the scrappin! The crowd applaud as we get ready to start the final round!

Ken shoots in with a lovely double leg takedown. Sawyer manages to land in full guard to minimise the damage.

Sawyer is active off his back here, looking for submissions.
Ken tries to free his leg and advance position but Sawyer is retaining full guard.
Ken pushes down on Sawyer's leg and manages to get into half guard.
Ken tries to pass the half guard into mount. Sawyer knows what he's doing though and prevents the attempt.
We've had a slow start to the round here - hopefully the action picks up.
Ken has decided to stand back up but his arm is trapped. Whilst he's worrying about his arm, Sawyer works to full guard.
Ken is looking to work some ground and pound but Sawyer has wrist control.
That's one minute gone in the round.
Sawyer wants to stand up but Ken is controlling him.
Ken must be cautious of submissions here, given that his opponent has the superior Jiu Jitsu.
Sawyer throwing his legs up looking for a triangle.
Ken stopping the sweep attempt from Sawyer.
Ken is frustrating his opponent with some stalling tactics from top position.
Ken is standing up over Sawyer. Sawyer looks to escape but Ken dives into side control.
That's two minutes gone in the round.
There's not a lot going on here and the crowd are letting the fighters know they're not willing to tolerate a lack of action.
Sawyer gets one leg under and gets the fight to half guard.
Ken trying to mount his opponent but Sawyer defends it.
Sawyer actively working from the bottom here.
Sawyer looking for submissions off his back.
Both fighters are breathing heavily.
Sawyer looks like he's trying to stand up.
That's three minutes gone in the round.
Sawyer trying to control here.
Ken trying to control from half guard but Sawyer is working away.

The ref stands the fighters back up due to a lack of activity.
Ken fakes a couple of low kicks, before throwing one on the third attempt. It connects and Sawyer has to reset his feet before getting ready to engage.
Sawyer shoots in but no luck this time.
Sawyer moves in looking to clinch but Ken pushes him off.

Sawyer pushes Ken up against the cage in a clinch.
That's four minutes gone in the round.
Ken gets a trip takedown into half guard.
Ken is looking to pass the guard... He's managed it - he's now in full mount!
Sawyer can't escape the position.
Ken tries to control but Sawyer wriggling away.
Sawyer is in all sorts of trouble here.
Ken trying to control but he's not successful this time.
Boooooooooooooooooooo!!! God, this has been a terrible round. Come on you two, sort yourselves out!
And that's the end of the fight!
Ken Ken comfortably won the final round on my scorecard.
I think Ken has won this one but let's see whether the judges agree with me. Over to the ring announcer for the scorecards.
Ladies and gentlemen, after 3 rounds of action, we go to the scorecards for a decision.
Judge John Kavanagh scores the fight 28:29
Judge Bruno Lombardi scores the fight 28:29
Judge Eddie Farnsworth scores the fight 28:29
In favor of your winner, by unanimous decision... Ken Ken!
|
|
|
|
|
|
|
|
|
|
|
|
|
|
|
|
|
|
|
|
|
|
|
| S |
C
A |
G |
S |
C
B |
G |
|
S |
C |
G |
|
energy
A | B |
|
hype
A | B |
|
pop
A | B |
|
mgr
A | B |
|
FIGHT
RATING
26% |
|
|
|
|
|
|
