|
|
PBP Commentary |
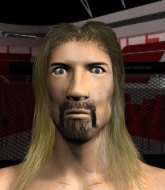
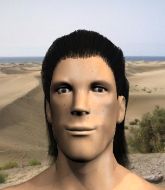
Coming up we have a lightweight MMA rules bout between John Murray (ranked 0 p4p, 0 weight class) and Bone Crash (ranked 0 p4p, 0 weight class). Both fighters really staring each other down here, as Bone Crash enters the cage!
 |
|
 |
| 180 cm
26
160 lbs
13 - 5 - 0 |
|
178 cm
27
165 lbs
7 - 6 - 0 |
Good wrestling
Dangerous knees
Cardio machine |
|
Good wrestler
World class MT
Good gas tank |
|
| |
|
Ladies and gentlemen. This fight is 3 rounds, in the lightweight division.
Introducing the fighter to my left, fighting out of the red corner.
With a record of
13 - 5 - 0, fighting out of Las Vegas, John Murray!
And introducing the fighter to my right, fighting out of the blue corner.
With a record of
7 - 6 - 0, fighting out of New York, Bone Crash!
The judges for this bout are George Francis, Gwen Towbar and Chris Downing.

The bell rings for round one and we are underway!
Murray throws a hook to the body but it doesn't connect.
Murray misses with a telegraphed body shot
and Crash counters with a three punch combination, finished off with a leg kick. Nice work.
Crash lands a two punch combo.
Crash has been working on his striking defense in training and it's paying off as Murray is landing a low percentage of strikes.
Murray slips in close and lands a nice hook before moving back out of range.
Crash cracks Murray with a good jab.
Murray looks to score with a jab to the body but Crash is just out of range.
Crash uses some good footwork to avoid the body shot by Murray.
That kick from Crash tenderised Murray's leg. Murray is trying to keep his angry face on.
Murray looks to have improved his striking defense since last time we saw him fight.
Murray throws a nice looking combination but Crash bobs and weaves to avoid any damage.
Wooooo! Give it up for these two warriors! They are putting on a show!
Crash is looking to chop away at Murray's legs.
Murray uses some good footwork to avoid the body shot by Crash.
Murray lands a powerful looking uppercut that connected with his opponent's jaw.
Crash throws a leg kick which misses Murray's front leg but catches the back leg as Murray tries to avoid it.
Nice defenses there by Crash.
Crash throws a sloppy head kick
and Murray counters with a three punch combo that has Crash backing up. Crash nods at Murray to acknowledge the strikes.
Murray blocks a head kick by Crash.
Crash takes a punch to the jaw and another one to the bread basket.
Crash displays good takedown defense there as he swats away a double leg from Murray.

That's one minute gone in the round.
Murray lunges in with swinging rights and lefts but Crash circles away quickly and effectively.
Murray keeps his opponent at a distance with a nice jab.
Murray darts in looking for a takedown but Crash gets double underhooks and turns Murray into the cage.
Murray misses with a straight right.
A head kick misses from Crash.
Murray throws a jab, cross combination which is slipped
and Crash counters with a left and a right that stings Murray.
Crash pulls out of a head kick attempt.
Crash swings away but doesn't land with a series of punches.
Murray fakes high and swings low for a body shot but Crash manages to avoid it.
Crash bobs and weaves well there to avoid the strikes.
Crash appears to be waiting to throw a counter punch to the body.
Murray closes the distance and clinches up with Crash, looking for a takedown. Murray pushes Crash against the cage but Crash circles to the side and manages to break the clinch.
That's three failed takedown attempts in the round for John Murray. That's going to take a lot out of him.
Murray misses with a body shot.
Murray takes a swing at Crash's ribcage but misses.
Crash unleashes a big counter combination but Murray bobs and weaves and avoids any damage.
Crash chopping away at his opponent's legs.
Well, he's not going to score with shots like that. A lazy body kick attempt from Crash.
Murray jabs Crash to the body, keeping him at a distance.

That's two minutes gone in the round.
We've seen a great period of action over the last minute or so - credit to both fighters for going all out!
A punch combination from Murray misses.
Murray misses with a takedown attempt - Crash sprawls well and throws a nice strike on the way out which just misses.
Crash lands a lovely overhand right.
Crash ducks under an overhand right and circles away with a smile on his face.
Crash takes a hook to the side of the head. I wonder if that's got his ears ringing.
Murray scores with a reasonable looking shot to the body. Crash doesn't seem bothered though.
Murray lunges in with an uppercut that skims his opponent's chin.
Murray misses with a body shot. Nice footwork from Crash.
Like a baseball bat into the meat of his leg there - nice leg kick by Crash.
Crash tries to score with a leg kick but it misses it's target.
Murray misses with a looping right.
Murray lands a body shot.
Crash throws a head kick that misses.
Crash uses good footwork to avoid the strikes from Murray.
A shot to the body from Murray misses
and Crash counters with a left and a right that stings Murray.

That's three minutes gone in the round.
Crash keeping a good distance there, avoiding the body shot.
Murray lands a jab-cross combination.
Crash walks straight into an uppercut. Luckily it didn't land flush.
Crash's corner calls for a 1, 2 combination and Crash duly obliges.
Crash tries to bum rush Murray with a series of wild strikes but Murray uses good footwork to avoid the assault.
Murray showing good head movement there, avoiding the strikes from Crash.
Crash throws a sloppy head kick and Murray moves out of range easily.
Crash is working the combinations to good effect here.
Murray throws a body shot but no joy.
Murray is looking to wear down Crash with body shots, infact he's throwing more body shots than head shots at the moment.
A looping hook to the body misses from Murray. Crash does a little dance to reset his feet.
Murray misses with a body shot.
Crash takes a really solid shot there but just smiles back and shrugs his shoulders.
We've seen a great period of action over the last minute or so - credit to both fighters for going all out!
Crash takes one to the side of the head.
Murray throws a monster uppercut resembling something out of street fighter but it doesn't land.
Crash blocks a jab.

Murray feints and then dives in with a takedown. That was a long way out but the feint bought him enough time to close the distance and complete the takedown. Now we'll play guard for a bit and see who can get the better of that position.
Murray throwing shots from guard but he's hitting more mat than opponent.

That's four minutes gone in the round.
Murray won't allow Crash to sweep him here.
Murray is intent on slowing down the pace of the fight, simply looking to control.
Crash controlling the position.
Murray passes into half guard.
Murray is looking to advance position but Crash won't allow it.
The crowd applaud the fighters' efforts here as the round comes to an end.
Murray wants to take a breather but Crash is having none of it.
And that�s the end of the round � the fighters go back to their corners.
That was a close round but I would say that John Murray will probably get the nod.
The fighters' corners scream their final instructions, as the referee calls time. Here we go, back to the action!

Murray throws a nice hook to the body that draws an oooh from the crowd.
Crash uses some good footwork to avoid the body shot by Murray.
Crash misses with a kick to the body.
Crash showing good head movement there, avoiding the strikes from Murray.
Murray swings for the body but Crash moves out of range.
Crash avoids the body shot from Murray.
A punch combination from Murray misses.
A swing and a miss from Crash.
A little feinted left hand from Murray on the counter but he doesn't commit to it.
Crash throws a head kick that misses.
A cross from Murray lands.
Murray pushes forward with a 1-2 combination that forces Crash back to the cage. Murray follows up with a solid lead hook to the liver.
No joy there for Murray, who threw a few shots but didn't land.
Crash connects with an inside leg kick.
Crash looks to land a combination but Murray avoids it well.
Fantastic stuff here - a very entertaining period of action, which has drawn cheers from the crowd.
Crash uses good footwork to avoid the strikes from Murray.
Crash pulls out of a head kick attempt.
That's one minute gone in the round.
Crash looks to land a body kick but Murray moved away.
Murray swings away but doesn't land with a series of punches.
Crash throws a wild body kick that Murray sees coming a mile off.
Murray throws a jab but it's blocked by Crash.
The fighters are starting to get sweaty, which will make takedowns a bit more tricky.
Crash takes one to the side of the head.
Crash lands a nice looking body kick.
Murray avoids a low kick by using good footwork.
Crash takes a hook to the side of the head. I wonder if that's got his ears ringing.
Crash tries a head kick but it misses.
Nice body kick from Crash.
Murray throws a body shot but no joy.
Crash throws a head kick that misses.
Crash stuns Murray with a nice body shot, before stepping back out of range.
Crash ducks under a wild hook from Murray.
Crash raises up his leg as if looking to counter with a high kick.
Crash throws a right high kick that is partially blocked by Murray.
The crowd cheering loudly, showing their appreciation for the quality fight we're seeing here.
Crash throws a head kick but Murray moves out of range.
That's two minutes gone in the round.
Crash throws a series of punches but Murray moves out of range.
Murray takes a swing at Crash's ribcage but misses.
Murray throws a right and a left that both miss.
Crash throws a head kick but Murray moves out of range.
A little feinted left hand from Murray on the counter but he doesn't commit to it.
Crash misses with an uppercut. Murray saw that one coming.
Crash looks to land a combination but Murray avoids it well.
Bone Crash is looking to keep the fight on the feet at all costs.
Murray looks for a takedown but Crash sprawls well.
Crash looks to score with a jab to the body but Murray is just out of range.
Murray closes the distance and clinches up with Crash, looking for a takedown. Murray pushes Crash against the cage but Crash circles to the side and manages to break the clinch.
Murray clobbers Crash with an overhand right that has the crowd gasping. That made a horrendous noise.
Murray tries to shoot in for a takedown. He's got hold of a leg but Crash swivels and escapes.
That's three failed takedown attempts in the round for John Murray. That's going to take a lot out of him.
Crash lands a jab followed by a nice looking cross.
Crash scores with a push kick.
Murray fakes low and throws an overhand right that catches Crash on the side of the head.
Murray looks to throw the jab but Crash is out of range.
Crash counters with a body kick.
That's three minutes gone in the round.
Well, he's not going to score with shots like that. A lazy body kick attempt from Crash.
Murray moves out of range as Crash throws a body kick.
Crash staying out of range there.
Murray cracks Crash with a good shot that sees him stumbling back into the cage.
Bone Crash seems to be getting the better of the standup.
Murray throws a shot to the body.
Murray shoots for a double leg takedown but Crash sprawls well. He's pushed Murray's face into the mat and manages to get back to his feet relatively easily.
Crash throws a sloppy head kick and Murray moves out of range easily.
Murray throws a monster uppercut resembling something out of street fighter but it doesn't land.
Murray checks a low kick. Bone on bone - not my idea of a good time.
Murray swung with a counter right hand that didn't connect.
Murray looks to score with a combo but nothing lands.
Crash rushes in with a sloppy looking punch
and Murray counters with a lovely straight right hand!
Murray tries to land with a swinging hook to the body but Crash was well out of range. Poor timing from Murray.
Murray shoots in for a takedown but Crash shows good takedown defense there and keeps this one on the feet.
Murray throws a lazy uppercut
and Crash counters with a lovely straight right hand!
The crowd cheers as Murray lands an impressive looking overhand right. Crash doesn't seem phased though.
Crash misses with a half-hearted attempt at a head kick.
That's four minutes gone in the round.
Crash throws a hook to the side of Murray's head but Murray sees it coming and ducks under it beautifully.
Fantastic stuff here - a very entertaining period of action, which has drawn cheers from the crowd.
Crash takes a shot right to the bread basket.
Murray throws a one two combo.
Crash throws a leg kick
and Murray counters with a lovely straight right hand!
Murray pushing out the jab but it's not landing.
Crash throws a body kick that misses.
Murray lands with a shot to the body.
A big left from Murray misses.
Murray avoids the head kick by Crash.
Murray appears to be looking for a counter punch to the body.
Crash lands a nice looking body kick.
Crash tries a head kick but it misses.
The crowd applaud the fighters' efforts here as the round comes to an end.
Crash throws a right and a left that both miss.
Murray is looking for a counter combo.
Murray loads up on a big right hand but Crash slips the punch.
Murray scores with a jab. Crash acknowledges it with a nod of the head.
Crash takes one on the chin but seems OK.
And that�s the end of the round � the fighters go back to their corners.
That was a close second round but I would say that John Murray will probably get the nod.
The corners get their ten second warning. Both fighters stand from their stools and stare eachother down, ready to get back to the action. This is the final round!

A low kick from Crash is predictable there
enabling Murray to counter with a crisp jab.
Crash lands with a head kick! That's gotta hurt.
Crash throws a hook to the body but it doesn't connect.
No joy there for Murray, who threw a few shots but didn't land.
Crash chopping away at his opponent's legs.
Bone Crash seems to be the more aggressive standup fighter in this bout.
Crash throws a head kick that misses.
Murray went nuts there looking for a big combo counter but none of the flurry connected.
Crash swinging wildly here.
Murray misses with a straight right.
Murray misses with a hook. Crash ducked under it nicely.
Crash does a little shimmy and throws a leg kick. The leg kick missed by a considerable margin though, making him look a little bit silly for doing the shimmy.
We've had a slow start to the round here - hopefully the action picks up.
Murray bobs and weaves and unloads with a good uppercut.
Murray lets the fists fly and connects with a left straight followed by a right hook.
Murray misses with the combination.
Fantastic stuff here - a very entertaining period of action, which has drawn cheers from the crowd.
Crash fakes a jab and throws a low kick but Murray checks it well.
That's one minute gone in the round.
Murray stuns Crash with a nice body shot, before stepping back out of range.
John Murray is looking to throw some combinations by the looks of things.
Murray fails to land with the punch combination there - jab, cross, hook, miss, miss, miss.
Murray changes levels and looks for a double leg takedown. Crash tries to avoid it but Murray manages to keep hold of a leg and drag Crash to the ground. Crash escapes though and pops straight back up to his feet.
Crash wants to slow Murray down by chopping away at his legs.
Murray looks to score with a jab to the body but Crash is just out of range.
Crash tries to land a leg kick but Murray saw it coming and moves away.
Crash cracks Murray with a good jab.
Crash has a pretty nasty looking mouse under his right eye.
Murray misses with a shot to the body
and Crash counters with a stiff right hand.
Murray moves out of range of the body kick.
Crash misses with a double jab
and Murray counters with a straight punch to the midsection.
Crash throws out a loose jab but Murray uses good head movement to avoid it.
Crash throws a big shot that misses.
Crash throws a lazy head kick
letting Murray counter with a right hand.
Murray shoots in for a takedown. He's persisting with it as Crash sprawls well. Crash wins this battle and keeps the fight standing. Murray gets slowly back to his feet.
That's two minutes gone in the round.
Crash staying out of range there.
A combination from Murray does no damage.
Murray shoots in for a takedown. "I don't think so" says Crash as he avoids it easily.
That's three failed takedown attempts in the round for John Murray. That's going to take a lot out of him.
The fans in attendance giving it up for the two fighters, who have really let it all hang out in the last minute or so!
Crash fails to land with the punch combination there - jab, cross, hook, miss, miss, miss.
Murray missing with a left hand there. Crash was out of range so wasted energy throwing that one.
Murray swinging wildly here.
Crash is clearly looking to counter with head kicks.
Both fighters are breathing heavily.
Crash connects with a high kick.
Murray tries to bum rush Crash with a series of wild strikes but Crash uses good footwork to avoid the assault.
Murray lets the fists fly and connects with a left straight followed by a right hook.
Murray throws a big shot that misses.
Crash showing good head movement there, avoiding the strikes from Murray.
That's three minutes gone in the round.
Crash looks to land a combination but Murray avoids it well.
Well, he's not going to score with shots like that. A lazy body kick attempt from Crash.
Crash tries to land a front kick but Murray steps back. That was a bit too telegraphed.
Crash connects with a single shot there.
Murray shoots in from a long way out. He's driving through with the takedown attempt and he eventually gets it, landing in Crash's guard.
Murray preventing the sweep.
Murray throws a strike but Crash rolls with it and manages to sweep. Now he's in guard on top.

Murray keeping moving, preventing Crash from controlling successfully.
The fighters are pressed up against the cage, both looking to find a bit of space to work.
Murray pulls Crash in close to his closed guard and prevents Crash from doing any damage or advancing position.
Crash stays in close to Murray's body and controls the position.
Bone Crash has stepped it up - he knows he needs a finish here!
That's four minutes gone in the round.
Murray controlling Crash's posture.
Murray is looking to stand up but Crash isn't so interested in that idea.
And that's the end of the fight!
That was a close round. You could make an argument for either fighter but I would give it to John Murray.
Well Murray has outscored his opponent in every aspect of the fight today. Only a scarily incompetent judge or two will keep him from a well deserved win... Over to the ring announcer for the scorecards.
Ladies and gentlemen, after 3 rounds of action, we go to the scorecards for a decision.
Judge George Francis scores the fight 30:27
Judge Gwen Towbar scores the fight 30:27
Judge Chris Downing scores the fight 30:27
In favor of your winner, by unanimous decision... John Murray!
|
|
|
|
|
|
|
|
|
|
|
|
|
|
|
|
|
|
|
|
|
|
|
| S |
C
A |
G |
S |
C
B |
G |
|
S |
C |
G |
|
energy
A | B |
|
hype
A | B |
|
pop
A | B |
|
mgr
A | B |
|
FIGHT
RATING
73% |
|
|
|
|
|
|

