|
|
PBP Commentary |
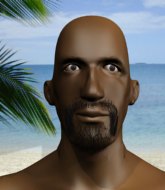
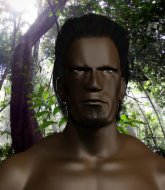
Coming up we have a lightweight MMA rules bout between Tom Huddlestone (ranked 0 p4p, 0 weight class) and Jake Mendes (ranked 0 p4p, 0 weight class). Tom Huddlestone has the better chin. Will he look to stand and bang today?
 |
|
 |
| 190 cm
35
166 lbs
13 - 9 - 0 |
|
173 cm
31
157 lbs
11 - 13 - 0 |
Good wrestling
World class boxer
Cardio machine |
|
Good wrestler
Excellent boxer
Powerful |
|
| |
|
Ladies and gentlemen. This fight is 3 rounds, in the lightweight division.
Introducing the fighter to my left, fighting out of the red corner.
With a record of
13 - 9 - 0, fighting out of New York, Tom Huddlestone!
And introducing the fighter to my right, fighting out of the blue corner.
With a record of
11 - 13 - 0, fighting out of New York, Jake Mendes!
The judges for this bout are David Schapiro, Jonathan Paton and Alyssa Summers.

The bell rings for round one and we are underway!

The fight moves into the clinch position.

Huddlestone works for the underhooks and manages to get a trip takedown into guard.
Huddlestone advances position into side control!
Huddlestone tries to move into full mount but can't pass Mendes's legs.
An elbow from Huddlestone crashes against the mat.
We've had a slow start to the round here - hopefully the action picks up.
Huddlestone misses with an attempted head punch from side control.
The strikes coming from Huddlestone are missing the target in this wave of attacks.
Huddlestone looking to punish the body of his opponent here but Mendes is avoiding damage well.
Mendes manages to get one leg in to regain half guard.
Mendes is doing well to avoid being mounted. He's controlling the position at the moment.

That's one minute gone in the round.
Huddlestone is pressing down on Mendes's thigh, looking to free his foot. Mendes is holding on for now.
Huddlestone thumps the canvas. Not on purpose obviously - he just missed Mendes's head.
Huddlestone wants to take a breather but Mendes is having none of it.
Mendes won't allow Huddlestone to pass to mount.
Huddlestone is working hard here to advance position.
The fighters are pressed up against the cage, both looking to find a bit of space to work.
Mendes is not content to let Huddlestone control the position.
Huddlestone tries to pass to full mount but Mendes defends it.
Huddlestone will need to keep those long limbs tucked in whilst he's on the ground, to prevent any submissions.

That's two minutes gone in the round.
Neither fighter has done anything of merit for a good minute or two here and the crowd are not happy about it.
Mendes tries to roll over but Huddlestone keeps him under control.
Huddlestone wants to pass to mount but Mendes is defending the position.
The ref warns both fighters not to hold the cage as they work up against the meshing.
Huddlestone is looking to take a break and control but Mendes is keeping him honest, looking to work from the bottom.

The ref stands the fighters back up due to a lack of activity.
Huddlestone's corner calls for a 1, 2 combination and Huddlestone duly obliges.
The fight stays on the outside here - Mendes looks like he's thinking about clinching though.
Huddlestone changes levels looking for a counter takedown but doesn't commit.
Mendes stuns Huddlestone with a nice body shot, before stepping back out of range.
Huddlestone slips a jab from Mendes.

That's three minutes gone in the round.
Mendes is looking to clinch.

Huddlestone has Mendes up against the cage in a clinch.
Mendes tries for a takedown. No joy.
Huddlestone tries to score a body lock takedown but Mendes shows good agility there to stay on his feet.
Huddlestone tries for a takedown. No joy.
Huddlestone has dropped down and is working for a takedown. Mendes is trying to keep an underhook but Huddlestone manages to get the takedown into half guard.
Huddlestone not throwing his punches with enough precision this time.
Huddlestone throwing shots but Mendes is blocking nicely.
Mendes trying to control here.
Huddlestone is trying to advance to mount but he's lost his balance and Mendes reverses the position - he's now on top in Huddlestone's guard.

That's four minutes gone in the round.

Mendes decides to stand up and beckons his opponent to follow.
Mendes doesn't manage to clinch there - Huddlestone circles away.
Huddlestone drops down looking for a counter takedown but Mendes sprawls and moves away.
Huddlestone blocks a head kick by Mendes.
Huddlestone keeps the fight on the outside.
Huddlestone tries to counter with a takedown but Mendes is quick to defend against it.
Mendes lands a jab to the head.

It looks like Tom Huddlestone has been cut.
Mendes tries to close the distance and clinch up but Huddlestone swats him away and circles back towards the center.
The crowd cheering loudly, showing their appreciation for the quality fight we're seeing here.
Huddlestone closes the distance and clinches.
Huddlestone pulls guard.
Huddlestone working a defensive guard here.
Mendes stands up from guard. Let's bang!
And that�s the end of the round � the fighters go back to their corners.
Tom Huddlestone dominated that round.
The cut man is working on Tom Huddlestone's cut.
The corners get their ten second warning. Both fighters stand from their stools and stare eachother down, ready to get back to the action.

Mendes misses with a lunging right hand
and Huddlestone counters with an outside leg kick.
Huddlestone keeps the fight on the outside.
Huddlestone went nuts there looking for a big combo counter but none of the flurry connected.
Mendes tries to clinch up against the cage, rushing in to close the distance. Huddlestone manages to break the clinch and circles back to the middle of the mat.
Huddlestone attempts a counter takedown but Mendes avoids it well and moves away.
Mendes digs a good hook to Huddlestone's body.
Mendes moves in looking to clinch but Huddlestone pushes him off.
Huddlestone attempts a counter takedown but Mendes avoids it well and moves away.
Mendes tries to clinch but Huddlestone moves out of range.
Huddlestone went nuts there looking for a big combo counter but none of the flurry connected.
Mendes scores with a crisp jab that stopped Huddlestone in his tracks.
Huddlestone has his takedown stuffed
and Mendes counters nicely by changing levels and landing a hook to the body.
We've had a slow start to the round here - hopefully the action picks up.
Mendes waving his hands out in front of him, looking to distract Huddlestone.
Jake Mendes seems to be getting the better of the standup.
Mendes is looking to clinch but Huddlestone is avoiding it.
Mendes looks to score with a jab to the body but Huddlestone is just out of range.
Tom Huddlestone is looking to throw some combinations by the looks of things.
Mendes tries to land with a swinging hook to the body but Huddlestone was well out of range. Poor timing from Mendes.
Mendes misses with a telegraphed body shot
and Huddlestone counters with a nice double leg into side control. Mendes won't be happy with that.
That's one minute gone in the round.
Mendes is being controlled here.
Mendes is not content to let Huddlestone control the position.
Huddlestone is really dominating this fight. Is there anything that Mendes can do to turn this around?
Huddlestone working the ground and pound but he's contacting the mat, not the fighter.

Huddlestone has had enough of the ground for now and decides to stand.
Sloppy strikes from Huddlestone. Those never looked like landing.
Mendes throws a fast counter high kick but Huddlestone manages to duck under it in time.
Mendes tries to close the distance and clinch but Huddlestone swats him to one side with an open hand palm strike and circles away.
Huddlestone swats away the attempt to clinch by Mendes.
Huddlestone feinted with a counter takedown.
Huddlestone fakes with an overhand right and moves in to clinch with Mendes, pushing him back against the cage.
That's two minutes gone in the round.
Huddlestone prevents a takedown attempt there.
Mendes prevents a takedown attempt there.
Mendes has Huddlestone pressed against the cage, preventing Huddlestone from circling away and getting back to striking at range.
Mendes prevents a takedown attempt there.
That's three failed takedown attempts in the round for Tom Huddlestone. That's going to take a lot out of him.
Huddlestone fails to pull the fight into his guard.
Mendes is working for a takedown up against the cage. He can't get it on this occasion though.
Huddlestone has dropped down and is looking to force the takedown but it's defended by Mendes after a bit of a struggle.

Huddlestone manages to break the clinch.
Mendes misses with an uppercut.
Jake Mendes seems to be the more aggressive standup fighter in this bout.
That's three minutes gone in the round.
Mendes misses the jab.
Huddlestone half commits to a counter takedown before pushing away, out of range.
A big right from Mendes misses.
Mendes moves into the clinch.
Mendes stops a takedown attempt from Huddlestone.
Huddlestone gets underhooks to prevent Mendes's takedown attempt.
Huddlestone tries for a takedown. No joy.
Huddlestone really does look like a pencil wearing a pair of gloves. Let's hope he has a gameplan to suit that ridiculous body shape.
Mendes tries to take the fight to the ground by pulling guard but can't manage it.
Huddlestone looking for a takedown.
Mendes goes for a takedown attempt but Huddlestone pushes him away and we're back to fighting at a distance.
Mendes tries to clinch but Huddlestone moves out of range.
Mendes tries to clinch up
and Huddlestone counters with a nice double leg into guard.
That's four minutes gone in the round.
Mendes is trying to control the position but Huddlestone postures up.
Huddlestone wants to stand but Mendes has a closed guard, so he can't escape.
Mendes controlling the position.
Huddlestone stands up and looks to throw the legs aside to pass to side control. Mendes swivels though and keeps the full guard.
Huddlestone content to stall in guard here.
The crowd thankful this round is nearly over.
Mendes looking to hit a scissor sweep but Huddlestone is one step ahead there.
It looks like the ref is thinking about a standup.
And that�s the end of the round � the fighters go back to their corners.
Tom Huddlestone dominated that second round.
The cut man is working on Tom Huddlestone's cut.
The corners get their ten second warning. Both fighters stand from their stools and stare eachother down, ready to get back to the action. This is the final round!

Mendes swings for the body but Huddlestone moves out of range.
Huddlestone tries to counter with a takedown but Mendes is quick to defend against it.
Mendes tries to clinch but is not successful on this occasion.
Huddlestone thumps Mendes with a low kick.
Huddlestone staying out of range there.
Huddlestone seem to be loading up, looking for a big counter.
Mendes looks to throw the jab but Huddlestone is out of range.
Huddlestone slips a jab and a cross from Mendes.
Huddlestone gets a double leg takedown into Mendes's guard.
Huddlestone pressing down on his opponent's thigh, looking to pass guard. Mendes is keeping the position for now.
Huddlestone throws a big right hand that misses.
We've had a slow start to the round here - hopefully the action picks up.
Mendes wants to stand and escape but Huddlestone is having none of it.
Huddlestone postures up to throw the ground and pound strikes but they don't connect.
Mendes wants to stand up but Huddlestone is controlling him.
That's one minute gone in the round.
Huddlestone trying to control but Mendes is working from the bottom.
Huddlestone lands a couple of elbows.
Mendes keeping moving, preventing Huddlestone from controlling successfully.
Huddlestone postures up.
Mendes keeping moving, preventing Huddlestone from controlling successfully.
The referee decides to stand the fighters back up.
Huddlestone blocks a jab.
Huddlestone tries to counter with a takedown but Mendes is quick to defend against it.
Mendes gets to the clinch - let's see what his plan is here.
Huddlestone is trying to work for a single leg takedown but Mendes pulls him back up using the underhooks.
Mendes is really struggling to land any decent head shots against his taller opponent.
Mendes wants a takedown but no success here.
That's two minutes gone in the round.
Huddlestone's corner calls for him to break the clinch, which he does.
Mendes looks to clinch
and Huddlestone counters with a nice double leg into side control. Mendes won't be happy with that.
Huddlestone working away.
Mendes is sneaking out the side here. He's bucked Huddlestone off and has taken his back!
Jake Mendes has stepped it up - he knows he needs a finish here!
Mendes controlling well, preventing Huddlestone from escaping the position.
Fantastic stuff here - a very entertaining period of action, which has drawn cheers from the crowd.
Mendes is looking to control Huddlestone but Huddlestone is wriggling around and keeping busy.
You can see the frustration on Huddlestone's face� He knows he is in trouble unless he improves his position sooner rather than later.
Mendes wants to control but Huddlestone manages to buck him off and is now in Mendes's guard! Nice work there by Huddlestone!
Huddlestone looking to pass the guard.
That's three minutes gone in the round.
Mendes can't do much from the bottom at the moment, as Huddlestone controls the pace.
Mendes is working an open guard here, looking to improve his position. No doubt that will leave him open to counters but at least he's being more offensive.
Mendes keeping moving, preventing Huddlestone from controlling successfully.
Huddlestone is looking to advance position but Mendes has hit a scissor sweep - now he's on top in mount!

Mendes prevents Huddlestone from getting the reversal.
That's four minutes gone in the round.
Mendes stands up from the dominant position, so we're back on the feet.
Mendes tries to clinch up against the cage, rushing in to close the distance. Huddlestone manages to break the clinch and circles back to the middle of the mat.
Huddlestone feinted with a counter takedown.
Huddlestone closes the distance and clinches.
Huddlestone has double underhooks and is working for a body lock takedown. He's got it. The fighters land in half guard but Mendes regains guard immediately.
Tom Huddlestone is fighting for a decision here - he's started to take the cautious approach.
Huddlestone postures up to throw the ground and pound strikes but they don't connect.
Mendes is working from a closed guard but he's struggling to control his opponent.
Huddlestone trying to control the position from guard on top but Mendes is wriggling around, looking for whatever he can.
And that's the end of the fight!
Tom Huddlestone showed his dominance in that final round.
Well I reckon that's a shut out for Huddlestone, winning every round. Will the judges agree? They are the ones who matter, even if they are often depressingly incompetent. Over to the ring announcer for the scorecards.
Ladies and gentlemen, after 3 rounds of action, we go to the scorecards for a decision.
Judge David Schapiro scores the fight 30:27
Judge Jonathan Paton scores the fight 30:27
Judge Alyssa Summers scores the fight 30:27
In favor of your winner, by unanimous decision... Tom Huddlestone!
Tom Huddlestone took some time post fight to say the following; 'thank you god!'.
|
|
|
|
|
|
|
|
|
|
|
|
|
|
|
|
|
|
|
|
|
|
|
| S |
C
A |
G |
S |
C
B |
G |
|
S |
C |
G |
|
energy
A | B |
|
hype
A | B |
|
pop
A | B |
|
mgr
A | B |
|
FIGHT
RATING
39% |
|
|
|
|
|
|
