|
|
PBP Commentary |
Coming up we have a welterweight MMA rules bout between Kale Hayabusa (ranked 0 p4p, 0 weight class) and Sean Davis (ranked 0 p4p, 0 weight class). Sean Davis has the better chin. Will he look to stand and bang today?
 |
|
 |
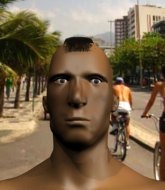
| 182 cm
19
165 lbs
1 - 1 - 0 |
|
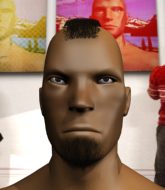
175 cm
22
165 lbs
1 - 0 - 0 |
BJJ Blue Belt
Counter striker
Big heart |
|
BJJ White Belt
Decent boxing
Solid chin |
|
| |
|
Ladies and gentlemen. This fight is 3 rounds, in the welterweight division.
Introducing the fighter to my left, fighting out of the red corner.
With a record of
1 - 1 - 0, fighting out of Las Vegas, Kale Hayabusa!
And introducing the fighter to my right, fighting out of the blue corner.
With a record of
1 - 0 - 0, fighting out of Las Vegas, Sean Davis!
The judges for this bout are Chris Downing, Robert Twigg and Wesley Smith.

The bell rings for round one and we are underway!
Well, he's not going to score with shots like that. A lazy body kick attempt from Davis.
Jeez, both these guys look absolutely knackered already, that's not a good sign!
Davis misses with a low kick.
Davis scores with a nice strike.
Hayabusa throws a combination but it was largely blocked by Davis.
Davis tries to work over Hayabusa's front leg with a kick but Hayabusa checks it.
Hayabusa throws a series of punches but Davis avoids them all with ease.
Davis throws a looping left and ducks down for a takedown. He's got his arms around Hayabusa's waist but Hayabusa gets an underhook and avoids the takedown by throwing Davis off to one side.
Hayabusa avoids a kick to the body.
Hayabusa lands three nice shots there - that looked like it hurt!
Hayabusa moves into range and lands a nice leg kick.
We've had a slow start to the round here - hopefully the action picks up.
Davis misses with a takedown attempt - Hayabusa sprawls well and throws a nice strike on the way out which just misses.
Hayabusa fails to land with a series of punches.
Davis shoots in for a takedown. "Ole!" shouts Hayabusa as he jumps to the side.
Kale Hayabusa has stuffed three takedown attempts in the round now. That's going to take a lot out of Sean Davis.

That's one minute gone in the round.

Davis looks for a takedown. He's got it. We're now in half guard.
Hayabusa is working for an escape here. He's hooked one of Davis's legs and he's managed to sneak out and take Davis's back!
Will Hayabusa go for the finish here or will he try and keep control of the position?
Davis is in bad spot here.
Davis trying to control but he's just got himself in more trouble.
Davis manages to reverse the position and now he's in Hayabusa's guard. Nice work there by Davis.
Hayabusa is striking from the bottom but Davis uses the opportunity to pass into half guard.
Davis stops Hayabusa from getting back to his feet.
Hayabusa trying to hold on to Davis's head to control him but Davis postures up.
Hayabusa slips a foot under and gets full guard. Nice work.

That's two minutes gone in the round.
Hayabusa has control of Davis's left arm, preventing Davis from doing any damage.
Davis lands a couple of elbows.
Hayabusa looking for a sweep. Not yet Hayabusa, not yet.

Hayabusa looking for submissions off his back, moving his hips, looking for an opening.
Hayabusa wants to stand up but Davis is controlling him.

Hayabusa is edging up against the cage. He's using the cage to get back to his feet. Nice work there - the fighters are clinched.
Davis has hold of one of Hayabusa's legs. Hayabusa is fighting the takedown attempt but Davis gets the trip and lands the takedown into guard.
Davis being controlled here momentarily.
Hayabusa wants to get back to his feet but he's too absorbed in his own little project and Davis manages to pass to side control.
Davis sitting and controlling from the half guard.

That's three minutes gone in the round.
Hayabusa holds on for dear life, maintaining half guard for now.
Davis looks towards his corner to check for any instructions. The corner give him nothing to work with, so he cracks Hayabusa with a short hammerfist. I guess that's as good as any advice he could get in this position.
Hayabusa is trying to stand up here but Davis is controlling him well.
Hayabusa tries to strike from the bottom but it doesn't land.
Hayabusa gets back to full guard.
Davis looking to sit in guard and control but Hayabusa gets the butterfly guard and sweeps. He's now in the guard on the top.
Davis really doesn't want to stay on the ground with Hayabusa. If he can't get it back to his feet, it's only a matter of time before he'll be tapping out.
Hayabusa trying to land body shots but he keeps hitting the mat.

That's four minutes gone in the round.
The crowd are getting on the fighters' backs, as the pace has dropped off in the last minute or so.
Hayabusa controlling from the top position.
Davis is trying to keep Hayabusa in close.
Hayabusa wants to control from the top but Davis keeps moving.
Hayabusa slows down the pace of the fight for a moment. He'll need to remain active if he doesn't want to see the fight stood back up.
Hayabusa tries to free his leg and advance position but Davis is retaining full guard.
Hayabusa trying to control but Davis is working from the bottom.
Davis tries to land a sweep but no joy.

Well, the referee has seen enough. Neither fighter is active enough on the ground so he's stood them back up.
Davis tries for a takedown but Hayabusa sees it coming a mile off and avoids it easily.
Hayabusa connects with a solid leg kick.
Hayabusa misses with a takedown attempt
and Davis counters with a nice double leg into half guard.
And that�s the end of the round � the fighters go back to their corners.
Sean Davis dominated that round.
That's time! Hayabusa's corner gives him a slap on the ass as he gets ready to fight.

Hayabusa keeps the fight on the outside.
Hayabusa is looking to slow Davis down with leg kicks.
Davis fails with the takedown
and Hayabusa counters with an inside leg kick.
Hayabusa misses with a double jab

and Davis moves into the clinch.
Hayabusa tries to jump guard but he falls flat on his backside. Davis smiles and moves away.
Davis clinches with his opponent.
Hayabusa jumps guard but Davis stands there with Hayabusa around his waist. Hayabusa gives up and drops back to his feet. We remain in the clinch.

Davis breaks the clinch.
Davis scores a takedown into full mount!
Both fighters are absolutely exhausted here.
Hayabusa is trying desperately to improve position.
That's one minute gone in the round.
The referee warns Hayabusa that he has to improve his position here as he takes two more clean shots to the head.
Davis trying to control but Hayabusa is having none of it.
Hayabusa wants to hold on but Davis pushes him away.
Hayabusa trying desperately to get to his feet.
Hayabusa working to try and regain half guard.
Davis is standing up out of mount! Strange tactic there - he must really want this one on the feet!
Davis throws a leg kick
and Hayabusa counters with a slapping leg kick.
Davis shoots in for a takedown and gets it.
Hayabusa is looking to regain full guard. Not this time though.
That's two minutes gone in the round.
Davis is thwarting Hayabusa's attempts to control the position.
The ref warns both fighters not to hold the cage as they work up against the meshing.
Hayabusa is positioning himself well to prevent Davis advancing to mount.
Davis prevents Hayabusa from improving his position.
Hayabusa is trying to stand.
Hayabusa is trying to maintain the position but Davis is very close to passing his half guard.
Davis stalling.
Hayabusa manages to get to full guard.
Hayabusa controls Davis momentarily but Davis frees himself.
That's three minutes gone in the round.
Davis wants to stand but Hayabusa is controlling his posture from full guard.
Hayabusa keeping moving, preventing Davis from controlling successfully.
Hayabusa pulls Davis in to control the position.
Davis trying to control but Hayabusa is working from the bottom.
Well, the referee has seen enough. Neither fighter is active enough on the ground so he's stood them back up.
Davis closes the distance looking to clinch
and Hayabusa counters with a nice leg kick.
That's four minutes gone in the round.
A few boos can be heard. I'm sure they will multiply if the fighters don't pick up the pace.
Davis tries for a takedown but Hayabusa circles away easily
and Hayabusa counters with a flying knee. Nice.
Hayabusa scores with a leg kick.
Davis throws a lazy body kick
and Hayabusa counters with a slapping leg kick.
Davis throws a looping left and ducks down for a takedown. He's got his arms around Hayabusa's waist but Hayabusa gets an underhook and avoids the takedown by throwing Davis off to one side.
Kale Hayabusa has stuffed three takedown attempts in the round now. That's going to take a lot out of Sean Davis.
Hayabusa darts in trying to clinch
and Davis counters with a takedown into side control.
Hayabusa holds on to Davis's head and controls the position momentarily.
Davis is looking for a kimura. He might have it! No, Hayabusa has escaped the position, nice work there.
Hayabusa is trying to buck Davis off.
And that�s the end of the round � the fighters go back to their corners.
Sean Davis showed his class in that round. I'd imagine he'll take it on all the scorecards.
The fighters' corners scream their final instructions, as the referee calls time. Here we go, back to the action! Ladies and gentlemen, this is the final round!

Davis drives through with a really nice takedown into side control.
Davis trying to control the action but Hayabusa is working from the bottom.
Davis working away.
Davis staying calm.
Hayabusa is trying to control Davis's posture but Davis avoids it.
Both fighters are breathing heavily.
Hayabusa is looking for a sweep.
That's one minute gone in the round.
Davis wants to lay and pray for a moment but Hayabusa keeps working.
Neither fighter is doing enough for the referee's liking and he's decided to stand them back up.
Hayabusa throws a nice inside leg kick.
Davis closes the distance, clinches up and gets a nice trip takedown into side control. Very smooth.
You can see the frustration on Hayabusa's face, being in this tough position on the bottom.
Davis wants to work for a kimura but he's foiled early by Hayabusa, who protects the arm well.
Hayabusa is sneaking out the side here. He's bucked Davis off and has taken his back!
Hayabusa controlling well, preventing Davis from escaping the position.
Hayabusa tries to keep control of the position but Davis is staying busy.
Davis controlling his opponent's hands, preventing the submission attempt.
Hayabusa is looking cool and calm here, just waiting for a good opportunity to attack and finish the fight from this dominant position.
Kale Hayabusa has stepped it up - he knows he needs a finish here!
That's two minutes gone in the round.
Davis trying to control the hands but Hayabusa breaks the grip.
Davis has the hand control, trying to stop the rear naked choke.
Hayabusa trying to control momentarily.
The fighters are pressed up against the cage, both looking to find a bit of space to work.
Davis holding both Hayabusa 's hands and preventing any damage.
Hayabusa is working for the choke. He's slipped one arm under the chin. Davis has to defend the other arm for all he's worth... but Hayabusa has managed to get that arm free too and he's tightening the choke! Davis taps out and looks absolutely disgusted with himself. Hayabusa doesn't care though - he's delighted!
Ladies and gentlemen, after 2:57 of round 3, we have a winner by way of Submission (RNC). Kale Hayabusa!
|
|
|
|
|
|
|
|
|
|
|
|
|
|
|
|
|
|
|
|
|
|
|
| S |
C
A |
G |
S |
C
B |
G |
|
S |
C |
G |
|
energy
A | B |
|
hype
A | B |
|
pop
A | B |
|
mgr
A | B |
|
FIGHT
RATING
73% |
|
|
|
|
|
|

