|
|
PBP Commentary |
Coming up we have a super heavyweight MMA rules bout between Atilla II (ranked 0 p4p, 0 weight class) and Kingston Young (ranked 0 p4p, 0 weight class). The crowd giving both fighters a great reception on their way into the arena. That's good to see.
 |
|
 |
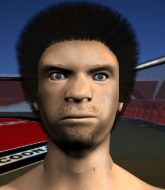
| 223 cm
25
289 lbs
0 - 0 - 0 |
|
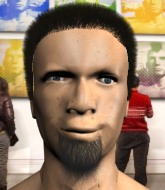
225 cm
18
300 lbs
0 - 10 - 0 |
BJJ White Belt
Solid boxing
Granite chin |
|
BJJ Blue Belt
Brawler
Knockout power |
|
| |
|
Ladies and gentlemen. This fight is 3 rounds, in the super heavyweight division.
Introducing the fighter to my left, fighting out of the red corner.
With a record of
0 - 0 - 0, fighting out of Hilo, Atilla II!
And introducing the fighter to my right, fighting out of the blue corner.
With a record of
0 - 10 - 0, fighting out of Hilo, Kingston Young!
The judges for this bout are Josh West, Ryoma Takatsuka and Micheangelo Fripello.

The bell rings for round one and we are underway!
II lands a nice hook to Young's body. Young takes it in his stride and looks to land his own strikes.
II throws a right and a left that Young avoids nicely.
And Young tries to counter it with a takedown but II pushes his down on his head and steps out.

Young gets caught on his heels momentarily as he allows II to score an easy takedown into full guard.

Young is working an open guard so II takes the opportunity to get back to his feet.
Nice sprawl there from II as Young shoots in.
II shoots in for a takedown. He's persisting with it as Young sprawls well. Young wins this battle and keeps the fight standing. II gets slowly back to his feet.
II backing away here, and Young unleashes a leg kick that just misses.
We've had a slow start to the round here - hopefully the action picks up.
A momentary lapse in concentration from Young enables II to shoot in and score with a neat double leg. Young manages to secure a closed guard as the fighters hit the mat.
Young trying to control the position.

That's one minute gone in the round.
II lands a couple of elbows.

Young working from the bottom, still in full guard. He's managed to get a loose triangle. II doesn't seem to be doing much to defend here, obviously he feels comfortable in the position. II manages to throw the legs off his shoulder and he's back into guard - no problem.
II throwing elbows and punches but not connecting, as Young works some decent striking defense from the bottom.
II trying to pass the guard but can't manage it just yet.
Young trying to control the position.
Young utilising some decent striking defenses from the guard, preventing the ground and pound.

That's two minutes gone in the round.
A few boos can be heard. I'm sure they will multiply if the fighters don't pick up the pace.
II wants to control from the top but Young keeps moving.
The fighters are pressed up against the cage, both looking to find a bit of space to work.
Young not looking particularly offensive just at the moment.
II engaging in some classic timewasting tactics.
Young working a defensive guard here.
II engaging in some classic timewasting tactics.

The referee has stepped in and called for a break in the action. We'll restart on the feet.
II feints and as Young raises his hands in defense, II changes levels and drives through with a takedown into guard.

That's three minutes gone in the round.
Young pulls II in close to prevent any damage.
Young is working actively off his back, looking to secure an arm or perhaps work for a triangle.
II loading up with the ground and pound but he's missing more than he's landing in this flurry.
Young is working an open guard so II takes the opportunity to get back to his feet.
Young shoots in for a double leg but II sprawls well. That's going to sap some energy.

That's four minutes gone in the round.
A few boos can be heard. I'm sure they will multiply if the fighters don't pick up the pace.

II fakes with an overhand right and moves in to clinch with Young, pushing him back against the cage.
Young jumps guard but II turns him against the cage and keeps the fight standing.
Atilla II has stuffed three takedown attempts in the round now. That's going to take a lot out of Kingston Young.
Young jumps guard but II turns him against the cage and keeps the fight standing.
II wants to take the fight to the mat but Young manages to get underhooks and keep the fight in the clinch.
II manages to pull guard.
II is breathing heavily.
II keeping moving, preventing Young from controlling successfully.
II keeping full guard, as Young tries to pass.
A big thud reverberates around the arena there as Young accidentally thumps the mat. Hopefully he's not broken his hand.
Boooooooooooooooooooo!!! God, this has been a terrible round. Come on you two, sort yourselves out!
II manages to wriggle out and sneak his way back up to his feet, so the fighters are now clinched up against the cage.
And that�s the end of the round � the fighters go back to their corners.
Atilla II dominated that round.
That's time! Back to the action!

Young closes this distance looking for a takedown but II circles away.
II closes this distance looking for a takedown but Young circles away.
II is really dominating this fight. Is there anything that Young can do to turn this around?
II looks for a takedown here. Will he get it? Young is fending him off so far but II persists. Nope, Young circles away and we're back to standing.
Some wild striking there from II.
Young wants to clinch up but II keeps it at a distance.
II pulls out of a head kick attempt.
II tries to close the distance and clinch up but Young swats him away and circles back towards the center.
II misses with a two punch combination.
Young unleashes a big counter combination but II bobs and weaves and avoids any damage.
We've had a slow start to the round here - hopefully the action picks up.

Young closes the distance and presses his opponent up against the cage.
Young tries a knee to the head but he's missed.
Young holding his opponent close, against the cage.
Both fighters are absolutely exhausted here.

Young manages to pull guard. Let's see whether he can land a sub off his back.
The ref warns both fighters not to hold the cage as they work up against the meshing.
That's one minute gone in the round.
II throws a strike but Young rolls with it and manages to sweep. Now he's in guard on top.

II striking off his back but it's not causing Young any problems.
II trying to control the position.
Young is pushing down on II's leg trying to pass to half guard. II is fighting to maintain full guard but Young has managed to sneak the leg through.
Young is trying to control. II wants to improve his position but can't escape this time.
Young thumps the canvas. Not on purpose obviously - he just missed II's head.
Still in half guard, Young seems content to control.
II trying to control from the bottom.
That's two minutes gone in the round.
II wants to get back to full guard but Young has mounted him!
Young thuds his fist into the canvas! Oooouch!
Young working to secure an arm triangle but it's not happening for him just yet.
II reaches up to try and control the position but Young seems to have an arm triangle now! Uh oh! II rolls and tries to escape and now Young has his back!
II staying busy and making it hard for Young to control.
II showing good submission defense here.
Young trying to control.
That's three minutes gone in the round.
II is very frustrated here, being controlled quite effectively by Young.
Young is looking to finish the fight by rear naked choke. II knows exactly what he's got planned though, so he's defending well. Maybe a few strikes would soften II for a finish.
Will Young go for the finish here or will he try and keep control of the position?
II trying to control but he's just got himself in more trouble.
That's four minutes gone in the round.
Neither fighter has done anything of merit for a good minute or two here and the crowd are not happy about it.
II is covering up but some of the strikes from Young are getting through and doing damage.
II defends a rear naked choke attempt by controlling one of Young's arms.
Young is persistently looking for the submission but II is defending it well.
II covering up well under a barage of strikes.
Boooooooooooooooooooo!!! God, this has been a terrible round. Come on you two, sort yourselves out!
Young is working hard for the rear naked choke here.
And that�s the end of the round � the fighters go back to their corners.
Kingston Young showed his class in that round. I'd imagine he'll take it on all the scorecards.
The referee calls time. The cornermen exit stage left and we're back to business. This is the final round!

Young is looking to clinch but II is avoiding it.
A counter left hand to the body from II misses its target.
Young gets tackled into the cage by II. II maintains the clinch.
Young tries to work over II's body with a swooping hook but it only glances the target.
Young is trying to work out of this bad position, with his back against the cage.

Young manages to break the clinch.
Nice body punch from II.
No luck with that takedown attempt from II.
Young fails miserably with a takedown attempt.
We've had a slow start to the round here - hopefully the action picks up.
II shoots for a double leg takedown but Young sprawls well. He's pushed II's face into the mat and manages to get back to his feet relatively easily.
II shoots in for a takedown. "Ole!" shouts Young as he jumps to the side.
That's three failed takedown attempts in the round for Atilla II. That's going to take a lot out of him.
Both fighters are breathing heavily.
That's one minute gone in the round.
Young tries to clinch up against the cage, rushing in to close the distance. II manages to break the clinch and circles back to the middle of the mat.
II looks to clinch
and Young counters with a series of strikes. II will be more careful next time no doubt.
Young shoots in looking for a takedown. II tries to sprawl out of it but Young keeps driving through. The fighters are pinned against the cage. II manages to get underhooks and after a bit of a struggle, circles away and we're back to standing.
Young looks for a takedown but II sprawls well.
Young moves into the clinch.
Both fighters working to control the clinch.
II has Young pressed up against the cage and is working for takedown. Young manages to improve position though and keeps the fight standing.
That's two minutes gone in the round.
Young lands with a short punch from the clinch.
Young lands a hook that snaps the head of II backwards.
Young trying to stall but II improves his position.
II trying to control the position but instead, Young has worked for underhooks and has pushed II into the cage.
II wants to strike at distance but he can't break free of the clinch.
Young is trying to pull guard but II has him pressed against the cage.
II tries to pull guard but can't drag his opponent to the mat. Young just stands there and leans against the cage.
Young tries for a takedown. No joy.
Young breaks the clinch and we're back to striking at distance.
Atilla II is winning the standup battle so far.
That's three minutes gone in the round.
Young shoots in for a takedown. He's persisting with it as II sprawls well. II wins this battle and keeps the fight standing. Young gets slowly back to his feet.
Young is looking to clinch.
Young rushes II and presses him up against the cage.
Young will no doubt start fighting again in a minute but for now he's just having a little rest, leaning II up against the cage.
II jumps guard.
II trying to keep a closed guard but Young is proving a slippery customer.
Young throws a big right hand that misses.
That's four minutes gone in the round.
II trying to control the position.
Young trying to control but II is working from the bottom.
Young throwing elbows and punches but not connecting, as II works some decent striking defense from the bottom.
Young wants to control from the top but II keeps moving.
Boooooooooooooooooooo!!! God, this has been a terrible round. Come on you two, sort yourselves out!
Young has decided he wants to stand but the closed guard of II is proving hard to escape from.
The referee decides to stand the fighters back up.
And that's the end of the fight!
Kingston Young comfortably won the final round on my scorecard.
I think Young has won this one but let's see whether the judges agree with me. Over to the ring announcer for the scorecards.
Ladies and gentlemen, after 3 rounds of action, we go to the scorecards for a decision.
Judge Josh West scores the fight 28:28
Judge Ryoma Takatsuka scores the fight 28:29
Judge Micheangelo Fripello scores the fight 28:28
The fight is ruled a majority draw!
|
|
|
|
|
|
|
|
|
|
|
|
|
|
|
|
|
|
|
|
|
|
|
| S |
C
A |
G |
S |
C
B |
G |
|
S |
C |
G |
|
energy
A | B |
|
hype
A | B |
|
pop
A | B |
|
mgr
A | B |
|
FIGHT
RATING
27% |
|
|
|
|
|
|
