|
|
PBP Commentary |
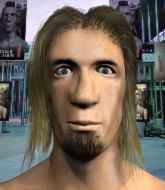
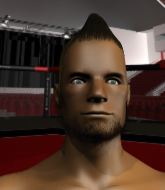
Coming up we have a bantamweight MMA rules bout between Shawn Gilmore (ranked 0 p4p, 0 weight class) and Kto Rycerz (ranked 0 p4p, 0 weight class). Kto Rycerz has the power to score a knockout today if he connects clean with Shawn Gilmore's chin.
 |
|
 |
| 220 cm
18
140 lbs
2 - 3 - 0 |
|
200 cm
18
130 lbs
0 - 1 - 0 |
BJJ Blue Belt
Counter fighter
Cuts easily |
|
BJJ Blue Belt
Brawler
Granite chin |
|
| |
|
Ladies and gentlemen. This fight is 3 rounds, in the bantamweight division.
Introducing the fighter to my left, fighting out of the red corner.
With a record of
2 - 3 - 0, fighting out of Las Vegas, Shawn Gilmore!
And introducing the fighter to my right, fighting out of the blue corner.
With a record of
0 - 1 - 0, fighting out of Las Vegas, Kto Rycerz!
The judges for this bout are George Francis, Robert Twigg and Chris Downing.

The bell rings for round one and we are underway!

Rycerz shoots in and gets a takedown into half guard. Rycerz showed some decent athleticism there.
Still in half guard, Rycerz seems content to control.
Rycerz thumps the canvas. Not on purpose obviously - he just missed Gilmore's head.
Rycerz trying to mount his opponent but Gilmore defends it.
Gilmore has no desire to be mounted, so is trying to control. Rycerz is working away from the top position though.
We've had a slow start to the round here - hopefully the action picks up.
Rycerz is keen to just control but Gilmore is a slippery customer.
Gilmore tries to roll over but Rycerz keeps him under control.
It looks like the ref is thinking about a standup.

That's one minute gone in the round.
Rycerz prevents Gilmore from standing back up.

The referee has decided to stand the fighters back up, so we'll restart on the feet.
Rycerz fails to land with the punch combination there - jab, cross, hook, miss, miss, miss.
Gilmore is trying to close the distance and clinch up, after that failed offence from Rycerz.
Gilmore tries to sprawl but Rycerz drives through with a takedown into half guard.

Rycerz decides to stand up.
Gilmore throws a wild body kick that Rycerz sees coming a mile off.
Gilmore dodges the punch combination from Rycerz.
Rycerz fails to land with the punch combination there - jab, cross, hook, miss, miss, miss.

Rycerz fakes with an overhand right and moves in to clinch with Gilmore, pushing him back against the cage.

That's two minutes gone in the round.
Rycerz has clasped his hands together around Gilmore's back... aaand, he's got a takedown into side control. Nicely done.
Rycerz throwing ground and pound but whilst doing so, he forgets to control position and Gilmore works his way back to half guard. Good composure under pressure.
Rycerz wants to pass the guard but Gilmore is defending well.
Rycerz is controlling the pace.
Fantastic stuff here - a very entertaining period of action, which has drawn cheers from the crowd.

Gilmore is defending against the submission attempts here by Rycerz.

That's three minutes gone in the round.
Gilmore blocking the ground and pound attempt from Rycerz.
Rycerz stalling.
Rycerz prevents Gilmore from standing back up.

That's four minutes gone in the round.
The crowd are showing their displeasure at the lack of action as loud boos ring out around the arena.
Rycerz sitting in half guard, looking to land shots. Gilmore defending well though.
Gilmore is looking to get back to is feet but Rycerz passes into side control.
Gilmore is not content to let Rycerz control the position.
Rycerz working away.
Boooooooooooooooooooo!!! God, this has been a terrible round. Come on you two, sort yourselves out!
Rycerz with the ground and pound but Gilmore regains half guard under the barage of strikes.
And that�s the end of the round � the fighters go back to their corners.
Kto Rycerz dominated that round.
The corners get their ten second warning. Both fighters stand from their stools and stare eachother down, ready to get back to the action.

Rycerz takes a head kick and shrugs it off.
Excellent takedown into side control there by Rycerz.
Rycerz has had enough of the ground for now and decides to stand.
Rycerz takes the fight into the clinch.
We've had a slow start to the round here - hopefully the action picks up.
Rycerz wants to break free but Gilmore has control.
Rycerz pushes Gilmore back against the cage and unloads with a body punch.
That's one minute gone in the round.
Rycerz tightens his grip and picks Gilmore up, before dumping him to the ground. Gilmore manages to land in guard.
Rycerz trying to control the position from guard on top but Gilmore is wriggling around, looking for whatever he can.
Gilmore is trying to control the position from the bottom.
The fighters are pressed up against the cage, both looking to find a bit of space to work.
Rycerz throws a big elbow that misses.
Rycerz controls the pace of the fight for a moment.
That's two minutes gone in the round.
Rycerz trying to control the position from guard on top but Gilmore is wriggling around, looking for whatever he can.
Rycerz has been the more effective fighter overall so far.
Rycerz might have to switch it up a bit here because his efforts to control Gilmore haven't been going to plan, at least at the current moment in time.
Gilmore will need to keep those long limbs tucked in whilst he's on the ground, to prevent any submissions.
Rycerz tries to free his leg and advance position but Gilmore is retaining full guard.
Rycerz with a flurry of punches that miss.
We may be looking at a referee standup if the pace doesn't pick up soon.
Gilmore controls Rycerz momentarily but Rycerz frees himself.
The referee decides to stand the fighters back up.
Rycerz shoots in with a lovely double leg takedown. Gilmore manages to land in full guard to minimise the damage.
That's three minutes gone in the round.
Rycerz wants to get up but he can't break Gilmore's closed guard. He needs to be careful trying to break the legs open, as he's open to submissions here.
Rycerz sitting in guard, not really doing much.
Rycerz gets to his feet - Gilmore follows without any prompting.
Rycerz shoots in and gets a takedown into half guard. Rycerz showed some decent athleticism there.
Gilmore really does look like a pencil wearing a pair of gloves. Let's hope he has a gameplan to suit that ridiculous body shape.
Rycerz looks to land a strike but Gilmore avoids it nicely and regains full guard.
That's four minutes gone in the round.
A few boos can be heard. I'm sure they will multiply if the fighters don't pick up the pace.
Rycerz throwing strikes but missing.
Rycerz drops back, looking for a kneebar! Gilmore looks panicked! The fighters roll across the mat, one looking to finish, one looking to escape. Gilmore looks to have wriggled free... Yes, he's got his leg free and he's dived into side control! Good work there from Gilmore!

Gilmore wants to control but Rycerz is keeping him busy.
Boooooooooooooooooooo!!! God, this has been a terrible round. Come on you two, sort yourselves out!
Rycerz struggling a bit here.
And that�s the end of the round � the fighters go back to their corners.
Kto Rycerz showed his class in that round. I'd imagine he'll take it on all the scorecards.
Well, the break between rounds is over. Let's get back to the scrappin! The crowd applaud as we get ready to start the final round!

Gilmore lands a body shot.
Rycerz is looking for a takedown here. He's shot in and has managed to get it, finishing up in Gilmore's half guard.

Gilmore is rocked!
Kto Rycerz has got the better of the ground game so far.
Rycerz trying to control the pace.
Oh Gilmore is still in real trouble! Will he be able to recover?!!
Rycerz seems to be looking for submissions.
Rycerz is thinking about going for an arm triangle but he can't free his leg.
Rycerz works his way into side control.
A lull in the action here as Rycerz stalls from top position.
Rycerz works to advance to full mount. Gilmore defends for a few seconds but eventually he succumbs.
Rycerz landing strikes, looking to finish!
Rycerz working to secure an arm triangle but it's not happening for him just yet.
Gilmore wriggling around on the bottom manages to avoid the strikes thrown by Rycerz.
Rycerz controlling his opponent.
Rycerz punching from mount but Gilmore doing a good job of avoiding damage.
Rycerz scoring with strikes but Gilmore is staying in there.
The crowd are loving this. Great action here.
Rycerz controlling the pace for now.
Rycerz's corner are shouting for him to control the position and he seems happy to oblige.
Both fighters are breathing heavily.
Let's hope that Rycerz has the urge to step up the pace any second now because for the last 15 or 20 seconds he's just been holding on tight.
More stalling from Rycerz.
Gilmore blocking the ground and pound.
That's one minute gone in the round.
Rycerz thowing strikes but they're hitting the gloves, not doing any damage.
Rycerz throws an elbow from mount that misses. Lucky escape for Gilmore because Rycerz loaded up on that one.
The ref warns both fighters not to hold the cage as they work up against the meshing.
Rycerz has his opponent pinned against the cage, landing some nasty ground and pound that is really making a bit of a mess out of Gilmore's face.
Rycerz has his opponent pinned against the cage, landing some nasty ground and pound that is really making a bit of a mess out of Gilmore's face.
Rycerz looking for a guillotine from mount but Gilmore is having none of it.
Rycerz is in full mount, looking to secure a guillotine but Gilmore is surviving well by controlling Rycerz's body position as best he can.
Rycerz controlling from the full mount.
Rycerz unloading with bombs!
Gilmore is in a horrible position here, under a barrage of strikes, he's managing to avoid any damage.
Poor strikes thrown by Rycerz there. More accuracy and less frantic strikes would help!
Rycerz with the ground and pound from mount.
Rycerz throwing sloppy strikes here. Perhaps if he tightened up his striking from such a dominant position, he'd be able to finish easier.
Rycerz punching from mount but Gilmore doing a good job of avoiding damage.
Gilmore gets back to half guard.
Rycerz missing with some ground and pound from the half guard.
Gilmore is looking to regain full guard. Not this time though.
Gilmore wants to control the action here but instead Rycerz manages to pass to full mount!
The fans in attendance giving it up for the two fighters, who have really let it all hang out in the last minute or so!
Rycerz controlling the position easily from mount.
Rycerz throwing sloppy strikes, which aren't doing any damage.
Rycerz looking to control and managing it successfully.
Rycerz misses with a series of strikes from mount. He'll no doubt be working on his ground and pound when he gets back to the gym.
Rycerz working to secure an arm triangle but it's not happening for him just yet.
Rycerz thowing shots but they're missing.
Rycerz with some aggressive grappling here. He's looking for submissions here, rather than waiting for the opportunity to counter.
Gilmore avoids a series of strikes thrown by Rycerz.
Rycerz lands an elbow that was bordering on illegal but the referee lets it go with a warning.
Rycerz throwing sloppy strikes here. Perhaps if he tightened up his striking from such a dominant position, he'd be able to finish easier.
Rycerz unloading with bombs!
Rycerz unloads with some shots from mount but Gilmore bucks and avoids them well.
Rycerz has the superior BJJ but he's also working some ground strikes into his gameplan.
Gilmore wriggling around on the bottom manages to avoid the strikes thrown by Rycerz.
Rycerz unloads with some shots from mount but Gilmore bucks and avoids them well.
Rycerz has control of Gilmore's right arm, working for a kimura. It's a bit of a token attempt though and Gilmore regains control of the situation pretty easily.
That's two minutes gone in the round.
Gilmore defends a decent attempt at a guillotine from Rycerz.
Rycerz is going oldschool here, as he tries to force Gilmore to tap using a forearm choke. This isn't 1993 though, so Gilmore shrugs it off.
Rycerz with the ground and pound from mount.
Rycerz throwing sloppy strikes here. Perhaps if he tightened up his striking from such a dominant position, he'd be able to finish easier.
Gilmore is trying to stand but he's just given Rycerz his back.
Gilmore showing good submission defense here.
Rycerz lands an elbow to the side of the head.
Rycerz misses with a punch to the head.
Rycerz is working hard for the rear naked choke here.
Rycerz has his opponent's back and is working for the choke.
Rycerz throwing wild punches that miss their target.
Rycerz is remaining active here, looking for the choke. The more discerning members of the crowd will appreciate his efforts.
Gilmore fending off the submission attempt from Rycerz.
Rycerz is punishing Gilmore with strikes - can he finish him?!
Gilmore tries to roll but Rycerz sticks to his back.
Rycerz looking for the choke but no joy.
Gilmore preventing the rear naked choke attempt from Rycerz.
Rycerz struggling to land strikes to the head as Gilmore covers up.
Rycerz looking for the choke from the back.
Rycerz is working really hard to secure the rear naked choke. Gilmore defends successfully for a significant amount of time. Both fighters are looking very determined.
Rycerz tightening his grip on Gilmore, looking for the choke.
Rycerz working for a RNC but it's not happening just yet.
Rycerz is looking to finish the fight by rear naked choke. Gilmore knows exactly what he's got planned though, so he's defending well. Maybe a few strikes would soften Gilmore for a finish.
Gilmore defends a rear naked choke attempt by controlling one of Rycerz's arms.
That's three minutes gone in the round.
Gilmore avoids the strikes from Rycerz.
Rycerz controlling from the back.
Gilmore is displaying good submission defense - not really looking in danger of submitting to the rear naked choke at the moment. That could change in an instant of course if Rycerz gets his way!
Rycerz is staying calm and holding on to the back position, whilst working on a rear naked choke. Gilmore is defending well though. Rycerz let's go of the attempt for now.
Gilmore wants to get back to his feet.
Gilmore is staying cool under pressure, defending well against the rear naked choke attempt from his opponent.
Rycerz is working for the rear naked choke. He has one arm under the chin but Gilmore has hold of the other arm. A bit of a stalemate here.
Gilmore is displaying good submission defense - not really looking in danger of submitting to the rear naked choke at the moment. That could change in an instant of course if Rycerz gets his way!
Rycerz has his opponent's back and is working for the choke.
Rycerz is persistently looking for the submission but Gilmore is defending it well.
Rycerz has the hooks sunk in and you can see the will to fight slowly draining out of Gilmore's body.
Rycerz is looking to finish the fight by rear naked choke. Gilmore knows exactly what he's got planned though, so he's defending well. Maybe a few strikes would soften Gilmore for a finish.
Rycerz is controlling his opponent, waiting for an opportunity to finish.
Rycerz is remaining active here, looking for the choke. The more discerning members of the crowd will appreciate his efforts.
Rycerz is looking to finish the fight by rear naked choke. Gilmore knows exactly what he's got planned though, so he's defending well. Maybe a few strikes would soften Gilmore for a finish.
What can Gilmore do to escape this position? He's going to have to figure it out pretty quick if he wants to stay in the fight!
Rycerz lands shots from the back.
Gilmore is displaying good submission defense - not really looking in danger of submitting to the rear naked choke at the moment. That could change in an instant of course if Rycerz gets his way!
Rycerz is punishing Gilmore with strikes - can he finish him?!
That's four minutes gone in the round.
Rycerz patiently working for the choke. Which fighter will keep their nerve here?
Rycerz is controlling his opponent, waiting for an opportunity to finish.
Rycerz misses with an elbow to the head.
Rycerz loading up with punches from the back mount - how long can Gilmore hold on?
Rycerz is working the ground and pound. Can Gilmore escape?
The crowd cheering loudly, showing their appreciation for the quality fight we're seeing here.
Rycerz controls the position.
Gilmore defends a rear naked choke attempt by controlling one of Rycerz's arms.
Gilmore wants to escape the position.
Rycerz punches the canvas rather than the man.
Gilmore covering up well under a barage of strikes.
Rycerz biding his time, controlling Gilmore.
Rycerz is working hard for the rear naked choke here.
Rycerz punches Gilmore on the ear.
Rycerz looking to break Gilmore's wrist control so he can sink in the choke. Gilmore remaining controlled and patient though - he really has to keep calm otherwise Rycerz will wrap this one up with the rear naked choke!
Gilmore is staying cool under pressure, defending well against the rear naked choke attempt from his opponent.
Gilmore covering up well under a series of strikes from Rycerz.
Rycerz really has the hooks in deep now - there seems like no escape for Gilmore.
Rycerz looking to break Gilmore's wrist control so he can sink in the choke. Gilmore remaining controlled and patient though - he really has to keep calm otherwise Rycerz will wrap this one up with the rear naked choke!
The crowd applaud the fighters' efforts here as the round comes to an end.
Rycerz lands a couple of good shots to his opponent's body and a final shot to the head. Good little attack there by Rycerz.
Rycerz is staying calm and holding on to the back position, whilst working on a rear naked choke. Gilmore is defending well though. Rycerz let's go of the attempt for now.
Rycerz controlling from the back.
Rycerz looking for the choke but no joy.
Shawn Gilmore has stepped it up - he knows he needs a finish here!
Kto Rycerz is fighting for a decision - hopefully he's judged it right and he's actually winning the fight.
Rycerz has Gilmore flattened out and is raining down punches.
And that's the end of the fight!
Kto Rycerz comfortably won the final round on my scorecard.
Well Rycerz has outworked and out performed his opponent in all aspects of the game today. He was simply too good and the decision should be no more than a formality. Over to the ring announcer for the scorecards.
Ladies and gentlemen, after 3 rounds of action, we go to the scorecards for a decision.
Judge George Francis scores the fight 26:30
Judge Robert Twigg scores the fight 26:30
Judge Chris Downing scores the fight 26:30
In favor of your winner, by unanimous decision... Kto Rycerz!
A victorious Kto Rycerz thanked his army of followers in his post fight interview, telling people to make sure they follow him on Twitter.
|
|
|
|
|
|
|
|
|
|
|
|
|
|
|
|
|
|
|
|
|
|
|
| S |
C
A |
G |
S |
C
B |
G |
|
S |
C |
G |
|
energy
A | B |
|
hype
A | B |
|
pop
A | B |
|
mgr
A | B |
|
FIGHT
RATING
47% |
|
|
|
|
|
|
