|
|
PBP Commentary |
Coming up we have a lightweight MMA rules bout between Modesto Price (ranked 0 p4p, 0 weight class) and Ian Hames (ranked 0 p4p, 0 weight class). Both fighters really staring each other down here, as Ian Hames enters the cage!
 |
|
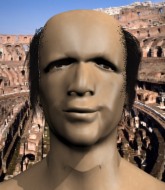 |
| 215 cm
18
161 lbs
1 - 2 - 0 |
|
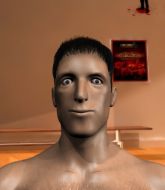
170 cm
21
155 lbs
0 - 1 - 0 |
BJJ Blue Belt
Counter fighter
Cuts easily |
|
BJJ White Belt
Decent boxing
Determined |
|
| |
|
Ladies and gentlemen. This fight is 3 rounds, in the lightweight division.
Introducing the fighter to my left, fighting out of the red corner.
With a record of
1 - 2 - 0, fighting out of Sydney, Modesto Price!
And introducing the fighter to my right, fighting out of the blue corner.
With a record of
0 - 1 - 0, fighting out of Sydney, Ian Hames!
The judges for this bout are Ron Honeybunn, Summer Carpenter and Donatello Bradman.

The bell rings for round one and we are underway!

Hames closes the distance and after a bit of a stuggle, scores a takedown into Price's guard.

Hames drops back for a leg! It's a sloppy attempt though and Hames jumps back into guard quickly, to retain the dominant position.
Hames postures up.
Hames looking to pass the guard.
Price trying to control the position.
Price is looking to get back to his feet but can't, whilst Hames is controlling him.
Price thows some rabbit punches from the bottom but they don't do any damage.
The referee is asking the fighters to pick up the pace.
We've had a slow start to the round here - hopefully the action picks up.
Price wants to stand up but Hames is controlling him.

The referee decides to stand the fighters back up.
Price gets caught on his heels momentarily as he allows Hames to score an easy takedown into full guard.
Hames scores with a decent looking elbow strike.

That's one minute gone in the round.
Hames trying to control but Price is working from the bottom.
Price is looking to stand up but Hames isn't so interested in that idea.
Price is working the butterfly guard. He manages to land a nice scissor sweep and is now in half guard on the top. Nice move.


Price is sneakily working for an arm triangle but Hames sees it coming and defends easily.
Hames wants to improve his position but Price is controlling well.
Price missing with the ground and pound from half guard.
Price seems to be working for a kimura but Hames defends the submission attempt.

That's two minutes gone in the round.
Price looks to score some points with some ground and pound.
Price prevents Hames from standing back up.
Hames looking to work for a kimura from the bottom.
The ref warns both fighters not to hold the cage as they work up against the meshing.
Price is trying for a guillotine from the top but the pressure isn't in the right place so Hames is just riding it out for now. Price eventually gives up the hold.
The fighters are pressed up against the cage, both looking to find a bit of space to work.
Price is trying to work for a kimura but Hames is defending well.

That's three minutes gone in the round.
Hames tries to roll over but Price keeps him under control.
Price wants to take a breather but Hames is having none of it.

That's four minutes gone in the round.
The crowd are showing their displeasure at the lack of action as loud boos ring out around the arena.
Price is looking for an arm triangle, whilst trying to pass to side control. Hames doesn't seem that keen to cooperate though. No luck this time Price.
Hames tries to roll over but Price keeps him under control.
Boooooooooooooooooooo!!! God, this has been a terrible round. Come on you two, sort yourselves out!
Price missing with some ground and pound from the half guard.
The referee claps his hands together and tells the fighters to work.
And that�s the end of the round � the fighters go back to their corners.
A close round but Ian Hames will probably get the nod.
That's the end of the interval. I'm sure that seemed a lot quicker than a minute for our two fighters! Back to the action.

Hames drives through with a takedown into Price's guard. Let's see what he can do from the top position.
Price trying to control the position.
Hames looking to pass the guard.
Hames is working the ground and pound from guard. He might want to try advancing position though to get more of an impact.
Price looking for a sweep. Not yet Price, not yet.
Price keeping moving, preventing Hames from controlling successfully.
Price tries to strike from the bottom.
We've had a slow start to the round here - hopefully the action picks up.
Price wants to stand but Hames is controlling the position.
Price throwing strikes off his back to little effect.
Hames trying to control the position from guard on top but Price is wriggling around, looking for whatever he can.
Hames throwing strikes from guard but Price blocks nicely.
Ian Hames has got the better of the ground game so far.
That's one minute gone in the round.
Price has momentary wrist control but Hames slips an elbow through the middle.
Hames wants to pass the guard but Price is keeping the position.
Hames postures up.
Hames connects with a couple of short punches.
Hames distracts Price with his right hand and drops a big elbow with his other arm.

Price is rocked!
Hames working some strikes from top position.
Oh Price is still in real trouble! Will he be able to recover?!!
Hames has been the more effective fighter overall so far.
Hames lands a couple of decent looking shots.
Hames thinks about going for a leg but decides against it, in order to maintain the position.
Hames is breathing heavily.
Hames tries to free his leg and advance position but Price is retaining full guard.
Price trying to control the position.
Hames is working the ground and pound from guard. He might want to try advancing position though to get more of an impact.
Hames pressing down on his opponent's thigh, looking to pass guard. Price is keeping the position for now.
Price is trying to stand up but he's not managed so far.
Hames distracts Price with his right hand and drops a big elbow with his other arm.
Hames trying to control the position from guard on top but Price is wriggling around, looking for whatever he can.
Price wants to stand and escape but Hames is having none of it.

Price pushes Hames off for just long enough to get back to his feet. Very athletic spring there.
Price fakes high and shoots in for a takedown but Hames avoids it really well and circles away.
Hames scores a trip takedown into side control. Nice.
Price wants to get back to his feet but Hames drags him back down.
Hames wants to control but Price is keeping him busy.
That's two minutes gone in the round.
This is a great period of action - very entertaining stuff!
Hames is looking for a kimura. He might have it! No, Price has escaped the position, nice work there.
Price wants to get back to his feet but Hames drags him back down.
Hames looking for an arm triangle but it's way too loose to do anything.
Hames trying to control the action but Price is working from the bottom.
Hames tries for a kimura. Not really close to a finish though.
Price is trying to stand back up. He's worked his way up against the cage but Hames has just dragged him back down to the mat.
Hames is trying to get an arm triangle but Price is defending well.
Hames sitting in side control, looking to soften his opponent up with elbows and hammerfists but Price is avoiding damage well and looking to escape the position.
Price is trying to buck Hames off.
Hames working hard here to secure a kimura but he's not really in the right position for it.
Hames tries for a kimura but Price is defending well.
Hames tries for a kimura. Not really close to a finish though.
Price is not content to let Hames control the position.
Hames tries to move into full mount but can't pass Price's legs.
Hames really doesn't want to stay on the ground with Price. If he can't get it back to his feet, it's only a matter of time before he'll be tapping out.
Price wants to control but Hames postures up.
Hames wants to work for a kimura but he's foiled early by Price, who protects the arm well.
Hames is looking to take a break and control but Price is keeping him honest, looking to work from the bottom.
Hames wants to work for a kimura but he's foiled early by Price, who protects the arm well.
Price seems to have got his legs back now.
That's three minutes gone in the round.
Price is pushing Hames's head away, looking to escape. Hames manages to hold on to the position though.
Hames works a knee to the body and follows up with a nice elbow to the head.
Price is trying to control Hames's posture but Hames avoids it.
Price gets back to half guard.
Hames prevents Price from standing back up.
Hames is thwarting Price's attempts to control the position.
Hames wants to work for an arm triangle but Price is really keeping half guard well and defending the submission attempt.
Hames is looking to take a break and control but Price is keeping him honest, looking to work from the bottom.
That's four minutes gone in the round.
A few boos can be heard. I'm sure they will multiply if the fighters don't pick up the pace.
Hames is working for a kimura but Price is defending it quite comfortably.
Hames controlling the pace.
Price manages to escape and get back to his feet!
Price tries to close the distance and clinch up but Hames swats him away and circles back towards the center.

Hames drives through and clinches with Price against the cage.
Price wants to strike at distance but he can't break free of the clinch.
The crowd thankful this round is nearly over.

Price pulls guard.
Hames won't allow Price to get back to his feet.
Hames is in close to Price's body, working some short punches and elbows.
Hames wants to control from the top but Price keeps moving.
And that�s the end of the round � the fighters go back to their corners.
Ian Hames showed his class in that round. I'd imagine he'll take it on all the scorecards.
The fighters get back to their feet, the hooter sounds and we're back to the action! This is the final round!

Hames looking to shoot here. He's gone for it and he's landed a takedown into side control! Oh, that's bad for Price!
Price is trying to control Hames's posture but Hames avoids it.
Price is sneaking out the side here. He's bucked Hames off and has taken his back!
Hames trying to control the hands but Price breaks the grip.
Price working from the back looking to end the fight with a rear naked choke. Hames is doing well to defend. Price seems to have got his hand under the chin though and he's sunk the choke in! Hames is forced to tap and this one is over!
Ladies and gentlemen, after 0:50 of round 3, we have a winner by way of Submission (RNC). Modesto Price!
|
|
|
|
|
|
|
|
|
|
|
|
|
|
|
|
|
|
|
|
|
|
|
| S |
C
A |
G |
S |
C
B |
G |
|
S |
C |
G |
|
energy
A | B |
|
hype
A | B |
|
pop
A | B |
|
mgr
A | B |
|
FIGHT
RATING
39% |
|
|
|
|
|
|
