|
|
PBP Commentary |
Coming up we have a lightweight MMA rules bout between Rick Ashton (ranked 0 p4p, 0 weight class) and Frank Hammer (ranked 0 p4p, 0 weight class). Ashton kept the crowd waiting but all that was forgotten when his ring entrance music started. The incomparable musical genius that is Lynyrd Skynyrd - Simple Man. Buckle up people - heeeeeeeeeere we go!
 |
|
 |
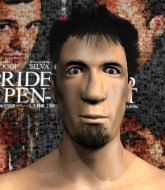
| 170 cm
37
170 lbs
22 - 15 - 0 |
|
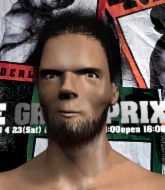
175 cm
30
168 lbs
18 - 8 - 0 |
Good wrestling
Excellent boxer
Cardio machine |
|
Good wrestler
Excellent boxer
Powerful |
|
| |
|
Ladies and gentlemen. This fight is 3 rounds, in the lightweight division.
Introducing the fighter to my left, fighting out of the red corner.
With a record of
22 - 15 - 0, fighting out of Los Angeles, Rick Ashton!
And introducing the fighter to my right, fighting out of the blue corner.
With a record of
18 - 8 - 0, fighting out of London, Frank Hammer!
The judges for this bout are , Jack Bonds and Don Winkell.

The bell rings for round one and we are underway!
Ashton shoots in for a takedown. He's persisting with it as Hammer sprawls well. Hammer wins this battle and keeps the fight standing. Ashton gets slowly back to his feet.
Hammer is definitely looking for the counter takedowns here.
Hammer swings for the body but Ashton moves out of range.
Ashton tries to drive through with a takedown attempt but Hammer defends well and Ashton ends up having to push Hammer into the cage where they will battle it out in the clinch.
Hammer looked like he wanted to counter with a punch but didn't throw it.
Hammer lands a nice looking body shot.
Rick Ashton seems to be the more aggressive standup fighter in this bout.
Ashton looks to score with a combo but nothing lands.
Hammer ducks right into an uppercut from Ashton.

Ashton gets a double leg takedown into Hammer's guard.
Ashton throws a big right hand that misses.
Ashton controls the pace of the fight for a moment.
Hammer working the defensive guard well to avoid strikes from Ashton.
Ashton stands and throws Hammer's legs to the side, diving into side control.
Ashton in side control, trying to ground and pound but not landing this time.

That's one minute gone in the round.
Hammer can't do much from the bottom here.
Ashton just content to control the position.
Hammer parries the strikes from Ashton easily there. Ashton is wary of posturing up too much because it might enable Hammer to escape.
Ashton takes a little break here. Hammer wants to take advantage but he is being controlled well.
Ashton advances to full mount.

That's two minutes gone in the round.
A few boos can be heard. I'm sure they will multiply if the fighters don't pick up the pace.
Hammer is desperately trying to get back to half guard.
Ashton dominating with strikes here.
Ashton lands a shot to the body, followed up by a shot to the exposed head of his trapped opponent.
Hammer keeping his composure momentarily, calmly looking to get back to half guard.
BOOM! Ashton connects with a massive shot to the dome!
Ashton raining down shots from the mount!
Ashton looking to control and managing it successfully.

That's three minutes gone in the round.
Hammer tries to get back to half guard but can't.
Ashton lands a heavy elbow.
Hammer keeping his composure momentarily, calmly looking to get back to half guard.
Hammer regains half guard.

Ashton is trying to work for a kimura but Hammer is defending well.
Hammer is refusing to be controlled, as Ashton sits in half guard.

That's four minutes gone in the round.
Ashton wants to pass the guard but Hammer is defending well.
Hammer avoiding damage under a succession of punches from Ashton.
Ashton thows a wild elbow that connects with the canvas.
Hammer tries to roll over but Ashton keeps him under control.
Ashton wants to lay and pray for a moment but Hammer keeps working.
The crowd thankful this round is nearly over.
Ashton wants to free his trapped foot but Hammer is holding on for dear life with his legs.
And that�s the end of the round � the fighters go back to their corners.
Rick Ashton dominated that round.
The referee calls time. The cornermen exit stage left and we're back to business.

Ashton misses with a jab, cross combination.
Ashton cracks Hammer with a good jab.
Hammer takes a swing at Ashton's ribcage but misses.
No joy there for Ashton, who threw a few shots but didn't land.
Hammer defending well as Ashton loads up on a big left hand.
A nice side step and Hammer releases a counter shot to the body, but it doesn't find it's home.
Ashton gets his takedown attempt stuffed easily
and Hammer counters with a good right hand that lands right on the jaw.
Ashton throws a right and a left that both miss.
Hammer scores with a sloppy right hand. Ashton should have avoided that one.
Hammer slaps away a takedown attempt from Ashton, before circling back to the center of the mat.
We've had a slow start to the round here - hopefully the action picks up.
A really sloppy takedown attempt there from Hammer.
Ashton misses with a takedown attempt

and Hammer counters into the clinch. Nicely done.
That's three failed takedown attempts in the round for Rick Ashton. That's going to take a lot out of him.
That's one minute gone in the round.
A head punch on the inside from Hammer fails to land.
Hammer doesn't land with the attempted body shot.
Ashton is really dominating this fight. Is there anything that Hammer can do to turn this around?
Ashton tries for a takedown. No joy.
Hammer has a couple of punches blocked by Ashton.
Hammer tries a shoulder strike but it doesn't do any damage.
Hammer swings away with an uppercut that misses.
Hammer misses with a shot to the kidneys.
Hammer has a couple of punches blocked by Ashton.
Hammer misses with a punch on the inside.
Ashton blocks an uppercut.
Hammer misses with the head strike.
Ashton prevents a body shot from Hammer.
Hammer misses with a body punch.
Hammer misses with some punches.
That's two minutes gone in the round.
Hammer lands a nice uppercut.
Hammer goes for a body shot but it's blocked.
Hammer stops a takedown attempt from Ashton.
Ashton is looking for a takedown up against the cage. Hammer gets underhooks though and prevents the takedown attempt.
Ashton has hold of a leg and is looking for a trip takedown. Hammer avoids it nicely though and we remain in the clinch.

Hammer is trying to trip Ashton. He has hold of a leg but Ashton is hopping around, keeping his balance for the moment. Hammer persists though and gets the takedown into guard.
Hammer advances position into side control!
Ashton is looking to regain half guard here but Hammer keeps moving and retains side control.
We've seen a great period of action over the last minute or so - credit to both fighters for going all out!
That's three minutes gone in the round.
Ashton is putting a lot of effort into getting back to his feet here.
Hammer trying to control the action but Ashton is working from the bottom.
Hammer landing a few strikes.
Ashton is looking to reverse the position.
Ashton wants to control but Hammer postures up.
Ashton regains half guard.
That's four minutes gone in the round.
Well. There's a bit of a lull in the action here and the crowd are starting to get restless.
Ashton is looking for a sweep. Hammer is wise to his cunning plan and keeps the top position.
Rick Ashton overall seems to be getting the better of the ground position in the fight so far.
Hammer missing with the ground and pound from half guard.
Hammer is keen to just control but Ashton is a slippery customer.
Ashton makes his way to full guard. A much better position for Ashton.
Ashton utilising some decent striking defenses from the guard, preventing the ground and pound.
Ashton manages to sweep nicely, so he's now on top. Hammer manages to get himself to full guard.

The ref warns both fighters not to hold the cage as they work up against the meshing.
The crowd thankful this round is nearly over.
Ashton is frustrating his opponent with some stalling tactics from top position.
Ashton is looking to pass into half guard but Hammer pushes him away with his feet and jumps on top - now Hammer is in guard.

And that�s the end of the round � the fighters go back to their corners.
Frank Hammer showed his class in that round. I'd imagine he'll take it on all the scorecards.
The fighters get back to their feet, the hooter sounds and we're back to the action! This is the final round!

Ashton shoots in for a takedown. "Ole!" shouts Hammer as he jumps to the side.
A big right from Ashton misses.
Ashton fails with a takedown attempt.
Hammer with the counter takedown but Ashton avoids it easily.
Good exchange - Ashton coming out on top.
Ashton misses with a hook. Hammer ducked under it nicely.
Ashton jabbing away but nothing is landing.
We've had a slow start to the round here - hopefully the action picks up.
Hammer slips a jab and a cross from Ashton.
Ashton connects with the punch.
Ashton fakes high and swings low for a body shot but Hammer manages to avoid it.
Hammer tries a counter takedown but it's more of a dummy move, and he uses it to push himself away.
Ashton takes a shot to the body in his stride.
Ashton shoots and misses
and Hammer counters with a right hand to the body.
That's three failed takedown attempts in the round for Rick Ashton. That's going to take a lot out of him.
That's one minute gone in the round.
Ashton fails to land with the punch combination there - jab, cross, hook, miss, miss, miss.
Hammer doesn't fully commit to the body shot counter.
Hammer is throwing a lot of body shots here, looking to wear down Ashton rather than just go for the knockout.
Both fighters are breathing heavily.
Hammer connects with the punch.
Ashton darts in looking for a takedown but Hammer gets double underhooks and turns Ashton into the cage.
And Hammer tries to counter it with a takedown but Ashton pushes his down on his head and steps out.
Ashton scores to the head and body with a nice combination!
Ashton takes a body punch that cleary hurt but he's trying not to show any weakness.
Ashton shoots in for a takedown. "I don't think so" says Hammer as he avoids it easily.
Ashton checks the leg kick nicely there.
Rick Ashton is looking to throw some combinations by the looks of things.
Ashton misses with a low kick as Hammer jumps back.
Ashton has his takedown stuffed
and Hammer counters with a right hand to the body.
Ashton takes a shot to the body in his stride.
Ashton will need to tighten up his combinations if he doesn't want to gas himself out, swinging at thin air.
That's two minutes gone in the round.
Hammer looks to score with a jab to the body but Ashton is just out of range.
Ashton gets his takedown attempt stuffed easily
and Hammer counters with a straight right hand.
Rick Ashton is winning the standup battle so far.
Fantastic stuff here - a very entertaining period of action, which has drawn cheers from the crowd.
Ashton tried to score with a low kick but Hammer checks it.
Hammer throws a front kick aimed at Ashton's knee but Ashton avoids it well.
Ashton uses some good footwork to avoid the body shot by Hammer.
Ashton cracks Hammer with a right hand to the side of the head.
Ashton shoots in but no luck this time.
Ashton misses with a wild combination.
Hammer scores with a hook to the body. Ashton takes a step back and tries to catch his breath.
Hammer works Ashton's body with a nice hook.
That's three minutes gone in the round.
Ashton fails with a takedown attempt from distance.
Ashton darts in looking for a takedown but Hammer gets double underhooks and turns Ashton into the cage.
Ashton misses with a jab and misses with a cross straight after too.
Hammer goes for a double leg but Ashton avoids the attempt and the two fighters end up clinched against the cage as Ashton continues to drive forward.
Hammer lands with a hook. Ashton tried to avoid it but it clipped the top of his head.
Hammer decides to change it up a bit and drives through with a nice takedown into half guard.
Hammer thumps the canvas. Not on purpose obviously - he just missed Ashton's head.
Hammer lands with a punch from half guard.
Ashton is trying to maintain the position but Hammer is very close to passing his half guard.
Ashton is pressing down on Hammer's left leg trying to get back to full guard. He's managed it.
That's four minutes gone in the round.
Ashton preventing the ground and pound from doing any damage.
The fighters are pressed up against the cage, both looking to find a bit of space to work.
Hammer throwing strikes from guard but Ashton blocks nicely.
Ashton working from the bottom, still in full guard. He's managed to get a loose triangle. Hammer doesn't seem to be doing much to defend here, obviously he feels comfortable in the position. Oh but Ashton is tightening it up a little... Hammer has to be careful here... He's got his foot tucked under now, this looks tight! Hammer reacted too slowly and this one could be over in a matter of seconds! YES! Hammer taps out! Nice BJJ there by Ashton!
Ladies and gentlemen, after 4:35 of round 3, we have a winner by way of Submission (Triangle Choke). Rick Ashton!
An out of breath and clearly excited Rick Ashton thanked Maximum Vitality for their help and support (and free stuff they sent him).
|
|
|
|
|
|
|
|
|
|
|
|
|
|
|
|
|
|
|
|
|
|
|
| S |
C
A |
G |
S |
C
B |
G |
|
S |
C |
G |
|
energy
A | B |
|
hype
A | B |
|
pop
A | B |
|
mgr
A | B |
|
FIGHT
RATING
54% |
|
|
|
|
|
|
