|
|
PBP Commentary |
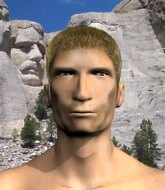
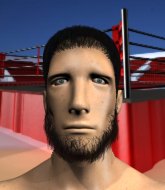
Coming up we have a light heavyweight MMA rules bout between Ranma Saotome (ranked 0 p4p, 0 weight class) and Nathan Taylor (ranked 0 p4p, 0 weight class). The atmosphere really building for this one as we go over to our ring announcer for the fighter introductions!
 |
|
 |
| 180 cm
23
210 lbs
5 - 4 - 0 |
|
183 cm
23
210 lbs
4 - 1 - 0 |
Good takedowns
Basic striking
Experienced |
|
BJJ Blue Belt
Excellent MT
Prefers standup |
|
| |
|
Ladies and gentlemen. This fight is 3 rounds, in the light heavyweight division.
Introducing the fighter to my left, fighting out of the red corner.
With a record of
5 - 4 - 0, fighting out of Montreal, Ranma Saotome!
And introducing the fighter to my right, fighting out of the blue corner.
With a record of
4 - 1 - 0, fighting out of Montreal, Nathan Taylor!
The judges for this bout are Yves DeLean, Steve Smith and Elvis Blanc.

The bell rings for round one and we are underway!
Taylor misses with a body kick.
Saotome fails to land with a series of punches.
Saotome checks the leg kick nicely there.
Saotome changes levels and looks for a double leg takedown. Taylor tries to avoid it but Saotome manages to keep hold of a leg and drag Taylor to the ground. Taylor escapes though and pops straight back up to his feet.
Danga de danga de dang - Taylor scores with a four punch combination!

Saotome darts in and lands a nice takedown into half guard.
Taylor makes his way to full guard. A much better position for Taylor.

Saotome thinks about going for a leg but decides against it, in order to maintain the position.
Saotome looking to pass the guard.
The ref warns both fighters not to hold the cage as they work up against the meshing.
Saotome slips nicely into half guard.
Taylor is trying to stand.
Taylor really doesn't want to stay on the ground with Saotome. If he can't get it back to his feet, it's only a matter of time before he'll be tapping out.
Saotome is tying to control. Taylor wants to improve his position but can't escape this time.
Saotome prevents Taylor from standing back up.
Saotome wants to lay and pray for a moment but Taylor keeps working.

That's one minute gone in the round.

It looks like we're going to have a standup here. Neither fighter is doing enough on the ground.
Saotome shoots in with a takedown attempt and he has Taylor pinned against the cage. Taylor gets the underhooks and manages to circle away.
Taylor misses with a series of wild punches.
Saotome tries for a takedown but Taylor sees it coming a mile off and avoids it easily.
That's three failed takedown attempts in the round for Ranma Saotome. That's going to take a lot out of him.
Saotome fails with a rather predictable takedown attempt.
Taylor is looking to score with low kicks.
Saotome shoots in and drives through. Taylor sprawls well.
Saotome shoots in for a takedown and gets it.
Taylor has no desire to be mounted, so is trying to control. Saotome is working away from the top position though.
Saotome is working for a submission of some sort.
Saotome is breathing heavily.

That's two minutes gone in the round.
Taylor is trying to stand up here but Saotome is controlling him well.
Saotome seems to be working for a kimura but Taylor defends the submission attempt.
Saotome is pressing down on Taylor's thigh, looking to free his foot. Taylor is holding on for now.
Taylor wants to get back to his feet.
Saotome is looking to take a break and control but Taylor is keeping him honest, looking to work from the bottom.
Taylor gets back to full guard.
The fighters are starting to perspire pretty heavily.
Taylor is trying to control the position from the bottom.
The referee decides to stand the fighters back up.
Saotome tries to shoot in for a takedown. He's got hold of a leg but Taylor swivels and escapes.

That's three minutes gone in the round.
Saotome drives through with a really nice takedown into side control.
Saotome trying to control the position but Taylor is working away.

Taylor throws Saotome to one side and escapes!
A punch combination from Taylor misses.
Saotome shoots in and drives through. Taylor sprawls well.
Saotome changes levels and looks for a double leg takedown. Taylor tries to avoid it but Saotome manages to keep hold of a leg and drag Taylor to the ground. Taylor escapes though and pops straight back up to his feet.
Saotome darts in and lands a nice takedown into half guard.
Taylor is looking to regain full guard. Not this time though.
Taylor is trying is best to control the position here.
Saotome uses his free foot to push down on Taylor's thigh. Eventually he works his other foot free and he's advanced to mount - this is trouble for Taylor.

That's four minutes gone in the round.
Saotome works his way to his opponent's back.
The crowd hopeful of a finish here - Saotome's supporters are on their feet, screaming for him to go for the rear naked choke.
Saotome controlling well, preventing Taylor from escaping the position.
Saotome patiently working for the choke. Which fighter will keep their nerve here?
Taylor prevents Saotome from getting a body triangle.
Saotome is persistently looking for the submission but Taylor is defending it well.
Fantastic stuff here - a very entertaining period of action, which has drawn cheers from the crowd.
The crowd applaud the fighters efforts here as the round comes to an end.
Saotome is working hard for the rear naked choke here.
And that�s the end of the round � the fighters go back to their corners.
That was a close round but I would say that Ranma Saotome will probably get the nod.
The fighters get back to their feet, the hooter sounds and we're back to the action!

Saotome takes a solid shot to the body. That one hurt him but he's trying not to show it.
Taylor misses with a two punch combination.
Saotome fails to land with the punch combination there - jab, cross, hook, miss, miss, miss.
Taylor throws a sloppy head kick and Saotome moves out of range easily.
Saotome looks for a takedown here. Will he get it? Taylor is fending him off so far but Saotome persists. Nope, Taylor circles away and we're back to standing.
Saotome shoots for a double leg takedown but Taylor sprawls well. He's pushed Saotome's face into the mat and manages to get back to his feet relatively easily.
Saotome fails with the takedown.
That's three failed takedown attempts in the round for Ranma Saotome. That's going to take a lot out of him.
Taylor misses with a two punch combination.
Saotome scores with a takedown into Taylor's guard.
Taylor looking to control the pace of the fight rather than finish it.
Saotome thinks about going for a leg but decides against it, in order to maintain the position.
Saotome wants to pass the guard but Taylor is keeping the position.
Both fighters are absolutely exhausted here.
That's one minute gone in the round.
Taylor wants to get back to his feet but Saotome is in a dominant position and won't allow it.
Taylor manages to land a sweep and now he's in mount on top!
Taylor avoids the attempt from Saotome to control.
Saotome is going to have to think about doing something other than just controlling because Taylor is managing to avoid having the position dictated to him.
Saotome is wriggling around trying to escape.
Taylor tries to control but Saotome wriggling away.
Saotome is desperately trying to get back to half guard.
Taylor tries to control but Saotome wriggling away.
That's two minutes gone in the round.
The crowd are starting to boo a lack of action.
Saotome is trying desperately to improve position.
Saotome is working hard here to advance position.
Saotome manages to regain half guard. Good work.
Saotome tries to get to full guard but Taylor has control of the leg.
Saotome trying to hold on to Taylor's head to control him but Taylor postures up.
The fighters are battling for position here. Saotome manages to regain full guard. Nice work.
That's three minutes gone in the round.
Saotome manages to land a sweep and now he's in mount on top!
Taylor is controlling an arm, preventing Saotome from taking his back. Although keeping him in mount is no better to be honest.
Ranma Saotome overall seems to be getting the better of the ground position in the fight so far.
Saotome looks like he's working for a submission but he's not found anything just yet.
Saotome wants to take Taylor's back here but Taylor is holding on to an arm, himself looking to escape.
Saotome moves to the back position.
Saotome working for a choke but Taylor is defending well.
Saotome looking for the RNC.
That's four minutes gone in the round.
Saotome tries to keep control of the position but Taylor is staying busy.
Saotome looking to break Taylor's wrist control so he can sink in the choke. Taylor remaining controlled and patient though - he really has to keep calm otherwise Saotome will wrap this one up with the rear naked choke!
Taylor showing good submission defense here.
Taylor looks to control his opponent's hands but he's not mananging it at the moment.
Saotome is persistently looking for the submission but Taylor is defending it well.
And that�s the end of the round � the fighters go back to their corners.
Ranma Saotome dominated that second round.
That's the end of the interval. I'm sure that seemed a lot quicker than a minute for our two fighters! Back to the action. The crowd applaud as we get ready to start the final round!

Taylor throws a right hand that Saotome ducks under and follows up with a left that Saotome also avoids with ease.
Saotome closes this distance looking for a takedown but Taylor circles away.
Saotome shoots in for a takedown but Taylor shows good takedown defense.
Taylor works Saotome's body with a nice hook.
Ranma Saotome seems to be the more aggressive standup fighter in this bout.
Saotome takes a head kick and shrugs it off.
Nice takedown defense from Taylor. No joy for Saotome on that attempt.
That's three failed takedown attempts in the round for Ranma Saotome. That's going to take a lot out of him.
Taylor swinging wilding here.
Saotome closes the distance, clinches up and gets a nice trip takedown into side control. Very smooth.
Saotome thinks about going for a far side armbar but bails out and retains the dominant position instead.
Taylor is trying to get back to half guard. He's pushing on Saotome's leg. He's managed it. Nice work.
Both fighters really going for it on the ground here!
Taylor is looking to escape.
That's one minute gone in the round.
Taylor is not content to let Saotome control the position.
Both fighters are breathing heavily.
Taylor tries to roll over but Saotome keeps him under control.
Taylor is staying active underneath Saotome, who seems content to just control the action from this position.
Saotome seems to be looking for submissions.
Saotome is looking for an arm triangle, whilst trying to pass to side control. Taylor doesn't seem that keen to cooperate though. No luck this time Saotome.
Taylor wants to get back to his feet.
That's two minutes gone in the round.
A lull in the action here being met with boos from the crowd.
The referee has ruled that neither fighter is active enough on the ground and has stood them back up.
Saotome bobs and weaves into range and then changes levels and scores with a nice takedown into side control.
Saotome is working for what looks like an arm triangle here. Taylor is trying to escape and Saotome transitions quickly into an armbar! He's slapped it on tight and Taylor is forced to tap! Nice work there by Saotome! Very nice indeed!
Ladies and gentlemen, after 2:25 of round 3, we have a winner by way of Submission (Armbar). Ranma Saotome!
|
|
|
|
|
|
|
|
|
|
|
|
|
|
|
|
|
|
|
|
|
|
|
| S |
C
A |
G |
S |
C
B |
G |
|
S |
C |
G |
|
energy
A | B |
|
hype
A | B |
|
pop
A | B |
|
mgr
A | B |
|
FIGHT
RATING
97% |
|
|
|
|
|
|
