|
|
PBP Commentary |
Coming up we have a heavyweight MMA rules bout between Courtney Byrd (ranked 0 p4p, 0 weight class) and Yoshi Hiroshima (ranked 0 p4p, 0 weight class). We have two fighters making their debuts here, so let's see who comes out of this one with their first professional victory.
 |
|
 |
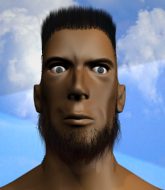
| 217 cm
18
278 lbs
0 - 0 - 0 |
|
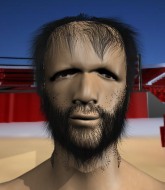
200 cm
18
250 lbs
0 - 0 - 0 |
BJJ Blue Belt
Counter fighter
Cuts easily |
|
BJJ Blue Belt
Brawler
Granite chin |
|
| |
|
Ladies and gentlemen. This fight is 3 rounds, in the heavyweight division.
Introducing the fighter to my left, fighting out of the red corner.
With a record of
0 - 0 - 0, fighting out of Tokyo, Courtney Byrd!
And introducing the fighter to my right, fighting out of the blue corner.
With a record of
0 - 0 - 0, fighting out of Tokyo, Yoshi Hiroshima!
The judges for this bout are Ren Mimura, Yukihiro Yamamoto and Sosuke Kotani.

The bell rings for round one and we are underway!

Hiroshima fakes an overhand right and shoots for a takedown. Byrd sprawls well initially but Hiroshima persists and gets the takedown into half guard.
Hiroshima controlling the action here.
Byrd is positioning himself well to prevent Hiroshima advancing to mount.
Hiroshima not landing any meaningful shots this time.
Byrd is concentrating on defense, preventing Hiroshima from advancing position.
Hiroshima throwing punches and elbows but they're not doing any damage.
We've had a slow start to the round here - hopefully the action picks up.
Byrd is concentrating on defense, preventing Hiroshima from advancing position.
Byrd trying to control but Hiroshima postures up.
Byrd gets full guard.
Byrd preventing the ground and pound from doing any damage.
Byrd wants to control here, rather than go for any submissions from the bottom. At least for now.

That's one minute gone in the round.
Byrd wants to sweep but no luck.
Byrd is working from a closed guard but he's struggling to control his opponent.
Byrd is doing well to control the posture of his opponent and prevent any damage.
Byrd trying to control the position.
The referee looks like he's ready to step in and stand the fighters back up.
Hiroshima wants to pass the guard but Byrd is keeping the position.
Byrd controls Hiroshima momentarily but Hiroshima frees himself.

The referee decides to stand the fighters back up.
Yoshi Hiroshima seems to be the more aggressive standup fighter in this bout.
Hiroshima throws a leg kick that is checked

and Byrd counters by moving into the clinch.

That's two minutes gone in the round.
The crowd are showing their displeasure at the lack of action as loud boos ring out around the arena.

Hiroshima escapes the clinch and we're back to striking.

Hiroshima moves into the clinch.
Hiroshima has picked Byrd up - he's going for a ride! Hiroshima dumps his opponent to the mat with a thud and settles into half guard.
Byrd desperately trying to maintain half guard.
Hiroshima is keen to just control but Byrd is a slippery customer.
Byrd is trying to get back to full guard.
Hiroshima wants to pass the guard but Byrd is defending well.
Hiroshima is persisting with the attempt to improve his position.
The fighters are battling for position here. Byrd manages to regain full guard. Nice work.

That's three minutes gone in the round.
Hiroshima lands a couple of elbows.
Byrd is trying to stand up but he's not managed so far.
There's a bit of a scramble here and now Byrd is on top in guard.

Hiroshima looking to control.

Hiroshima had isolated an arm as going for a kimura. Byrd defends it easily.
Hiroshima is pulling down on Byrd's head to control his posture.
Byrd trying to control but Hiroshima is working from the bottom.

That's four minutes gone in the round.
Byrd would like to get this fight back to the feet but can't get free from the closed guard.
Hiroshima keeping moving, preventing Byrd from controlling successfully.
The fighters are pressed up against the cage, both looking to find a bit of space to work.
Hiroshima lands a beautiful sweep and he's now moved into his opponent's guard.

Byrd is trying to control the position but Hiroshima postures up.
Boooooooooooooooooooo!!! God, this has been a terrible round. Come on you two, sort yourselves out!
Byrd has Hiroshima pulled in close to control his posture.
Byrd is trying to control the position from the bottom.
And that�s the end of the round � the fighters go back to their corners.
Yoshi Hiroshima dominated that round.
The fighters' corners scream their final instructions, as the referee calls time. Here we go, back to the action!


Byrd closes the distance and clinches up, looking for a takedown. He shifts his weight and gets a nice trip into half guard.

Byrd is trying for a guillotine from the top but the pressure isn't in the right place so Hiroshima is just riding it out for now. Byrd eventually gives up the hold.
Hiroshima trying to control but Byrd postures up.
We've had a slow start to the round here - hopefully the action picks up.
Ground and pound from Byrd.
Hiroshima is holding on to half guard well.
That's one minute gone in the round.
Byrd working over Hiroshima with some ground and pound. Hiroshima looks like he wants out of this position, which is understandable.
Byrd controlling the action here.
Hiroshima is looking for a sweep. Byrd is wise to his cunning plan and keeps the top position.
Hiroshima really doesn't want to stay on the ground with Byrd. If he can't get it back to his feet, it's only a matter of time before he'll be tapping out.
Hiroshima is trying to stand back up but Byrd is controlling him
Hiroshima is looking to regain full guard. Not this time though.
Hiroshima keeps trying to improve his position.

Hiroshima manages to create a bit of space in order to work his way back to his feet. Byrd keeps hold of his opponent and drives him back against the cage.
That's two minutes gone in the round.
Hiroshima drags the fight down to the ground.

Byrd gets to his feet and steps away from his opponent.
Hiroshima feints and then dives in with a takedown. That was a long way out but the feint bought him enough time to close the distance and complete the takedown. Now we'll play guard for a bit and see who can get the better of that position.
Hiroshima must be cautious of submissions here, given that his opponent has the superior Jiu Jitsu.
Byrd looking to sweep here. No luck so far.
Yoshi Hiroshima has got the better of the ground game so far.
Byrd trying to keep a closed guard but Hiroshima is proving a slippery customer.
Hiroshima is fighting to break Byrd's control of his arms but Byrd is doing a good job of controlling the position at the moment.
Hiroshima controls the pace of the fight for a moment.
That's three minutes gone in the round.
Hiroshima working some ground and pound from guard but it's not doing any damage.
Byrd is pulling down on Hiroshima's head. It's preventing any offense from Hiroshima, at least for the moment.
Byrd will need to keep those long limbs tucked in whilst he's on the ground, to prevent any submissions.
Byrd continues to stall.
Byrd has controlled the position for a good 20 seconds, which will no doubt be starting to frustrate his opponent.
Hiroshima slows down the pace of the fight for a moment. He'll need to remain active if he doesn't want to see the fight stood back up.
The referee claps his hands together and tells the fighters to work.
That's four minutes gone in the round.
A lull in the action here being met with boos from the crowd.
Byrd working a defensive guard here.
The referee decides to stand the fighters back up.
Hiroshima stuffs a takedown. It's all about dictating where the fight takes place and Hiroshima wants it to stay on the feet.
Both fighters are absolutely exhausted here.
Byrd shoots for a double leg takedown but Hiroshima sprawls well. He's pushed Byrd's face into the mat and manages to get back to his feet relatively easily.
Hiroshima darts in and lands a nice takedown into half guard.
Byrd is looking to regain full guard. Not this time though.
Hiroshima trying to control from half guard but Byrd is working away.
Boooooooooooooooooooo!!! God, this has been a terrible round. Come on you two, sort yourselves out!
The two fighters exchange a few words. I couldn't hear what they were saying but maybe it's more fun if you make it up yourself. Hiroshima connects with a nice short shot to Byrd's temple.
And that�s the end of the round � the fighters go back to their corners.
Yoshi Hiroshima showed his class in that round. I'd imagine he'll take it on all the scorecards.
OK. That's time! The bell goes and we're back to the action. Let's get this one finished - here comes the final round!

Hiroshima throws the overhand right but ducks down into a quick takedown attempt. Byrd was covering up waiting for the punch and Hiroshima finishes the takedown easily into guard.

Byrd is edging up against the cage. He's using the cage to get back to his feet. Nice work there - the fighters are clinched.
Byrd pulls guard successfully.
Byrd is working an open guard here, looking to improve his position. No doubt that will leave him open to counters but at least he's being more offensive.
Hiroshima wanted to stand there but Byrd had control of the position.
We've had a slow start to the round here - hopefully the action picks up.
Hiroshima landing some decent shots from guard.
The step up in weight doesn't seem to be a problem for Hiroshima. He's performing admirably here against the bigger man.
Hiroshima tries to free his leg and advance position but Byrd is retaining full guard.
That's one minute gone in the round.
Byrd keeping moving, preventing Hiroshima from controlling successfully.
Hiroshima avoids a guillotine attempt easily.
Both fighters are breathing heavily.
Hiroshima looking to pass the guard.
Byrd is adopting a defensive guard.
Byrd not looking particularly offensive just at the moment.
Hiroshima looking to control the position here, rather than advance.
Hiroshima stands up and looks to throw the legs aside to pass to side control. Byrd swivels though and keeps the full guard.
That's two minutes gone in the round.
A few boos can be heard. I'm sure they will multiply if the fighters don't pick up the pace.
Hiroshima wants to stand but Byrd is controlling his posture from full guard.
The referee must be thinking about standing these guys back up.
Byrd wants to control here, rather than go for any submissions from the bottom. At least for now.
The referee has stepped in and called for a break in the action. We'll restart on the feet.
Byrd closes the distance, clinches up and gets a nice trip takedown into side control. Very smooth.
Byrd has control of an arm but Hiroshima manages to advance to Byrd's back!
Byrd trying to control but not successfully.
Byrd is trying to get back to his feet but he's not managed it yet.
That's three minutes gone in the round.
Byrd wants to escape the position.
Hiroshima lands a couple of good shots to his opponent's body and a final shot to the head. Good little attack there by Hiroshima.
Hiroshima has been the more effective fighter overall so far.
Byrd surviving as best he can, preventing damage.
Hiroshima working for the choke.
Hiroshima scores with punches from the back.
Byrd staying busy and making it hard for Hiroshima to control.
Hiroshima lands a shot to the head.
Byrd is displaying good submission defense - not really looking in danger of submitting to the rear naked choke at the moment. That could change in an instant of course if Hiroshima gets his way!
That's four minutes gone in the round.
Hiroshima is working really hard to secure the rear naked choke. Byrd defends successfully for a significant amount of time. Both fighters are looking very determined.
Byrd defends a rear naked choke attempt by controlling one of Hiroshima's arms.
Byrd is really stuck here.
The crowd thankful this round is nearly over.
Hiroshima working for a RNC but it's not happening just yet.
Byrd trying to control the hands but Hiroshima won't let him.
And that's the end of the fight!
Yoshi Hiroshima comfortably won the final round on my scorecard.
Well Hiroshima has outworked and out performed his opponent in all aspects of the game today. He was simply too good and the decision should be no more than a formality. Over to the ring announcer for the scorecards.
Ladies and gentlemen, after 3 rounds of action, we go to the scorecards for a decision.
Judge Ren Mimura scores the fight 27:30
Judge Yukihiro Yamamoto scores the fight 27:30
Judge Sosuke Kotani scores the fight 27:30
In favor of your winner, by unanimous decision... Yoshi Hiroshima!
|
|
|
|
|
|
|
|
|
|
|
|
|
|
|
|
|
|
|
|
|
|
|
| S |
C
A |
G |
S |
C
B |
G |
|
S |
C |
G |
|
energy
A | B |
|
hype
A | B |
|
pop
A | B |
|
mgr
A | B |
|
FIGHT
RATING
30% |
|
|
|
|
|
|
