|
|
PBP Commentary |
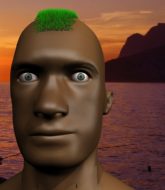
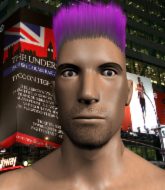
Coming up we have a lightweight MMA rules bout between David Bell (ranked 0 p4p, 0 weight class) and Corak Hoon (ranked 0 p4p, 0 weight class). Both these guys have really solid chins. Will we see a standup war or will they both decide that a knockout is unlikely and try to win the fight elsewhere?
 |
|
 |
| 184 cm
21
166 lbs
2 - 6 - 0 |
|
170 cm
25
165 lbs
0 - 0 - 0 |
BJJ White Belt
Brawler
Good chin |
|
Good wrestler
Counter fighter
Granite chin |
|
| |
|
Ladies and gentlemen. This fight is 3 rounds, in the lightweight division.
Introducing the fighter to my left, fighting out of the red corner.
With a record of
2 - 6 - 0, fighting out of The Island, David Bell!
And introducing the fighter to my right, fighting out of the blue corner.
With a record of
0 - 0 - 0, fighting out of The Island, Corak Hoon!
The judges for this bout are Santiago Holmes, Bart Greer and Peter Branson.

The bell rings for round one and we are underway!
Hoon needs to keep his hands up - Bell had a free shot at his head there.

Hoon looks for a takedown. He's got it. We're now in half guard.
Bell is staying active underneath Hoon, who seems content to just control the action from this position.
Hoon slips a nice elbow through Bell's hands, connecting with Bell's forehead.
The ref warns both fighters not to hold the cage as they work up against the meshing.
Bell gets full guard.
Hoon scores with a decent looking elbow strike.
Hoon loading up with the ground and pound but he's missing more than he's landing in this flurry.
Hoon landing with the ground and pound.
Hoon landing with the ground and pound.

Hoon drops back looking for a leg! Bell is in trouble here! The fighters roll with the hold and Bell manages to kick Hoon off! Hoon jumps back into Bell's guard.
We've had a slow start to the round here - hopefully the action picks up.
Hoon is in close to Bell's body, working some short punches and elbows.
Hoon trying to control but Bell is working from the bottom.

That's one minute gone in the round.
Hoon slips nicely into half guard.
Hoon wants to take a breather but Bell is having none of it.
Hoon throwing shots but Bell is blocking nicely.
Bell on the receiving end of some nice ground and pound.
Hoon seems to be taking a bit of a break to think of his next move. He lands a short punch in the meantime.
Bell is not content to let Hoon control the position.
Hoon is working for submissions here but there's nothing on.
Bell on the receiving end of some nice ground and pound.
Bell on his back here. We all know that wrestlers don't like being on their back so let's see if Bell tries to get out of the position.
Hoon seems to be working for a kimura but Bell defends the submission attempt.
Still in half guard, Hoon seems content to control.
Hoon scores with a couple of good hammerfists.

That's two minutes gone in the round.
Hoon wants to control but Bell is keeping him busy.
Hoon passes to full mount!
Bell is bucking up trying to escape but Hoon cracks him with another couple of good strikes.
BOOM! Hoon connects with a massive shot to the dome!
Hoon working away from the top, dropping strikes.
Hoon lands a nice shot to the head.
Bell is desperately trying to improve his position but Hoon has a good base and remains in mount.
Bell looks to be in better condition than last time we saw him fight. Obviously he's been working hard on his cardio.
Hoon has control of Bell's right arm, working for a kimura. It's a bit of a token attempt though and Bell regains control of the situation pretty easily.
Bell is really trying hard to get back to his feet.
Hoon has the superior BJJ but he's also working some ground strikes into his gameplan.
Hoon in mount throwing good strikes here, bouncing his opponent's head off the canvas.
Hoon putting on the heat here with some good ground and pound!

That's three minutes gone in the round.
Hoon trying to control but Bell is having none of it.
Bell really trying hard to get back to half guard here.
Bell in a bad spot here, taking shots to the head.
Hoon lands an elbow that was bordering on illegal but the referee lets it go with a warning.
Bell is in a horrible position here. Hoon smacks him with another shot as he tries to escape the position.
Hoon wants to control the pace but Bell is squirming around nicely.
Hoon working the ground and pound effectively.
Hoon tries to control but Bell wriggling away.
Hoon with good strikes from the mount here!

That's four minutes gone in the round.
Hoon working for a guillotine from mount but Bell is in no mood to give up.
Hoon with the ground and pound from mount.
Bell taking shots to the head.
Hoon looking to control but Bell is working nicely, looking to advance position himself.
Bell is bucking up trying to escape but Hoon cracks him with another couple of good strikes.
Hoon raining down hammerfists from mount.
Bell is trying desperately to improve position.
Bell wants to hold on but Hoon pushes him away.
Bell is desperately trying to get back to half guard.
Hoon raining down hammerfists from mount.
Hoon prevents Bell from getting the reversal.
Hoon working to secure an arm triangle but it's not happening for him just yet.
And that�s the end of the round � the fighters go back to their corners.
Corak Hoon dominated that round.
The referee calls time. The cornermen exit stage left and we're back to business.

Hoon shoots in but no luck this time.
David Bell is looking to throw some combinations by the looks of things.
Hoon fails in his attempt to clinch.
Bell appears to be looking for a counter takedown.

Hoon tries to sprawl but Bell drives through with a takedown into half guard.
Hoon looking for submissions from an awkward position here.
Hoon has no desire to be mounted, so is trying to control. Bell is working away from the top position though.

Bell is working for a kimura but Hoon is defending it quite comfortably.
Hoon wants to get back to full guard.
We've had a slow start to the round here - hopefully the action picks up.
Hoon gets back to full guard.
Bell missing there with some ground and pound from the guard.
That's one minute gone in the round.
Hoon wants to sweep here but Bell controlling him for the moment.
Hoon controls Bell momentarily but Bell frees himself.
Hoon wants to sweep here but Bell controlling him for the moment.
We've had a lack of effective grappling in the last minute or so, which could well see a referee standup.
Hoon throwing some rather feeble looking strikes off his back.

The referee has stepped in and called for a break in the action. We'll restart on the feet.
Bell gets the takedown into side control.
Hoon is sneaking out the side here. He's bucked Bell off and has taken his back!
Bell defending nicely against the rear naked choke attempt.
Hoon is breathing heavily.
Bell is defending well here and trying to improve his position.
Hoon working for the choke.
That's two minutes gone in the round.
Hoon is working the back position looking for the choke. Oh, he's slid into an armbar! Beautiful transition and Bell taps out! Fantastic Jiu Jitsu from Hoon.
Ladies and gentlemen, after 2:20 of round 2, we have a winner by way of Submission (Armbar). Corak Hoon!
A very excited looking Corak Hoon made sure he remembered to thank all the fans both in the arena and on the internet. He said all the coolest people spend all day on MMA websites, which got a big reaction.
|
|
|
|
|
|
|
|
|
|
|
|
|
|
|
|
|
|
|
|
|
|
|
| S |
C
A |
G |
S |
C
B |
G |
|
S |
C |
G |
|
energy
A | B |
|
hype
A | B |
|
pop
A | B |
|
mgr
A | B |
|
FIGHT
RATING
37% |
|
|
|
|
|
|

