|
|
PBP Commentary |
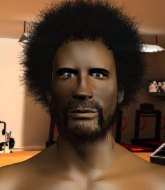
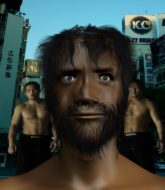
Coming up we have a middleweight MMA rules bout between Lenny Wong (ranked 0 p4p, 0 weight class) and Karly Maybi (ranked 0 p4p, 0 weight class). The crowd seem to be enjoying Maybi's choice of entrance music: Bad blood. The crowd giving both fighters a great reception on their way into the arena. That's good to see.
 |
|
 |
| 189 cm
26
189 lbs
0 - 2 - 0 |
|
190 cm
20
190 lbs
3 - 2 - 0 |
Decent wrestler
Solid boxing
KO power |
|
BJJ Blue Belt
Basic striking
Granite chin |
|
| |
|
Ladies and gentlemen. This fight is 3 rounds, in the middleweight division.
Introducing the fighter to my left, fighting out of the red corner.
With a record of
0 - 2 - 0, fighting out of The Island, Lenny Wong!
And introducing the fighter to my right, fighting out of the blue corner.
With a record of
3 - 2 - 0, fighting out of The Island, Karly Maybi!
The judges for this bout are Michael Johnstone, Bart Greer and Daniel Franklin.

The bell rings for round one and we are underway!
A head kick misses from Maybi.

Maybi closes the distance and clinches.
Wong on the defensive, avoiding the knees to the body.
Maybi looks to throw an elbow but misses.
Maybi looks more muscular than last time we saw him. He must have been on the weights.
Maybi using the Thai plumb to throw knees but Wong has his back arched nicely, preventing the strike.

Maybi breaks from the clinch.
Maybi wants to clinch up but Wong keeps it at a distance.
Maybi lands with a nice body kick.
Wong lands a jab, followed by a cross and another cross, as Maybi backs up against the cage.
Wong lunges in with swinging rights and lefts but Maybi circles away quickly and effectively.
Wong shoots in for a takedown. He's persisting with it as Maybi sprawls well. Maybi wins this battle and keeps the fight standing. Wong gets slowly back to his feet.
Maybi darts in trying to clinch
and Wong counters with a stiff right hand.

Maybi gets tackled into the cage by Wong. Wong maintains the clinch.

That's one minute gone in the round.

Wong breaks from the clinch.
Maybi shoots in looking for a double leg takedown. Wong defends it nicely.
Maybi closes the distance and presses his opponent up against the cage.
Wong jumps guard but Maybi turns him against the cage and keeps the fight standing.
Maybi effectively controlling the action here.
Wong's corner calls for him to break the clinch, which he does.
Maybi changes levels and looks for a double leg takedown. Wong tries to avoid it but Maybi manages to keep hold of a leg and drag Wong to the ground. Wong escapes though and pops straight back up to his feet.
Wong misses with a takedown attempt. He shot from a bit too far out.
That's three failed takedown attempts in the round for Lenny Wong. That's going to take a lot out of him.
Maybi is on the wrong end of a nice combination from Wong.

That's two minutes gone in the round.
Wong misses with a takedown attempt. He shot from a bit too far out.
Maybi moves into the clinch.
Maybi using the Thai plumb to throw knees but Wong has his back arched nicely, preventing the strike.
Wong looking to slow down the pace here.
Maybi pushes off and fires off an elbow that misses, before clinching up again, against the cage.
Wong escapes the clinch and we're back to striking.
Maybi avoids the head kick by Wong.
Wong seems to be moving with more speed, compared to his last bout. He must have been working on that in the gym.
Maybi misses with a double jab.
Wooooo! Give it up for these two warriors! They are putting on a show!
Maybi dives in and grabs Wong's left leg, looking for a takedown. Wong pushes down on Maybi's head and hops out.
Maybi shoots in and drives through. Wong sprawls well.
Wong shoots in but Maybi avoids the takedown attempt easily.
Maybi connects with an inside leg kick.

That's three minutes gone in the round.
A solid body kick from Maybi.
Wong walks forward and throws out a flicking leg kick. Maybi checks it nicely though, as he moves to the side.
No luck for Wong with that takedown attempt.
Wong gets tackled into the cage by Maybi. Maybi maintains the clinch.
Wong avoids a wild elbow strike from Maybi.
Wong's corner calls for him to break the clinch, which he does.
Maybi clinches.
Maybi lands an elbow that stopped Wong in his tracks for a moment.

Wong tightens his grip and picks Maybi up, before dumping him to the ground. Maybi manages to land in guard.
Wong not doing a lot at the moment. He'll have to show some more aggression or the fight will get stood up.
Wong has to be careful here, sitting in the guard of a superior BJJ player.

That's four minutes gone in the round.
We get told so often about how wrestlers don't like to be on their backs. Let's see if Maybi can do anything to dispel that myth.
Wong stands up and looks to throw the legs aside to pass to side control. Maybi swivels though and keeps the full guard.
Wong postures up in Maybi's guard and throws a big left but Maybi blocks it.
Wong sitting in guard, not really doing much.
The referee is pacing around the two fighters - he looks like he's thinking about a standup.
A big thud reverberates around the arena there as Wong accidentally thumps the mat. Hopefully he's not broken his hand.

The ref stands the fighters back up due to a lack of activity.
And that�s the end of the round � the fighters go back to their corners.
A close round but Karly Maybi will probably get the nod.
That's time! Back to the action!

Maybi misses with a body kick.
Maybi tries to clinch there but Wong circles away.
Maybi tries to clinch but is not successful on this occasion.
Wong tries to score a power double leg takedown but Maybi sees that one coming and sprawls well. That will dishearten Wong somewhat.
Maybi closes the distance and presses his opponent up against the cage.
Maybi lands an elbow inside.

It looks like Lenny Wong has been cut.
Maybi connects with a knee to the head.
We've had a slow start to the round here - hopefully the action picks up.
Wong managing to block the knees to the body from Maybi.
Wong tries to pull guard but can't drag his opponent to the mat. Maybi just stands there and leans against the cage.
Maybi landing some nice looking knees to the body.
Wong with the Thai clinch. He's looking to land a big knee but he's not managed it this time.
Maybi throws a knee to the head but misses.
That's one minute gone in the round.
Maybi using the Thai clinch to land knees to the body.
Wong pushes off an throws an elbow but Maybi leans to the side and avoids it. We're back to clinching against the cage.
Maybi is stalling here. The referee will be looking to step in if he doesn't pick up the pace.
Wong has hold of a leg and is looking for a trip takedown. Maybi avoids it nicely though and we remain in the clinch.
That's three failed takedown attempts in the round for Lenny Wong. That's going to take a lot out of him.
Maybi pushes off and circles away, back to the middle of the mat.
Maybi slaps away a takedown attempt from Wong, before circling back to the center of the mat.
Wong gets tackled into the cage by Maybi. Maybi maintains the clinch.
Maybi lands an elbow inside.
Maybi content to slow the pace in the clinch.
Maybi stalling here - the referee won't stand for too much of that.
Maybi lands an elbow just above Wong 's eye.
Good anti-grappling being displayed by Wong as Maybi tries to tie him up.
That's two minutes gone in the round.
Wong jumps guard but his hands slip and he falls flat on his back. Well, he's made himself look a right mug there, as Maybi walks away with a smile on his face. Wong gets slowly back to his feet and shakes his head.
No luck for Wong with that takedown attempt.
Maybi doesn't manage to clinch there - Wong circles away.
Wong takes the fight into the clinch.
With the two fighters working up against the cage, Maybi just misses with a elbow thrown towards Wong's brow.
Maybi content to slow the pace in the clinch.
Wong is trying to pull guard but being pressed up against the cage enables Maybi to keep the fight standing.
Wong avoids the elbow strike from Maybi, against the cage.
Wong goes for a takedown attempt but Maybi pushes him away and we're back to fighting at a distance.
This is a great period of action - very entertaining stuff!
Wong shoots in but no luck this time.
The fight stays on the outside here - Maybi looks like he's thinking about clinching though.
That's three minutes gone in the round.
Maybi rushes Wong and pushes him back against the cage in a clinch.
Wong avoids a wild elbow strike from Maybi.
Maybi lands an elbow inside that Wong shrugs off.
Wong takes an elbow to the temple.
With the two fighters working up against the cage, Maybi just misses with a elbow thrown towards Wong's brow.
Maybi looking to throw knees to the head but Wong is blocking nicely.
Karly Maybi seems to be working more effectively in the clinch in the fight so far.
Maybi throws a knee to the head but misses.
Maybi landing knees to the body.
Maybi is looking to score with knees to the body. Maybe he'll change it up and go body then head. Wong is defending well for now.
Wong goes for a takedown attempt but Maybi pushes him away and we're back to fighting at a distance.
Maybi rushes Wong and pushes him back against the cage in a clinch.
Wong throws an elbow that misses.
That's four minutes gone in the round.
Maybi scores a nice knee to the body.
Both fighters are absolutely exhausted here.
Wong takes an elbow to the forehead.
Wong is trying to slow down the pace in the clinch, to catch his breath.
Wong is working for a takedown up against the cage. He can't get it on this occasion though.
Wooooo! Give it up for these two warriors! They are putting on a show!
Maybi looking to throw knees to the head but Wong is blocking nicely.
Maybi breaks the clinch and we're back to striking at distance.
Wong digs a good body shot into Maybi's ribs.
No luck for Wong with that takedown attempt.
Maybi is definitely looking for the counter takedowns here.
Nice sprawl there from Maybi as Wong shoots in.
Maybi tries to clinch but Wong moves out of range.
Wong stuffs a takedown. It's all about dictating where the fight takes place and Wong wants it to stay on the feet.
Maybi avoids the head kick by Wong.
Wong shoots in for a takedown - he's clinched up with Maybi but Maybi pushes him off and we're back to square one.
And that�s the end of the round � the fighters go back to their corners.
Karly Maybi showed his class in that round. I'd imagine he'll take it on all the scorecards.
The cut man is working on Lenny Wong's cut.
Well, the break between rounds is over. Let's get back to the scrappin! This is the final round!

Maybi moves into range and clinches up with Wong.
Maybi is pressed up against the cage. Wong has hold of a leg and is looking to drag Maybi down to the mat. Maybi avoids the attempt though and has circled away. We're back to striking at a distance.
Maybi scores with a spinning back kick!
Wong staying out of range there.
As Maybi looks to move away, Wong throws a big counter combo bu Maybi just gets out of the way.
Lenny Wong is winning the standup battle so far.
Wong takes a head kick and shrugs it off.
Wong fails with a takedown attempt.
Maybi throws a series of punches but Wong avoids them all with ease.
We've had a slow start to the round here - hopefully the action picks up.
Wong circles away from the clinch attempt.
Wong throws a leg kick but Maybi moved away.
Wong stuffs a takedown. It's all about dictating where the fight takes place and Wong wants it to stay on the feet.
Maybi gets to the clinch - let's see what his plan is here.
A nice glancing elbow lands by Maybi.
That's one minute gone in the round.
Wong tries to pull guard but Maybi forces him back to his feet, against the cage.
That's three failed takedown attempts in the round for Lenny Wong. That's going to take a lot out of him.
Maybi manages to break the clinch.
Maybi drives through and clinches with Wong against the cage.
Wong is trying to pull guard but Maybi has him pressed against the cage.
Wong can't get the takedown.
Wong is looking to take this one to the mat.
Both fighters are breathing heavily.
Maybi is trying to maintain a safe position but Wong gets an underhook and turns Maybi into the cage.
Maybi lands a big knee to the head and Wong goes down! Maybi pounces and finishes the fight with strikes! He jumps to his feet and celebrates with the crowd!
Ladies and gentlemen, after 1:38 of round 3, we have a winner by way of TKO (Strikes). Karly Maybi!
Karly Maybi took some time post fight to say the following; 'Down you go..'.
|
|
|
|
|
|
|
|
|
|
|
|
|
|
|
|
|
|
|
|
|
|
|
| S |
C
A |
G |
S |
C
B |
G |
|
S |
C |
G |
|
energy
A | B |
|
hype
A | B |
|
pop
A | B |
|
mgr
A | B |
|
FIGHT
RATING
53% |
|
|
|
|
|
|
