|
|
PBP Commentary |
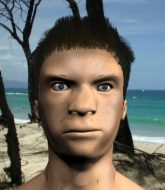
Coming up we have a lightweight MMA rules bout between Winston Churchill (ranked 0 p4p, 0 weight class) and Perrin Aybara (ranked 0 p4p, 0 weight class). Perrin Aybara acknowledges the crowd's support as he enters the cage.
 |
|
 |
| 170 cm
24
165 lbs
8 - 7 - 0 |
|
172 cm
25
159 lbs
11 - 7 - 0 |
Good wrestling
World class boxer
Cardio machine |
|
Good wrestler
Excellent MT
Good gas tank |
|
| |
|
Ladies and gentlemen. This fight is 3 rounds, in the lightweight division.
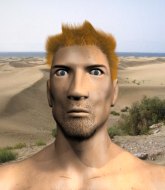
Introducing the fighter to my left, fighting out of the red corner.
With a record of
8 - 7 - 0, fighting out of Las Vegas, Winston Churchill!
And introducing the fighter to my right, fighting out of the blue corner.
With a record of
11 - 7 - 0, fighting out of Los Angeles, Perrin Aybara!
The judges for this bout are Gregory Folan, Elvis Blanc and Robert Douchet.

The bell rings for round one and we are underway!

Churchill pushes Aybara up against the cage in a clinch.

Aybara manages to break the clinch.
Perrin Aybara seems to be the more aggressive standup fighter in this bout.
Aybara swings for the body but Churchill moves out of range.
Churchill misses with a looping left.
Aybara scores with the left hand. Churchill knows he should have avoided that one.
Churchill tries to clinch there but Aybara circles away.
Churchill misses with a series of wild punches.
Churchill moves in looking to clinch but Aybara pushes him off.
A looping hook to the body misses from Churchill. Aybara does a little dance to reset his feet.
Churchill tries to close the distance and clinch up against the cage but Aybara paws at him with a jab and circles away.
Churchill takes a really solid shot there but just smiles back and shrugs his shoulders.
Aybara scores with a shot to the body.
We can't be sure of the tactics at this early stage but we have heard that Aybara has been working on his takedowns a lot in the buildup to the fight and we can only assume he's going to look to take this to the mat.
Churchill closes the distance and clinches.
Aybara tries to land a knee to the body but he is off balance and Churchill avoids it.
An uppercut on the inside fails to land for Aybara.
Aybara misses with a shot to the kidneys.
Aybara's head jolts backwards as he takes an uppercut right on the button!
We've seen a great period of action over the last minute or so - credit to both fighters for going all out!
Churchill fails to land with a short punch on the inside.
Churchill working aggressively here.

That's one minute gone in the round.
Churchill working aggressively here.
Churchill fails to land with a short punch on the inside.
Churchill throws a punch but it's blocked by Aybara.
A head punch blocked on the inside by Aybara.
Aybara lands an uppercut.
Aybara tries to take the fight to the ground by pulling guard but can't manage it.
Aybara misses with a short punch on the inside.
Aybara throws a punch but it's blocked by Churchill.
An uppercut on the inside fails to land for Churchill.
Churchill lands on the inside with an uppercut.
Churchill dodges an elbow strike from Aybara.
Churchill lands with a short head shot on the inside.
Aybara lands a nice elbow.
Aybara breaks from the clinch.
Aybara fakes high and swings low for a body shot but Churchill manages to avoid it.
The fight stays on the outside here - Churchill looks like he's thinking about clinching though.
Aybara fakes high and swings low for a body shot but Churchill manages to avoid it.
Churchill tries to clinch but Aybara moves out of range.
Aybara feints the counter takedown.
Churchill throws a series of punches but Aybara moves out of range.

That's two minutes gone in the round.
We've seen a great period of action over the last minute or so - credit to both fighters for going all out!
Churchill misses with the combination.
Aybara connects nicely with a jab. Noted by the judges no doubt.

Aybara drives through with a takedown into guard.
Churchill is looking to stand up but Aybara isn't so interested in that idea.
Aybara works over Churchill with some ground and pound from guard.
Aybara working in close now, lands a nice elbow to the side of Churchill's head.
Churchill is working an open guard here, looking to improve his position. No doubt that will leave him open to counters but at least he's being more offensive.
Aybara trying to control the position from guard on top but Churchill is wriggling around, looking for whatever he can.
Aybara is in close to Churchill's body, working some short punches and elbows.
Churchill has a closed guard, preventing anything of note from happening. Perhaps he's looking to stall.

That's three minutes gone in the round.
Churchill is working the butterfly guard. He manages to land a nice scissor sweep and is now in half guard on the top. Nice move.

Churchill works his way into side control.
Aybara gets back to half guard.
Churchill looking to pass the half guard. Not this time.
Aybara wants to improve his position but Churchill is controlling well.
Churchill wants to stand up but Aybara has a hold of him and won't allow it.
Churchill not landing any meaningful shots this time.

That's four minutes gone in the round.
Aybara wants to get back to full guard.

Churchill stands up and beckons Aybara to join him on the feet.
Aybara looking to shoot here. He's gone for it and he's landed a takedown into side control! Oh, that's bad for Churchill!
Churchill is putting a lot of effort into getting back to his feet here.
Aybara trying to control the position but Churchill is working away.
Churchill manages to work his way to half guard, despite Aybara's best efforts.

Churchill makes some distance and scrambles quickly back to his feet. Nice work!
Fantastic stuff here - a very entertaining period of action, which has drawn cheers from the crowd.
Churchill pushes Aybara up against the cage in a clinch.
A head punch on the inside from Aybara fails to land.
Aybara tries a body shot but Churchill blocks it.
Churchill misses with some punches.
Churchill tries a shoulder strike but it doesn't do any damage.
And thats the end of the round the fighters go back to their corners.
That was a close round but I would say that Winston Churchill will probably get the nod.
That's time! Churchill's corner gives him a slap on the ass as he gets ready to fight.

Aybara throws a chopping leg kick but Churchill manages to avoid taking any serious damage.
A telegraphed takedown attempt from Aybara is defended easily by Churchill.
Aybara connects with a right hand. Churchill shakes it off.
Churchill pushes Aybara up against the cage in a clinch.
Churchill lands with a quick shot inside that doesn't really do much damage.

It looks like Perrin Aybara has been cut.
Churchill blocks a couple of punches on the inside.
Churchill misses with a punch on the inside.
Aybara blocks an uppercut.
We've had a slow start to the round here - hopefully the action picks up.
Aybara tries a shoulder strike but it doesn't do any damage.
Churchill misses with some punches.
Churchill swings wildly with an uppercut but Aybara uses good head movement to avoid it.
Churchill lands a left hand that snaps the head of Aybara backwards.
Churchill fails to land with a short punch on the inside.
Churchill lands punches inside but they're not really causing much damage.
That's one minute gone in the round.
Churchill swings wildly with an uppercut but Aybara uses good head movement to avoid it.
An uppercut on the inside fails to land for Churchill.
Churchill misses with some punches.
Aybara breaks the clinch and we return to the middle of the mat.
Aybara looks to land a right hand but Churchill moved out of range.
A little feinted left hand from Churchill on the counter but he doesn't commit to it.
Sloppy strikes from Churchill. Those never looked like landing.
Churchill tries to close the distance and clinch up against the cage but Aybara paws at him with a jab and circles away.
Aybara shoots in for a takedown. "I don't think so" says Churchill as he avoids it easily.
Churchill fails in his attempt to clinch.

Churchill tries to keep at a distance but Aybara has taken the fight into the clinch.
Churchill blocks an elbow strike from Aybara.
Churchill misses with a hook from the clinch.
Aybara blocking some punches.
Aybara gets through Churchill's defenses to land a nice punch to the side of the head.
Winston Churchill has scored more points in the clinch so far.
A head punch blocked on the inside by Aybara.
Churchill throws a blind hook that connects with the side of Aybaras head.
Aybara tries to land a knee to the body but he is off balance and Churchill avoids it.
That's two minutes gone in the round.
Churchill lands a shoulder strike that jolts his opponent's head backwards.
Aybara wants a takedown but no success here.
Winston Churchill has stuffed three takedown attempts in the round now. That's going to take a lot out of Perrin Aybara.
This has been an exciting period of action!
Churchill misses with a short punch on the inside.
A head punch on the inside from Churchill fails to land.
Aybara lands punches inside but they're not really causing much damage.
Churchill misses with a short punch on the inside.
Churchill working aggressively here.
Churchill working some nice short punches in the clinch.
Churchill lands on the inside with an uppercut.
Churchill lands with a right to the head.
Churchill lands a hook that snaps the head of Aybara backwards.
Aybara tries to land knees in the clinch but Churchill avoids the damage to the body.
Aybara ties up his opponent against the cage and manages to drag the fight down to the ground. Aybara no doubt will be looking to work submissions from his guard.
The ref warns both fighters not to hold the cage as they work up against the meshing.
Churchill wants to pass the guard but Aybara is keeping the position.
Aybara has his hands on Churchill's head, controlling the position.
Churchill advances position into side control!
That's three minutes gone in the round.
Churchill trying to control the action but Aybara is working from the bottom.
Churchill stands up and beckons Aybara to his feet.
Churchill keeping his hands up high there, blocking the jab from Aybara.
Aybara has his hands up protecting his head but a hook from Churchill finds it's way round the side to connect with Aybara's head.
Aybara misses with a straight right.
Aybara rushes Churchill and presses him up against the cage.
Churchill lands punches inside but they're not really causing much damage.
That's four minutes gone in the round.
Churchill blocks the elbow strike.
A shot in the inside from Churchill.
Churchill blocks a couple of punches on the inside.
Aybara swings wildly with an uppercut but Churchill uses good head movement to avoid it.
Aybara tries to land a shot to the body but it's blocked.
A quick uppercut on the inside from Churchill.
Aybara swings wildly with an uppercut but Churchill uses good head movement to avoid it.
Aybara is working on a leg, looking for a takedown but Churchill is defending well.
Aybara tries to land knees in the clinch but Churchill avoids the damage to the body.
Aybara lands a right uppercut that snaps the head of Churchill backwards.
Fantastic stuff here - a very entertaining period of action, which has drawn cheers from the crowd.
Aybara blocks a punch to the side of the head.
Churchill misses with some punches.
Aybara misses with a hook from the clinch.
Aybara blocks an uppercut.
Churchill fails to land with a short punch on the inside.
Churchill blocks a punch to the side of the head.
Churchill prevents the takedown attempt.
Aybara makes some space for himself and lands an uppercut.
And thats the end of the round the fighters go back to their corners.
Winston Churchill dominated that second round.
The cut man is working on Perrin Aybara's cut.
OK. That's time! The bell goes and we're back to the action. The crowd applaud as we get ready to start the final round!

Aybara clinches up with Churchill and pushes him back against the cage.
Churchill lands with a quick shot inside that doesn't really do much damage.
Churchill throws a blind hook that connects with the side of Aybaras head.
A short right from Aybara.
Churchill lands a left hand.
Aybara tries to land knees in the clinch but Churchill avoids the damage to the body.
Aybara pushes off and circles away, back to the middle of the mat.
Churchill has Aybara up against the cage in a clinch.
Churchill misses with a punch on the inside.
Churchill blocks an uppercut.
Churchill lands with a left to the head.
Churchill lands with a short shot to the head.
Churchill throws a punch but it's blocked by Aybara.
Wooooo! Give it up for these two warriors! They are putting on a show!
Churchill fails to land with a short punch on the inside.
Aybara tries a shoulder strike but it doesn't do any damage.
Churchill swings away with an uppercut that misses.
A head punch blocked on the inside by Aybara.
Churchill lands with a short shot to the head.
Churchill lands with a light punch inside.
That's one minute gone in the round.
Churchill misses with a short punch on the inside.
Kneeeeees! The crowd are calling for knees to the body. Aybara obliges.
Aybara is working for takedown but Churchill is calmly controlling the position for now.
Aybara tries to throw a body punch but Churchill avoids it by throwing Aybara back against the cage.
Churchill misses with a punch on the inside.
Aybara has a couple of punches blocked by Churchill.
Churchill scores with an uppercut up the middle.
Churchill swings wildly with an uppercut but Aybara uses good head movement to avoid it.
Churchill blocking some punches.
Churchill lands with a good tight uppercut to the head.
A head punch blocked on the inside by Aybara.
Churchill scores with a shot to the side of Aybara's head.
A head punch on the inside from Aybara fails to land.
Aybara breaks the clinch and we're back to striking at distance.
Churchill misses with a wild body shot.
Churchill misses with a body shot. Nice footwork from Aybara.
Churchill tries to close the distance and clinch but Aybara swats him to one side with an open hand palm strike and circles away.
That's two minutes gone in the round.
Aybara lands a lovely overhand right.
Aybara scores with a sloppy right hand. Churchill should have avoided that one.
Winston Churchill is looking to keep the fight on the feet at all costs.
This is a great period of action - very entertaining stuff!
Churchill avoids the clinch attempt nicely.
Churchill tries to clinch up against the cage, rushing in to close the distance. Aybara manages to break the clinch and circles back to the middle of the mat.
Aybara swats away the attempt to clinch by Churchill.
Churchill closes the distance and presses his opponent up against the cage.
Churchill lands a right hand.
Winston Churchill is fighting for a decision here - he's started to take the cautious approach.
Aybara manages to break the clinch.
Aybara throws a lazy uppercut
and Churchill counters with a straight right hand.
Churchill tries to clinch but Aybara is having none of it.
A telegraphed right hand from Aybara misses the target.
Churchill misses with a jab, cross combination.
Aybara throws a right hand that misses
and Churchill cracks him with a counter punch right on the button.
That's three minutes gone in the round.
Aybara lands an overhand right.
Churchill moves in looking to clinch but Aybara pushes him off.
Churchill fails in his attempt to clinch.
Aybara lands a really nice looking cross but Churchill seems unphased.
Aybara fails with the takedown.
Churchill moves into the clinch successfully.
Churchill throws a punch but it's blocked by Aybara.
An uppercut on the inside fails to land for Aybara.
Churchill managing to block the knees to the body from Aybara.
Churchill blocks a punch to the side of the head.
Aybara trying to land knees to the body.
Churchill blocks a couple of punches on the inside.
That's four minutes gone in the round.
Churchill lands a right hand that snaps the head of Aybara backwards.
Still in the clinch, Churchill scores with a nice short uppercut.
Churchill is really dominating this fight. Is there anything that Aybara can do to turn this around?
Churchill misses with a hook from the clinch.
Churchill throws a punch but it's blocked by Aybara.
Churchill throws a head punch that misses.
Aybara wants to break free. God knows he wants to breaaaak freeee.
Aybara changes levels and goes for a takedown here. Churchill fights it off and pushes away nicely.
Winston Churchill has stuffed three takedown attempts in the round now. That's going to take a lot out of Perrin Aybara.
Aybara tries to land a leg kick but Churchill saw it coming and moves away.
The fight stays on the outside here - Churchill looks like he's thinking about clinching though.
Perrin Aybara seems to be getting the better of the standup.
Fantastic stuff here - a very entertaining period of action, which has drawn cheers from the crowd.
Aybara throws a hard body shot but it just misses.
Churchill tries to clinch there but Aybara circles away.
Winston Churchill is looking to throw some combinations by the looks of things.
Aybara avoids the clinch attempt nicely.
Perrin Aybara has stepped it up - he knows he needs a finish here!
Churchill tries to clinch there but Aybara circles away.
And that's the end of the fight!
Winston Churchill showed his dominance in that final round.
Well I reckon that's a shut out for Churchill, winning every round. Will the judges agree? They are the ones who matter, even if they are often depressingly incompetent. Over to the ring announcer for the scorecards.
Ladies and gentlemen, after 3 rounds of action, we go to the scorecards for a decision.
Judge Gregory Folan scores the fight 30:27
Judge Elvis Blanc scores the fight 30:27
Judge Robert Douchet scores the fight 30:27
In favor of your winner, by unanimous decision... Winston Churchill!
Winston Churchill spent the whole post fight interview bigging himself up. It didn't go down that well with the fans after a while as they thought it was a bit arrogant.
|
|
|
|
|
|
|
|
|
|
|
|
|
|
|
|
|
|
|
|
|
|
|
| S |
C
A |
G |
S |
C
B |
G |
|
S |
C |
G |
|
energy
A | B |
|
hype
A | B |
|
pop
A | B |
|
mgr
A | B |
|
FIGHT
RATING
62% |
|
|
|
|
|
|
