|
|
PBP Commentary |
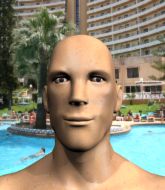
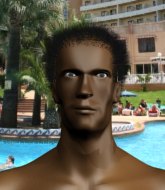
Coming up we have a featherweight MMA rules bout between Conor McGregor (ranked 0 p4p, 0 weight class) and Batraz Montana (ranked 0 p4p, 0 weight class). We have two fighters making their debuts here, so let's see who comes out of this one with their first professional victory.
 |
|
 |
| 190 cm
25
150 lbs
0 - 0 - 0 |
|
185 cm
25
150 lbs
0 - 0 - 0 |
BJJ Blue Belt
Solid Muay Thai
KO power |
|
BJJ Blue Belt
Solid Muay Thai
Granite chin |
|
| |
|
Ladies and gentlemen. This fight is 3 rounds, in the featherweight division.
Introducing the fighter to my left, fighting out of the red corner.
With a record of
0 - 0 - 0, fighting out of The Island, Conor McGregor!
And introducing the fighter to my right, fighting out of the blue corner.
With a record of
0 - 0 - 0, fighting out of The Island, Batraz Montana!
The judges for this bout are Bart Greer, Sandra Marshall and Peter Branson.

The bell rings for round one and we are underway!
Montana looks frustrated there after his takedown attempt is stuffed easily.
McGregor really does look like a pencil wearing a pair of gloves. Let's hope he has a gameplan to suit that ridiculous body shape.
Montana tries to clinch but is not successful on this occasion.
McGregor keeps the fight standing with a nice sprawl.
McGregor appears to be looking for a big counter.
Montana shoots for a takedown but McGregor saw that one coming a mile off and avoided it easily.
Conor McGregor has stuffed three takedown attempts in the round now. That's going to take a lot out of Batraz Montana.
Montana throws a low kick but McGregor moves out of range easily.
McGregor throws a big counter combination but Montana scrambles out of danger and avoids any damage.
We've had a slow start to the round here - hopefully the action picks up.
Montana is looking to clinch but McGregor is avoiding it.
McGregor throws a big counter combination but Montana scrambles out of danger and avoids any damage.
Montana dives in and grabs McGregor's left leg, looking for a takedown. McGregor pushes down on Montana's head and hops out.
As Montana looks to move away, McGregor throws a big counter combo but Montana just gets out of the way.
Montana tries to close the distance and clinch but McGregor swats him to one side with an open hand palm strike and circles away.
As Montana looks to move away, McGregor throws a big counter combo but Montana just gets out of the way.

That's one minute gone in the round.
McGregor circles away from the clinch attempt.
McGregor takes a head kick and keeps coming.
Montana closes the distance and clinches up with McGregor, looking for a takedown. Montana pushes McGregor against the cage but McGregor circles to the side and manages to break the clinch.
McGregor went nuts there looking for a big combo counter but none of the flurry connected.
Montana tries to close the distance and clinch but McGregor swats him to one side with an open hand palm strike and circles away.
McGregor went nuts there looking for a big combo counter but none of the flurry connected.
Montana misses with a takedown attempt. He shot from a bit too far out.
McGregor went nuts there looking for a big combo counter but none of the flurry connected.
Montana shoots in looking for a takedown. McGregor tries to sprawl out of it but Montana keeps driving through. The fighters are pinned against the cage. McGregor manages to get underhooks and after a bit of a struggle, circles away and we're back to standing.

That's two minutes gone in the round.
Montana throws a head kick that misses.
Montana shoots in for a takedown but doesn't get it.
McGregor is looking for a counter combo.
Conor McGregor is looking to keep the fight on the feet at all costs.
Montana looks winded!
Montana tries for a takedown but McGregor circles away easily
and McGregor counters with a one-two to the body.
Montana fakes high and shoots in for a takedown but McGregor avoids it really well and circles away.
As Montana looks to move away, McGregor throws a big counter combo but Montana just gets out of the way.
Montana changes levels and looks for a double leg takedown. McGregor tries to avoid it but Montana manages to keep hold of a leg and drag McGregor to the ground. McGregor escapes though and pops straight back up to his feet.
Batraz Montana seems to be the more aggressive standup fighter in this bout.
Montana tries to close the distance and clinch up but McGregor swats him away and circles back towards the center.
McGregor throws a big counter combination but Montana scrambles out of danger and avoids any damage.

That's three minutes gone in the round.
Montana tries for a takedown but McGregor circles away easily
and McGregor counters with a three punch combination, finished off with a leg kick. Nice work.
McGregor circles away from the clinch attempt
and McGregor counters with a left and a right that stings Montana.
Montana with a lazy takedown attempt
and McGregor counters with a two punch combo.
Montana moves in looking to clinch but McGregor pushes him off.
McGregor throws a big counter combination but Montana scrambles out of danger and avoids any damage.
Montana throws a jab, cross combination which is slipped
and McGregor counters with a series of strikes. Montana will be more careful next time no doubt.
Montana tries to clinch but McGregor moves away
and McGregor counters with a two punch combo.

That's four minutes gone in the round.
This has been an exciting period of action!
A punch combination from Montana misses.
It looked like McGregor was looking amped, ready to throw a big counter but didn't commit.
Montana with a lazy takedown attempt
and McGregor counters with a series of strikes. Montana will be more careful next time no doubt.
Montana shoots for a double leg takedown but McGregor sprawls well. He's pushed Montana's face into the mat and manages to get back to his feet relatively easily.
McGregor went nuts there looking for a big combo counter but none of the flurry connected.
Montana shoots in but doesn't get the takedown
and McGregor counters with a left and a right that stings Montana.
Montana wants to clinch
and McGregor counters with a three punch combination, finished off with a leg kick. Nice work.
Montana fails with the takedown
and McGregor counters with a series of strikes. Montana will be more careful next time no doubt.
And that�s the end of the round � the fighters go back to their corners.
Conor McGregor dominated that round.
The corners get their ten second warning. Both fighters stand from their stools and stare eachother down, ready to get back to the action.

Montana with a poor takedown
and McGregor counters with a left and a right that stings Montana.
Montana looks for a takedown here. Will he get it? McGregor is fending him off so far but Montana persists. Nope, McGregor circles away and we're back to standing.
McGregor appears to be looking for a big counter.
Montana doesn't succeed with the takedown
and McGregor counters with a three punch combo that has Montana backing up. Montana nods at McGregor to acknowledge the strikes.
Conor McGregor has stuffed three takedown attempts in the round now. That's going to take a lot out of Batraz Montana.
Montana pushes McGregor away with a front kick.
Montana throws the left hand but McGregor avoids the punch easily.
We've had a slow start to the round here - hopefully the action picks up.
Montana misses with a takedown
and McGregor counters with a three punch combo that has Montana backing up. Montana nods at McGregor to acknowledge the strikes.
Montana rushes in with a sloppy looking punch
and McGregor counters with a two punch combo.
Conor McGregor is looking to throw some combinations by the looks of things.
That's one minute gone in the round.
Montana gets his takedown attempt stuffed easily
and McGregor counters with a one-two to the body.
Montana is breathing heavily.
Montana shoots and misses
and McGregor counters with a one-two to the body.
Montana gets his takedown attempt stuffed easily
and McGregor counters with a three punch combination, finished off with a leg kick. Nice work.
Montana throws a wild body kick that McGregor sees coming a mile off.
McGregor is really dominating this fight. Is there anything that Montana can do to turn this around?
Montana tries to clinch but McGregor moves away
and McGregor counters with a one-two to the body.
Montana misses with a takedown attempt
and McGregor counters with a two punch combo.
Wooooo! Give it up for these two warriors! They are putting on a show!
Montana throws a left and a right that both miss
and McGregor counters with a left and a right that stings Montana.
That's two minutes gone in the round.
Montana has his takedown stuffed
and McGregor counters with a two punch combo.
Montana fails with the takedown
and McGregor counters with a three punch combination, finished off with a leg kick. Nice work.
Montana has his takedown stuffed
and McGregor counters with a left and a right that stings Montana.
Montana shoots and misses
and McGregor counters with a three punch combination, finished off with a leg kick. Nice work.
Montana throws a combination that misses
and McGregor counters with a three punch combination, finished off with a leg kick. Nice work.
That's three minutes gone in the round.
Montana with a poor takedown
and McGregor counters with a three punch combination, finished off with a leg kick. Nice work.
Montana with a poor takedown
and McGregor counters with a two punch combo.
Montana shoots in but doesn't get the takedown
and McGregor counters with a left and a right that stings Montana.
Montana wants to clinch but McGregor slips to the side
and McGregor counters with a left and a right that stings Montana.
Montana gets his takedown attempt stuffed easily
and McGregor counters with a three punch combination, finished off with a leg kick. Nice work.
This has been an exciting period of action!
Montana tries to clinch
and McGregor counters with a three punch combo that has Montana backing up. Montana nods at McGregor to acknowledge the strikes.
Montana doesn't succeed with the takedown
and McGregor counters with a two punch combo.
That's four minutes gone in the round.
Montana throws a poor cross that misses
and McGregor counters with a three punch combo that has Montana backing up. Montana nods at McGregor to acknowledge the strikes.
Montana misses with a combination
and McGregor counters with a three punch combo that has Montana backing up. Montana nods at McGregor to acknowledge the strikes.
Montana misses with a takedown
and McGregor counters with a three punch combo that has Montana backing up. Montana nods at McGregor to acknowledge the strikes.
Montana is trying desperately to land a takedown but McGregor is having absolutely none of it. This is turning into a bit of a nightmare for Montana.
The crowd applaud the fighters' efforts here as the round comes to an end.
Montana gets his takedown attempt stuffed easily
and McGregor counters with a series of strikes. Montana will be more careful next time no doubt.
And that�s the end of the round � the fighters go back to their corners.
Conor McGregor dominated that second round.
Well, the break between rounds is over. Let's get back to the scrappin! This is the final round!

Montana shoots in but no luck this time.
McGregor appears to be looking for a big counter.
Montana shoots in looking for a takedown but McGregor manages to keep the fight standing, pushing Montana's face into the canvas for good measure before circling away.
As Montana looks to move away, McGregor throws a big counter combo but Montana just gets out of the way.
Montana tries for a takedown but McGregor circles away easily
and McGregor counters with a series of strikes. Montana will be more careful next time no doubt.
Conor McGregor has stuffed three takedown attempts in the round now. That's going to take a lot out of Batraz Montana.
Montana gets his takedown attempt stuffed easily
and McGregor counters with a series of strikes. Montana will be more careful next time no doubt.
McGregor is working the combinations to good effect here.
We've had a slow start to the round here - hopefully the action picks up.
Montana misses with a shot to the body
and McGregor counters with a one-two to the body.
Montana takes a big intake of breath there - he's definitely tired.
Montana has his takedown stuffed
and McGregor counters with a one-two to the body.
That's one minute gone in the round.
A head kick by Montana misses
and McGregor counters with a left and a right that stings Montana.
Montana throws a sloppy head kick
and McGregor counters with a one-two to the body.
Montana darts in trying to clinch
and McGregor counters with a left and a right that stings Montana.
Montana misses with a takedown attempt
and McGregor counters with a left and a right that stings Montana.
Montana has his takedown stuffed
and McGregor counters with a one-two to the body.
That's two minutes gone in the round.
The crowd cheering loudly, showing their appreciation for the quality fight we're seeing here.
Montana with a lazy takedown attempt
and McGregor counters with a one-two to the body.

Montana is rocked!
Montana with a poor takedown
and McGregor counters with a series of strikes. Montana will be more careful next time no doubt.
Montana is still on wobbly legs! Can McGregor finish him?
Montana swings widly with a right hand
and McGregor counters with a series of strikes. Montana will be more careful next time no doubt.
Montana tries a head kick but it misses.
It looked like McGregor was looking amped, ready to throw a big counter but didn't commit.
No luck with that takedown attempt from Montana.
Montana throws a predictable looking body shot
and McGregor counters with a one-two to the body.
Montana tries to grapple but his opponent circles
and McGregor counters with a one-two to the body.
That's three minutes gone in the round.
Montana misses with a takedown attempt
and McGregor counters with a one-two to the body.
Montana seems to have recovered his senses.
Montana tries for a takedown but McGregor circles away easily
and McGregor counters with a two punch combo.
Both these guys seem content to just stand up and trade with eachother but Montana might want to think about changing up his gameplan a bit because over the course of the fight, McGregor has got the better of the exchanges.
Montana darts in trying to clinch
and McGregor counters with a one-two to the body.
Montana throws a body kick despite being completely out of range
and McGregor counters with a three punch combination, finished off with a leg kick. Nice work.
That's four minutes gone in the round.
McGregor circles away from the clinch attempt.
As Montana looks to move away, McGregor throws a big counter combo but Montana just gets out of the way.
Montana wants to clinch but McGregor slips to the side
and McGregor counters with a left and a right that stings Montana.
The crowd are loving this. Great action here.
Montana misses with a jab to the body
and McGregor counters with a two punch combo.
Montana throws a looping left and ducks down for a takedown. He's got his arms around McGregor's waist but McGregor gets an underhook and avoids the takedown by throwing Montana off to one side.
McGregor went nuts there looking for a big combo counter but none of the flurry connected.
Montana tries for a takedown but McGregor circles away easily
and McGregor counters with a left and a right that stings Montana.
Montana tries to drive through with a takedown attempt but McGregor defends well and Montana ends up having to push McGregor into the cage where they will battle it out in the clinch.
McGregor seem to be loading up, looking for a big counter.
Montana tries a switch kick but it misses it's target.
And that's the end of the fight!
Conor McGregor showed his dominance in that final round.
Well McGregor has outscored his opponent in every aspect of the fight today. Only a scarily incompetent judge or two will keep him from a well deserved win... Over to the ring announcer for the scorecards.
Ladies and gentlemen, after 3 rounds of action, we go to the scorecards for a decision.
Judge Bart Greer scores the fight 30:25
Judge Sandra Marshall scores the fight 30:25
Judge Peter Branson scores the fight 30:25
In favor of your winner, by unanimous decision... Conor McGregor!
|
|
|
|
|
|
|
|
|
|
|
|
|
|
|
|
|
|
|
|
|
|
|
| S |
C
A |
G |
S |
C
B |
G |
|
S |
C |
G |
|
energy
A | B |
|
hype
A | B |
|
pop
A | B |
|
mgr
A | B |
|
FIGHT
RATING
71% |
|
|
|
|
|
|
