|
|
PBP Commentary |
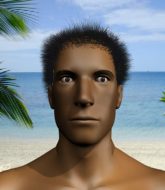
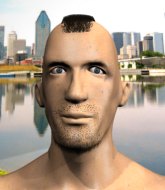
Coming up we have a light heavyweight MMA rules bout between Sammy Boyd (ranked 0 p4p, 0 weight class) and Keiichi Yamada (ranked 0 p4p, 0 weight class). Over to our ring announcer for the fighter introductions!
 |
|
 |
| 188 cm
36
214 lbs
19 - 12 - 0 |
|
170 cm
28
205 lbs
12 - 12 - 0 |
Abu Dhabi Champ
Lethal high kicks
Cardio machine |
|
Excellent grappler
World class boxer
Good gas tank |
|
| |
|
Ladies and gentlemen. This fight is 3 rounds, in the light heavyweight division.
Introducing the fighter to my left, fighting out of the red corner.
With a record of
19 - 12 - 0, fighting out of Los Angeles, Sammy Boyd!
And introducing the fighter to my right, fighting out of the blue corner.
With a record of
12 - 12 - 0, fighting out of St Petersburg, Keiichi Yamada!
The judges for this bout are , Frank Antenori and Jack Bonds.

The bell rings for round one and we are underway!
Boyd throws a couple of head shots and lands with the final one - a decent hook, which struck Yamada on the side of the head.

Yamada has closed the distance and engaged Boyd in a clinch.

Boyd has dropped down and is working for a takedown. Yamada is trying to keep an underhook but Boyd manages to get the takedown into half guard.
Yamada is looking for a sweep. Boyd is wise to his cunning plan and keeps the top position.
Boyd trying to control the action but Yamada is working from the bottom.
Boyd not landing any meaningful shots this time.
Yamada wants to get back to full guard.
Yamada moves into full guard.
Yamada wants to sweep but no luck.
Boyd pressing down on his opponent's thigh, looking to pass guard. Yamada is keeping the position for now.
Boyd postures up to throw the ground and pound strikes but they don't connect.
Yamada working the defensive guard well to avoid strikes from Boyd.
Boyd pressing down on his opponent's thigh, looking to pass guard. Yamada is keeping the position for now.
Boyd scoring with some ground and pound.

That's one minute gone in the round.

Yamada is looking for a triangle but Boyd pushes his legs off easily.
The ref warns both fighters not to hold the cage as they work up against the meshing.
Yamada has a loose triangle. He'll be looking to tighten that up but Boyd can see exactly what he's planning and manages to posture up and free himself.
Yamada looking to hit a scissor sweep but Boyd is one step ahead there.
Yamada is working actively off his back, looking to secure an arm or perhaps work for a triangle.
Yamada tries to land a sweep but no joy.
Yamada preventing the ground and pound from doing any damage.
Boyd is stalling in the full guard.
The fighters are starting to perspire pretty heavily.
Boyd is working Yamada over from the guard. He should look to pass the guard and do a little more damage with these strikes.

That's two minutes gone in the round.
Boyd keeps in close for a moment and lands a decent shot to the side of Yamada's head.
Boyd missing there with some ground and pound from the guard.
Boyd trying to control the position from guard on top but Yamada is wriggling around, looking for whatever he can.
Boyd slips effortlessly into side control - very nice.
Yamada is trying to improve his position.
Boyd scoring with punches and elbows.
Boyd scores with a couple of short elbows.
Yamada tries to improve position but can't.
Boyd is looking to take a break and control but Yamada is keeping him honest, looking to work from the bottom.
Yamada takes a big shot right to the temple there but he's taken it well.
Yamada has found himself in a tricky position here. He's been working his transitions in training so let's see if he can work his way out of it.

That's three minutes gone in the round.
Yamada sneaks back into half guard.
Boyd will need to keep those long limbs tucked in whilst he's on the ground, to prevent any submissions.
Yamada wants to improve his position but Boyd is controlling well.
Boyd scores with a couple of good hammerfists.
Boyd wants to pass the guard but Yamada is defending well.
Boyd trying to control the action but Yamada is working from the bottom.

Boyd is trying for a guillotine from the top but the pressure isn't in the right place so Yamada is just riding it out for now. Boyd eventually gives up the hold.
Boyd is just sitting in half guard, waiting for something to happen.

That's four minutes gone in the round.
Boyd trying to control from half guard but Yamada is working away.
Boyd is thinking about going for an arm triangle but he can't free his leg.
Boyd tries to pass to full mount but Yamada defends it.
Yamada gets back to full guard.
The crowd thankful this round is nearly over.
Yamada has his foot on Boyd's thigh. He's trying to push off and get in position for a triangle, I think. Boyd works his way back into a safe position though.
Yamada working from the bottom, still in full guard. He's managed to get a loose triangle. Boyd doesn't seem to be doing much to defend here, obviously he feels comfortable in the position. Boyd manages to throw the legs off his shoulder and he's back into guard - no problem.
Boyd stopping the sweep attempt from Yamada.
And that�s the end of the round � the fighters go back to their corners.
Sammy Boyd dominated that round.
The corners get their ten second warning. Both fighters stand from their stools and stare eachother down, ready to get back to the action.

Boyd throws a body kick that misses.
Yamada takes the fight into the clinch.
Boyd fails to land with a short punch on the inside.
A short right from Yamada on the inside.
Yamada has a couple of punches blocked by Boyd.
A head punch blocked on the inside by Boyd.
Boyd wants a takedown.
Boyd has hold of a leg and is looking for a trip takedown. Yamada avoids it nicely though and we remain in the clinch.
Boyd drops down for a takedown but doesn't get it.
That's three failed takedown attempts in the round for Sammy Boyd. That's going to take a lot out of him.
Boyd goes for a takedown in the clinch but Yamada prevents it.
Boyd changes levels and goes for a takedown here. Yamada fights it off and pushes away nicely.
We've had a slow start to the round here - hopefully the action picks up.
Nice defenses there by Boyd.
Keiichi Yamada seems to be the more aggressive standup fighter in this bout.
Boyd tries to clinch there but Yamada circles away.
Boyd looks to land a left hand but Yamada moved out of range nicely.
Boyd shoots for a double leg takedown but Yamada sprawls well. He's pushed Boyd's face into the mat and manages to get back to his feet relatively easily.
Yamada lands with a hook. Boyd tried to avoid it but it clipped the top of his head.
Boyd jabs at Yamada's body.
Boyd uses some good footwork to avoid the body shot by Yamada.
That's one minute gone in the round.
Yamada lands with a cross to side of his opponent's head.
Boyd ducks down and throws a hook to the body but Yamada moves away.
Yamada is the aggressor but that punch slipped nicely by Boyd.
Boyd moves forwards but Yamada connects with a nice, crisp jab.
Nice straight punches there by Yamada. You know Roy Jones Jr respects the hands of Yamada.
Yamada lands with a straight right. Boyd didn't see that one coming.
Boyd blocks a low kick nicely.
Boyd looks to land a body kick but Yamada moved away.
Boyd on the wrong end of a vicious looking body shot.
Yamada fakes with the hands and throws a leg kick but Boyd is out of range.
Nice shot by Yamada.
Yamada misses the jab.
Boyd keeping his hands up high there, blocking the jab from Yamada.
Boyd gets cracked there but stands up to it.
Boyd throws out a loose jab but Yamada uses good head movement to avoid it.
This is a great period of action - very entertaining stuff!
Yamada swings wildly with a right hand that was never going to find it's target.
Yamada misses with a straight left.
Boyd throws a chopping leg kick but Yamada manages to avoid taking any serious damage.
That's two minutes gone in the round.
A nice inside leg kick there by Yamada. That's going to slow Boyd down.
Boyd connects with a looping left hand that seems like it dazed Yamada momentarily.
Yamada lunges in with an uppercut that skims his opponent's chin.
Keiichi Yamada seems to be getting the better of the standup.
Yamada's hands are dropping dangerously low here and Boyd connects clean with a right hook that sends him down to one knee! Yamada scrambles back to his feet.
Yamada lands with a hook. Boyd tried to avoid it but it clipped the top of his head.
Boyd blocks a jab.
Yamada misses with a looping left.
A lazy left from Boyd finds it's target.
The sound of bone on bone echoes around the arena as Yamada checks a leg kick.
Yamada blocks a head kick by Boyd.
Yamada throws a hook but Boyd blocks it.
Boyd scores with a head kick. Yamada tried to block it but didn't get his arm up in time.

It looks like Keiichi Yamada has been cut.
Boyd throws a body punch but Yamada moves out of range.
The fighters circle momentarily. Yamada darts into range and connects with a nice straight punch.
Boyd throws a low kick but his opponent is out of range.
Yamada moving in and out of range nicely, whilst landing the scoring shot.
A jab from Yamada does it's job there.
That's three minutes gone in the round.
Boyd lands with an overhand left.
Yamada misses with a wild body shot.
A really sloppy takedown attempt there from Boyd.
Yamada cracks a nice hook into Boyd's ribs.
A slow jab from Yamada misses its intended target.
Boyd feints with a shoulder and throws a nice leg kick to Yamada's calf.
Boyd drops his hands and takes a jab to the jaw for his troubles.
A good leg kick by Yamada.

Boyd drives through and clinches with Yamada against the cage.
Boyd is using his height advantage well here, landing a good percentage of his punches.
Boyd is working Yamada over against the cage.
Yamada lands with a short punch from the clinch.
Boyd has Yamada pressed up against the cage and is working for takedown. Yamada manages to improve position though and keeps the fight standing.
Yamada tries to land a shot to the body but it's blocked.
Yamada misses with a short punch on the inside.
Yamada tries to throw a body punch but Boyd avoids it by throwing Yamada back against the cage.
Yamada lands with a quick shot inside that doesn't really do much damage.
Wooooo! Give it up for these two warriors! They are putting on a show!
A nice left hand lands by Boyd.
That's four minutes gone in the round.
Boyd is trying to trip Yamada. He has hold of a leg but Yamada is hopping around, keeping his balance for the moment. Boyd persists though and gets the takedown into guard.
The fighters are pressed up against the cage, both looking to find a bit of space to work.
Boyd trying to pass the guard but can't manage it just yet.
Boyd loading up with the ground and pound but he's missing more than he's landing in this flurry.
Yamada has his foot on Boyd's thigh. He's trying to push off and get in position for a triangle, I think. Boyd works his way back into a safe position though.
Boyd preventing the sweep.
Yamada is looking for a triangle but Boyd pushes his legs off easily.
Yamada keeping full guard, as Boyd tries to pass.
Boyd slows down the pace of the fight for a moment. He'll need to remain active if he doesn't want to see the fight stood back up.
Boyd working from the guard for now, landing some ground and pound.
The crowd applaud the fighters' efforts here as the round comes to an end.
Boyd wants to pass the guard but Yamada is keeping the position.
Yamada looking for a sweep. Not yet Yamada, not yet.
And that�s the end of the round � the fighters go back to their corners.
Keiichi Yamada showed his class in that round. I'd imagine he'll take it on all the scorecards.
The cut man is working on Keiichi Yamada's cut.
Well, the break between rounds is over. Let's get back to the scrappin! This is the final round!

Boyd displays some good footwork, moving neatly out of range as Yamada throws out the jab.
Boyd bobs and weaves and then throws a good body kick.
Boyd ducks under a wild hook from Yamada.
Yamada misses with a body shot. Nice footwork from Boyd.
Yamada lands with an uppercut that bounces Boyd off the cage and back into range.
Yamada clinches up with Boyd and pushes him back against the cage.
Yamada blocks a body shot from Boyd.
Boyd prevents a body shot from Yamada.
Boyd presses Yamada against the cage and delivers a mid-strength body shot.
A nice right hand lands inside from Boyd.
Yamada misses with the head strike.
A hook to the body from Boyd.
Keiichi Yamada seems to be working more effectively in the clinch in the fight so far.
Boyd tries a body shot but Yamada blocks it.
We've had a slow start to the round here - hopefully the action picks up.
Boyd tries a shoulder strike but it doesn't do any damage.
Boyd misses with some punches.
Yamada misses with a punch on the inside.
Yamada is defending well against a takedown attempt.
Still in the clinch, Boyd scores with a nice short uppercut.
Yamada prevents the takedown attempt.
Yamada throws a blind hook that connects with the side of Boyds head.
This is a great period of action - very entertaining stuff!
Boyd fails to land with a short punch on the inside.
That's one minute gone in the round.
Boyd doesn't land with the attempted body shot.
Boyd blocks a body shot from Yamada.
Yamada tried to land a shot to the body but connects with Boyd's elbow.
Boyd blocks a couple of punches on the inside.
Boyd throws a punch but it's blocked by Yamada.
Boyd working some nice short punches in the clinch.
Yamada tries to throw a body punch but Boyd avoids it by throwing Yamada back against the cage.
Boyd tries to land a shot to the body but it's blocked.
Yamada lands punches inside but they're not really causing much damage.
Boyd tries a shoulder strike but it doesn't do any damage.
Yamada lands a nice shot to the body.
Boyd lands with a good tight uppercut to the head.
Yamada swings wildly with an uppercut but Boyd uses good head movement to avoid it.
Boyd tries to throw a body punch but Yamada avoids it by throwing Boyd back against the cage.
Yamada fails to land with a short punch on the inside.
Boyd has a body lock and is looking for a takedown. Yamada is bouncing around trying to prevent the takedown and somehow he has indeed managed to stay on his feet.
That's three failed takedown attempts in the round for Sammy Boyd. That's going to take a lot out of him.
Yamada lands a body punch.
Both fighters are breathing heavily.
Nice body punch from Yamada - that landed with a thud.
Yamada lands a short shot on the inside that snaps the head of Boyd backwards.
That's two minutes gone in the round.
Yamada tries to throw a body punch but Boyd avoids it by throwing Yamada back against the cage.
Yamada works on Boyd's body with a couple of short punches.
Yamada works on Boyd's body with a couple of short punches.
Yamada working on landing some head shots here - that one got through nicely.
We've seen a great period of action over the last minute or so - credit to both fighters for going all out!
Yamada lands a shoulder strike that jolts his opponent's head backwards.
Yamada scores with an uppercut up the middle.

Boyd is rocked!
Yamada lands a hook to the body. It's hard to tell if that hurt Boyd or not.
Oh Boyd is still all over the place! His legs are completely gone! Will he be able to recover?!!
Yamada lands an uppercut in the clinch that drops Boyd to his knees! Yamada keeps firing more shots against his stricken opponent and the referee jumps in to save him!
Ladies and gentlemen, after 2:28 of round 3, we have a winner by way of TKO (Strikes). Keiichi Yamada!
|
|
|
|
|
|
|
|
|
|
|
|
|
|
|
|
|
|
|
|
|
|
|
| S |
C
A |
G |
S |
C
B |
G |
|
S |
C |
G |
|
energy
A | B |
|
hype
A | B |
|
pop
A | B |
|
mgr
A | B |
|
FIGHT
RATING
66% |
|
|
|
|
|
|
