|
|
PBP Commentary |
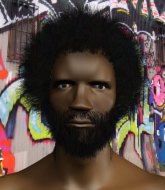
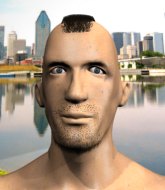
Coming up we have a light heavyweight MMA rules bout between Cron Spliffton (ranked 0 p4p, 0 weight class) and Keiichi Yamada (ranked 0 p4p, 0 weight class). Both these guys have really solid chins. Will we see a standup war or will they both decide that a knockout is unlikely and try to win the fight elsewhere?
 |
|
 |
| 191 cm
32
220 lbs
16 - 5 - 0 |
|
170 cm
29
205 lbs
13 - 12 - 0 |
Great wrestler
World class boxer
Insanely flexible |
|
Excellent grappler
Excellent MT
Good gas tank |
|
| |
|
Ladies and gentlemen. This fight is 3 rounds, in the light heavyweight division.
Introducing the fighter to my left, fighting out of the red corner.
With a record of
16 - 5 - 0, fighting out of Los Angeles, Cron Spliffton!
And introducing the fighter to my right, fighting out of the blue corner.
With a record of
13 - 12 - 0, fighting out of St Petersburg, Keiichi Yamada!
The judges for this bout are Jack Bonds, Frank Antenori and .

The bell rings for round one and we are underway!
Spliffton ducks under an overhand right and circles away with a smile on his face.
Spliffton defending well as Yamada loads up on a big left hand.
Yamada finds nothing but air with that leg kick attempt.
Spliffton is looking to counter the offense by Yamada and move into the clinch.
Spliffton swings for the body but Yamada moves out of range.
Spliffton uses good head movement to avoid the hook from Yamada.
A jab from Yamada finds it's way through Spliffton's defenses.
Spliffton throws a jab but it's blocked by Yamada.
Yamada throws a monster uppercut resembling something out of street fighter but it doesn't land.
Yamada feints a straight left to the body, then turns around with a flashy move and hits Splifftons jaw with a dramatic spinning back fist!
Spliffton blocks a low kick nicely.
Yamada takes an uppercut right on the button but keeps his composure.
Nice straight punches there by Spliffton. You know Roy Jones Jr respects the hands of Spliffton.
Yamada scores with a slapping inside leg kick.
Yamada takes a swing at Spliffton's ribcage but misses.
Yamada lands with a cross to side of his opponent's head.
Yamada throws a leg kick that misses.
Fantastic stuff here - a very entertaining period of action, which has drawn cheers from the crowd.
Spliffton lands the left hand.
Yamada has done a lot of speed work in the buildup to this fight.
Keiichi Yamada seems to be the more aggressive standup fighter in this bout.
Yamada scores with the left hand. Spliffton knows he should have avoided that one.
Spliffton takes a shot right to the liver - Bas would have been proud of that punch.

That's one minute gone in the round.
Yamada tries to land a front kick but Spliffton steps back. That was a bit too telegraphed.
Spliffton throws a quick inside leg kick.
Yamada lands with a cross.
Spliffton misses with a low kick.
Yamada follows through with a counter body kick but it doesn't land.
Yamada on the wrong end of a nice jab.
A big left from Yamada misses.
Spliffton looks to throw the jab but Yamada is out of range.

Yamada decides to change it up a bit and drives through with a nice takedown into half guard.
Yamada wants to take a breather but Spliffton is having none of it.

Spliffton is defending against the submission attempts here by Yamada.
Yamada sitting in half guard, looking to land shots. Spliffton defending well though.
Yamada wants to control but Spliffton is keeping him busy.
The ref warns both fighters not to hold the cage as they work up against the meshing.

That's two minutes gone in the round.
Yamada tries to pass the half guard into mount. Spliffton knows what he's doing though and prevents the attempt.
Yamada thows a huge punch but Spliffton dodges it nicely.
Yamada thows a wild elbow that connects with the canvas.
Spliffton wants to control but Yamada is keeping busy.
This is a great period of action - very entertaining stuff!
Yamada passes the half guard and he's now in mount! Big trouble for Spliffton!
Yamada goes for an armbar but he's fallen flat on his backside there and now Spliffton is on top in guard.
Yamada looking for a guillotine here but Spliffton defends easily.

That's three minutes gone in the round.
Yamada is throwing his legs up, looking for submissions. Spliffton is aware though and is defending well.
Yamada looking to sweep here. No luck so far.
Spliffton's corner is telling him to maintain position.
Yamada is active off his back here, looking for submissions.
The fighters are pressed up against the cage, both looking to find a bit of space to work.
Yamada looking for a sweep. Not yet Yamada, not yet.
The fighters are starting to perspire pretty heavily.

That's four minutes gone in the round.
A lull in the action here being met with boos from the crowd.
Yamada keeps trying to improve his position.
Spliffton will need to keep those long limbs tucked in whilst he's on the ground, to prevent any submissions.
Spliffton is stalling in the full guard.
Spliffton stopping the sweep attempt from Yamada.
Spliffton trying to control the position from guard on top but Yamada is wriggling around, looking for whatever he can.
Spliffton controlling from the top position.

The referee has motioned to the fighters to stand back up. He just wasn't happy with the level of activity.
And that�s the end of the round � the fighters go back to their corners.
Keiichi Yamada dominated that round.
That's time! Back to the action!

Spliffton scores with a spinning back kick!
Yamada connects with an inside leg kick.
Spliffton is using his height advantage well here, landing a good percentage of his punches.
Yamada connects with a slap. Keep your fist closed son.
Spliffton throws a body shot but no joy.
Keiichi Yamada seems to be getting the better of the standup.
Yamada chopping away at his opponent's legs.
Yamada moves out of range as Spliffton throws a body kick.
Yamada throws an uppercut from half a mile away. Spliffton sees it coming and avoids it easily.
Spliffton takes a big uppercut there. He seems a bit wobbly but no, he's OK.
Spliffton looks to have improved his striking defense since last time we saw him fight.
Spliffton bobs and weaves well there to avoid the strikes.
Spliffton misses the jab.
We've had a slow start to the round here - hopefully the action picks up.
Yamada throws an uppercut from half a mile away. Spliffton sees it coming and avoids it easily.
Spliffton misses the shot to the body.
Yamada misses with an uppercut. Spliffton saw that one coming.
A jab lands there for Spliffton.
Yamada closes the distance and gets a double leg, slamming Spliffton to the mat! Spliffton manages to get full guard.
Yamada has been the more effective fighter overall so far.
The crowd cheering loudly, showing their appreciation for the quality fight we're seeing here.
Yamada pressing down on his opponent's thigh, looking to pass guard. Spliffton is keeping the position for now.
That's one minute gone in the round.
Yamada trying to control the position from guard on top but Spliffton is wriggling around, looking for whatever he can.
Keiichi Yamada has got the better of the ground game so far.
Yamada stopping the sweep attempt from Spliffton.
Yamada working from the guard for now, landing some ground and pound.
Spliffton keeping moving, preventing Yamada from controlling successfully.
Yamada forces his way into half guard.
Yamada is working for submissions here but there's nothing on.
Yamada is trying to control the action in half guard but Spliffton is working away on the bottom, looking perhaps to get back to full guard.
That's two minutes gone in the round.
The crowd are hurling abuse towards the fighters... You can hardly blame them though because there isn't a lot going on in the fight.
Yamada is trying for a guillotine from the top but the pressure isn't in the right place so Spliffton is just riding it out for now. Yamada eventually gives up the hold.
Yamada wants to free his trapped foot but Spliffton is holding on for dear life with his legs.
Spliffton is staying active underneath Yamada, who seems content to just control the action from this position.
Yamada slips a nice elbow through Spliffton's hands, connecting with Spliffton's forehead.
Yamada lands with an elbow from half guard - that looked like it hurt.
Spliffton works his way to full guard. Good work.
That's three minutes gone in the round.
Yamada passes easily into side control. Nice work.
Yamada throws a knee to the body but it doesn't do much damage.
Yamada taking a breather here.
Yamada wants to lay and pray for a moment but Spliffton keeps working.
Yamada scoring with punches from side control.
Yamada advances to full mount.
That's four minutes gone in the round.
Yamada throws some wild stikes that Spliffton manages to avoid easily.
Yamada controlling the position easily from mount.
Yamada avoids the attempt from Spliffton to control.
Yamada looking to finish with strikes here!
Spliffton holding onto his opponent's waist for dear life, as Yamada tries to land some strikes to get him to release his grip.
The crowd thankful this round is nearly over.
Spliffton working to try and regain half guard.
And that�s the end of the round � the fighters go back to their corners.
Keiichi Yamada showed his class in that round. I'd imagine he'll take it on all the scorecards.
OK. That's time! The bell goes and we're back to the action. This is the final round!

Good standup being displayed there by Yamada as he connects with a hook.
Yamada throws an overhand right that lands on Spliffton's shoulder, as Spliffton tries to avoid the shot.
Yamada throws a body shot but no joy.
Yamada ducks low and lands a nice hook to the body of his opponent.
Ouch! a nice leg kick from Yamada, right into the meat.
Yamada lands a nice hook to Spliffton's body. Spliffton takes it in his stride and looks to land his own strikes.
A big left from Yamada misses.
Yamada misses with a lunging right hand

and Spliffton holds on and brings the fighters into a clinch.
Yamada is trying to push Spliffton away but Spliffton has him pressed against the cage, so he's going nowhere.
A shot in the inside from Spliffton.
With the fighters clinched against the cage, Yamada creates a bit of distance for himself and scores with a nice uppercut.
Yamada working hard to break the clinch.
A head punch blocked on the inside by Yamada.
Yamada is trying to work out of this bad position, with his back against the cage.
Yamada is working for takedown but Spliffton is calmly controlling the position for now.
A nice right hand lands inside from Spliffton.
Spliffton misses with a punch on the inside.
The fans in attendance giving it up for the two fighters, who have really let it all hang out in the last minute or so!
Yamada lands punches inside but they're not really causing much damage.
That's one minute gone in the round.
Spliffton tried to land a shot to the body but connects with Yamada's elbow.
A nice left hand lands by Spliffton.
A nice right hand lands inside from Spliffton.
Spliffton throws a head punch that misses.
A shot in the inside from Spliffton.
Yamada pressing his opponent against the cage.
Spliffton fails to land with a short punch on the inside.
Spliffton cracks Yamada with a nice body shot.

Yamada manages to break the clinch.
Yamada misses with a straight left.
Yamada misses with a left hand
and Spliffton holds on and brings the fighters into a clinch.
Spliffton lands with a right to the head.
Yamada tries for a takedown. No joy.
Yamada working hard to break the clinch.
Yamada breaks the clinch.
Spliffton with a nice looking leg kick. You could hear that one land in a back row.
Yamada throws a jab but it's blocked by Spliffton.
That's two minutes gone in the round.
Spliffton thuds a mid kick into his opponent's body. That will wear on Yamada if he has to take too many more of those.
The crowd are loving this. Great action here.
Yamada slips a jab from Spliffton.
Spliffton misses with a straight right.
Spliffton throws a head kick but Yamada moves out of range.
Yamada throws a big shot that misses.
Spliffton seemed to be looking to counter by closing the distance.
Yamada uses some good footwork to avoid the body shot by Spliffton.
A lazy left from Yamada finds it's target.
Yamada tries to land a front kick but Spliffton steps back. That was a bit too telegraphed.
Spliffton is looking to counter the offense by Yamada and move into the clinch.
Spliffton throws a push kick but Yamada slaps the foot to one side.
Yamada connects with a lovely right hand, straight down the pipe.
Yamada misses with a leg kick.
As Yamada tries to get set, Spliffton tries to push him back and clinch up but Yamada manages to avoid the attempt.
Yamada lands with a good body shot.
Spliffton staying out of range there.
Spliffton takes a kick to the body and keeps moving.
Spliffton bobs and weaves well there to avoid the strikes.
Yamada looks to throw the jab but Spliffton is out of range.
Spliffton seemed to be looking to counter by closing the distance.
That's three minutes gone in the round.
Yamada is moving around nicely and scores here with a single head shot.
Yamada moves forwards but Spliffton connects with a nice, crisp jab.
Spliffton displays some good footwork, moving neatly out of range as Yamada throws out the jab.
Spliffton throws an overhand right that lands on Yamada's shoulder, as Yamada tries to avoid the shot.
Spliffton lands a lovely overhand right.
Spliffton throws a body kick but he was well out of range there.
A solid body kick from Spliffton.
Yamada misses with a low kick.
Cron Spliffton has stepped it up - he knows he needs a finish here!
Yamada throws a looping overhand right but Spliffton ducks down to avoid it.
Yamada throws an ugly left hook that misses
and Spliffton counters by moving into the clinch.
Yamada pushes off and circles away, back to the middle of the mat.
A slapping leg kick lands for Spliffton.
Like a baseball bat into the meat of his leg there - nice leg kick by Yamada.
Spliffton takes one on the button.
Wooooo! Give it up for these two warriors! They are putting on a show!
Yamada misses with a low kick.
Spliffton takes a step towards his opponent and connects with a left hand, before circling away.
That's four minutes gone in the round.
Yamada goes for a double leg but Spliffton avoids the attempt and the two fighters end up clinched against the cage as Spliffton continues to drive forward.
Cron Spliffton has stuffed three takedown attempts in the round now. That's going to take a lot out of Keiichi Yamada.
Yamada on the wrong end of a nice low kick. He's acting like it's no big deal but he doesn't want to take many more of those.
Yamada throws a shot to the body.
Yamada misses with an uppercut. Spliffton saw that one coming.
Spliffton looks to throw the jab but Yamada is out of range.
Keiichi Yamada is fighting for a decision - hopefully he's judged it right and he's actually winning the fight.
Spliffton misses the shot to the body.
Yamada uses decent footwork to sidestep a right hand from Spliffton.
Yamada throws an overhand right that lands on Spliffton's shoulder, as Spliffton tries to avoid the shot.
Oooooooooooh, not good. A low kick from Spliffton lands where it shouldn't have, right in the... well, you know what he did? He kicked him in the penis. He's injured, injured bad. The referee sends both fighters to their corners and Yamada has 5 minutes to recover. He's OK now though... a thumbs up from Yamada and we're back underway with a touch of gloves.
Spliffton uses good footwork to avoid the strikes from Yamada.
Yamada looks for a takedown. He's got it. We're now in half guard.
Spliffton tries to get to full guard but Yamada has control of the leg.
Yamada with a momentary lay and pray from half guard.
And that's the end of the fight!
I would just about give that final round to Keiichi Yamada.
I've got Yamada winning every round here. Surely the decision will go his way and he'll pick up a well deserved decision victory. Over to the ring announcer for the scorecards.
Ladies and gentlemen, after 3 rounds of action, we go to the scorecards for a decision.
Judge Jack Bonds scores the fight 28:29
Judge Frank Antenori scores the fight 28:30
Judge Percy O'Donnell scores the fight 28:29
In favor of your winner, by unanimous decision... Keiichi Yamada!
|
|
|
|
|
|
|
|
|
|
|
|
|
|
|
|
|
|
|
|
|
|
|
| S |
C
A |
G |
S |
C
B |
G |
|
S |
C |
G |
|
energy
A | B |
|
hype
A | B |
|
pop
A | B |
|
mgr
A | B |
|
FIGHT
RATING
51% |
|
|
|
|
|
|
