|
|
PBP Commentary |
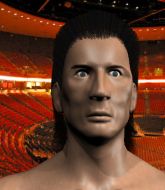
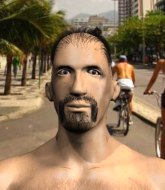
Coming up we have a lightweight MMA rules bout between Kyle Munro (ranked 0 p4p, 0 weight class) and Nick Diaz (ranked 0 p4p, 0 weight class). We have two fighters making their debuts here, so let's see who comes out of this one with their first professional victory.
 |
|
 |
| 175 cm
25
155 lbs
0 - 0 - 0 |
|
190 cm
25
160 lbs
0 - 0 - 0 |
BJJ Blue Belt
Excellent MT
KO power |
|
BJJ Blue Belt
Decent boxing
Determined |
|
| |
|
Ladies and gentlemen. This fight is 3 rounds, in the lightweight division.
Introducing the fighter to my left, fighting out of the red corner.
With a record of
0 - 0 - 0, fighting out of The Island, Kyle Munro!
And introducing the fighter to my right, fighting out of the blue corner.
With a record of
0 - 0 - 0, fighting out of The Island, Nick Diaz!
The judges for this bout are Daniel Franklin, Michael Johnstone and Santiago Holmes.

The bell rings for round one and we are underway!
Munro goes for a spinning back kick but it misses.
Diaz shoots in for a takedown. "I don't think so" says Munro as he avoids it easily.
Munro throws a sloppy head kick and Diaz moves out of range easily.
Munro swings and misses with a hook to the body.
Munro fails with a takedown attempt.
Diaz shoots in with a takedown attempt and he has Munro pinned against the cage. Munro gets the underhooks and manages to circle away.
Munro throws a nice head kick!

It looks like Nick Diaz has been cut.
We've had a slow start to the round here - hopefully the action picks up.
A head kick by Munro misses
and Diaz counters with a good right hand that lands right on the jaw.
Munro throws a sloppy head kick and Diaz moves out of range easily.
Diaz is a painfully thin specimen of a man. You do wonder whether a good body kick would snap him clean in two.
Diaz dives in and grabs Munro's left leg, looking for a takedown. Munro pushes down on Diaz's head and hops out.
Kyle Munro has stuffed three takedown attempts in the round now. That's going to take a lot out of Nick Diaz.
A head kick by Munro misses
and Diaz counters with a good right hand that lands right on the jaw.
Diaz tries to shoot in for a takedown. He's got hold of a leg but Munro swivels and escapes.
Munro thinks about countering with a head kick.

That's one minute gone in the round.
Munro throws a sloppy head kick and Diaz moves out of range easily.
Munro is breathing heavily.
Munro throws a lazy head kick

and Diaz counters into the clinch. Nicely done.
Munro stops a takedown attempt from Diaz.

Diaz manages to break the clinch.
Munro goes for a high kick. It partially lands.
Diaz has a takedown stuffed.
Munro misses with a head kick.
Munro throws a head kick but Diaz moves out of range.
Munro throws a leg kick
enabling Diaz to counter with a crisp jab.
Diaz is using his reach advantage to land shots from outside his opponent's range.
Munro misses with a half-hearted attempt at a head kick.
Diaz throws a counter combo.
Diaz shoots in for a takedown but Munro shows good takedown defense.
Diaz dives in and grabs Munro's left leg, looking for a takedown. Munro pushes down on Diaz's head and hops out.
A head kick misses from Munro.
Diaz connects with a crisp jab.

That's two minutes gone in the round.
Munro throws a lazy head kick
and Diaz counters with a crisp hook to the side of the head.
Wooooo! Give it up for these two warriors! They are putting on a show!
A head kick misses from Munro.
Diaz looks like he wants to counter punch here.
Kyle Munro seems to be the more aggressive standup fighter in this bout.
Munro throws a sloppy head kick and Diaz moves out of range easily.
Munro throws a sloppy head kick
and Diaz cracks him with a counter punch right on the button.
Diaz closes this distance looking for a takedown but Munro circles away.
Munro misses with a half-hearted attempt at a head kick.
Munro doesn't react quick enough there as he takes a shot to the body.
Diaz has used his reach advantage pretty well so far tonight.
Munro buckles his opponent's knee momentarily with a nice leg kick.
Diaz scores with a nice head shot.
Munro thuds his shin into the meat of Diaz's side.
Munro throws a sloppy head kick and Diaz moves out of range easily.
Diaz looked like he wanted to counter with a punch but didn't throw it.
Diaz closes the distance and lands a one-two.
Munro throws a head kick that misses and slips in the process. He scrambles back to his feet and the fighters circle.
Diaz blocks a head kick by Munro.

That's three minutes gone in the round.
Nice uppercut there from Diaz.
Diaz shoots in for a takedown but Munro shows good takedown defense.
Munro lands a high kick!
Diaz shoots in but no luck this time.
A solid leg kick lands there for Munro.
Munro throws a head kick but Diaz moves out of range.
Diaz shoots in looking for a takedown but Munro manages to keep the fight standing, pushing Diaz's face into the canvas for good measure before circling away.
Diaz on the wrong end of a nice low kick. He's acting like it's no big deal but he doesn't want to take many more of those.
Diaz darts in looking for a takedown but Munro gets double underhooks and turns Diaz into the cage.
Munro tries a switch kick but it misses it's target.
Munro takes a hook to the side of the head. I wonder if that's got his ears ringing.
Diaz looks for a takedown here. Will he get it? Munro is fending him off so far but Diaz persists. Nope, Munro circles away and we're back to standing.
Diaz steps to his left, right into the path of a big body kick from Munro. That one must have hurt.
Munro pulls out of a head kick attempt.

That's four minutes gone in the round.
We've seen a great period of action over the last minute or so - credit to both fighters for going all out!

Diaz drops down and drives through with a powerful takedown into guard.

Munro looks to be working for a triangle here. Oh, it looks like he might have it! Diaz has picked Munro up and slammed him! Munro can't keep hold of the triangle and Diaz manages to pass to side control!
Diaz lands a few punches from side control.

Diaz is looking for a kimura. He might have it! No, Munro has escaped the position, nice work there.
Munro is positioning himself to get back to half guard.
Diaz looking to punish the body of his opponent here but Munro is avoiding damage well.
Munro is trying to get back to half guard.
And thats the end of the round the fighters go back to their corners.
Kyle Munro dominated that round.
The cut man is working on Nick Diaz's cut.
That's the end of the interval. I'm sure that seemed a lot quicker than a minute for our two fighters! Back to the action.

A head kick misses from Munro.
Munro throws a hard body shot but it just misses.
Kyle Munro is winning the standup battle so far.
Diaz keeping a good distance there, avoiding the body shot.
A little jabbing left from Diaz on the counter but it doesn't find it's target.
Munro is really dominating this fight. Is there anything that Diaz can do to turn this around?
Diaz tries to drive through with a takedown attempt but Munro defends well and Diaz ends up having to push Munro into the cage where they will battle it out in the clinch.
Munro throws a head kick that misses and slips in the process. He scrambles back to his feet and the fighters circle.
A head kick by Munro misses
and Diaz connects with a straight left hand counter down the middle.
Diaz shoots in for a takedown but Munro shows good takedown defense.
A head kick by Munro misses
and Diaz counters with a nice body shot.
Diaz moves into the clinch successfully.
Diaz lands with a left to the head.
We've had a slow start to the round here - hopefully the action picks up.
Diaz pulls Munro into guard.
Munro is looking to pass into half guard but Diaz pushes him away with his feet and jumps on top - now Diaz is in guard.

Both fighters are absolutely exhausted here.
Munro is looking for a triangle here but Diaz uses the submission attempt to pass into side control.
Wooooo! Give it up for these two warriors! They are putting on a show!
Munro tries to bench press Diaz off him but Diaz keeps the position.
That's one minute gone in the round.
Munro throwing some weak shots from the bottom that do no damage.
Munro might be looking to lock onto one of his opponent's long limbs for a submission, whilst we're on the ground.
Munro is looking to slip a leg under and get half guard but Diaz is one step ahead and moves to full mount!
Diaz sitting in mount, just looking to control for the moment.
Munro swinging wildly from the bottom but he's not landing.
Diaz lands a couple of good shots and Munro has given up his back, trying to escape the position!
Munro wants to escape the position.
Munro avoids the strikes from Diaz.
Munro wants to escape the position.
Munro trying to control the hands but Diaz breaks the grip.
That's two minutes gone in the round.
Diaz scores with a nice shot to the head of his opponent. Munro is looking for a way out.
Munro rolls, trying to escape but Diaz keeps control of the position.
Diaz working for a RNC but it's not happening just yet.
The fighters are pressed up against the cage, both looking to find a bit of space to work.
Munro covering up well under a barage of strikes.
You know, I was talking to some of our celebrities at ringside tonight and they were split right down the middle on who was going to win this fight.
Diaz working for the choke.
Diaz is working hard for the rear naked choke here.
That's three minutes gone in the round.
Munro turns into Diaz and is now in his guard.
Diaz trying to control the position.
Munro postures up and lands a big shot to Diaz's brow.
Munro wants to control from the top but Diaz keeps moving.
Diaz utilising some decent striking defenses from the guard, preventing the ground and pound.
Munro with a couple of shots to the head there. Not particularly brutal.
Diaz is adopting a defensive guard.
Diaz is throwing his legs up, looking for submissions. Munro is aware though and is defending well.
Munro is pushing down on Diaz's leg trying to pass to half guard. Diaz is fighting to maintain full guard but Munro has managed to sneak the leg through.
That's four minutes gone in the round.
Munro throwing punches and elbows but they're not doing any damage.
Diaz wants to improve his position but Munro is controlling well.
Munro landing with strikes to the body and head, softening up his opponent.
Munro is thwarting Diaz's attempts to control the position.
Diaz connecting with a few gentle strikes.
Munro looks towards his corner to check for any instructions. The corner give him nothing to work with, so he cracks Diaz with a short hammerfist. I guess that's as good as any advice he could get in this position.
Munro slips a nice elbow through Diaz's hands, connecting with Diaz's forehead.
Munro tries to pass to full mount but Diaz defends it.
Diaz actively working from the bottom here.
Munro looks towards his corner to check for any instructions. The corner give him nothing to work with, so he cracks Diaz with a short hammerfist. I guess that's as good as any advice he could get in this position.
And thats the end of the round the fighters go back to their corners.
Nick Diaz showed his class in that round. I'd imagine he'll take it on all the scorecards.
The cut man is working on Nick Diaz's cut.
That's the end of the interval. I'm sure that seemed a lot quicker than a minute for our two fighters! Back to the action. This is the final round!

Munro misses with a body shot.
Munro leaves Diaz with his face pressed against the mat as he sprawls beautifully, defending against a solid takedown attempt.
Munro throws a head kick that misses.
Munro throws a head kick that misses
and Diaz counters with a straight right hand.
A head kick by Munro misses
and Diaz counters with a three punch combo that has Munro backing up. Munro nods at Diaz to acknowledge the strikes.
Munro throws a half hearted mid kick.
Diaz is loading up here, looking for a big counter of his own.
Diaz's corner calls for a 1-2. Diaz obliges with the 1 part as he scores the single shot and moves back out of range.
Diaz shoots in looking for a takedown but Munro manages to keep the fight standing, pushing Diaz's face into the canvas for good measure before circling away.
Munro throws a counter high kick but Diaz was just alert enough to avoid it.
Diaz takes a kick to the side of the head.
We've had a slow start to the round here - hopefully the action picks up.
Diaz fakes an overhand right and shoots for a takedown. Munro sprawls well initially but Diaz persists and gets the takedown into half guard.
This is a great period of action - very entertaining stuff!
Diaz sitting and controlling from the half guard.
Munro is looking to improve his position.
Both fighters are breathing heavily.
That's one minute gone in the round.
Munro missing with punches from the bottom.
Well, if Diaz is going to just lie there, perhaps we should talk about what we're having for dinner tonight
I'm having a ham and pineapple pizza
Yum. Can't wait.
The ref warns both fighters not to hold the cage as they work up against the meshing.
Diaz throwing shots but Munro is blocking nicely.
Munro looking to work for a kimura from the bottom.
Munro is looking to get full guard. It looks like he might be successful but at the last minute Diaz jumps into side control!
A lull in the action here.
Munro is positioning himself to get back to half guard.
That's two minutes gone in the round.
Neither fighter has done anything of merit for a good minute or two here and the crowd are not happy about it.
Diaz controlling the position.
Munro has been looking to land a fair amount of strikes on the ground. He might be looking to soften his opponent up in order to work for a submission.
Munro is trying to get back to half guard.
Diaz staying calm.
Munro dodges the ground and pound from Diaz.
That's three minutes gone in the round.
Diaz is trying to land an Americana. He has the arm isolated but Munro is keeping cool and he's avoided the danger for now.
Munro is trying to control Diaz's posture but Diaz avoids it.

Diaz decides to take the fight back to the feet.
Diaz shoots in for a takedown but Munro shows good takedown defense there and keeps this one on the feet.
Kyle Munro has stuffed three takedown attempts in the round now. That's going to take a lot out of Nick Diaz.
Munro throws a head kick that misses and slips in the process. He scrambles back to his feet and the fighters circle.
Diaz feints the counter takedown.
Munro throws a lazy head kick
and Diaz makes him pay by landing a nice hook to the body before moving out of range.
Munro throws a sloppy head kick and Diaz moves out of range easily.
Diaz replies with a solid counter kick to the body but Munro blocks it well.
Diaz rushes Munro and pushes him back against the cage in a clinch.
Diaz tries to score a body lock takedown but Munro shows good agility there to stay on his feet.
Diaz avoiding damage as Munro throws knees to the body.
That's four minutes gone in the round.
Munro misses with a knee to the head.
Munro gets underhooks to prevent Diaz's takedown attempt.
Munro unloads a knee to the mid-section.
Munro prevents Diaz from breaking the clinch.
Munro with an attempt at a knee that misses.
Munro missing with knees to the body.
Diaz ties up his opponent against the cage and manages to drag the fight down to the ground. Diaz no doubt will be looking to work submissions from his guard.
Munro pushes down on Diaz's leg and manages to get into half guard.
Diaz regains full guard, whilst avoiding punches from Munro.
The crowd thankful this round is nearly over.
Munro trying to control but Diaz is working from the bottom.
And that's the end of the fight!
I would just about give that final round to Nick Diaz.
I think Diaz has won this one but let's see whether the judges agree with me. Over to the ring announcer for the scorecards.
Ladies and gentlemen, after 3 rounds of action, we go to the scorecards for a decision.
Judge Daniel Franklin scores the fight 28:29
Judge Michael Johnstone scores the fight 28:29
Judge Santiago Holmes scores the fight 28:29
In favor of your winner, by unanimous decision... Nick Diaz!
A pretty intense looking Nick Diaz took the opportunity post-fight to ask for a shot at the title.
|
|
|
|
|
|
|
|
|
|
|
|
|
|
|
|
|
|
|
|
|
|
|
| S |
C
A |
G |
S |
C
B |
G |
|
S |
C |
G |
|
energy
A | B |
|
hype
A | B |
|
pop
A | B |
|
mgr
A | B |
|
FIGHT
RATING
47% |
|
|
|
|
|
|
