|
|
PBP Commentary |
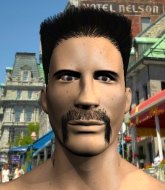
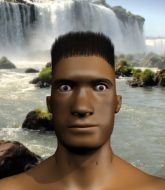
Coming up we have a heavyweight MMA rules bout between Benedict Riggs (ranked 0 p4p, 0 weight class) and Erik Gringley (ranked 0 p4p, 0 weight class). We have two fighters making their debuts here, so let's see who comes out of this one with their first professional victory.
 |
|
 |
| 182 cm
18
278 lbs
0 - 0 - 0 |
|
215 cm
18
240 lbs
0 - 0 - 0 |
BJJ Blue Belt
Counter fighter
Cuts easily |
|
BJJ White Belt
Brawler
Heavy handed |
|
| |
|
Ladies and gentlemen. This fight is 3 rounds, in the heavyweight division.
Introducing the fighter to my left, fighting out of the red corner.
With a record of
0 - 0 - 0, fighting out of Amsterdam, Benedict Riggs!
And introducing the fighter to my right, fighting out of the blue corner.
With a record of
0 - 0 - 0, fighting out of Amsterdam, Erik Gringley !
The judges for this bout are Saam Ante, Wagner Zegers and Patrick Alders.

The bell rings for round one and we are underway!
Riggs throws out a loose jab but Gringley uses good head movement to avoid it.
Gringley slips a straight right by Riggs.
Gringley darts in looking for a takedown but Riggs gets double underhooks and turns Gringley into the cage.
Riggs attempts a counter takedown but Gringley avoids it well and moves away.
Gringley throws out a powerful jab.

It looks like Benedict Riggs has been cut.
Good work by Riggs as he checks the leg kick.
Riggs stuffs the takedown.
Riggs throws a shot from downtown. Gringley moves away and avoids it.

Riggs closes the distance and presses his opponent up against the cage.
Riggs is trying to pull guard but being pressed up against the cage enables Gringley to keep the fight standing.
We've had a slow start to the round here - hopefully the action picks up.
Gringley taking a break, stalling in the clinch.
Gringley is trying to pull guard but Riggs turns him against the cage and we stay in the clinch.
Benedict Riggs has stuffed three takedown attempts in the round now. That's going to take a lot out of Erik Gringley .

Riggs manages to pull guard. Let's see whether he can land a sub off his back.

Gringley has gone for a leg lock! Riggs slips out almost immediately though and dives into Gringley 's guard.


That's one minute gone in the round.
Riggs trying to land body shots but he keeps hitting the mat.
Riggs works over Gringley with some ground and pound from guard.
Riggs works over Gringley with some ground and pound from guard.
Riggs really is a fat lump.
Riggs stands up over Gringley , holding his feet. He dives back in and lands a decent shot to the head.

Riggs drops back for a leg! It's a sloppy attempt though and Riggs jumps back into guard quickly, to retain the dominant position.
Riggs is trying to work a guillotine from the top, or something like that? Don't know how he thinks he's going to get a finish from there.
Riggs wanted to stand there but Gringley had control of the position.
Gringley manages to sweep nicely, so he's now on top. Riggs manages to get himself to full guard.

Riggs has been looking to land a fair amount of strikes on the ground. He might be looking to soften his opponent up in order to work for a submission.
Gringley wants to control from the top but Riggs keeps moving.

That's two minutes gone in the round.
Riggs controlling the position.
The fighters are pressed up against the cage, both looking to find a bit of space to work.
Riggs wants to stand but Gringley is controlling the position.
Riggs scores with a nice shot.
Gringley throws a strike but Riggs rolls with it and manages to sweep. Now he's in guard on top.
Riggs is sitting in guard, working some ground and pound.
Riggs with a nice head shot there.
Riggs might be looking to lock onto one of his opponent's long limbs for a submission, whilst we're on the ground.
Gringley working for a triangle but Riggs defends it easily.
The fighters are going at a pretty good pace and they're both starting to sweat now.
Riggs drops back looking for a leg! Gringley is in trouble here! The fighters roll with the hold and Gringley manages to kick Riggs off! Riggs jumps back into Gringley 's guard.

That's three minutes gone in the round.
Riggs stands up over Gringley , holding his feet. He dives back in and lands a decent shot to the head.
Gringley is active off his back here, looking for submissions.
Gringley controls Riggs momentarily but Riggs frees himself.

Riggs gets to his feet and steps away from his opponent.
Riggs takes a punch right to his stomach. That took the wind out of him momentarily.
Gringley is looking to clinch.

Gringley has Riggs up against the cage in a clinch.

That's four minutes gone in the round.
Gringley drops down looking for an ankle pick but Riggs pulls his leg out and moves away.
Riggs feints and then dives in with a takedown. That was a long way out but the feint bought him enough time to close the distance and complete the takedown. Now we'll play guard for a bit and see who can get the better of that position.
Riggs landing with the ground and pound.
Gringley working a defensive guard here.
Riggs gets to his feet - Gringley follows without any prompting.
The crowd thankful this round is nearly over.
Gringley fails to land with a series of punches.
Gringley fails to land the takedown.
And that�s the end of the round � the fighters go back to their corners.
Benedict Riggs dominated that round.
The cut man is working on Benedict Riggs's cut.
That's the end of the interval. I'm sure that seemed a lot quicker than a minute for our two fighters! Back to the action.

Gringley wants to clinch up but Riggs keeps it at a distance.
Gringley tries to close the distance and clinch up but Riggs swats him away and circles back towards the center.
Gringley uses decent footwork to sidestep a right hand from Riggs.
Gringley tries to score a power double leg takedown but Riggs sees that one coming and sprawls well. That will dishearten Gringley somewhat.
Riggs is looking to counter punch.
Erik Gringley seems to be the more aggressive standup fighter in this bout.
Gringley fails with a rather predictable takedown attempt.
We've had a slow start to the round here - hopefully the action picks up.
Riggs misses with a hook. Gringley ducked under it nicely.
Erik Gringley is looking to throw some combinations by the looks of things.
Gringley blocks a head kick by Riggs.
Riggs is really dominating this fight. Is there anything that Gringley can do to turn this around?
Gringley closes the distance and presses his opponent up against the cage.
Riggs manages to pull guard. Let's see whether he can land a sub off his back.
That's one minute gone in the round.
Gringley is looking to advance position but Riggs has hit a scissor sweep - now he's on top in mount!
Riggs jumps to side control looking for an arm triangle but Gringley manages to avoid the submission attempt.
Riggs working hard here to secure a kimura but he's not really in the right position for it.
Riggs is working for what looks like an arm triangle here. Gringley is trying to escape and Riggs transitions quickly into an armbar! He's slapped it on tight and Gringley is forced to tap! Nice work there by Riggs! Very nice indeed!
Ladies and gentlemen, after 1:48 of round 2, we have a winner by way of Submission (Armbar). Benedict Riggs!
|
|
|
|
|
|
|
|
|
|
|
|
|
|
|
|
|
|
|
|
|
|
|
| S |
C
A |
G |
S |
C
B |
G |
|
S |
C |
G |
|
energy
A | B |
|
hype
A | B |
|
pop
A | B |
|
mgr
A | B |
|
FIGHT
RATING
38% |
|
|
|
|
|
|

