|
|
PBP Commentary |
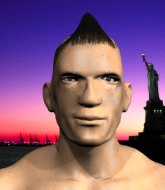
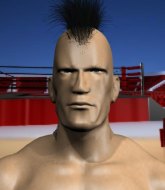
Coming up we have a lightweight MMA rules bout between Dj Bucks (ranked 0 p4p, 0 weight class) and Charlie Rebel (ranked 0 p4p, 0 weight class). These two fighters really are very evenly matched on the feet - it will be fascinating to see who can assert themselves in that aspect of the fight.
 |
|
 |
| 181 cm
17
164 lbs
0 - 1 - 0 |
|
175 cm
25
163 lbs
4 - 0 - 0 |
BJJ White Belt
Excellent MT
Cardio machine |
|
BJJ White Belt
Excellent MT
Determined |
|
| |
|
Ladies and gentlemen. This fight is 3 rounds, in the lightweight division.
Introducing the fighter to my left, fighting out of the red corner.
With a record of
0 - 1 - 0, fighting out of New York, Dj Bucks!
And introducing the fighter to my right, fighting out of the blue corner.
With a record of
4 - 0 - 0, fighting out of New York, Charlie Rebel!
The judges for this bout are Dean Styles, Reed Andrews and Bruno Lombardi.

The bell rings for round one and we are underway!
Rebel throws a jab when Bucks was well out of range.

Rebel clinches with his opponent.
Bucks working hard to break the clinch.
Bucks blocks an uppercut.
A short right from Rebel.
Bucks blocks a body shot from Rebel.
Bucks tries to pull guard but Rebel won't allow it.
Bucks is trying to slow down the pace in the clinch, to catch his breath.
Rebel lands a left hand.
Bucks looking to slow down the pace here.
Bucks is trying to pull guard but Rebel turns him against the cage and we stay in the clinch.
We've had a slow start to the round here - hopefully the action picks up.
Rebel lands a right hand.
Bucks has been talking about how he's improved his wrestling in the run up to the fight so let's see if that's enough to sway the balance.
Rebel can't find room to land a body shot as Bucks controls the action.
Rebel tried to land a shot to the body but connects with Bucks's elbow.
Rebel misses with a short punch on the inside.

That's one minute gone in the round.
A short uppercut from Rebel.
Rebel misses with a short punch on the inside.
Rebel lands a left hand.
Rebel tries to work over Bucks's body with a swooping hook but it only glances the target.
Bucks is trying to pull guard but being pressed up against the cage enables Rebel to keep the fight standing.
That's three failed takedown attempts in the round for Dj Bucks. That's going to take a lot out of him.
Both guys are working to get underhooks.
An uppercut on the inside fails to land for Rebel.
Bucks looking to stall.
Rebel working aggressively here.
Rebel scores with a nice hook to the head.
A right hand to the body from Rebel.
Bucks has a body lock and is looking for a takedown. Rebel is bouncing around trying to prevent the takedown and somehow he has indeed managed to stay on his feet.
Rebel looks more muscular than last time we saw him. He must have been on the weights.
The two fighters are working to gain dominance in the clinch.
Rebel fails to land with a short punch on the inside.
Bucks goes for a takedown attempt but Rebel pushes him away and we're back to fighting at a distance.

That's two minutes gone in the round.
Some wild striking there from Bucks.
Rebel uses good head movement to avoid the hook from Bucks.
Rebel tries to counter with a clinch but Bucks shakes him off and moves away.
Rebel missing with a left hand there. Bucks was out of range so wasted energy throwing that one.
Bucks throws a leg kick but Rebel sees it coming and checks it nicely.
Rebel drives through and clinches with Bucks against the cage.
Rebel lands a hook that snaps the head of Bucks backwards.
Fantastic stuff here - a very entertaining period of action, which has drawn cheers from the crowd.
A right hook to the body lands for Rebel.
A shot in the inside from Rebel.
Bucks wants to break free but Rebel has control.
Rebel lands a shoulder strike.
A hook to the body from Rebel.
Bucks has hold of a leg and is looking for a trip takedown. Rebel avoids it nicely though and we remain in the clinch.
Rebel lands a right hand that snaps the head of Bucks backwards.
Rebel lands a right uppercut that snaps the head of Bucks backwards.
Rebel working aggressively here.

That's three minutes gone in the round.
Rebel lands a short shot on the inside that snaps the head of Bucks backwards.
Bucks has dropped down and is looking to force the takedown but it's defended by Rebel after a bit of a struggle.
Bucks working hard to break the clinch.
A nice left hand lands by Rebel.
Rebel keeps control of Bucks as he tries to wriggle out of the double underhooks.
Bucks is trying to force a seperation but Rebel has the dominant position.
Rebel lands an uppercut.
Bucks fails to pull guard.
Bucks prevents a body shot from Rebel.

Bucks breaks the clinch.
Rebel just misses with a punch to the body.
A combination from Bucks does no damage.
Rebel swings and misses with a hook to the body.
The fighters circling - Bucks throws out the jab but it was never going to land.
Rebel rushes Bucks and pushes him back against the cage in a clinch.

That's four minutes gone in the round.
Bucks is looking for a takedown.
Rebel prevents a takedown attempt there.
Rebel swings wildly with an uppercut but Bucks uses good head movement to avoid it.
Bucks wants to strike at distance but he can't break free of the clinch.
Rebel lands a shoulder strike.
Rebel tries to land a shot to the body but it's blocked.
Bucks's head jolts backwards as he takes an uppercut right on the button!
Fantastic stuff here - a very entertaining period of action, which has drawn cheers from the crowd.
A frustrated look appears on Bucks's face as he tries to break the clinch.
Rebel lands on the inside with an uppercut.
Rebel softening up his opponent with strikes, against the cage.
Bucks blocks a couple of punches on the inside.
Rebel doesn't land with the attempted body shot.
Rebel lands a right uppercut that snaps the head of Bucks backwards.
Good anti-grappling being displayed by Rebel as Bucks tries to tie him up.
And that�s the end of the round � the fighters go back to their corners.
Charlie Rebel dominated that round.
The minute break is over - no more time for sponges and pep talks - back to the action!

Rebel clinches up with Bucks and pushes him back against the cage.
Rebel works on Bucks's body with a couple of short punches.
A short uppercut from Rebel.
Still in the clinch, Rebel scores with a nice short uppercut.
An uppercut to the body lands inside from Rebel.
Bucks wants to break free. God knows he wants to breaaaak freeee.
Rebel misses with a short punch on the inside.
Rebel lands a right hand that snaps the head of Bucks backwards.
Rebel lands with a light punch inside.
Rebel lands a hook to the side of the head.
We've had a slow start to the round here - hopefully the action picks up.
Rebel keeps the fight in the clinch, despite Bucks's efforts to push away.
Bucks blocks a body shot from Rebel.
Rebel scores with an uppercut up the middle.
Bucks fails to pull guard.
That's one minute gone in the round.
Good anti-grappling being displayed by Rebel as Bucks tries to tie him up.
The fighters are going at a pretty good pace and they're both starting to sweat now.
Rebel lands a body shot.
Rebel lands with a left to the head.
With the fighters clinched against the cage, Rebel creates a bit of distance for himself and scores with a nice uppercut.
Rebel misses with a hook from the clinch.
Bucks jumps guard but his hands slip and he falls flat on his back. Well, he's made himself look a right mug there, as Rebel walks away with a smile on his face. Bucks gets slowly back to his feet and shakes his head.
Rebel throws a body punch but Bucks moves out of range.
Charlie Rebel seems to be the more aggressive standup fighter in this bout.
Some wild striking there from Bucks.
Rebel misses with an uppercut.
Rebel has been the more effective fighter overall so far.
Rebel slips under a jab.
Bucks ducks under a wild hook from Rebel.
Rebel throws an overhand right that lands on Bucks's shoulder, as Bucks tries to avoid the shot.
Bucks looks to throw the jab but Rebel is out of range.
Bucks with a nice looking leg kick. You could hear that one land in a back row.
That's two minutes gone in the round.
Rebel moves into the clinch.
Bucks wants a takedown.
That's three failed takedown attempts in the round for Dj Bucks. That's going to take a lot out of him.
Bucks is trying to break the clinch but Rebel is controlling him.
Rebel scores with a nice hook to the head.
Bucks's head jolts backwards as he takes an uppercut right on the button!
This is a great period of action - very entertaining stuff!
A head punch blocked on the inside by Bucks.
Rebel scores with a shot to the side of Bucks's head.

Bucks is rocked!
Rebel works for underhooks and lands a body shot in the process.
Oh Bucks is still all over the place! His legs are completely gone! Will he be able to recover?!!
Rebel lands a shoulder strike.
A right handed body shot lands from Rebel.
Rebel is working Bucks over against the cage.
A short body shot lands from Rebel as the two fighters clinch.
Rebel lands a body punch.
Rebel pushes Bucks back against the cage and lands a hook to the side of the head.
Rebel throws a big uppercut that drops Bucks! More strikes from Rebel and the referee jumps in to stop the fight! Bucks lies dazed against the cage as Rebel celebrates with his cornermen!
Ladies and gentlemen, after 2:48 of round 2, we have a winner by way of TKO (Strikes). Charlie Rebel!
|
|
|
|
|
|
|
|
|
|
|
|
|
|
|
|
|
|
|
|
|
|
|
| S |
C
A |
G |
S |
C
B |
G |
|
S |
C |
G |
|
energy
A | B |
|
hype
A | B |
|
pop
A | B |
|
mgr
A | B |
|
FIGHT
RATING
52% |
|
|
|
|
|
|
