|
|
PBP Commentary |
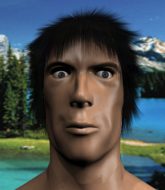
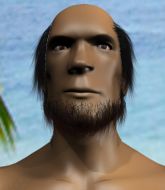
Coming up we have a featherweight MMA rules bout between Moses Mendoza (ranked 0 p4p, 0 weight class) and Steven Howard (ranked 0 p4p, 0 weight class). Both fighters look pumped up here. Let's hope this is a good fight!
 |
|
 |
| 202 cm
18
150 lbs
1 - 4 - 0 |
|
175 cm
18
140 lbs
1 - 2 - 0 |
BJJ Blue Belt
Counter fighter
Cuts easily |
|
BJJ Purple Belt
Brawler
Likes musicals |
|
| |
|
Ladies and gentlemen. This fight is 3 rounds, in the featherweight division.
Introducing the fighter to my left, fighting out of the red corner.
With a record of
1 - 4 - 0, fighting out of Rio de Janeiro, Moses Mendoza!
And introducing the fighter to my right, fighting out of the blue corner.
With a record of
1 - 2 - 0, fighting out of Rio de Janeiro, Steven Howard!
The judges for this bout are Alexandre Firmino, Edson Gomes and Felipe Paraventi.

The bell rings for round one and we are underway!
Howard fails with the takedown.
Mendoza was looking to counter that move with a punch but didn't quite pull the trigger.
Howard looks really tired already! That doesn't bode well for a good, competitive fight!
Howard moves in looking to clinch but Mendoza pushes him off.
Mendoza swung with a counter right hand that didn't connect.

Mendoza moves into range and clinches up with Howard.
Howard drops to a knee looking for a takedown but Mendoza gets the underhooks and prevents it.

Mendoza ties up his opponent against the cage and manages to drag the fight down to the ground. Mendoza no doubt will be looking to work submissions from his guard.
Mendoza will need to keep those long limbs tucked in whilst he's on the ground, to prevent any submissions.
Mendoza not looking particularly offensive just at the moment.
We've had a slow start to the round here - hopefully the action picks up.
Mendoza lands a beautiful sweep and he's now moved into his opponent's guard.

Howard preventing the ground and pound from doing any damage.
Mendoza connects with a couple of short punches.

That's one minute gone in the round.
Howard avoiding any damage from the ground and pound.
The ref warns both fighters not to hold the cage as they work up against the meshing.
Mendoza scores with a decent looking elbow strike.
Mendoza lands a couple of decent looking shots.
Mendoza lands a couple of decent looking shots.
Mendoza is looking to work some ground and pound but Howard has wrist control.
Howard wants to stand but Mendoza is controlling the position.
Mendoza throwing strikes but missing.
Mendoza postures up in Howard's guard and throws a big left but Howard blocks it.
A big thud reverberates around the arena there as Mendoza accidentally thumps the mat. Hopefully he's not broken his hand.

That's two minutes gone in the round.
A few boos can be heard. I'm sure they will multiply if the fighters don't pick up the pace.
Mendoza with a flurry of punches that miss.
Mendoza knows he needs to get back to his feet asap. He's simply no match for Howard on the ground.
Howard is trying to stand up but he's not managed so far.
Mendoza throwing shots from guard but he's hitting more mat than opponent.
We must be close to a standup if these guys don't pick up the pace.
Howard looking to hit a scissor sweep but Mendoza is one step ahead there.

The referee has decided to stand the fighters back up, so we'll restart on the feet.
Mendoza shoots in for a takedown but Howard shows good takedown defense.
Mendoza dives in and grabs Howard's left leg, looking for a takedown. Howard pushes down on Mendoza's head and hops out.
Mendoza changes levels and looks for a double leg takedown. Howard tries to avoid it but Mendoza manages to keep hold of a leg and drag Howard to the ground. Howard escapes though and pops straight back up to his feet.
That's three failed takedown attempts in the round for Moses Mendoza. That's going to take a lot out of him.
Mendoza closes the distance, clinches up and gets a nice trip takedown into side control. Very smooth.
Mendoza connects with a decent looking elbow from side control that caused Howard some visible discomfort.

That's three minutes gone in the round.

Mendoza thinks about going for a far side armbar but bails out and retains the dominant position instead.
Howard is positioning himself to get back to half guard.
Mendoza working away.
The strikes coming from Mendoza are missing the target in this wave of attacks.
Mendoza working the ground and pound.

That's four minutes gone in the round.
A lull in the action here being met with boos from the crowd.
Howard tries to bench press Mendoza off him but Mendoza keeps the position.
Mendoza grinds an elbow into Howard's temple.
The fighters are pressed up against the cage, both looking to find a bit of space to work.
Mendoza wants to work for a kimura but he's foiled early by Howard, who protects the arm well.
You can see the frustration on Howard's face, being in this tough position on the bottom.
Howard is looking for a sweep.
Boooooooooooooooooooo!!! God, this has been a terrible round. Come on you two, sort yourselves out!
Mendoza is trying to land an Americana. He has the arm isolated but Howard is keeping cool and he's avoided the danger for now.
And that�s the end of the round � the fighters go back to their corners.
Moses Mendoza dominated that round.
That's the end of the round. The referee orders the cornermen out of the cage so we can get back down to business.

Mendoza rushes Howard and pushes him back against the cage in a clinch.
Mendoza pulls guard successfully.
Mendoza trying to keep a closed guard but Howard is proving a slippery customer.
Mendoza wants to sweep here but Howard controlling him for the moment.
Mendoza really does look like a pencil wearing a pair of gloves. Let's hope he has a gameplan to suit that ridiculous body shape.
Mendoza throws his legs up looking for a submission but Howard uses it to pass to side control.
We've had a slow start to the round here - hopefully the action picks up.
Mendoza is looking to reverse the position.
Mendoza is really dominating this fight. Is there anything that Howard can do to turn this around?
Both fighters are absolutely exhausted here.
Howard takes a little break here. Mendoza wants to take advantage but he is being controlled well.
That's one minute gone in the round.
Mendoza is trying to control Howard's posture but Howard avoids it.
Moses Mendoza overall seems to be getting the better of the ground position in the fight so far.
Mendoza is positioning himself to get back to half guard.
Howard controls the position from side control.

Howard wants to work for a kimura but he's foiled early by Mendoza, who protects the arm well.
That's two minutes gone in the round.
Well. There's a bit of a lull in the action here and the crowd are starting to get restless.
Mendoza is looking to regain half guard here but Howard keeps moving and retains side control.
Mendoza is not content to let Howard control the position.
Mendoza is trying to get back to half guard.
Mendoza is not content to let Howard control the position.
Mendoza is positioning himself to get back to half guard.
That's three minutes gone in the round.
Mendoza struggling a bit here.
Howard misses with an attempted head punch from side control.
Mendoza prevents Howard from improving position.
Mendoza is trying to improve his position.
Mendoza looks to move to half guard but instead Howard has passed into mount! Damn!
Mendoza defends a decent attempt at a guillotine from Howard.
Howard avoids the attempt from Mendoza to control.
That's four minutes gone in the round.
A nice elbow there by Howard.
Mendoza is looking to get to half guard.
Howard sitting in mount, just looking to control for the moment.
Mendoza regains half guard.
Mendoza has no desire to be mounted, so is trying to control. Howard is working away from the top position though.
Boooooooooooooooooooo!!! God, this has been a terrible round. Come on you two, sort yourselves out!
The referee calls for the fighters to work.
Howard trying to control from half guard but Mendoza is working away.
And that�s the end of the round � the fighters go back to their corners.
Steven Howard showed his class in that round. I'd imagine he'll take it on all the scorecards.
That's time! Mendoza's corner gives him a slap on the ass as he gets ready to fight. Ladies and gentlemen, this is the final round!

Mendoza shoots in but no luck this time.
Howard tries to close the distance and clinch but Mendoza swats him to one side with an open hand palm strike and circles away.
Mendoza misses with a takedown attempt - Howard sprawls well and throws a nice strike on the way out which just misses.
Howard is loading up here, looking for a big counter of his own.
Howard swinging wildly here.
We've had a slow start to the round here - hopefully the action picks up.
Howard displays good takedown defense there as he swats away a double leg from Mendoza.
That's three failed takedown attempts in the round for Moses Mendoza. That's going to take a lot out of him.
Both fighters are breathing heavily.
Mendoza fails miserably with a takedown attempt.
That's one minute gone in the round.
Mendoza shoots in but Howard avoids the takedown attempt easily.
Howard tries to counter with a clinch but Mendoza shakes him off and moves away.
Howard has been working on his striking defense in training and it's paying off as Mendoza is landing a low percentage of strikes.

Howard closes the distance and clinches.
Howard jumps guard but Mendoza turns him against the cage and keeps the fight standing.
Mendoza tries to pull guard but Howard holds him up against the cage and eventually Mendoza drops back down to his feet.
Howard gets underhooks to prevent Mendoza's takedown attempt.
Mendoza gets control of Howard's arms and successfully pulls guard. Mendoza will no doubt be looking for submissions off his back.
That's two minutes gone in the round.
Howard is looking to stand up but Mendoza won't let him.
Mendoza has a loose triangle. He'll be looking to tighten that up but Howard can see exactly what he's planning and manages to posture up and free himself.
Mendoza has momentary wrist control but Howard slips an elbow through the middle.
Mendoza is trying to hold Howard in close to prevent damage but Howard has managed to pass into half guard.
Howard is taking a breather. Mendoza says something to him but it's hard to make out. Perhaps he's telling him to get on with it and actually do something.
Howard trying to control from half guard but Mendoza is working away.
Howard throwing shots but Mendoza is blocking nicely.
Howard trying to control the action but Mendoza is working from the bottom.
Mendoza trying to hold on to Howard's head to control him but Howard postures up.
That's three minutes gone in the round.
Howard is controlling the pace.
Mendoza is looking to regain full guard. Not this time though.
Mendoza looking to work for a kimura from the bottom.
Mendoza is trying to get back to full guard.
Howard seems like he's working for an arm triangle here. He's freed his trapped foot and he's rotating nicely. Mendoza is in big trouble! He's tapping out! This one is aaaaaaaaaaaall over!
Ladies and gentlemen, after 4:55 of round 3, we have a winner by way of Submission (Arm Triangle). Steven Howard!
|
|
|
|
|
|
|
|
|
|
|
|
|
|
|
|
|
|
|
|
|
|
|
| S |
C
A |
G |
S |
C
B |
G |
|
S |
C |
G |
|
energy
A | B |
|
hype
A | B |
|
pop
A | B |
|
mgr
A | B |
|
FIGHT
RATING
30% |
|
|
|
|
|
|

