|
|
PBP Commentary |
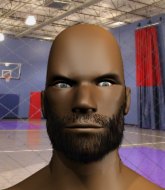
Coming up we have a heavyweight MMA rules bout between Lucas Hood (ranked 0 p4p, 0 weight class) and Nick Force (ranked 0 p4p, 0 weight class). Over to our ring announcer for the fighter introductions!
 |
|
 |
| 190 cm
28
260 lbs
9 - 2 - 0 |
|
189 cm
26
270 lbs
9 - 2 - 0 |
Good wrestling
Excellent boxer
Insanely flexible |
|
Olympic wrestler
World class MT
Good gas tank |
|
| |
|
Ladies and gentlemen. This fight is 3 rounds, in the heavyweight division.
Introducing the fighter to my left, fighting out of the red corner.
With a record of
9 - 2 - 0, fighting out of Montreal, Lucas Hood!
And introducing the fighter to my right, fighting out of the blue corner.
With a record of
9 - 2 - 0, fighting out of Las Vegas, Nick Force!
The judges for this bout are Dean Styles, Eddie Farnsworth and Anthony Taglia.

The bell rings for round one and we are underway!
Hood goes to the watering hole and comes back with a big thumbs up from the judges as he scores a three punch combo.
Hood throws a combination that misses
and Force counters with a right hand to the body.
Force digs a good body shot into Hood's ribs.

Hood scores with a takedown into Force's guard.
Force seems keen to control Hood's posture.
Hood throwing shots from guard but he's hitting more mat than opponent.
Hood throws a strike but Force rolls with it and manages to sweep. Now he's in guard on top.

Force with a flurry of punches that miss.
Force pressing down on his opponent's thigh, looking to pass guard. Hood is keeping the position for now.
Wooooo! Give it up for these two warriors! They are putting on a show!

That's one minute gone in the round.
Force trying to control but Hood is working from the bottom.
Force throwing strikes but missing.
The fighters are pressed up against the cage, both looking to find a bit of space to work.
Force trying to land body shots but he keeps hitting the mat.
Force working some ground and pound from guard but it's not doing any damage.
Force throwing shots from guard but he's hitting more mat than opponent.
Force missing there with some ground and pound from the guard.

That's two minutes gone in the round.
The crowd are starting to boo a lack of action.
Force postures up in Hood's guard and throws a big left but Hood blocks it.

The referee has motioned to the fighters to stand back up. He just wasn't happy with the level of activity.
Hood misses with a jab, cross combination.
Force throws a nice inside leg kick.
Hood takes a shot right to the bread basket.
Hood takes a swing at Force's ribcage but misses.
It seemed like Force was going to counter with the hook but didn't fully commit to it.
Hood closes the distance and clinches up with Force, looking for a takedown. Hood pushes Force against the cage but Force circles to the side and manages to break the clinch.
Lucas Hood seems to be the more aggressive standup fighter in this bout.
Force swings wildly with a right hand that was never going to find it's target.
Hood throwing a counter right hand but Force manages to avoid it.
Force avoids the clinch attempt nicely.
Hood swings away but doesn't land with a series of punches.
Force waving his hands out in front of him, looking to distract Hood.
No joy there for Hood, who threw a few shots but didn't land.

That's three minutes gone in the round.
Hood tries to clinch there but Force circles away.

Force drives through with a takedown into Hood's guard. Let's see what he can do from the top position.
Force working some ground and pound from guard but it's not doing any damage.
Hood working the defensive guard well to avoid strikes from Force.
Force passes easily into side control. Nice work.
Force throws an elbow but Hood slips to the side and avoids it well.
Hood is working to avoid the ground and pound but Force connects with a decent elbow.
Force working the head and body with strikes.
Force is pausing for a moment. What's he doing? It looks like he's clearing his nose. Oh dude! He's shot a load of snot all down Hood's shoulder. That is not cool.

That's four minutes gone in the round.
Force working the ground and pound but he's contacting the mat, not the fighter.
Force throwing strikes but Hood manages to buck up and roll into a nice reversal - now he's on top in side control!
Hood throws an elbow but Force slips to the side and avoids it well.
Hood landing strikes.
Hood throwing ground and pound but whilst doing so, he forgets to control position and Force works his way back to half guard. Good composure under pressure.
This is a great period of action - very entertaining stuff!
Force is refusing to be controlled, as Hood sits in half guard.
Hood looks over to his corner - he wants some instructions but his corner are not responding.
Hood with the ground and pound but Force uses the opportunity to regain guard.
And thats the end of the round the fighters go back to their corners.
A close round but Nick Force will probably get the nod.
Well, the break between rounds is over. Let's get back to the scrappin!

Hood tries to grapple but his opponent circles
and Force makes him pay by landing a nice hook to the body before moving out of range.
Hood tries to bum rush Force with a series of wild strikes but Force uses good footwork to avoid the assault.
Force scores with a nice head shot.
Force has tried to improve his agility in the runup to this fight.
Hood shoots in but no luck this time.
Hood tries to close the distance and clinch but Force swats him to one side with an open hand palm strike and circles away.
Nick Force seems to be getting the better of the standup.
We've had a slow start to the round here - hopefully the action picks up.
Hood closes the distance and after a bit of a stuggle, scores a takedown into Force's guard.
Force tries to land a sweep but no joy.
The ref warns both fighters not to hold the cage as they work up against the meshing.
Hood trying to land body shots but he keeps hitting the mat.
Force tries to land a sweep but no joy.
That's one minute gone in the round.
Hood wants to control from the top but Force keeps moving.
Force is working the butterfly guard. He manages to land a nice scissor sweep and is now in half guard on the top. Nice move.
Force thows a huge punch but Hood dodges it nicely.
Force throws a big elbow that misses, also allowing Hood to regain full guard.
Hood is controlling Force's posture.
Force slips effortlessly into side control - very nice.
Hood struggling a bit here.
That's two minutes gone in the round.
Hood taking punishment in the form of punches.
Force is looking to take a break and control but Hood is keeping him honest, looking to work from the bottom.
Hood stops Force from passing to mount.
Force slows the pace down.
Hood dodges the ground and pound from Force.
That's three minutes gone in the round.
Check out the look on Force's face as he threw that strike - that's one determined fighter!
Hood is working to avoid the ground and pound but Force connects with a decent elbow.
Force postures up a little and throws a couple of hammerfists but they don't connect properly.
Hood can't do much from the bottom here.
Force in side control, trying to ground and pound but not landing this time.
Hood taking punishment in the form of punches.
Force creates a bit of distance and throws down some hard shots.
Hood on the wrong end of some ground and pound.
Force creates some space and throws a big elbow, but Hood sees it coming and moves his head just enough to avoid the strike.
Both fighters are absolutely exhausted here.
That's four minutes gone in the round.
Force working the ground and pound but he's contacting the mat, not the fighter.
Hood is trying to improve his position.
Force lands a knee to the body and follows it up with some ground and pound to the head. That will wear Hood down.
The ground and pound from Force seems to be hitting the mat more than his opponent.
Force misses with the ground and pound.
Force creates some space and throws a big elbow, but Hood sees it coming and moves his head just enough to avoid the strike.
Force scoring with punches from side control.
Force has been the more effective fighter overall so far.
Boooooooooooooooooooo!!! God, this has been a terrible round. Come on you two, sort yourselves out!
Force throws a knee to the body but it doesn't do much damage.
Force scores with a couple of nice shots to the head there. The referee takes a look at Hood to see if he's OK.
And thats the end of the round the fighters go back to their corners.
Nick Force showed his class in that round. I'd imagine he'll take it on all the scorecards.
OK. That's time! The bell goes and we're back to the action. Let's get this one finished - here comes the final round!

Hood closes the distance and clinches up with Force, looking for a takedown. Hood pushes Force against the cage but Force circles to the side and manages to break the clinch.
Hood looks to have improved his striking defense since last time we saw him fight.
Force throws a right hand that Hood ducks under and follows up with a left that Hood also avoids with ease.
Hood tries to clinch up.
Force appeared to try and counter that last move with a leg kick.
Force pounces like a tiger and cracks Hood with a vicious hook! Hood is down but not out! Force follows up with more strikes forcing the ref to jump in and stop it!
Ladies and gentlemen, after 0:24 of round 3, we have a winner by way of TKO (Punches). Nick Force!
Nick Force seemed lost for words in his post fight interview but he remembered to thank his fans and directed everyone to his website.
|
|
|
|
|
|
|
|
|
|
|
|
|
|
|
|
|
|
|
|
|
|
|
| S |
C
A |
G |
S |
C
B |
G |
|
S |
C |
G |
|
energy
A | B |
|
hype
A | B |
|
pop
A | B |
|
mgr
A | B |
|
FIGHT
RATING
39% |
|
|
|
|
|
|

