|
|
PBP Commentary |
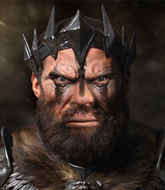
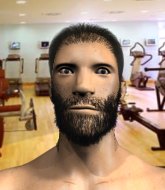
Coming up we have a light heavyweight MMA rules bout between King Jong Bwang (ranked 7834 p4p, 656 weight class) and Just Whymer (ranked 4636 p4p, 513 weight class). Bwang comes to the cage accompanied by Liberation. King Jong Bwang has the edge in experience - let's see if he can make that count tonight.
 |
|
 |
| 190 cm
18
205 lbs
2 - 1 - 0 |
|
194 cm
18
209 lbs
1 - 1 - 0 |
BJJ White Belt
Excellent MT
Good chin |
|
BJJ Blue Belt
Excellent boxer
Granite chin |
|
| |
|
Ladies and gentlemen. This fight is 3 rounds, in the light heavyweight division.
Introducing the fighter to my left, fighting out of the red corner.
With a record of
2 - 1 - 0, fighting out of Las Vegas, King Jong Bwang!
And introducing the fighter to my right, fighting out of the blue corner.
With a record of
1 - 1 - 0, fighting out of Las Vegas, Just Whymer!
The judges for this bout are Chad Campbell, Joseph Jones and Reed Andrews.

The bell rings for round one and we are underway!
Bwang looks to throw the jab but Whymer is out of range.
Whymer throws a hard body shot but it just misses.
Bwang lands with a straight right. Whymer didn't see that one coming.
Whymer scores with a sloppy punch to the body. Not much technique there but it did the business.
Whymer cracks Bwang with a right hand to the side of the head.
Whymer throws a nice hook to the body that draws an oooh from the crowd.
Bwang seems to be moving with more speed, compared to his last bout. He must have been working on that in the gym.
Whymer throws a combination but it was largely blocked by Bwang.
Whymer looks to land a right hand but Bwang moved out of range.
Bwang keeping a good distance there, avoiding the body shot.
Whymer throws a body punch but Bwang moves out of range.

Whymer takes the fight into the clinch.
Whymer lands a nice shot to the body.
Bwang has a couple of punches blocked by Whymer.
A nice left hand lands by Bwang.
The fans in attendance giving it up for the two fighters, who have really let it all hang out in the last minute or so!
Bwang tried to land a shot to the body but connects with Whymer's elbow.
Whymer misses with a hook from the clinch.
Whymer blocks an uppercut.
Bwang tries to work over Whymer's body with a swooping hook but it only glances the target.

That's one minute gone in the round.
Whymer blocks a couple of punches on the inside.
Bwang tries to throw a body punch but Whymer avoids it by throwing Bwang back against the cage.
Bwang misses with a body punch.
Bwang misses with a body punch.
Bwang lands with a light punch inside.
Bwang misses with a punch to the body.
A left hand lands to the body for Bwang.
Bwang cracks Whymer with a nice body shot.
Bwang lands with a short shot to the head.
Bwang swings wildly with an uppercut but Whymer uses good head movement to avoid it.
Whymer prevents a body shot from Bwang.
A head punch on the inside from Whymer fails to land.
Whymer lands with a right to the head.
Whymer has been looking to improve his clinch game in recent weeks. Bwang seems to have the measure of him in the clinch so far, so let's see if Whymer can turn it around.
Whymer letting Bwang take a breather here.
Bwang tried to land a shot to the body but connects with Whymer's elbow.
A short right hand to the side of the head by Whymer.
Whymer blocking some punches.

That's two minutes gone in the round.
Bwang misses with a hook from the clinch.
Bwang works for underhooks and lands a body shot in the process.
Whymer swings away with an uppercut that misses.
A body shot lands from Whymer.
Bwang works on Whymer's body with a couple of short punches.
This has been an exciting period of action!
Whymer's head jolts backwards as he takes an uppercut right on the button!
Whymer digs a right hand into Bwang's ribs. Those have got to be taking their toll on Bwang's gas tank.
Whymer blocks a couple of punches on the inside.
Bwang lands a left hand.
Whymer blocks an uppercut.
Bwang swings wildly with an uppercut but Whymer uses good head movement to avoid it.
Bwang blocks a body shot from Whymer.
Bwang tries a body shot but Whymer blocks it.
Whymer lands a short shot on the inside that snaps the head of Bwang backwards.
Bwang tries to land a shot to the body but it's blocked.
An uppercut to the body lands inside from Whymer.
Whymer lands with a short punch from the clinch.
Bwang struggles to land a body shot inside as Whymer controls his hands.

That's three minutes gone in the round.
Bwang tries a body shot but Whymer blocks it.

Bwang breaks the clinch and we're back to striking at distance.
Whymer throws a right and a left that both miss.
Bwang tests Whymer's chin there with a solid looking shot.
A looping hook to the body misses from Bwang. Whymer does a little dance to reset his feet.
Bwang steps to the side to avoid the strikes from Whymer.
Bwang throws a jab when Whymer was well out of range.
Whymer slips under a jab.
Whymer is looking to take this fight into the clinch.
A quick step to the side and Bwang tries to counter with a shot to the body but it doesn't connect.
Bwang staying out of range there.
Whymer lands a straight punch to the body, keeping Bwang at a distance.
Whymer avoids the body shot from Bwang.
Bwang fakes high and swings low for a body shot but Whymer manages to avoid it.
Whymer closes the distance and lands a one-two.

It looks like King Jong Bwang has been cut.
The fighters circle momentarily. Whymer darts into range and connects with a nice straight punch.

That's four minutes gone in the round.
This has been an exciting period of action!
A looping hook to the body misses from Whymer. Bwang does a little dance to reset his feet.
Whymer misses with an uppercut. Bwang saw that one coming.
Bwang throws a front kick aimed at Whymer's knee but Whymer avoids it well.
Whymer has managed to clinch.
Bwang lands with a right to the head.
Whymer blocks a body shot from Bwang.
Bwang tries to work over Whymer's body with a swooping hook but it only glances the target.
Whymer blocks an uppercut.
Bwang tries to throw a body punch but Whymer avoids it by throwing Bwang back against the cage.
Bwang blocks a couple of punches on the inside.
Whymer misses with a punch to the body.
Whymer lands with a left to the head.
Whymer can't find room to land a body shot as Bwang controls the action.
Whymer lands a right hand.
A head punch on the inside from Whymer fails to land.
Bwang tries a body shot but Whymer blocks it.
Whymer lands a hook to the side of the head.
And that�s the end of the round � the fighters go back to their corners.
A close round but Just Whymer will probably get the nod.
The cut man is working on King Jong Bwang's cut.
The fighters' corners scream their final instructions, as the referee calls time. Here we go, back to the action!

Whymer lands a body shot.
Whymer throws out a loose jab but Bwang uses good head movement to avoid it.
Whymer lands a body shot.
Bwang misses the jab.
Whymer slips a straight right by Bwang.
Whymer throws a series of punches but Bwang moves out of range.
Bwang is looking to counter with a shot to the body.
Whymer throws an uppercut from half a mile away. Bwang sees it coming and avoids it easily.
Whymer misses with a hook
and Bwang counters with a lovely straight right hand!
Bwang takes a swing at Whymer's ribcage but misses.
Whymer jabs Bwang to the body, keeping him at a distance.
Whymer keeping his hands up high there, blocking the jab from Bwang.
We've had a slow start to the round here - hopefully the action picks up.
A looping hook to the body misses from Bwang. Whymer does a little dance to reset his feet.
Whymer scores with a hook to the body. Bwang takes a step back and tries to catch his breath.
Bwang lands with a shot to the body.
Wooooo! Give it up for these two warriors! They are putting on a show!
A big left from Whymer misses.
Whymer swings for the body but Bwang moves out of range.
That's one minute gone in the round.
Whymer with a hook.
Bwang cracks Whymer with a good shot that sees him stumbling back into the cage.
Bwang misses with a straight right.
Whymer blocks a jab.
Whymer is throwing a lot of body shots here, looking to wear down Bwang rather than just go for the knockout.
Whymer lands a head shot.
Nice shot by Whymer.

Bwang is rocked!
Whymer ducks down into range and throws a picture perfect right hook that connects with Bwang's jaw. Bwang's eyes stare off into space as he falls to the mat, out cold! Whymer does the decent thing and steps back, rather than landing any shots to his unconscious opponent.
Ladies and gentlemen, after 1:33 of round 2, we have a winner by way of KO (Punch). Just Whymer!
Just Whymer decided to thank the fans in attendance for making a great atmosphere. It seemed to go down pretty well.
|
|
|
|
|
|
|
|
|
|
|
|
|
|
|
|
|
|
|
|
|
|
|
| S |
C
A |
G |
S |
C
B |
G |
|
S |
C |
G |
|
energy
A | B |
|
hype
A | B |
|
pop
A | B |
|
mgr
A | B |
|
FIGHT
RATING
60% |
|
|
|
|
|
|
