|
|
PBP Commentary |
Coming up we have a welterweight MMA rules bout between Antone Griffith (ranked 9152 p4p, 0 weight class) and Obadele Haynes (ranked 5892 p4p, 0 weight class). Antone Griffith has a significant reach advantage - let's see if he can make it count.
 |
|
 |
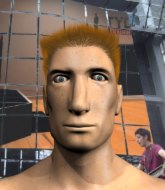
| 216 cm
18
177 lbs
0 - 1 - 1 |
|
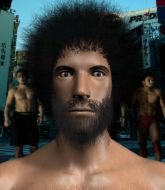
181 cm
19
175 lbs
0 - 0 - 0 |
BJJ Blue Belt
Counter fighter
Cuts easily |
|
BJJ White Belt
Basic striking
Solid chin |
|
| |
|
Ladies and gentlemen. This fight is 3 rounds, in the welterweight division.
Introducing the fighter to my left, fighting out of the red corner.
With a record of
0 - 1 - 1, fighting out of Helsinki, Antone Griffith!
And introducing the fighter to my right, fighting out of the blue corner.
With a record of
0 - 0 - 0, fighting out of Helsinki, Obadele Haynes!
The judges for this bout are Roosa J�rvil�inen, Johanna Lukiainen and Tarja Halkonen.

The bell rings for round one and we are underway!

Haynes clinches up against the cage.
Haynes has Griffith pressed against the cage.
Griffith wants to get back to striking at distance but Haynes won't allow it.
Griffith really does look like a pencil wearing a pair of gloves. Let's hope he has a gameplan to suit that ridiculous body shape.
Griffith wants to break the clinch but can't.
Haynes has Griffith pressed against the cage, preventing Griffith from circling away and getting back to striking at range.
Griffith working hard to break the clinch.
Haynes stalling the fight.
Haynes lands a body punch.

Haynes breaks from the clinch.
Haynes swings away but doesn't land with a series of punches.
Griffith tries to counter by moving into the clinch but Haynes manages to circle out of the way.
We've had a slow start to the round here - hopefully the action picks up.
Haynes misses with a jab, cross combination.
Griffith showing good head movement there, avoiding the strikes from Haynes.
Griffith seemed to be looking to counter by closing the distance.

That's one minute gone in the round.
Haynes throws a sloppy head kick and Griffith moves out of range easily.
Haynes shoots in for a double leg but Griffith sprawls well. That's going to sap some energy.
Griffith tries to keep at a distance but Haynes has taken the fight into the clinch.
The two fighters are working to gain dominance in the clinch.
Griffith wants to break free. God knows he wants to breaaaak freeee.
Knees to the body from Haynes.
Griffith has had enough of the clinch but Haynes keeps him there for the moment.
Griffith is trying to break free.
Haynes pushes off and circles away, back to the middle of the mat.
Griffith avoids the head kick by Haynes.
Haynes misses with a two punch combination.

That's two minutes gone in the round.
A head kick misses from Haynes.
Haynes misses with a two punch combination.
Griffith is trying to close the distance and clinch up, after that failed offence from Haynes.

Griffith closes the distance and pushes Haynes back into the cage.
Griffith blocks an elbow strike.
Griffith taking a break, stalling in the clinch.
A frustrated look appears on Griffith's face as he tries to break the clinch.
Griffith taking a break, stalling in the clinch.
Haynes can't get the takedown.
Haynes tries to stall but Griffith uses the opportunity to gain a better position.
Haynes blocks an uppercut.
Griffith is trying to push Haynes away but Haynes has him pressed against the cage, so he's going nowhere.

That's three minutes gone in the round.
Griffith takes a knee to the side of the body.
Haynes breaks the clinch and we return to the middle of the mat.
Haynes moves into the clinch.
Haynes prevents Griffith from breaking the clinch.
Griffith has Haynes pressed against the cage.

Griffith escapes the clinch and we're back to striking.
Haynes misses with a body shot. Nice footwork from Griffith.
Griffith tries to counter by clinching up but Haynes breaks away and moves out of range.
Haynes jabs at Griffith's body.
Haynes lands with a thumping leg kick.
Haynes fakes a head shot and lands one to the body.

That's four minutes gone in the round.
Haynes misses with a half-hearted attempt at a head kick.
Haynes clinches up with Griffith and pushes him back against the cage.
Griffith blocks an elbow strike.
Haynes misses the knee to the body. Nice hip positioning from Griffith.
Griffith's head jolts backwards as he takes an uppercut right on the button!
Haynes is trying to pull guard but Griffith has him pressed against the cage.
Antone Griffith has stuffed three takedown attempts in the round now. That's going to take a lot out of Obadele Haynes.
The crowd cheering loudly, showing their appreciation for the quality fight we're seeing here.
Haynes breaks from the clinch.
Haynes rushes Griffith and presses him up against the cage.
Griffith wants to break free. God knows he wants to breaaaak freeee.
Haynes drops to a knee looking for a takedown but Griffith gets the underhooks and prevents it.
Haynes looks winded!
Griffith's corner are urging him to control the action in the clinch for a moment, rather than mount any serious offense. I'm sure the crowd appreciate those instructions... not.
And that�s the end of the round � the fighters go back to their corners.
Obadele Haynes dominated that round.
That's time! Griffith's corner gives him a slap on the ass as he gets ready to fight.

Haynes throws the kick towards the body but Griffith avoids it.
Griffith tries to counter by moving into the clinch but Haynes manages to circle out of the way.
Haynes throws a head kick that misses.
Griffith appears to be looking for a big counter.
Griffith stuffs the takedown attempt from Haynes. Haynes gets slowly back to his feet.
Griffith scores to the head and body with a nice combination!
Haynes closes the distance and clinches.
We've had a slow start to the round here - hopefully the action picks up.
The two fighters are working to gain dominance in the clinch.
Haynes escapes the clinch and we're back to striking.
Haynes pulls out of a head kick attempt.
Haynes throws a head kick that misses.
Griffith seemed to be looking to counter by closing the distance.
That's one minute gone in the round.
Haynes lands a kick to the ribs of his opponent. Nice work there - in and out in a flash.
Haynes clinches with his opponent.
Griffith breaks from the clinch.
Haynes moves into the clinch.
Griffith has had enough of the clinch but Haynes keeps him there for the moment.

Haynes pulls Griffith into guard.
Griffith prevents Haynes from getting back to his feet.
Griffith working some ground and pound from guard but it's not doing any damage.
Haynes has been the more effective fighter overall so far.
Griffith makes a bit of distance and scores with some ground and pound, still in guard.
Griffith is looking to work some ground and pound but Haynes has wrist control.

Griffith drops back for a leg! It's a sloppy attempt though and Griffith jumps back into guard quickly, to retain the dominant position.
The fighters are pressed up against the cage, both looking to find a bit of space to work.
That's two minutes gone in the round.
Griffith postures up to throw the ground and pound strikes but they don't connect.

The fighters are working up against the cage. Haynes manages to wriggle his way back to his feet, so the fighters are now clinched against the cage.
Haynes has Griffith pressed against the cage, preventing Griffith from circling away and getting back to striking at range.
Haynes wants a takedown but no success here.
Haynes is breathing heavily.
Haynes looking to throw knees to the head but Griffith is blocking nicely.
Haynes manages to pull guard.
The crowd are loving this. Great action here.
Griffith is working Haynes over from the guard. He should look to pass the guard and do a little more damage with these strikes.

Griffith gets to his feet - Haynes follows without any prompting.
Griffith avoids the head kick by Haynes.
That's three minutes gone in the round.
Haynes shoots in and scores a nice double leg takedown into half guard.
Griffith manages to get to full guard.
Haynes won't allow Griffith to sweep him here.
Haynes is looking to stand up but Griffith won't let him.
Griffith has a closed guard, preventing anything of note from happening. Perhaps he's looking to stall.
Griffith has been looking to land a fair amount of strikes on the ground. He might be looking to soften his opponent up in order to work for a submission.
The ref warns both fighters not to hold the cage as they work up against the meshing.
There's a bit of a scramble here and now Griffith is on top in guard.

That's four minutes gone in the round.
Haynes is working an open guard so Griffith takes the opportunity to get back to his feet.
Griffith closes the distance and clinches.
Haynes stalling in the clinch but Griffith improves position.
Haynes is trying to work out of this bad position, with his back against the cage.
Haynes tries to take the fight to the ground by pulling guard but can't manage it.
Antone Griffith has stuffed three takedown attempts in the round now. That's going to take a lot out of Obadele Haynes.
Haynes keeps control of Griffith as he tries to wriggle out of the double underhooks.
Haynes blocks a punch to the side of the head.
Haynes tries to break the clinch but Griffith is controlling the position.
Griffith effectively controlling the action here.
And that�s the end of the round � the fighters go back to their corners.
A close second round but Obadele Haynes will probably get the nod - 10:9.
The fighters' corners scream their final instructions, as the referee calls time. Here we go, back to the action! So, we enter the final round. Let's see if either fighter can bring us a finish, or whether we're going to the judges scorecards.

Haynes avoids the clinch attempt nicely.
Griffith throws a sloppy head kick and Haynes moves out of range easily.
Haynes takes the fight into the clinch.
Griffith is trying to break the clinch but Haynes is controlling him.
Haynes with an attempt at a knee that misses.
Haynes is trying to slow down the pace of the fight but Griffith is keeping busy.
Haynes blocks an elbow strike from Griffith.
We've had a slow start to the round here - hopefully the action picks up.
Haynes is trying to break free.
Griffith avoiding damage as Haynes throws knees to the body.
Haynes escapes the clinch and we're back to striking.
That's one minute gone in the round.
Haynes has taken the fight to the clinch.
Haynes pushes off and fires off an elbow that misses, before clinching up again, against the cage.
Haynes misses the knee to the body. Nice hip positioning from Griffith.
Haynes wants to get back to striking at distance but Griffith won't allow it.
Griffith is trying to push Haynes away but Haynes has him pressed against the cage, so he's going nowhere.
Obadele Haynes seems to be working more effectively in the clinch in the fight so far.
Haynes breaks the clinch.
Obadele Haynes seems to be the more aggressive standup fighter in this bout.
Haynes looks to land a combination but Griffith avoids it well.
Griffith is looking for a counter combo.
Haynes throws a series of punches but Griffith moves out of range.
Obadele Haynes seems to be getting the better of the standup.
Haynes takes a big intake of breath there - he's definitely tired.
Griffith looks for the body kick but Haynes saw that one coming.
Haynes throws a head kick that half lands.
Haynes forces Griffith back against the cage and clinches.
That's two minutes gone in the round.
Griffith content to slow the pace in the clinch.
Haynes is trying to slow down the pace in the clinch, to catch his breath.
Haynes keeps control of Griffith as he tries to wriggle out of the double underhooks.
Haynes breaks the clinch and we return to the middle of the mat.
Haynes misses with a half-hearted attempt at a head kick.
Griffith fakes with a right hand and throws a good leg kick, right into the thigh. That had to hurt Haynes.
Haynes clinches with his opponent.
Haynes's corner calls for him to break the clinch, which he does.
This is a great period of action - very entertaining stuff!
Haynes gets cracked with a nice right hand there by Griffith.
That's three minutes gone in the round.
Griffith tries to keep at a distance but Haynes has taken the fight into the clinch.
Griffith tries to break free but Haynes pushes him back against the cage.
Griffith gets double underhooks to prevent a takedown attempt from Haynes.
Griffith pushes off and circles away, back to the middle of the mat.

Griffith shoots in and scores a nice double leg takedown into half guard.
Griffith is looking for a kimura. It's going to be difficult to finish that from half guard though and Haynes defends it well.
That's four minutes gone in the round.
Haynes is trying to stand.
Griffith gets to his feet - back to striking we go!
Haynes throws a looping left and ducks down for a takedown. He's got his arms around Griffith's waist but Griffith gets an underhook and avoids the takedown by throwing Haynes off to one side.
Haynes takes the fight into the clinch.
Griffith slowing the pace effectively.
The crowd thankful this round is nearly over.
Haynes is trying to pull guard but Griffith has him pressed against the cage.
Antone Griffith has stepped it up - he knows he needs a finish here!
Obadele Haynes is fighting for a decision - hopefully he's judged it right and he's actually winning the fight.
Antone Griffith has stuffed three takedown attempts in the round now. That's going to take a lot out of Obadele Haynes.
Griffith manages to break the clinch.
And that's the end of the fight!
Obadele Haynes comfortably won the final round on my scorecard.
I've got Haynes winning every round here. Surely the decision will go his way and he'll pick up a well deserved decision victory. Over to the ring announcer for the scorecards.
Ladies and gentlemen, after 3 rounds of action, we go to the scorecards for a decision.
Judge Roosa J�rvil�inen scores the fight 28:29
Judge Johanna Lukiainen scores the fight 27:30
Judge Tarja Halkonen scores the fight 27:30
In favor of your winner, by unanimous decision... Obadele Haynes!
An out of breath Obadele Haynes thanked his loyal fans in his post fight interview, giving them credit for his success over the course of his career.
|
|
|
|
|
|
|
|
|
|
|
|
|
|
|
|
|
|
|
|
|
|
|
| S |
C
A |
G |
S |
C
B |
G |
|
S |
C |
G |
|
energy
A | B |
|
hype
A | B |
|
pop
A | B |
|
mgr
A | B |
|
FIGHT
RATING
37% |
|
|
|
|
|
|

