|
|
PBP Commentary |
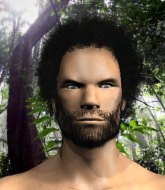
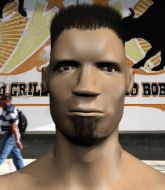
Coming up we have a middleweight MMA rules bout between Jay Who (ranked 0 p4p, 0 weight class) and Lucas Kellis (ranked 0 p4p, 0 weight class). Who comes to the cage accompanied by Requiem for a tower. Kellis is bouncing up and down as he enters the arena, backed by Cypress Hill How I Could Just Kill a Man. Jay Who has the edge in experience - let's see if he can make that count tonight.
 |
|
 |
| 175 cm
22
185 lbs
3 - 1 - 0 |
|
183 cm
19
189 lbs
2 - 0 - 0 |
BJJ Brown Belt
Counter striker
Self confident |
|
BJJ Purple Belt
Brawler
Determined |
|
| |
|
Ladies and gentlemen. This fight is 3 rounds, in the middleweight division.
Introducing the fighter to my left, fighting out of the red corner.
With a record of
3 - 1 - 0, fighting out of Montreal, Jay Who!
And introducing the fighter to my right, fighting out of the blue corner.
With a record of
2 - 0 - 0, fighting out of Montreal, Lucas Kellis!
The judges for this bout are Robert Douchet, William Peck and Elvis Blanc.

The bell rings for round one and we are underway!
Who fails in his attempt to clinch.

Who scores a trip takedown into side control. Nice.
Who working away.
Kellis is looking to reverse the position.
Kellis being controlled for a moment.

Who looking for an arm triangle but it's way too loose to do anything.
Kellis bucks up and tries to throw Who off but instead Who has got his back!
Kellis defends a rear naked choke attempt by controlling one of Who's arms.
The ref warns both fighters not to hold the cage as they work up against the meshing.

That's one minute gone in the round.
Kellis tries to escape the position.
Who controls the action.
Kellis breaks Who's hooks off and manages to turn into his guard.
Kellis looks gassed!
Who has a loose triangle. He'll be looking to tighten that up but Kellis can see exactly what he's planning and manages to posture up and free himself.
Who trying to keep a closed guard but Kellis is proving a slippery customer.
Kellis preventing the sweep.

Who kicks Kellis off and gets to his feet.
Who doesn't manage to clinch there - Kellis circles away.

That's two minutes gone in the round.
Kellis gets taken down but at least he's managed to land in guard.
Who wants to control from the top but Kellis keeps moving.
The fighters are pressed up against the cage, both looking to find a bit of space to work.
Who tries to free his leg and advance position but Kellis is retaining full guard.
Who won't allow Kellis to sweep him here.
Kellis not looking particularly offensive just at the moment.
Who controls the pace of the fight for a moment.
Kellis not looking particularly offensive just at the moment.
Who works a leg free and moves into half guard.
Who works his way into full mount!
The fighters are starting to perspire pretty heavily.
Who scoring with strikes but Kellis is staying in there.
Kellis is writhing around trying to get back to his feet.
Kellis bucks up and manages to get a nice reversal! He's in guard on the top - nicely done!

That's three minutes gone in the round.
Kellis wants to stand but Who is controlling his posture from full guard.
Kellis wants to control from the top but Who keeps moving.
Who keeping full guard, as Kellis tries to pass.
Kellis sitting in guard here, content to control.
Kellis trying to control but Who is working from the bottom.
Who throws some shots to the body, keeping his opponent honest.
Kellis avoids a guillotine attempt easily.

That's four minutes gone in the round.
A few boos can be heard. I'm sure they will multiply if the fighters don't pick up the pace.
Who wants to sweep here but Kellis controlling him for the moment.
Who has a loose triangle. He'll be looking to tighten that up but Kellis can see exactly what he's planning and manages to posture up and free himself.
Kellis thows a big elbow that misses.
Who looking to control.
Kellis trying to control the position from guard on top but Who is wriggling around, looking for whatever he can.

The referee decides to stand the fighters back up.
Who feints and then dives in with a takedown. That was a long way out but the feint bought him enough time to close the distance and complete the takedown. Now we'll play guard for a bit and see who can get the better of that position.
Who works a leg free and moves into half guard.
Kellis is staying active underneath Who, who seems content to just control the action from this position.
Who trying to pass the guard but Kellis defending well.
Who content to control rather than advance.
And that�s the end of the round � the fighters go back to their corners.
Jay Who dominated that round.
The fighters get back to their feet, the hooter sounds and we're back to the action!

Who closes the distance, clinches up and gets a nice trip takedown into side control. Very smooth.
Kellis is not content to let Who control the position.
Who tries for a kimura but Kellis is defending well.
Who tries to move into full mount but can't pass Kellis's legs.
Who wants to control but Kellis is keeping him busy.
Who moves into full mount!
Kellis tries to lock up and control but Who gives him a forearm to the face and pushes him away.
That's one minute gone in the round.
Kellis takes a big shot to the head but keeps on trying to improve his position.
Who putting on the heat here with some good ground and pound!
Kellis is breathing heavily.
Who trying to control but Kellis is having none of it.
Kellis is in all sorts of trouble here.
Who has hold of Kellis's left arm, perhaps looking for a submission. The two fighters tussle over control of the isolated limb and Kellis manages to get his arm back to his side and away from danger.
Kellis wants to hold on but Who pushes him away.
Who stands up from the dominant position. He obviously fancies his chances standing.
Kellis shoots in but doesn't get the takedown
and Who counters with a single leg into guard. Kellis didn't expect that.
Kellis is controlling Who's posture.
Who trying to control the position from guard on top but Kellis is wriggling around, looking for whatever he can.
That's two minutes gone in the round.
Kellis working a defensive guard here.
Who tries to free his leg and advance position but Kellis is retaining full guard.
Kellis working a defensive guard here.
Kellis has his foot on Who's thigh. He's trying to push off and get in position for a triangle, I think. Who works his way back into a safe position though.
Who tries to free his leg and advance position but Kellis is retaining full guard.
Jay Who overall seems to be getting the better of the ground position in the fight so far.
Kellis lands a beautiful switch and he's in full mount! That could spell trouble for Who!
Kellis lands a heavy elbow.
This is a great period of action - very entertaining stuff!
Kellis connects with a couple of good shots from mount.
Who wants to control but Kellis is having none of it.
Who sneaks a leg under to get to half guard.
That's three minutes gone in the round.
Who wants to control but Kellis is keeping busy and won't allow it.
Who landing a few short strikes.
Who makes his way to full guard. A much better position for Who.
Who is controlling Kellis's posture.
Who looking to control.
Who is working the butterfly guard. He manages to land a nice scissor sweep and is now in half guard on the top. Nice move.
Kellis wants to control but Who is keeping busy.
Who is looking for a kimura but Kellis is holding onto that half guard position, so it's hard for Who to get the leverage.
Kellis tries to roll over but Who keeps him under control.
Who is controlling the pace.
That's four minutes gone in the round.
Who is looking to pass the guard... He's managed it - he's now in full mount!
Who with the ground and pound from mount.
Who tries to control but Kellis wriggling away.
Kellis tries to hold on but Who postures up.
The crowd applaud the fighters efforts here as the round comes to an end.
Kellis regains half guard.
Who trying to control from half guard but Kellis is working away.
And that�s the end of the round � the fighters go back to their corners.
Jay Who dominated that second round.
That's the end of the round. The referee orders the cornermen out of the cage so we can get back down to business. Let's get this one finished - here comes the final round!

Who is looking to clinch.
Jay Who is looking to throw some combinations by the looks of things.
Who feints and as Kellis raises his hands in defense, Who changes levels and drives through with a takedown into guard.
Who sitting in guard here, content to control.
Kellis trying to control the position here.
Kellis working a defensive guard here.
Who looking to sit in guard and control but Kellis gets the butterfly guard and sweeps. He's now in the guard on the top.
Who has managed to work for a loose triangle. I think Kellis should be able to defend this one pretty easily though. Oh, Who has tightened it up now! Kellis should have reacted faster there - he's in big trouble and yes, he's tapped out! This one is all over!
Ladies and gentlemen, after 1:05 of round 3, we have a winner by way of Submission (Triangle). Jay Who!
|
|
|
|
|
|
|
|
|
|
|
|
|
|
|
|
|
|
|
|
|
|
|
| S |
C
A |
G |
S |
C
B |
G |
|
S |
C |
G |
|
energy
A | B |
|
hype
A | B |
|
pop
A | B |
|
mgr
A | B |
|
FIGHT
RATING
100% |
|
|
|
|
|
|

