|
|
PBP Commentary |
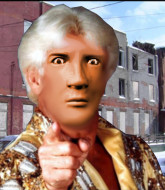
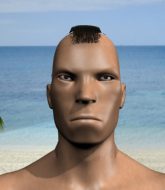
Coming up we have a light heavyweight MMA rules bout between Nick Flair (ranked 5617 p4p, 517 weight class) and Woodford May (ranked 23648 p4p, 603 weight class). Flair comes to the cage accompanied by 7734. Both fighters look pumped up here. Let's hope this is a good fight!
 |
|
 |
| 170 cm
18
200 lbs
1 - 0 - 0 |
|
185 cm
19
220 lbs
0 - 2 - 0 |
BJJ Blue Belt
Basic striking
Good chin |
|
BJJ White Belt
Excellent boxer
Prefers standup |
|
| |
|
Ladies and gentlemen. This fight is 3 rounds, in the light heavyweight division.
Introducing the fighter to my left, fighting out of the red corner.
With a record of
1 - 0 - 0, fighting out of Montreal, Nick Flair!
And introducing the fighter to my right, fighting out of the blue corner.
With a record of
0 - 2 - 0, fighting out of St Petersburg, Woodford May!
The judges for this bout are Colin Fotheringham, Donald Grub and Phil Schofield.

The bell rings for round one and we are underway!
May throws a head kick but Flair moves out of range.
Flair could do with losing a few pounds - he looks very soft around the mid section, to put it politely.

May clinches up with Flair and pushes him back against the cage.
Flair wants a takedown.
Flair tries for a takedown but May manages to get underhooks.
Flair tries to land a knee to the body but he is off balance and May avoids it.

May breaks the clinch and we return to the middle of the mat.
Woodford May seems to be the more aggressive standup fighter in this bout.
Flair avoids the body shot from May.
Flair shoots in looking for a takedown. May tries to sprawl out of it but Flair keeps driving through. The fighters are pinned against the cage. May manages to get underhooks and after a bit of a struggle, circles away and we're back to standing.
A nice side step and May releases a counter shot to the body, but it doesn't find it's home.
Flair has been working on his boxing with his coaches at North Side Discount Fitness & Premium Tacos in the buildup to the fight.
That's three failed takedown attempts in the round for Nick Flair. That's going to take a lot out of him.
May scores with a sloppy punch to the body. Not much technique there but it did the business.
We've had a slow start to the round here - hopefully the action picks up.
May throws a head kick that misses and slips in the process. He scrambles back to his feet and the fighters circle.
May fakes a head punch and goes low to the body. Nicely done.
Flair is breathing heavily.
May closes the distance and clinches.
May wants to break free. God knows he wants to breaaaak freeee.

That's one minute gone in the round.
May manages to break the clinch.
May throws a jab to the body, straight down the pipe. Boom. That sent Flair stumbling backwards but he manages to regain his composure quickly.
May throws a head kick that misses.
May lands a jab. Then a cross. Then finally a nice hook to the body. Good work there by May.

It looks like Nick Flair has been cut.
May rushes Flair and presses him up against the cage.
May trying to land knees to the body.
A frustrated look appears on May's face as he tries to break the clinch.
May wants to break the clinch but can't.
May escapes the clinch and we're back to striking.
May gets to the clinch - let's see what his plan is here.
May wants to break free. God knows he wants to breaaaak freeee.
Flair tries for a takedown. No joy.
May pushes off and circles away, back to the middle of the mat.
May clinches with his opponent.
Flair has a body lock and is looking for a takedown. May is bouncing around trying to prevent the takedown and somehow he has indeed managed to stay on his feet.
May tries to break free but Flair pushes him back against the cage.

That's two minutes gone in the round.
May breaks the clinch and we return to the middle of the mat.
Fantastic stuff here - a very entertaining period of action, which has drawn cheers from the crowd.
May fakes with an overhand right and moves in to clinch with Flair, pushing him back against the cage.
May breaks the clinch and we return to the middle of the mat.
May scores with a jab to the body.
May jabs at Flair's body.
May closes the distance and clinches.
May escapes the clinch and we're back to striking.
Flair doesn't react quick enough there as he takes a shot to the body.
May's coach down at Fisticuffs was telling us pre-fight that they have been working on May's balance. Obviously they view that as a key factor in the outcome of this fight.
May tests Flair's chin there with a solid looking shot.
May clinches up against the cage.
May is trying to break the clinch but Flair is controlling him.
May breaks from the clinch.
Flair misses with a combination
and May counters with a straight punch to the midsection.

That's three minutes gone in the round.
May gets to the clinch - let's see what his plan is here.
May wants to break free but Flair has control.
A frustrated look appears on May's face as he tries to break the clinch.
May breaks the clinch and we're back to striking at distance.
May moves into range and clinches up with Flair.
Flair tries to throw a body punch but May avoids it by throwing Flair back against the cage.
Flair looking to slow down the pace here.
May breaks the clinch and we return to the middle of the mat.
May blocks a head kick by Flair.
May drives through and clinches with Flair against the cage.
Flair tries to pull guard but May won't allow it.
May escapes the clinch and we're back to striking.
May moves into the clinch.
May is trying to break free.
May breaks the clinch and we return to the middle of the mat.

That's four minutes gone in the round.
May has taken the fight to the clinch.
May looks like he'd prefer to be striking at range right now.
Flair is trying to pull guard but May turns him against the cage and we stay in the clinch.
May avoids a wild elbow strike from Flair.
May missing with knees to the body.
May tries to break free but Flair pushes him back against the cage.
May looks like he'd prefer to be striking at range right now.
May is trying to break the clinch but Flair has him pressed against the cage.
Flair managing to block the knees to the body from May.
Flair misses with a punch to the body.
Flair is trying to pull guard but May has him pressed against the cage.
May is looking to control Flair's arms but Flair gets an underhook and turns him. Now May has his back to the cage.
A frustrated look appears on May's face as he tries to break the clinch.
May tries to break the clinch but Flair is controlling the position.

Flair jumps guard and drags May to the mat. He's obviously going to be looking for submissions off his back.
This has been an exciting period of action!

Flair looking for submissions off his back, moving his hips, looking for an opening.
And that�s the end of the round � the fighters go back to their corners.
Woodford May dominated that round.
The cut man is working on Nick Flair's cut.
The fighters get back to their feet, the hooter sounds and we're back to the action!

Flair blocks a head kick by May.
A punch combination from Flair misses.
May changes levels and scores with a jab to the body.
May moves into range and clinches up with Flair.
Flair tries to land knees in the clinch but May avoids the damage to the body.
May pushes off and circles away, back to the middle of the mat.
Flair misses with a low kick.
Boom, another hit is landed. "You're gunna get knocked out" taunts May, as that shot connected.
May tries a switch kick but it misses it's target.
May moves into the clinch.
We've had a slow start to the round here - hopefully the action picks up.
May's corner calls for him to break the clinch, which he does.
May closes the distance and clinches.
May manages to break the clinch.
May has been the more effective fighter overall so far.
May bobs and weaves and unloads with a good uppercut.
The fans in attendance giving it up for the two fighters, who have really let it all hang out in the last minute or so!
Flair shoots in but no luck this time.
That's one minute gone in the round.
Flair falls off balance throwing a combination
and May counters with a straight right hand.
Both fighters are absolutely exhausted here.
May with a body punch. A glancing blow.
The fight moves into the clinch position.
Flair is trying to pull guard but May has him pressed against the cage.
A frustrated look appears on May's face as he tries to break the clinch.
May escapes the clinch and we're back to striking.
May moves into range and clinches up with Flair.
May escapes the clinch and we're back to striking.
Flair fails with a takedown attempt.
That's three failed takedown attempts in the round for Nick Flair. That's going to take a lot out of him.
May clinches up with Flair and pushes him back against the cage.
Flair keeps control of May as he tries to wriggle out of the double underhooks.
That's two minutes gone in the round.
May escapes the clinch and we're back to striking.
May dips to his left and cracks Flair with an uppercut!
May fakes with an overhand right and moves in to clinch with Flair, pushing him back against the cage.
May breaks from the clinch.
This has been an exciting period of action!
May has taken the fight to the clinch.
May wants to get back to striking at distance but Flair won't allow it.
Flair is looking for a takedown up against the cage. May gets underhooks though and prevents the takedown attempt.
May is trying to break free.
May is trying to force a seperation but Flair has the dominant position.
May wants to break the clinch but can't.
Woodford May seems to be working more effectively in the clinch in the fight so far.
May manages to break the clinch.
May closes the distance and clinches.
May misses the knee to the body. Nice hip positioning from Flair.
May is looking for a takedown.
Flair is pushing May up against the cage, for a bit of lean and pray action. Action being used the in the loosest possible sense of the word.
May tries to score a body lock takedown but Flair shows good agility there to stay on his feet.
That's three minutes gone in the round.
Flair jumps guard but May turns him against the cage and keeps the fight standing.
May is looking to break free of the clinch but Flair has double underhooks.
May prevents a body shot from Flair.
May breaks the clinch and we're back to striking at distance.
Flair swings away but doesn't land with a series of punches.
May lands a jab to Flair's midsection.
May getting the better of the striking in that exchange.
Nick Flair's cut is getting worse.
Flair tries to keep at a distance but May has taken the fight into the clinch.
A frustrated look appears on May's face as he tries to break the clinch.
May breaks the clinch.
Flair takes a hook to the side of the head. I wonder if that's got his ears ringing.
Flair tries to keep at a distance but May has taken the fight into the clinch.
That's four minutes gone in the round.
Flair is trying to stall.
Flair drops down for a takedown but doesn't get it.
May escapes the clinch and we're back to striking.
May has used his reach advantage pretty well so far tonight.
Flair moves out of range of the body kick.
May takes the fight into the clinch.
May's corner calls for him to break the clinch, which he does.
The fans in attendance giving it up for the two fighters, who have really let it all hang out in the last minute or so!
Flair takes a body punch but keeps moving.
May is using his reach advantage to land shots from outside his opponent's range.
May closes the distance and pushes Flair back into the cage.
Flair keeps the fight in the clinch, despite May's efforts to push away.
Flair gets double underhooks to prevent a takedown attempt from May.
And that�s the end of the round � the fighters go back to their corners.
Woodford May showed his class in that round. I'd imagine he'll take it on all the scorecards.
The cut man is working on Nick Flair's cut.
The corners get their ten second warning. Both fighters stand from their stools and stare eachother down, ready to get back to the action. This is the final round!

Flair blocks a head kick by May.
Flair shoots in for a takedown. He's persisting with it as May sprawls well. May wins this battle and keeps the fight standing. Flair gets slowly back to his feet.
May wants to slow Flair down by chopping away at his legs.
May checks a leg kick.
May now looks to counter with a shot at the body.
Flair misses with a body shot. Nice footwork from May.
May moves into the clinch.
Flair is defending well against a takedown attempt.
Flair is looking to score with knees to the body. Maybe he'll change it up and go body then head. May is defending well for now.
We've had a slow start to the round here - hopefully the action picks up.
Flair pulls guard.
Flair is working the butterfly guard. He manages to land a nice scissor sweep and is now in half guard on the top. Nice move.

May wants to control but Flair is keeping busy and won't allow it.
Both fighters are breathing heavily.
That's one minute gone in the round.
May tries to strike from the bottom but it doesn't land.
May wants to get back to his feet.
Flair is thwarting May's attempts to control the position.
Flair controlling the action here.
Flair throwing punches and elbows but they're not doing any damage.
May really doesn't want to stay on the ground with Flair. If he can't get it back to his feet, it's only a matter of time before he'll be tapping out.
Flair missing with the ground and pound from half guard.
Flair not doing much here.
That's two minutes gone in the round.
The crowd are getting on the fighters' backs, as the pace has dropped off in the last minute or so.
Flair is working for submissions here but there's nothing on.
Flair has been looking to land a fair amount of strikes on the ground. He might be looking to soften his opponent up in order to work for a submission.
May is trying to maintain the position but Flair is very close to passing his half guard.
May is trying to get back to full guard.
May wants to control the action here but instead Flair manages to pass to full mount!
Flair pausing momentarily but resumes with a couple of decent strikes that do a bit of damage.
Flair controlling from the full mount.
Flair is still in mount, landing shots to his trapped opponent. May can't stay in a position like this for much longer.
That's three minutes gone in the round.
Flair with good strikes from the mount here!
May is trying desperately to improve position.
Flair jumps to side control looking for an arm triangle but May manages to avoid the submission attempt.
Flair sitting in side control, looking to soften his opponent up with elbows and hammerfists but May is avoiding damage well and looking to escape the position.
May sneaks back into half guard.
May gets back to full guard.
That's four minutes gone in the round.
May doesn't do any damage with a couple of strikes from the bottom.
May utilising some decent striking defenses from the guard, preventing the ground and pound.
Nick Flair overall seems to be getting the better of the ground position in the fight so far.
May wants to get back to his feet but Flair is in a dominant position and won't allow it.
May trying to control the position.
Nick Flair has stepped it up - he knows he needs a finish here!
Boooooooooooooooooooo!!! God, this has been a terrible round. Come on you two, sort yourselves out!
Flair with a nice head shot there.
Flair is in close to May's body, working some short punches and elbows.
Woodford May is fighting for a decision - hopefully he's judged it right and he's actually winning the fight.

May pushes Flair off for just long enough to get back to his feet. Very athletic spring there.
And that's the end of the fight!
Nick Flair showed his dominance in that final round.
I think May has won this one but let's see whether the judges agree with me. Over to the ring announcer for the scorecards.
Ladies and gentlemen, after 3 rounds of action, we go to the scorecards for a decision.
Judge Colin Fotheringham scores the fight 26:29
Judge Donald Grub scores the fight 26:29
Judge Phil Schofield scores the fight 27:29
In favor of your winner, by unanimous decision... Woodford May!
Woodford May looked relieved post fight as he said the following; 'Line em up. Win or lose I am here to fight.'.
|
|
|
|
|
|
|
|
|
|
|
|
|
|
|
|
|
|
|
|
|
|
|
| S |
C
A |
G |
S |
C
B |
G |
|
S |
C |
G |
|
energy
A | B |
|
hype
A | B |
|
pop
A | B |
|
mgr
A | B |
|
FIGHT
RATING
47% |
|
|
|
|
|
|
