|
|
PBP Commentary |
Coming up we have a bantamweight MMA rules bout between Edgar Humperdink (ranked 0 p4p, 0 weight class) and Nimith Luanglathay (ranked 0 p4p, 0 weight class). Luanglathay has a pretty significant injury - he really shouldn't be fighting right now but he's a warrior and he's here none the less! Over to our ring announcer for the fighter introductions!
 |
|
 |
| 163 cm
20
135 lbs
1 - 0 - 0 |
|
165 cm
22
131 lbs
1 - 3 - 0 |
BJJ Blue Belt
Improved boxing
Prefers ground |
|
BJJ Blue Belt
Brawler
Solid chin |
|
| |
|
Ladies and gentlemen. This fight is 2 rounds, in the bantamweight division.
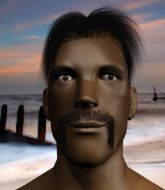
Introducing the fighter to my left, fighting out of the red corner.
With a record of
1 - 0 - 0, fighting out of Tokyo, Edgar Humperdink!
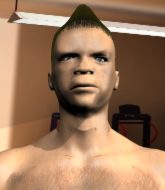
And introducing the fighter to my right, fighting out of the blue corner.
With a record of
1 - 3 - 0, fighting out of Tokyo, Nimith Luanglathay!
The judges for this bout are Taro Takaoka, Shirou Masuda and Yukihiro Shimada.

The bell rings for round one and we are underway!
Luanglathay stuffs the takedown attempt from Humperdink. Humperdink gets slowly back to his feet.
Luanglathay looks gassed!

Humperdink closes the distance and clinches up, looking for a takedown. He shifts his weight and gets a nice trip into half guard.

Humperdink is thinking about going for an arm triangle but he can't free his leg.
Humperdink is looking to take a break and control but Luanglathay is keeping him honest, looking to work from the bottom.
Both fighters really going for it on the ground here!
Humperdink stops Luanglathay from getting back to his feet.
Humperdink missing with the ground and pound from half guard.
Luanglathay keeping his head moving to avoid the ground and pound.
Humperdink seems to be looking for submissions.
Humperdink is looking for a kimura. It's going to be difficult to finish that from half guard though and Luanglathay defends it well.

The referee decides to stand the fighters back up.
Humperdink will have to do better than that with his takedown attempts.
Humperdink looks for a takedown but Luanglathay sprawls well.
That's three failed takedown attempts in the round for Edgar Humperdink. That's going to take a lot out of him.
Humperdink scores a trip takedown into side control. Nice.

That's one minute gone in the round.
Luanglathay can't do much from the bottom here.
Humperdink thinks about going for a far side armbar but bails out and retains the dominant position instead.
Humperdink tries for a kimura but Luanglathay is defending well.
Luanglathay is pushing Humperdink's head away, looking to escape. Humperdink manages to hold on to the position though.
Humperdink wants to control but Luanglathay is keeping him busy.
Humperdink tries to move into full mount but can't pass Luanglathay's legs.
Humperdink tries for a kimura but Luanglathay is defending well.
Humperdink is looking for a kimura. He might have it! No, Luanglathay has escaped the position, nice work there.
Luanglathay can't do much from the bottom here.
Luanglathay is looking to reverse the position.

That's two minutes gone in the round.
A few boos can be heard. I'm sure they will multiply if the fighters don't pick up the pace.
The referee decides to stand the fighters back up.
Luanglathay wants to clinch.
Luanglathay tries to clinch up but Humperdink circles away and keeps his distance.
Luanglathay gets taken down but at least he's managed to land in guard.
Luanglathay keeping full guard, as Humperdink tries to pass.
Luanglathay is looking to stand up but Humperdink isn't so interested in that idea.
Luanglathay trying to keep a closed guard but Humperdink is proving a slippery customer.
The fighters are tangled up in the ropes here. We might need a restart if the fighters can't break free themselves.
Humperdink wants to pass the guard but Luanglathay is keeping the position.
The referee decides to stand the fighters back up.
Luanglathay is looking to clinch but Humperdink is avoiding it.

That's three minutes gone in the round.
Humperdink darts in and lands a nice takedown into half guard.
Humperdink is tying to control. Luanglathay wants to improve his position but can't escape this time.
Humperdink is looking for a kimura but Luanglathay is holding onto that half guard position, so it's hard for Humperdink to get the leverage.
Humperdink prevents Luanglathay from improving his position.
Humperdink is working for a kimura but Luanglathay is defending it quite comfortably.
Humperdink is scoring with some nice ground and pound from the dominant position.
Luanglathay manages to get to full guard.
Humperdink pressing down on his opponent's thigh, looking to pass guard. Luanglathay is keeping the position for now.
Humperdink with a flurry of punches that miss.

That's four minutes gone in the round.
Humperdink pressing down on his opponent's thigh, looking to pass guard. Luanglathay is keeping the position for now.
The referee decides to stand the fighters back up.
Humperdink shoots in for a takedown but doesn't get it.
Humperdink closes the distance and looks for a trip takedown... aaaand he's got it - Humperdink lands in his opponent's guard.
Luanglathay is trying to control the position but Humperdink postures up.
Humperdink wants to pass the guard but Luanglathay is keeping the position.
Humperdink thinks about going for a leg but decides against it, in order to maintain the position.
Humperdink passes into half guard.
Luanglathay is looking to control Humperdink's leg but it's slowly edging free. Can Luanglathay avoid being mounted?
Humperdink is thinking about going for an arm triangle but he can't free his leg.
Luanglathay trying to control here.

That's five minutes gone in the round.
Humperdink trying to mount his opponent but Luanglathay defends it.
Humperdink throwing shots but they're hitting the canvas more than the man.
Luanglathay trying to control here.
Neither fighter is doing enough for the referee's liking and he's decided to stand them back up.

Humperdink clinches.
Luanglathay tries to score a body lock takedown but Humperdink shows good agility there to stay on his feet.
Humperdink tries to score a body lock takedown but Luanglathay shows good agility there to stay on his feet.
Luanglathay with an attempt at a knee that misses.
With the fighters up against the ropes, Humperdink throws an elbow but misses.
Humperdink can't get the takedown.
Humperdink jumps guard but Luanglathay stands there with Humperdink around his waist. Humperdink gives up and drops back to his feet. We remain in the clinch.
Humperdink tries for a takedown. No joy.
Luanglathay with an attempt at a knee that misses.
Humperdink using the Thai plumb to throw knees but Luanglathay has his back arched nicely, preventing the strike.
Humperdink tries to jump guard but he falls flat on his backside. Luanglathay smiles and moves away.
Nimith Luanglathay seems to be the more aggressive standup fighter in this bout.
Humperdink has taken the fight to the clinch.
Humperdink drops to a knee looking for a takedown but Luanglathay gets the underhooks and prevents it.
Humperdink tries to pull guard but Luanglathay holds him up against the ropes and eventually Humperdink drops back down to his feet.

That's six minutes gone in the round.
Humperdink fails to pull the fight into his guard.
Luanglathay gets underhooks to prevent Humperdink's takedown attempt.
Humperdink tries to take the fight to the ground by pulling guard but can't manage it.
Luanglathay wants to push off and get back to the center of the mat but Humperdink has him pressed against the ropes.
Luanglathay tries to pull guard but can't drag his opponent to the mat. Humperdink just stands there and leans against the ropes.
Humperdink trying to stall but Luanglathay improves his position.
Luanglathay gets underhooks to prevent Humperdink's takedown attempt.
Humperdink tries for a takedown but Luanglathay manages to get underhooks.
Humperdink tries to jump guard but he falls flat on his backside. Luanglathay smiles and moves away.
Humperdink scores with a nice takedown into half guard. Let's see what he's got on the ground.
Humperdink is looking for a kimura but he's never going to get it from there.
Luanglathay is looking to improve his position.
Humperdink is working for a kimura but Luanglathay is defending it quite comfortably.
Luanglathay keeps control of the position for the meantime.

That's seven minutes gone in the round.
Humperdink tries to pass to full mount but Luanglathay defends it.
Humperdink is looking for a kimura. It's going to be difficult to finish that from half guard though and Luanglathay defends it well.
Luanglathay desperately trying to maintain half guard.
Humperdink is thinking about going for an arm triangle but he can't free his leg.
Humperdink is looking for an arm triangle, whilst trying to pass to side control. Luanglathay doesn't seem that keen to cooperate though. No luck this time Humperdink.
Humperdink passes to side control.
The fighters are trapped in the ropes so we're going to have a reposition here. The ref calls for a break and repositions the fighters in the center of the ring.
Luanglathay is looking for a sweep.

That's eight minutes gone in the round.
My god... these two guys really need to pick up the pace or everyone will leave to go get a beer.
Humperdink is looking for a kimura. He might have it! No, Luanglathay has escaped the position, nice work there.
Humperdink wants to work for a kimura but he's foiled early by Luanglathay, who protects the arm well.
Humperdink thinks about going for a far side armbar but bails out and retains the dominant position instead.
Luanglathay is looking to regain half guard here but Humperdink keeps moving and retains side control.
Luanglathay is trying to control Humperdink's posture but Humperdink avoids it.
Humperdink is trying to land an Americana. He has the arm isolated but Luanglathay is keeping cool and he's avoided the danger for now.
Humperdink tries for a kimura but Luanglathay is defending well.
Luanglathay manages to get back to half guard.
Humperdink is looking for a kimura. It's going to be difficult to finish that from half guard though and Luanglathay defends it well.

That's nine minutes gone in the round.
Humperdink wants to free his trapped foot but Luanglathay is holding on for dear life with his legs.
Humperdink is looking for a kimura but he's never going to get it from there.
Humperdink passes to full mount!
Humperdink working for a submission but Luanglathay is keeping him at bay.
Humperdink trying to control but Luanglathay is having none of it.
Humperdink looking to secure an arm triangle but Luanglathay defends it well.
Humperdink wants to finish this one by submission but Luanglathay is holding onto his waist, trying to prevent any attacks from Humperdink.
Humperdink lands a couple of nice shots there from mount.
And that�s the end of the round � the fighters go back to their corners.
Edgar Humperdink dominated that round.
The fighters' corners scream their final instructions, as the referee calls time. Here we go, back to the action! This is the final round!

Luanglathay tries to clinch but fails miserably
and Humperdink counters with a driving takedown into guard. Nice work there by Humperdink.

Humperdink stands up from guard. Let's bang!
Humperdink tries to shoot in for a takedown. He's got hold of a leg but Luanglathay swivels and escapes.
Humperdink misses with a takedown attempt. He shot from a bit too far out.
Luanglathay tries to clinch
and Humperdink counters with a shoot takedown into half guard.
Humperdink prevents Luanglathay from improving his position.
Humperdink wants to lay and pray for a moment but Luanglathay keeps working.
Humperdink prevents Luanglathay from improving his position.
Luanglathay avoiding damage under a succession of punches from Humperdink.
Humperdink is trying to work for a kimura but Luanglathay is defending well.
Luanglathay regains full guard. Nicely done.
Luanglathay is breathing heavily.
Luanglathay wants to stand but Humperdink is controlling the position.
Humperdink has to be careful here, sitting in the guard of a superior BJJ player.
Humperdink tries to free his leg and advance position but Luanglathay is retaining full guard.
Well, the referee has seen enough. Neither fighter is active enough on the ground so he's stood them back up.
Humperdink fails with the takedown.
That's three failed takedown attempts in the round for Edgar Humperdink. That's going to take a lot out of him.
Humperdink changes levels and drives through with a really nice takedown into side control. Luanglathay looks really pissed at himself for not defending that better.
That's one minute gone in the round.
Humperdink is in a dominant position here, looking for a kimura. Luanglathay looks calm but he's in trouble here. Humperdink gets his head over his opponent's head and yanks on the arm. Luanglathay is tapping like a morse code operator on the titanic! SOS! SOS! Humperdink lets go of the hold and Luanglathay can pop his arm back in it's socket.
Ladies and gentlemen, after 1:25 of round 2, we have a winner by way of Submission (Kimura). Edgar Humperdink!
|
|
|
|
|
|
|
|
|
|
|
|
|
|
|
|
|
|
|
|
|
|
|
| S |
C
A |
G |
S |
C
B |
G |
|
S |
C |
G |
|
energy
A | B |
|
hype
A | B |
|
pop
A | B |
|
mgr
A | B |
|
FIGHT
RATING
0% |
|
|
|
|
|
|

