|
|
PBP Commentary |
Coming up we have a featherweight MMA rules bout between Kendo Hirigushi (ranked 232 p4p, 26 weight class) and David Paddington (ranked 331 p4p, 40 weight class). Paddington is bobbing his head along to his entrance song: Broken - Next time around. I don't know about you partner, but I'm pumped for this one!
 |
|
 |
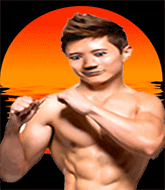
| 181 cm
29
160 lbs
19 - 8 - 0 |
|
167 cm
26
153 lbs
18 - 10 - 0 |
Good wrestling
World class boxer
Insanely flexible |
|
Olympic wrestler
World class boxer
Good gas tank |
|
| |
|
Ladies and gentlemen. This fight is 3 rounds, in the featherweight division.
Introducing the fighter to my left, fighting out of the red corner.
With a record of
19 - 8 - 0, fighting out of London, Kendo Hirigushi!
And introducing the fighter to my right, fighting out of the blue corner.
With a record of
18 - 10 - 0, fighting out of Helsinki, David Paddington!
The judges for this bout are Timothy Bukovac, Jack Bonds and Frank Antenori.

The bell rings for round one and we are underway!
Hirigushi ducks down and throws a hook to the body but Paddington moves away.
Paddington drops down looking to force a counter takedown but Hirigushi defends it well.
Hirigushi scores with a shot to the body.
Hirigushi misses with an uppercut. Paddington saw that one coming.
Paddington keeps his opponent at a distance with a nice jab.
Hirigushi misses with a wild body shot.
Paddington misses with a hook
and Hirigushi counters with a crisp hook to the side of the head.
Paddington slips under a jab.
Paddington throws a body punch but Hirigushi moves out of range.
Hirigushi throws a hook but Paddington avoids it easily.
Hirigushi swings away but doesn't land with a series of punches.
Paddington takes a step towards his opponent and connects with a left hand, before circling away.
Paddington throws a body shot but no joy.
Paddington throws a body shot but no joy.
It looked like Hirigushi was looking amped, ready to throw a big counter but didn't commit.
Nice takedown defense from Hirigushi. No joy for Paddington on that attempt.
Paddington misses with a jab and misses with a cross straight after too.
It looked like Hirigushi wanted to counter with a hook but didn't fully commit.
Hirigushi misses with a two punch combination.
Paddington now looks to counter with a shot at the body.

That's one minute gone in the round.
Paddington lands a powerful looking uppercut that connected with his opponent's jaw.
Paddington lands a nice hook to Hirigushi's body. Hirigushi takes it in his stride and looks to land his own strikes.
Paddington avoids the clinch attempt nicely.
David Paddington seems to be the more aggressive standup fighter in this bout.
Hirigushi takes a solid shot to the body. That one hurt him but he's trying not to show it.
Hirigushi uses some good footwork to avoid the body shot by Paddington.
Hirigushi throws a left and a right that both miss

and Paddington counters into the clinch. Nicely done.
Paddington has dropped down and is looking to force the takedown but it's defended by Hirigushi after a bit of a struggle.
Hirigushi lands with a short head shot on the inside.
Hirigushi misses with a hook to the ribs.
Paddington blocks a couple of punches on the inside.
Hirigushi tried to land a shot to the body but connects with Paddington's elbow.
Hirigushi prevents a takedown attempt there.
Kendo Hirigushi has stuffed three takedown attempts in the round now. That's going to take a lot out of David Paddington.
Hirigushi prevents a takedown attempt there.
A shot in the inside from Paddington.
Hirigushi misses with a shot to the kidneys.
An uppercut on the inside fails to land for Hirigushi.
Hirigushi lands a hook that snaps the head of Paddington backwards.

That's two minutes gone in the round.
This is a great period of action - very entertaining stuff!
Hirigushi throws a head punch that misses.
Hirigushi scores with a nice hook to the head.
A short right hand to the side of the head by Paddington.
Paddington blocks a punch to the side of the head.
Hirigushi lands with a short head shot on the inside.
Paddington tries to throw a body punch but Hirigushi avoids it by throwing Paddington back against the cage.
Hirigushi has a couple of punches blocked by Paddington.
Hirigushi misses with the head strike.
Paddington blocks a punch to the side of the head.
Paddington blocks a punch to the side of the head.
Hirigushi swings wildly with an uppercut but Paddington uses good head movement to avoid it.
Paddington misses with a hook to the ribs.
Paddington has a couple of punches blocked by Hirigushi.
With the fighters clinched against the cage, Paddington creates a bit of distance for himself and scores with a nice uppercut.
Hirigushi throws a punch but it's blocked by Paddington.
Hirigushi working aggressively here.
Paddington misses with some punches.
Paddington lands a short shot on the inside that snaps the head of Hirigushi backwards.
Paddington takes a shot to the head.

That's three minutes gone in the round.
Hirigushi blocks a punch to the side of the head.
Hirigushi misses with a short punch on the inside.
Paddington is working for a takedown up against the cage. He can't get it on this occasion though.
Paddington tries a body shot but Hirigushi blocks it.
Paddington is leaning against Hirigushi and scores with a nice uppercut to the body.
Paddington blocks an uppercut.

Paddington has picked Hirigushi up - he's going for a ride! Paddington dumps his opponent to the mat with a thud and settles into half guard.
Paddington missing with some ground and pound from the half guard.
Hirigushi on the receiving end of some nice ground and pound.
Paddington throwing shots but Hirigushi is blocking nicely.
Hirigushi is trying to defend against the ground and pound but Paddington scores with a couple of nice shots.
Hirigushi is looking to improve his position.
Paddington has the superior BJJ but he's also working some ground strikes into his gameplan.

Paddington is looking for an arm triangle, whilst trying to pass to side control. Hirigushi doesn't seem that keen to cooperate though. No luck this time Paddington.
Hirigushi is in a tricky position. We've heard reports from his gym mates at Total Impact MMA/KT that he's been drilling escapes, so let's see if he can get back to his feet.
Hirigushi blocking the ground and pound attempt from Paddington.

That's four minutes gone in the round.
Paddington throws a big elbow that misses, also allowing Hirigushi to regain full guard.
Paddington trying to land body shots but he keeps hitting the mat.
A big thud reverberates around the arena there as Paddington accidentally thumps the mat. Hopefully he's not broken his hand.
Hirigushi looking for a sweep. Not yet Hirigushi, not yet.
Paddington won't allow Hirigushi to get back to his feet.
This is a great period of action - very entertaining stuff!

Hirigushi wriggles free and stands up.

Hirigushi moves into the clinch successfully.
Hirigushi has a couple of punches blocked by Paddington.
And that�s the end of the round � the fighters go back to their corners.
That was a close round but I would say that Kendo Hirigushi will probably get the nod.
The fighters get back to their feet, the hooter sounds and we're back to the action!

Paddington tries to clinch but Hirigushi is having none of it.
A shot to the liver by Hirigushi. Beautiful body shot.
Hirigushi tries to clinch
and Paddington connects with a straight left hand counter down the middle.
Paddington is looking to clinch.
Paddington looks to land a combination but Hirigushi avoids it well.
Paddington fakes high and swings low for a body shot but Hirigushi manages to avoid it.
Hirigushi throws a big counter combination but Paddington scrambles out of danger and avoids any damage.
Hirigushi ducks down and throws a hook to the body but Paddington moves away.
Hirigushi displays some good footwork, moving neatly out of range as Paddington throws out the jab.
Paddington throws a body punch but Hirigushi moves out of range.
Paddington throws a hook to the side of Hirigushi's head but Hirigushi sees it coming and ducks under it beautifully.
We've had a slow start to the round here - hopefully the action picks up.
Paddington is on the wrong end of a nice combination from Hirigushi.
Hirigushi tries to clinch but Paddington moves out of range.
Paddington misses with a takedown attempt - Hirigushi sprawls well and throws a nice strike on the way out which just misses.
Hirigushi swinging wildly here.
That's one minute gone in the round.
Paddington swings for the body but Hirigushi moves out of range.
Hirigushi cracks Paddington with a good shot that sees him stumbling back into the cage.
Kendo Hirigushi is winning the standup battle so far.
Hirigushi uses some good footwork to avoid the body shot by Paddington.
Hirigushi changes levels and scores with a jab to the body.
Paddington throws a poor cross that misses
and Hirigushi counters with a lovely straight right hand!
Hirigushi looks to land a left hand but Paddington moved out of range nicely.
Paddington is definitely looking for the counter takedowns here.
Paddington takes one on the button.
Paddington misses with a right hand
and Hirigushi connects with a straight left hand counter down the middle.
Hirigushi jabs. That one connects to the head of his opponent.
Hirigushi throws a good cross that connects.
Hirigushi works his jab well there, keeping his opponent at a distance.
Nice sprawl there from Hirigushi as Paddington shoots in.
This has been an exciting period of action!
Paddington tries to clinch but Hirigushi is having none of it.
Paddington misses with a straight right.
Hirigushi is looking to counter punch.
That's two minutes gone in the round.
Paddington lands the left hand.
Nice jab there from Paddington.
Hirigushi uses good footwork to avoid the strikes from Paddington.
Hirigushi takes a step towards his opponent and connects with a left hand, before circling away.
Hirigushi moves into the clinch successfully.
Paddington pulls guard successfully.
Hirigushi is looking to stand up but Paddington won't let him.
Paddington working for a triangle but Hirigushi defends it easily.
Paddington is trying to keep Hirigushi in close.
Hirigushi trying to stand up but can't free himself from Paddington's guard.
That's three minutes gone in the round.
Hirigushi got a little sloppy there for a moment and Paddington has worked his way into a loose triangle - can he finish it?! No, Hirigushi has managed to get both his arms back between Paddington's legs - danger averted.
Paddington looking for subs off his back but Hirigushi has passed one foot through into half guard.
Paddington actively working from the bottom here.

Hirigushi decides to return to a standing position.
That's four minutes gone in the round.
Well. There's a bit of a lull in the action here and the crowd are starting to get restless.
Hirigushi throws a combination but comes up with nothing but fresh air.
And an attempted straight right on the counter from Paddington! But no joy.
Hirigushi stooping low to avoid any incoming strikes and then lunges in with an uppercut come cross that lands flush.
Paddington misses with an uppercut. Hirigushi saw that one coming.
An attempted straight right counter from Hirigushi misses the target.
Paddington throws a right hand that misses
and Hirigushi counters with a lovely straight right hand!
Hirigushi with a jab.
Hirigushi is using his reach advantage well here, landing the more effective single shots from range.
Hirigushi takes a swing at Paddington's ribcage but misses.
Hirigushi steps to the side to avoid the strikes from Paddington.
Hirigushi misses with a body shot.
A left lands for Hirigushi.
Paddington throws a lazy uppercut
and Hirigushi connects with a straight left hand counter down the middle.
Paddington closes the distance and takes a jab right on the nose as he does so.
Paddington looks to land a right hand but Hirigushi moved out of range.
Hirigushi bobs and weaves well there to avoid the strikes.
Hirigushi throws a right and a left that both miss.
And that�s the end of the round � the fighters go back to their corners.
Kendo Hirigushi dominated that second round.
The corners get their ten second warning. Both fighters stand from their stools and stare eachother down, ready to get back to the action. This is the final round!

Paddington scores with a jab to the body.
Paddington scores with a jab to the head.
Paddington looks to throw the jab but Hirigushi is out of range.
A counter left hand to the body from Hirigushi misses its target.
Paddington throws a body shot but no joy.
Hirigushi is looking to counter with a shot to the body.
Hirigushi is really dominating this fight. Is there anything that Paddington can do to turn this around?
Hirigushi keeps the fight on the outside.
Hirigushi ducks down and throws a hook to the body but Paddington moves away.
Hirigushi gets cracked with a nice right hand there by Paddington.
Hirigushi stalks Paddington and leaps in with a furious combination of punches. Uppercuts and crosses smash into Paddington's face. Paddington staggers backwards, shaken.
Paddington cracks Hirigushi with an open hand slap.
Paddington throws the left hand but Hirigushi avoids the punch easily.
Paddington misses with a straight right.
Hirigushi moves forwards but Paddington connects with a nice, crisp jab.
Paddington cracks Hirigushi with a right hand to the side of the head.
The crowd cheering loudly, showing their appreciation for the quality fight we're seeing here.
Hirigushi stuns Paddington with a nice body shot, before stepping back out of range.
Hirigushi misses the shot to the body.
That's one minute gone in the round.
Hirigushi takes one on the chin but keeps coming.
Paddington swinging wildly here.
A shot to the body from Hirigushi misses
and Paddington counters with a stiff right hand.
Hirigushi throws out a token jab with nothing on it.
Paddington misses with a hook
and Hirigushi counters with a left to the body.
Hirigushi uses some good footwork to avoid the body shot by Paddington.
Hirigushi lands a nice shot to the body.
The fighters circling - Paddington throws out the jab but it was never going to land.
A punch combination from Paddington misses.
Paddington throws a series of punches but Hirigushi avoids them all with ease.
Paddington bobs and weaves well there to avoid the strikes.
Paddington pushing out the jab but it's not landing.
No joy there for Hirigushi, who threw a few shots but didn't land.
That's two minutes gone in the round.
Hirigushi is looking to clinch but Paddington is avoiding it.
Paddington catches Hirigushi with a nice straight right. He seems pissed - ooooh, it's on now! On like donkey kong!
This has been an exciting period of action!
Paddington throws a series of punches but Hirigushi avoids them all with ease.
Hirigushi uses good head movement to avoid the hook from Paddington.
Paddington rushes in with a sloppy looking punch
and Hirigushi counters with a one-two to the body.
Paddington swings wildly with a couple of big hooks
and Paddington takes a counter punch right on the button for his troubles.
Hirigushi connects with a lovely right hand, straight down the pipe.
Hirigushi scores with a one two! Paddington had his feet all tangled up there and couldn't avoid the strikes.
Hirigushi throws a combination but it was largely blocked by Paddington.
Hirigushi throws a hard body shot but it just misses.
Paddington lands a straight punch to the body, keeping Hirigushi at a distance.
Hirigushi lands a jab-cross combination.
Paddington shoots in for a takedown. "I don't think so" says Hirigushi as he avoids it easily.
Hirigushi misses with the combination.
David Paddington has stepped it up - he knows he needs a finish here!
That's three minutes gone in the round.
Hirigushi takes a body punch but keeps moving.
Paddington misses with a looping left.
Hirigushi throws out a loose jab but Paddington uses good head movement to avoid it.
Paddington throws a hook but Hirigushi avoids it easily.
Paddington scores with a reasonable looking shot to the body. Hirigushi doesn't seem bothered though.
Hirigushi throws a right and a left that both miss.
Kendo Hirigushi is fighting for a decision here - he's started to take the cautious approach.
Hirigushi moves into range and throws a lovely three punch combination.
Paddington throws a poor cross that misses
and Hirigushi counters with a stiff right hand.
Hirigushi is using his height advantage well here, landing a good percentage of his punches.
Paddington punishes Hirigushi's body with a nice straight punch.
Paddington waving his hands out in front of him, looking to distract Hirigushi.
Hirigushi tries to clinch up but Paddington circles away and keeps his distance.
That's four minutes gone in the round.
Hirigushi fails to land with the punch combination there - jab, cross, hook, miss, miss, miss.
Kendo Hirigushi is looking to keep the fight on the feet at all costs.
Paddington slips under a jab.
Paddington jabbing away but nothing is landing.
Paddington has a pretty nasty looking mouse under his right eye.
Paddington moves out of range of the strikes.
Paddington swings away with a counter right hand but no contact made.
Wooooo! Give it up for these two warriors! They are putting on a show!
Hirigushi ducks under a wild hook from Paddington.
Hirigushi defending well as Paddington loads up on a big left hand.
Hirigushi is looking to counter with a shot to the body.
Hirigushi dips down and scores with a jab to the body.
Paddington looks to score with a jab to the body but Hirigushi is just out of range.
Hirigushi misses with a few strikes there.
Paddington misses with a hook.
Hirigushi avoids the clinch attempt nicely.
Hirigushi ducks under a wild hook from Paddington.
Hirigushi lands with a hook. Paddington tried to avoid it but it clipped the top of his head.
The crowd applaud the fighters' efforts here as the round comes to an end.
Paddington lands a jab. Then a cross. Then finally a nice hook to the body. Good work there by Paddington.
And that's the end of the fight!
That was a close round. You could make an argument for either fighter but I would give it to Kendo Hirigushi.
Well I reckon that's a shut out for Hirigushi, winning every round. Will the judges agree? They are the ones who matter, even if they are often depressingly incompetent. Over to the ring announcer for the scorecards.
Ladies and gentlemen, after 3 rounds of action, we go to the scorecards for a decision.
Judge Timothy Bukovac scores the fight 30:27
Judge Jack Bonds scores the fight 30:27
Judge Frank Antenori scores the fight 30:27
In favor of your winner, by unanimous decision... Kendo Hirigushi!
Kendo Hirigushi decided to go for the less than humble approach in his post fight interview, telling everyone how he is going to conquer the world. The crowd seemed to like it when really that sort of approach could have gone either way.
|
|
|
|
|
|
|
|
|
|
|
|
|
|
|
|
|
|
|
|
|
|
|
| S |
C
A |
G |
S |
C
B |
G |
|
S |
C |
G |
|
energy
A | B |
|
hype
A | B |
|
pop
A | B |
|
mgr
A | B |
|
FIGHT
RATING
67% |
|
|
|
|
|
|
