|
|
PBP Commentary |
Coming up we have a light heavyweight MMA rules bout between Buster McDiggle (ranked 1525 p4p, 219 weight class) and Hamza Keita (ranked 4171 p4p, 465 weight class). Keita is bouncing up and down as he enters the arena, backed by Secka - Pointure . Buster McDiggle has the better chin. Will he look to stand and bang today?
 |
|
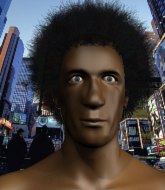 |
| 193 cm
31
209 lbs
6 - 7 - 0 |
|
177 cm
28
211 lbs
8 - 7 - 0 |
Abu Dhabi Champ
World class boxer
Granite chin |
|
BJJ Red Belt
Solid Muay Thai
Good gas tank |
|
| |
|
Ladies and gentlemen. This fight is 3 rounds, in the light heavyweight division.
Introducing the fighter to my left, fighting out of the red corner.
With a record of
6 - 7 - 0, fighting out of Amsterdam, Buster McDiggle!
And introducing the fighter to my right, fighting out of the blue corner.
With a record of
8 - 7 - 0, fighting out of Montreal, Hamza Keita!
The judges for this bout are Elvis Blanc, Gregory Folan and Robert Douchet.

The bell rings for round one and we are underway!
A jab from Keita misses.

McDiggle gets in close and instigates a clinch.
Keita drops down looking for an ankle pick but McDiggle pulls his leg out and moves away.
Keita circles away from the clinch attempt.
McDiggle gets to the clinch - let's see what his plan is here.
McDiggle scores with a hook to the body.
McDiggle keeps the fight in the clinch, despite Keita's efforts to push away.
Keita can't break the clinch.
McDiggle content to slow the pace in the clinch.
Keita tries to break the clinch but McDiggle is controlling the position.
Keita is trying to pull guard but McDiggle has him pressed against the cage.
Keita looking to stall.
We've had a slow start to the round here - hopefully the action picks up.
McDiggle tries a body shot but Keita blocks it.

McDiggle pushes off and circles away, back to the middle of the mat.
McDiggle closes the distance and pushes Keita back into the cage.
A right handed body shot lands from McDiggle.
Keita tried to land a shot to the body but connects with McDiggle's elbow.

That's one minute gone in the round.
McDiggle prevents the takedown attempt.
Buster McDiggle has stuffed three takedown attempts in the round now. That's going to take a lot out of Hamza Keita.
A right hook to the body lands for McDiggle.
Keita tries to pull guard but McDiggle holds him up against the cage and eventually Keita drops back down to his feet.
McDiggle keeps the fight in the clinch, despite Keita's efforts to push away.
McDiggle scores with a shoulder strike.
McDiggle pushes Keita back against the cage and lands a hook to the side of the head.
McDiggle softening up his opponent with strikes, against the cage.
McDiggle throws a blind hook that connects with the side of Keitas head.
Keita working hard to break the clinch.

Keita breaks the clinch and we're back to striking at distance.
McDiggle tries to clinch up against the cage, rushing in to close the distance. Keita manages to break the clinch and circles back to the middle of the mat.
Keita changes levels for a counter takedown but doesn't follow through with his attempt.
Keita ducks down and throws a hook to the body but McDiggle moves away.
McDiggle looks to score with a jab to the body but Keita is just out of range.
McDiggle clinches.
Keita misses with a hook to the ribs.
McDiggle tries a body shot but Keita blocks it.

That's two minutes gone in the round.
McDiggle lands with a left to the head.
Keita blocks an uppercut.
McDiggle lands punches inside but they're not really causing much damage.
We've seen a great period of action over the last minute or so - credit to both fighters for going all out!
McDiggle is working Keita over against the cage.
McDiggle softening up his opponent with strikes, against the cage.
McDiggle definitely looks more muscular than last time we saw him fight.
McDiggle tries a shoulder strike but it doesn't do any damage.
Keita fails to pull guard.
McDiggle doesn't land with the attempted body shot.
McDiggle taking a breather.
McDiggle pushes Keita back against the cage and lands a hook to the side of the head.
McDiggle lands with a short shot to the head.
McDiggle throws a hook to the body. More of an arm punch but it's all scoring with the judges.
Keita wants to break the clinch but can't.
McDiggle scores with a shot to the side of Keita's head.
Good anti-grappling being displayed by McDiggle as Keita tries to tie him up.
Come on Keita - let's have some action - none of this stalling nonsense.
An uppercut on the inside fails to land for McDiggle.

That's three minutes gone in the round.
With the fighters clinched against the cage, McDiggle creates a bit of distance for himself and scores with a nice uppercut.
Keita wants to break free but McDiggle has control.
Keita tries to take the fight to the ground by pulling guard but can't manage it.
McDiggle misses with a body punch.
McDiggle throws a punch but it's blocked by Keita.
McDiggle can't find room to land a body shot as Keita controls the action.
Keita breaks the clinch and we return to the middle of the mat.
McDiggle moves into the clinch successfully.
Keita will no doubt start fighting again in a minute but for now he's just having a little rest, leaning McDiggle up against the cage.
McDiggle gets through Keita's defenses to land a nice punch to the side of the head.
Keita working aggressively here.
McDiggle breaks from the clinch.
McDiggle tries to clinch but is not successful on this occasion.
Keita displaying good standup as he scores with a three punch combination.

It looks like Buster McDiggle has been cut.
McDiggle has Keita up against the cage in a clinch.

That's four minutes gone in the round.
McDiggle stalling here - the referee won't stand for too much of that.
McDiggle lands a short shot on the inside that snaps the head of Keita backwards.
Fantastic stuff here - a very entertaining period of action, which has drawn cheers from the crowd.
Keita misses with a punch on the inside.
Keita is trying to break the clinch but McDiggle is controlling him.
McDiggle working on landing some head shots here - that one got through nicely.
A left hand lands to the body for McDiggle.
Keita misses with a hook to the ribs.
Keita has a body lock and is looking for a takedown. McDiggle is bouncing around trying to prevent the takedown and somehow he has indeed managed to stay on his feet.
McDiggle misses with a punch to the body.
McDiggle lands with a left to the head.
McDiggle lands with a quick shot inside that doesn't really do much damage.
McDiggle is leaning against Keita and scores with a nice uppercut to the body.
Keita wants to stall.
McDiggle stays in close to his opponent and throws a right hand to the body.
Keita looks winded!
A left hand lands to the body for McDiggle.
And that�s the end of the round � the fighters go back to their corners.
Buster McDiggle dominated that round.
The cut man is working on Buster McDiggle's cut.
That's the end of the interval. I'm sure that seemed a lot quicker than a minute for our two fighters! Back to the action.

McDiggle cracks Keita with a hook to the temple - Keita is on wobbly legs here! McDiggle swarms him with hook after hook, landing with each one! Keita falls to the canvas face first and the referee dives in to stop the fight! McDiggle wins by TKO!
Ladies and gentlemen, after 0:05 of round 2, we have a winner by way of TKO (Punches). Buster McDiggle!
Buster McDiggle managed to slip a mention for his sponsors, Ma Balls Is Hot Clothing, into his post fight interview.
|
|
|
|
|
|
|
|
|
|
|
|
|
|
|
|
|
|
|
|
|
|
|
| S |
C
A |
G |
S |
C
B |
G |
|
S |
C |
G |
|
energy
A | B |
|
hype
A | B |
|
pop
A | B |
|
mgr
A | B |
|
FIGHT
RATING
47% |
|
|
|
|
|
|

