|
Play
by Play - Fighter's Fight Commentary
|
Event:
TWGC 36 (145lbs, D4): Finals - Round 2
Date: Jan 08, 2022 |
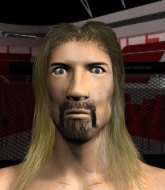
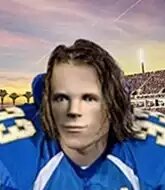
This TWGC bout is 1 fifteen minute round in the featherweight division. Introducing today's competitors. In the red corner, competing out of St Petersburg, with a TWGC record of 2 wins and 0 losses; Todd Ianuzzi! And in the blue corner, fighting out of New York, with a TWGC record of 2 wins and 0 losses; Tim Riggins!
The judges for this bout are Bruno Lombardi, Eddie Farnsworth and Anthony Taglia.
The official calls the fighters to the middle and the contest is under way.#TD#
Riggins gets caught napping as Ianuzzi dives in and scores a takedown. Riggins manages to retain guard. Score +2 for takedown into guard / half guard: Ianuzzi (2) vs (0) Riggins#SUB2#
Riggins escapes his hips to the side and looks to be working for an armbar. Ianuzzi gives him a little smile and shakes his head. No chance.
Ianuzzi trying to control the position from guard on top but Riggins is wriggling around, looking for whatever he can. #SUB2#
Riggins escapes his hips to the side and looks to be working for an armbar. Ianuzzi gives him a little smile and shakes his head. No chance.
Ianuzzi stands up and looks to throw the legs aside to pass to side control. Riggins swivels though and keeps the full guard.
We've had a slow start to the round here - hopefully the action picks up.
Ianuzzi trying to control the position from guard on top but Riggins is wriggling around, looking for whatever he can.
Riggins is a painfully thin specimen of a man. You do wonder whether a good body kick would snap him clean in two.#SUB2#
Riggins is throwing his legs up, looking for submissions. Ianuzzi is aware though and is defending well.#T1#
Ianuzzi tries to free his leg and advance position but Riggins is retaining full guard. #SUB2#
Riggins looking for a guillotine here but Ianuzzi defends easily.
Ianuzzi trying to control the position from guard on top but Riggins is wriggling around, looking for whatever he can. #SUB#
Ianuzzi is trying to work a guillotine from the top, or something like that? Don't know how he thinks he's going to get a finish from there. #SUB2#
Riggins has managed to work for a loose triangle. I think Ianuzzi should be able to defend this one pretty easily though. Oh, Riggins has tightened it up now! Ianuzzi should have reacted faster there - he's in big trouble and yes, he's tapped out! This one is all over!
Ladies and gentlemen, after 2:56 of round 1, we have a winner by way of Submission (Triangle). Tim Riggins!
Tim Riggins was full of energy after the big win and talked about how he thinks he can do big things in this sport. The crowd were appreciative of his determination to succeed. |
|
|
|
Event:
TWGC 36 (145lbs, D4): Finals - Round 1
Date: Jan 07, 2022 |
This TWGC bout is 1 fifteen minute round in the featherweight division. Introducing today's competitors. In the red corner, competing out of St Petersburg, with a TWGC record of 1 wins and 0 losses; Todd Ianuzzi! And in the blue corner, fighting out of Helsinki, with a TWGC record of 1 wins and 0 losses; Ronaldo Diaz!
The judges for this bout are Reed Andrews, Lou da Vinci and Jorge Garcia.
The official calls the fighters to the middle and the contest is under way.#TD#
Ianuzzi closes the distance, clinches up and gets a nice trip takedown into side control. Very smooth. Score +4 for clean takedown past guard: Ianuzzi (4) vs (0) Diaz
Diaz tries to work a leg under to get back to half guard but Ianuzzi wriggles his own leg back out and remains in side control.
Ianuzzi trying to control the position but Diaz is working away.
Diaz sneaks back into half guard.
Diaz tries to roll over but Ianuzzi keeps him under control.
Ianuzzi wants to free his trapped foot but Diaz is holding on for dear life with his legs.
Diaz is looking to improve his position.
We've had a slow start to the round here - hopefully the action picks up.
Ianuzzi stalling.
Diaz regains full guard. Nicely done.
The fighters are pressed up against the cage, both looking to find a bit of space to work.#T1#
Diaz wants to sweep here but Ianuzzi controlling him for the moment. #SUB2#
Diaz working from the bottom, still in full guard. He's managed to get a loose triangle. Ianuzzi doesn't seem to be doing much to defend here, obviously he feels comfortable in the position. Ianuzzi manages to throw the legs off his shoulder and he's back into guard - no problem.
Diaz keeping moving, preventing Ianuzzi from controlling successfully.
Diaz has control of Ianuzzi's left arm, preventing Ianuzzi from doing any damage.
Diaz looking to sweep here. No luck so far. #SUB2#
Diaz has his foot on Ianuzzi's thigh. He's trying to push off and get in position for a triangle, I think. Ianuzzi works his way back into a safe position though.
Diaz not looking particularly offensive just at the moment.
Our spies down at at EFC Gym inform us that Diaz has really been working on his submissions in the buildup to this fight. Will it pay off?
Ianuzzi trying to pass the guard but can't manage it just yet. #T2##SUB2#
Diaz looking for submissions from the bottom here. Moving his hips around, possibly looking for an armbar.
Diaz has his hands on Ianuzzi's head, controlling the position.
Ianuzzi trying to control the position from guard on top but Diaz is wriggling around, looking for whatever he can. #SUB2#
Ianuzzi avoids a guillotine attempt easily.
Ianuzzi trying to control the position from guard on top but Diaz is wriggling around, looking for whatever he can. #SUB2#
Diaz looking for submissions off his back, moving his hips, looking for an opening.
#T3##SUB2#
Diaz working for a triangle but Ianuzzi defends it easily.
Ianuzzi sneaks a leg through and gets to half guard. That was like a knife through butter how easily he passed Diaz's guard. #SUB#
Ianuzzi is trying for a guillotine from the top but the pressure isn't in the right place so Diaz is just riding it out for now. Ianuzzi eventually gives up the hold. #SUB2#
Diaz looking for submissions from an awkward position here.#T4#
Diaz is trying to get back to full guard.
Diaz wants to control but Ianuzzi is keeping busy.
Diaz is looking to regain full guard. Not this time though.
Diaz is doing well to avoid being mounted. He's controlling the position at the moment.
Ianuzzi is keen to just control but Diaz is a slippery customer.
Diaz wants to get back to full guard.
Ianuzzi wants to pass the guard but Diaz is defending well. #T5#
Diaz is trying to get back to full guard.
Ianuzzi wants to lay and pray for a moment but Diaz keeps working.
The referee calls for the fighters to work.
Diaz moves his hips nicely and gets into full guard.#SUB2#
Diaz is looking for a triangle here but Ianuzzi uses the submission attempt to pass into side control.
Score +3 for passing guard: Ianuzzi (7) vs (0) Diaz
Ianuzzi working away.#T6#
Diaz is not content to let Ianuzzi control the position.
Ianuzzi has knee on belly momentarily but Diaz bucks him off and regains half guard.
Diaz trying to control but Ianuzzi postures up.
Diaz moves his hips nicely and gets into full guard.#SUB2#
Ianuzzi got a little sloppy there for a moment and Diaz has worked his way into a loose triangle - can he finish it?! No, Ianuzzi has managed to get both his arms back between Diaz's legs - danger averted.#T7##SUB2#
Diaz looking for submissions from the bottom but instead Ianuzzi passes into half guard.
Diaz wants to control but Ianuzzi is keeping busy and won't allow it.
Ianuzzi wants to pass the guard but Diaz is defending well.
Ianuzzi works his way into full mount! Score +3 for passing guard: Ianuzzi (10) vs (0) Diaz
Diaz is desperately trying to get back to half guard.
Diaz manages to regain half guard. Good work. #T8#
Diaz is controlling Ianuzzi's position as best he can from this difficult position.
Diaz is not content to let Ianuzzi control the position.
Diaz is looking for a sweep. Ianuzzi is wise to his cunning plan and keeps the top position.
Ianuzzi wants to free his trapped foot but Diaz is holding on for dear life with his legs.
Diaz is trying to get back to full guard.
Diaz keeps trying to improve his position.#T9#
Diaz gets back to full guard.
Diaz is working an open guard here, looking to improve his position. No doubt that will leave him open to counters but at least he's being more offensive.
Diaz trying to keep a closed guard but Ianuzzi is proving a slippery customer.
#SUB2#
Diaz is looking for a triangle but Ianuzzi pushes his legs off easily.
Ianuzzi tries to free his leg and advance position but Diaz is retaining full guard. #SUB2#
Diaz looking for submissions from the bottom here. Moving his hips around, possibly looking for an armbar.
#SUB2#
Diaz throws his legs up looking for a submission but Ianuzzi uses it to pass to side control.
Score +3 for passing guard: Ianuzzi (13) vs (0) Diaz#T10#
Diaz tries to work a leg under to get back to half guard but Ianuzzi wriggles his own leg back out and remains in side control. #SUB#
Ianuzzi wants to work for a kimura but he's foiled early by Diaz, who protects the arm well. #SUB#
Ianuzzi is looking for a kimura. He might have it! No, Diaz has escaped the position, nice work there.
Diaz tries to buck Ianuzzi off but Ianuzzi is having none of it.#SUB#
Ianuzzi wants to work for a kimura but he's foiled early by Diaz, who protects the arm well.
Ianuzzi is breathing heavily.
Diaz is trying to get back to half guard. He's pushing on Ianuzzi's leg. He's managed it. Nice work.#T11##SUB2#
Diaz actively working from the bottom here.
Ianuzzi is looking to advance position but Diaz won't allow it.
Ianuzzi prevents Diaz from improving his position.
Ianuzzi is trying to control. Diaz wants to improve his position but can't escape this time. #SUB2#
Diaz looking to work for a kimura from the bottom.
Diaz tries to get to full guard but Ianuzzi has control of the leg. #T12#
Diaz keeping hold of Ianuzzi's head, controlling as best he can.
Diaz trying to control but Ianuzzi postures up.
Ianuzzi wants to pass the guard but Diaz is defending well.
Ianuzzi is trying to control the action in half guard but Diaz is working away on the bottom, looking perhaps to get back to full guard. #SUB2#
Diaz looking to work for a kimura from the bottom.#T13#
Diaz is looking to regain full guard. Not this time though.
Diaz is still trying to improve position.#SUB2#
Diaz looking for submissions off his back.
Diaz tries to roll over but Ianuzzi keeps him under control.#SUB2#
Diaz looking to work for a kimura from the bottom.
Ianuzzi tries to pass to full mount but Diaz defends it. #T14#
Diaz trying to control here but he's found himself mounted! Oh no!
Score +3 for passing guard: Ianuzzi (16) vs (0) Diaz
Diaz keeping his composure momentarily, calmly looking to get back to half guard.
Ianuzzi wants to control the pace but Diaz is squirming around nicely.
Diaz really trying hard to get back to half guard here.
Boooooooooooooooooooo!!! God, this has been a terrible round. Come on you two, sort yourselves out!
Ianuzzi takes Diaz's back. Score +3 for taking back: Ianuzzi (19) vs (0) Diaz
And that's the end of the fight!
Ianuzzi takes the fight on points by 19 to 0.
Todd Ianuzzi seemed lost for words in his post fight interview but he remembered to thank his fans and directed everyone to his website. |
|
|
|
Event:
TWGC 36 (145lbs, D4): Tokyo Qualifier - Round 1
Date: Dec 29, 2021 |
This TWGC bout is 1 fifteen minute round in the featherweight division. Introducing today's competitors. In the red corner, competing out of Las Vegas, with a TWGC record of 0 wins and 0 losses; Erica Santana! And in the blue corner, fighting out of St Petersburg, with a TWGC record of 0 wins and 0 losses; Todd Ianuzzi!
The judges for this bout are Kenichi Hosakawa, Shigeki Sano and Yukihiro Yamamoto.
The fighters connect hands in the middle of the mat and we are under way.#CL2#
Ianuzzi has managed to clinch.
#TD2#
Ianuzzi gets a trip takedown into half guard. Score +2 for takedown into guard / half guard: Santana (0) vs (2) Ianuzzi#SUB2#
Ianuzzi is working for a kimura but Santana is defending it quite comfortably.
#SUB2#
Ianuzzi maintaining the dominant position here and is working for a kimura. He's locked it up! Santana could be in real trouble here! He's trying to wriggle out but Ianuzzi has cracked it and Santana is screaming in pain - he's tapped out! Great finish by Ianuzzi!
Ladies and gentlemen, after 0:29 of round 1, we have a winner by way of Submission (Kimura). Todd Ianuzzi!
A very excited looking Todd Ianuzzi made sure he remembered to thank all the fans both in the arena and on the internet. He said all the coolest people spend all day on MMA websites, which got a big reaction. |
|
|
|
Event:
QFC Tournament 1077 Round 2
Date: Nov 14, 2021 |
#R1#
Fries stuffs the takedown.
Ianuzzi misses the shot to the body.
Ianuzzi shoots in but Fries avoids the takedown attempt easily.
Fries slips a straight right by Ianuzzi.
Fries half commits to a counter takedown before pushing away, out of range.
Ianuzzi keeps the fight standing with a nice sprawl.
Fries throws a looping left and ducks down for a takedown. He's got his arms around Ianuzzi's waist but Ianuzzi gets an underhook and avoids the takedown by throwing Fries off to one side.
Ianuzzi fails with the takedown#CL#
and Fries counters into the clinch. Nicely done.
Deacon Fries has stuffed three takedown attempts in the round now. That's going to take a lot out of Todd Ianuzzi.
We've had a slow start to the round here - hopefully the action picks up.#BC2#
Ianuzzi pushes off and circles away, back to the middle of the mat.
Fries is trying hard to land a takedown here. Ianuzzi sprawls well and keeps this one on the feet.
Fries fails with the takedown.#T1#
Ianuzzi tries to clinch there but Fries circles away.
Fries shoots in with a takedown attempt and he has Ianuzzi pinned against the cage. Ianuzzi gets the underhooks and manages to circle away. #TD#
Fries throws the overhand right but ducks down into a quick takedown attempt. Ianuzzi was covering up waiting for the punch and Fries finishes the takedown easily into guard.
Fries preventing the sweep.
Fries passes into half guard.
The fighters are pressed up against the cage, both looking to find a bit of space to work.
Fries wants to free his trapped foot but Ianuzzi is holding on for dear life with his legs. #T2#
Ianuzzi works his way to full guard. Good work.
Ianuzzi tries to land a sweep but no joy.
Fries looking to pass the guard. #SUB2#
Ianuzzi is looking for a guillotine. You can't force these things though and Fries defends well.
Ianuzzi utilising some decent striking defenses from the guard, preventing the ground and pound. #SUB2#
Ianuzzi looking for submissions from the bottom here. Moving his hips around, possibly looking for an armbar.
#T3#
Fries is intent on slowing down the pace of the fight, simply looking to control.
Fries loading up with the ground and pound but he's missing more than he's landing in this flurry. #SUB2#
Ianuzzi looking for subs off his back but Fries has passed one foot through into half guard.
Fries is nestled in close to Ianuzzi, controlling him well. He's worked in a nice elbow to the side of the head as well, for good measure.
Ianuzzi wants to get back to full guard.#T4#
Well. There's a bit of a lull in the action here and the crowd are starting to get restless.
The two fighters exchange a few words. I couldn't hear what they were saying but maybe it's more fun if you make it up yourself. Fries connects with a nice short shot to Ianuzzi's temple.
Fries wants to control but Ianuzzi is keeping him busy.
Fries working Ianuzzi over with strikes.
Fries thows a wild elbow that connects with the canvas.
Fries looking to pass the half guard. Not this time.
Ianuzzi gets back to full guard.
Boooooooooooooooooooo!!! God, this has been a terrible round. Come on you two, sort yourselves out!
Fries passes easily into side control. Nice work.
And that is the end of the round. The fighters go back to their corners.
Deacon Fries dominated that round.
OK. That's time! The bell goes and we're back to the action.#R2#
Ianuzzi tries to score a power double leg takedown but Fries sees that one coming and sprawls well. That will dishearten Ianuzzi somewhat.
Fries is looking to counter punch.#TD#
Fries shoots in and scores a nice double leg takedown into half guard.
Ianuzzi moves his hips nicely and gets into full guard.
We've had a slow start to the round here - hopefully the action picks up.
Fries missing there with some ground and pound from the guard. #SUB2#
Fries avoids a guillotine attempt easily.
#T1##SUB2#
Ianuzzi has an active guard here but Fries has managed to pass into half guard.
Nice strikes from Fries there.
Ianuzzi gets back to full guard.
#SUB2#
Ianuzzi looking for a guillotine here but Fries defends easily.
Fries looking to control the position here, rather than advance.
The ref warns both fighters not to hold the cage as they work up against the meshing.#T2#
A few boos can be heard. I'm sure they will multiply if the fighters don't pick up the pace.
Fries pressing down on his opponent's thigh, looking to pass guard. Ianuzzi is keeping the position for now. #SUB2#
Fries got a little sloppy there for a moment and Ianuzzi has worked his way into a loose triangle - can he finish it?! No, Fries has managed to get both his arms back between Ianuzzi's legs - danger averted.
Fries postures up and lands a big shot to Ianuzzi's brow. #T3#
Fries is working the ground and pound from guard. He might want to try advancing position though to get more of an impact.
Fries is really dominating this fight. Is there anything that Ianuzzi can do to turn this around?
Fries stands up and looks to throw the legs aside to pass to side control. Ianuzzi swivels though and keeps the full guard.
Fries postures up and lands a big shot to Ianuzzi's brow.
Fries trying to land body shots but he keeps hitting the mat.
Fries lands a couple of digs.#SUB2#
Ianuzzi looking for submissions off his back, moving his hips, looking for an opening.
Ianuzzi is breathing heavily.
Fries works a leg free and moves into half guard. #T4#
Ianuzzi wants to improve his position but Fries is controlling well.
Fries trying to mount his opponent but Ianuzzi defends it.
Fries takes advantage of the dominant position to land a couple of big hammer fists.#SUB#
Fries is sneakily working for an arm triangle but Ianuzzi sees it coming and defends easily.
Boooooooooooooooooooo!!! God, this has been a terrible round. Come on you two, sort yourselves out!
Ianuzzi is staying active underneath Fries, who seems content to just control the action from this position.
And that is the end of the round. The fighters go back to their corners.
Deacon Fries dominated that second round.
That's time! Fries's corner gives him a slap on the ass as he gets ready to fight. This is the final round!#R3#
Ianuzzi connects with a slap. Keep your fist closed son.
A low kick from Ianuzzi is predictable there #TD#
and Fries counters with a shoot takedown into half guard.
Fries frees up his trapped foot and advances to mount.
Fries lands with some vicious ground and pound - can Ianuzzi hang on?
Ianuzzi in a bad spot here, taking shots to the head.
Ianuzzi manages to regain half guard. Good work.
Fries scores with a couple of good hammerfists.
The crowd cheering loudly, showing their appreciation for the quality fight we're seeing here.
The two fighters exchange a few words. I couldn't hear what they were saying but maybe it's more fun if you make it up yourself. Fries connects with a nice short shot to Ianuzzi's temple.
Ianuzzi won't allow Fries to pass to mount. #T1#
Fries slips a nice elbow through Ianuzzi's hands, connecting with Ianuzzi's forehead.
Well, if Fries is going to just lie there, perhaps we should talk about what we're having for dinner tonight� I'm having a ham and pineapple pizza� Yum. Can't wait.
Ianuzzi gets back to full guard.
#SUB2#
Ianuzzi looking for a guillotine here but Fries defends easily.
Ianuzzi is working from a closed guard but he's struggling to control his opponent.#T2#
A lull in the action here being met with boos from the crowd.
Fries wants to control from the top but Ianuzzi keeps moving.
Fries has to be careful here, sitting in the guard of a superior BJJ player.#SUB2#
Ianuzzi has an active guard here but Fries has managed to pass into half guard.
Ianuzzi takes a big intake of breath there - he's definitely tired.
Ground and pound from Fries. #SUB2#
Ianuzzi looking to work for a kimura from the bottom.
Fries working Ianuzzi over with strikes. #T3#
Ianuzzi slips a foot under and gets full guard. Nice work.
Ianuzzi keeping moving, preventing Fries from controlling successfully.
Deacon Fries overall seems to be getting the better of the ground position in the fight so far.#SUB2#
Ianuzzi has his foot on Fries's thigh. He's trying to push off and get in position for a triangle, I think. Fries works his way back into a safe position though.#T4#
The crowd are getting on the fighters' backs, as the pace has dropped off in the last minute or so.
Fries advances to half guard.
Ianuzzi is trying to defend against the ground and pound but Fries scores with a couple of nice shots.
Ianuzzi is trying to control but Fries manages to pass to mount!
Ianuzzi is desperately trying to get back to half guard.
Fries wants to control the pace but Ianuzzi is squirming around nicely.
Ianuzzi taking shots to the head.
Todd Ianuzzi has stepped it up - he knows he needs a finish here!
Deacon Fries is fighting for a decision here - he's started to take the cautious approach.
The crowd thankful this round is nearly over.#SUB#
Fries jumps to side control looking for an arm triangle but Ianuzzi manages to avoid the submission attempt.
And that's the end of the fight!
Deacon Fries showed his dominance in that final round.
Well I reckon that's a shut out for Fries, winning every round. Will the judges agree? They are the ones who matter, even if they are often depressingly incompetent. Over to the ring announcer for the scorecards.
Ladies and gentlemen, after 3 rounds of action, we go to the scorecards for a decision.
Judge Vladimir Khabensky scores the fight for Deacon Fries!
Judge Aleksandr Martynov scores the fight for Deacon Fries!
Judge Illya Tyunina scores the fight for Deacon Fries!
Deacon Fries wins by unanimous decision! |
|
|
|
Event:
QFC Tournament 1077 Round 1
Date: Nov 13, 2021 |
#R1#
Ianuzzi misses with a body shot.
Ianuzzi fakes high and swings low for a body shot but Ali manages to avoid it.
Ali half commits to a counter takedown before pushing away, out of range.
Ali tries to clinch there but Ianuzzi circles away.
Ali tries to clinch up.
Ianuzzi changes levels for a counter takedown but doesn't follow through with his attempt.#TD2#
Ianuzzi looks for a takedown. He's got it. We're now in half guard.
Ali is trying to defend against the ground and pound but Ianuzzi scores with a couple of nice shots.#SUB2#
Ianuzzi is working for a kimura but Ali is defending it quite comfortably.
Ianuzzi not landing any meaningful shots this time.
We've had a slow start to the round here - hopefully the action picks up.
Ali tries to roll over but Ianuzzi keeps him under control.#T1##ES#
Ali manages to create a bit of space in order to work his way back to his feet. Ianuzzi keeps hold of his opponent and drives him back against the cage.
Ali tries to stall but Ianuzzi uses the opportunity to gain a better position.
Ali pushes off and fires off an elbow that misses, before clinching up again, against the cage.
Ali is trying to pull guard but Ianuzzi turns him against the cage and we stay in the clinch.
Ali is working for a takedown up against the cage. He can't get it on this occasion though.
Ali is trying to pull guard but Ianuzzi turns him against the cage and we stay in the clinch.
That's three failed takedown attempts in the round for Khali Ali. That's going to take a lot out of him.#BC#
Ali escapes the clinch and we're back to striking.
Ali misses with a two punch combination.
Ianuzzi is trying to avoid his opponent's strikes and get into the clinch.
Ali misses with a takedown attempt - Ianuzzi sprawls well and throws a nice strike on the way out which just misses.
Ali fakes high and shoots in for a takedown but Ianuzzi avoids it really well and circles away.#T2#
Ali closes this distance looking for a takedown but Ianuzzi circles away.
Ali shoots in and drives through. Ianuzzi sprawls well.
Ali is breathing heavily.
Ali will have to do better than that with his takedown attempts.#TD2#
Ianuzzi closes the distance and clinches up, looking for a takedown. He shifts his weight and gets a nice trip into half guard.
Ali tries to kick Ianuzzi off in order to stand up. Ianuzzi Avoids the leg push though and dives into side control.
Wooooo! Give it up for these two warriors! They are putting on a show!#SUB2#
Ianuzzi tries for an arm triangle. That looks pretty tight to me. Is this one over!?! Possibly, maybe, no Ianuzzi has let go of the choke. Obviously it wasn't as tight as we thought! #SUB2#
Ianuzzi is trying to land an Americana. He has the arm isolated but Ali is keeping cool and he's avoided the danger for now.
Check out the look on Ianuzzi's face as he threw that strike - that's one determined fighter!
#T3#
Ianuzzi working away diligently from side control. Landing strikes effectively there - that will score him some points on the judges scorecards.
Ianuzzi is looking to take a break and control but Ali is keeping him honest, looking to work from the bottom.
Ianuzzi lands a knee to the body and follows it up with some ground and pound to the head. That will wear Ali down.
Ianuzzi advances to full mount.
The fighters are starting to perspire pretty heavily.
Ianuzzi postures up and cracks his opponent a couple of times before moving back into close ground control. Ali looks a forlorn figure.
#T4#
Ianuzzi raining down shots from the mount!
Ali knows he needs to get back to his feet asap. He's simply no match for Ianuzzi on the ground.
Ianuzzi lands a big shot there that rocks Ali but he's holding on and managing to survive for now.
Ianuzzi lands an elbow that was bordering on illegal but the referee lets it go with a warning.
Ali is looking to improve his position but Ianuzzi isn't that keen on the idea.
Ianuzzi landing strikes from the mount.
Ianuzzi lands a couple of good shots and Ali has given up his back, trying to escape the position!
This is a great period of action - very entertaining stuff!#SUB2#
Ianuzzi has the rear naked choke here! This is very bad for Ali! Can he survive? No! He's out! Ianuzzi gets to his feet and celebrates with his cornermen. He looks absolutely delighted. In the post fight interviews he takes time to thank his parents and everyone who has believed in him from the start. How sweet.
Ladies and gentlemen, after 4:58 of round 1, we have a winner by way of Submission (RNC). Todd Ianuzzi!
Todd Ianuzzi thanked the fans post fight for their support. |
|
|
|
|
|
|