|
Play
by Play - Fighter's Fight Commentary
|
Event:
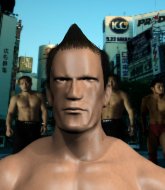
ICE 5: UA KUDALAIA
Date: Jan 14, 2023 |
#R1##CL#
Perusinac takes the fight into the clinch.
Perusinac working on landing some head shots here - that one got through nicely.#TD2#
Shulenberg jumps into guard, dragging Perusinac to the mat.
Shulenberg is working an open guard here, looking to improve his position. No doubt that will leave him open to counters but at least he's being more offensive.
Shulenberg is working the butterfly guard. He manages to land a nice scissor sweep and is now in half guard on the top. Nice move. #REVB##SUB2#
Shulenberg is looking for a kimura but Perusinac is holding onto that half guard position, so it's hard for Shulenberg to get the leverage. #SUB2#
Shulenberg wants to work for an arm triangle but Perusinac is really keeping half guard well and defending the submission attempt.
#SUB2#
Shulenberg is trying to work for a kimura. This could be trouble! No, Perusinac has managed to free his arm - good work.
We've had a slow start to the round here - hopefully the action picks up.#ES#
Perusinac manages to escape and get back to his feet! #T1##CL#
Perusinac has managed to clinch.
Perusinac scores with a hook to the body.
Perusinac scores with a knee to the head.
#CUT#It looks like Chris Shulenberg has been cut.
Shulenberg looks winded!
A nice glancing elbow lands by Perusinac.
Perusinac crunches a lovely knee into Shulenberg's ribcage.
Perusinac pushes Shulenberg back against the cage and unloads with a body punch.
Perusinac lands a right uppercut that snaps the head of Shulenberg backwards.
Perusinac scores with an uppercut up the middle.
Perusinac scores a nice knee to the body.
Perusinac crunches a lovely knee into Shulenberg's ribcage.
We're hearing some news coming in from back stage. It's official - Shulenberg has eaten all the pies!
Wooooo! Give it up for these two warriors! They are putting on a show!
Perusinac using the Thai clinch to land knees to the body.
Perusinac softening up his opponent with strikes, against the cage.
A right hook to the body lands for Perusinac.
Perusinac landing knees to the head.
Perusinac lands a knee to the head there! That was nasty!
Perusinac lands a knee to the head.
#ROC#Shulenberg is rocked!
Shulenberg is pressed against the cage. Perusinac pushes back and unleashes a big elbow that really hurts Shulenberg! Two more big strikes from Perusinac and Shulenberg crumples to the mat and taps out furiously due to the strikes!
Ladies and gentlemen, after 2:57 of round 1, we have a winner by way of Submission (Strikes). Didi Perusinac! |
|
|
|
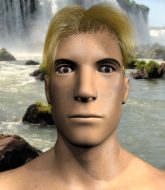
Event:
ICE 1: Aloha Hilo
Date: Dec 17, 2022 |
#R1#
Shulenberg is on the wrong end of a nice combination from Head.#CUT2#It looks like Chris Shulenberg has been cut.
We can't be sure of the tactics at this early stage but we have heard that Head has been working on his takedowns a lot in the buildup to the fight and we can only assume he's going to look to take this to the mat.#TD2#
Head gets the takedown into side control.
Head taking a breather here.
Shulenberg is looking to regain half guard here but Head keeps moving and retains side control.
Head is maintaining the dominant position - no doubt Shulenberg will start to get frustrated soon if he's not already.
Shulenberg tries to bench press Head off him but Head keeps the position.
Head controlling the position from side mount.
Shulenberg really is a fat lump.#SUB2#
Head tries for a kimura but Shulenberg is defending well.
Shulenberg is looking for a sweep.
Shulenberg is working hard here to advance position.
Head trying to control the action but Shulenberg is working from the bottom.
Shulenberg is looking for a sweep.#T1#
Head in side control, just content to control the action for now.
Shulenberg tries to buck Head off but Head is having none of it.
Shulenberg is not content to let Head control the position.
Shulenberg is looking for a sweep.
Head is staying tight to Shulenberg's torso, preventing him from escaping. #T2#
The crowd are showing their displeasure at the lack of action as loud boos ring out around the arena.
Shulenberg is not content to let Head control the position.
Head might have to switch it up a bit here because his efforts to control Shulenberg haven't been going to plan, at least at the current moment in time.
A bit of a lull in the action. I'm sure it will pick up again soon... even if the ref has to physically pick them up and put them back on their feet.
Shulenberg knows he needs to get back to his feet asap. He's simply no match for Head on the ground.
Head is looking to take a break and control but Shulenberg is keeping him honest, looking to work from the bottom.
Shulenberg is looking to regain half guard here but Head keeps moving and retains side control.
Head is looking to take a break and control but Shulenberg is keeping him honest, looking to work from the bottom. #T3#
Shulenberg tries to buck Head off but Head is having none of it.
Head controls the position.
The fighters are pressed up against the cage, both looking to find a bit of space to work.
Shulenberg is trying to improve his position.
Head controls the position.
Head is looking to take a break and control but Shulenberg is keeping him honest, looking to work from the bottom.
Shulenberg is looking for a sweep.
Head is maintaining the dominant position - no doubt Shulenberg will start to get frustrated soon if he's not already.
Shulenberg is positioning himself to get back to half guard. #T4#
My god... these two guys really need to pick up the pace or everyone will leave to go get a beer.
Head controls the position.
Shulenberg tries to bench press Head off him but Head keeps the position.
Head is looking to take a break and control but Shulenberg is keeping him honest, looking to work from the bottom.
Head tries to advance to mount but Shulenberg denies him.
You can see the frustration on Shulenberg's face as Head controls the position.
Boooooooooooooooooooo!!! God, this has been a terrible round. Come on you two, sort yourselves out!
Shulenberg is trying to improve his position.
And that is the end of the round. The fighters go back to their corners.
Richard Head dominated that round.
The cut man is working on Chris Shulenberg's cut.
That's the end of the interval. I'm sure that seemed a lot quicker than a minute for our two fighters! Back to the action.#R2#
Shulenberg misses with a takedown attempt
enabling Head to counter with a crisp jab.
Head scores with a jab to the body.
Shulenberg fails with a takedown attempt.
Head displays good takedown defense there as he swats away a double leg from Shulenberg.
That's three failed takedown attempts in the round for Chris Shulenberg. That's going to take a lot out of him.#TD#
Shulenberg fakes an overhand right and shoots for a takedown. Head sprawls well initially but Shulenberg persists and gets the takedown into half guard.
We've had a slow start to the round here - hopefully the action picks up.
Head manages to get to full guard.
Head is pulling down on Shulenberg's head to control his posture.
Head has been the more effective fighter overall so far.#T1#
Shulenberg has to be careful here, sitting in the guard of a superior BJJ player.
Shulenberg stopping the sweep attempt from Head.
Head is working the butterfly guard. He manages to land a nice scissor sweep and is now in half guard on the top. Nice move. #REVB#
Head controlling the pace.
Head works his way into side control.
Head throws a knee to the body but it doesn't do much damage.#T2#
Shulenberg tries to slip a leg under to move to half guard but Head presses down on the leg and jumps into full mount!
Head sitting in mount, just looking to control for the moment.
Richard Head has got the better of the ground game so far.
Shulenberg keeping his composure momentarily, calmly looking to get back to half guard.
Head throwing strikes here but Shulenberg is writhing around nicely and avoiding any serious damage.
Shulenberg is trying to escape the mount.
Head controlling his opponent.
Head tries to control but Shulenberg wriggling away.
Head misses with a head shot.
Head sitting in mount, just looking to control for the moment.
Head trying to control but he's not successful this time. #T3#
Shulenberg can't escape the position.
Head trying to control but Shulenberg is having none of it.
Shulenberg is looking to get to half guard.
Head controlling the position easily from mount. #SUB2#
Head jumps to side control looking for an arm triangle but Shulenberg manages to avoid the submission attempt.
Shulenberg is trying to improve his position.
The ref warns both fighters not to hold the cage as they work up against the meshing.#T4#
Head wants to control but Shulenberg is keeping him busy.
Head taking a breather here.
Head is looking to take a break and control but Shulenberg is keeping him honest, looking to work from the bottom.
Shulenberg is trying to get back to half guard. He's pushing on Head's leg. He's managed it. Nice work.
Head is looking to take a break and control but Shulenberg is keeping him honest, looking to work from the bottom.
The crowd thankful this round is nearly over.
Head content to sit in half guard and control for a moment.
Head is trying to control. Shulenberg wants to improve his position but can't escape this time.
And that is the end of the round. The fighters go back to their corners.
Richard Head showed his class in that round. I'd imagine he'll take it on all the scorecards.
The cut man is working on Chris Shulenberg's cut.
The corners get their ten second warning. Both fighters stand from their stools and stare each other down, ready to get back to the action. This is the final round!#R3#
Shulenberg dives in and grabs Head's left leg, looking for a takedown. Head pushes down on Shulenberg's head and hops out.
Head with the counter takedown but Shulenberg avoids it easily.
Shulenberg shoots in for a takedown. "Ole!" shouts Head as he jumps to the side.
Head lands a leg kick. The shin dug right into the meat of the thigh.
Shulenberg fails to land the takedown.
That's three failed takedown attempts in the round for Chris Shulenberg. That's going to take a lot out of him.
Shulenberg shoots in but doesn't get the takedown
and Head counters with a stiff right hand.
We've had a slow start to the round here - hopefully the action picks up.
Head listening to his corner there, landing a nice uppercut.
Head stuffs the takedown attempt from Shulenberg. Shulenberg gets slowly back to his feet.
Both fighters are breathing heavily.#T1#
Head fakes a jab and then connects with a hook.
Shulenberg has his front leg slapped to the side - a nice low kick landing there from Head.
Chris Shulenberg is looking to throw some combinations by the looks of things.
Shulenberg shoots in but no luck this time.
Shulenberg misses with a takedown attempt
and Head counters with a two punch combo. #TD#
Shulenberg fakes an overhand right and shoots for a takedown. Head sprawls well initially but Shulenberg persists and gets the takedown into half guard.
Head slips a foot under and gets full guard. Nice work.
Head is working an open guard here, looking to improve his position. No doubt that will leave him open to counters but at least he's being more offensive.
Head is working the butterfly guard. He manages to land a nice scissor sweep and is now in half guard on the top. Nice move. #REVB##T2#
Wooooo! Give it up for these two warriors! They are putting on a show!
Head seems content to maintain position for now, rather than mounting any offense.
Both fighters have adopted an aggressive gameplan on the ground!
Shulenberg wants to improve his position but Head is controlling well.
Head passes to full mount!
Head controlling the position easily from mount.
Head trying to control but he's not successful this time.
Head looking to control and managing it successfully. #T3#
Shulenberg slips a leg in and gets back to half guard.
Head is looking to take a break and control but Shulenberg is keeping him honest, looking to work from the bottom.
Head moves nicely into side control.
Shulenberg is looking to regain half guard here but Head keeps moving and retains side control.
Head postures up a little and throws a couple of hammerfists but they don't connect properly.
Head trying to control the position but Shulenberg is working away.
Head moves into full mount!
Head looking to ground and pound but Shulenberg is blocking nicely.
Shulenberg can't escape the position.
Head controlling from mount. #T4#
Head wants to control the pace but Shulenberg is squirming around nicely.
Head sitting in mount, just looking to control for the moment.
Shulenberg is trying desperately to improve position.
Head is in the full mount, landing strikes.
Shulenberg is desperately trying to get back to half guard.
Shulenberg wriggling around on the bottom manages to avoid the strikes thrown by Head.
Head tucks in and makes sure he doesn't lose the dominant position.
And that's the end of the fight!
Richard Head comfortably won the final round on my scorecard.
Well Head has outworked and out performed his opponent in all aspects of the game today. He was simply too good and the decision should be no more than a formality. Over to the ring announcer for the scorecards.
Ladies and gentlemen, after 3 rounds of action, we go to the scorecards for a decision.
Judge Micheangelo Fripello scores the fight 27:30
Judge Ryoma Takatsuka scores the fight 27:30
Judge Josh West scores the fight 27:30
In favor of your winner, by unanimous decision... Richard Head!
A relieved looking Richard Head thanked the fans for their support and gave the usual line about them being amazing. They seemed to believe that he actually meant it. |
|
|
|
Event:
Quick Fight Championship
Date: Nov 27, 2022 |
#R1##CL2#
Parkkinen closes the distance and pushes Shulenberg back into the cage.
Parkkinen throws a hook to the body. More of an arm punch but it's all scoring with the judges.
Parkkinen lands with a quick shot inside that doesn't really do much damage.
A body shot lands from Parkkinen.
Shulenberg's head jolts backwards as he takes an uppercut right on the button!
Parkkinen blocks a couple of punches on the inside.
A head punch on the inside from Parkkinen fails to land.
Parkkinen lands a hook to the body. It's hard to tell if that hurt Shulenberg or not.
A short right hand to the side of the head by Parkkinen.
Parkkinen lands a left hand.
Parkkinen struggles to land a body shot inside as Shulenberg controls his hands.
Shulenberg tries to jump guard but he falls flat on his backside. Parkkinen smiles and moves away.
Shulenberg takes one on the chin but keeps coming.
Parkkinen scores with a decent looking hook.
Parkkinen lands with a cross.
We've seen a great period of action over the last minute or so - credit to both fighters for going all out!#TD#
Shulenberg shoots in for a takedown and gets it. Let's see what he's got on the mat. #SUB#
Shulenberg is trying to work a guillotine from the top, or something like that? Don't know how he thinks he's going to get a finish from there. #T1##SUB#
Shulenberg drops back for a leg! It's a sloppy attempt though and Shulenberg jumps back into guard quickly, to retain the dominant position. #SUB#
Shulenberg is trying to work a guillotine from the top, or something like that? Don't know how he thinks he's going to get a finish from there.
Parkkinen trying to keep a closed guard but Shulenberg is proving a slippery customer.
Shulenberg passes easily into side control. Nice work.
You can see the frustration on Parkkinen's face, being in this tough position on the bottom.#SUB#
Shulenberg has an Americana. Parkkinen didn't react quickly enough there and he's in big trouble now! He tries to squirm out but is forced to tap! Shulenberg is delighted and gyrates in front of the ring girls. They seem to like the attention - it'll be interesting to see if Shulenberg hooks up with any of them at the after show party.
Ladies and gentlemen, after 2:57 of round 1, we have a winner by way of Submission (Americana). Chris Shulenberg! |
|
|
|
Event:
Quick Fight Championship
Date: Nov 02, 2022 |
#R1##CL2#
Shulenberg rushes Blue and presses him up against the cage.
Shulenberg can't break the clinch.
Blue gets underhooks to prevent Shulenberg's takedown attempt.
Blue presses Shulenberg against the cage and delivers a mid-strength body shot.
Blue using the Thai clinch to land knees to the body.
Shulenberg looks winded!#TD#
Blue successfully pulls guard.
Blue wants to stand and escape but Shulenberg is having none of it.
Blue looking to hit a scissor sweep but Shulenberg is one step ahead there.
Blue will need to keep those long limbs tucked in whilst he's on the ground, to prevent any submissions.
Shulenberg won't allow Blue to get back to his feet.
We've had a slow start to the round here - hopefully the action picks up.
Blue tries to land a sweep but no joy.
Blue wants to stand up but Shulenberg is controlling him.
We're hearing some news coming in from back stage. It's official - Shulenberg has eaten all the pies!
Shulenberg's corner is telling him to maintain position.
It looks like the ref is thinking about a standup.#T1##REF3#
The referee has motioned to the fighters to stand back up.#CL#
Blue closes the distance and presses his opponent up against the cage.
Shulenberg wants to get back to striking at distance but Blue won't allow it.
Shulenberg wants to take the fight to the mat but Blue manages to get underhooks and keep the fight in the clinch.#TD#
Blue has managed to pull guard. Let's see whether he can work an aggressive guard. It will also be interesting to see what tactics Shulenberg uses from the top position.
Blue is looking to stand up but Shulenberg isn't so interested in that idea. #SU2#
Shulenberg decides he's had enough of playing guard and decides to stand. Come on Blue, up you get! #CL#
Blue gets in close and instigates a clinch. #T2#
Blue will no doubt start fighting again in a minute but for now he's just having a little rest, leaning Shulenberg up against the cage.
Blue lands a body shot in the clinch.
Blue works for underhooks and lands a body shot in the process.
Blue changes levels and goes for a takedown here. Shulenberg fights it off and pushes away nicely.
#CL#
Shulenberg tries to keep at a distance but Blue has taken the fight into the clinch.#TD#
Blue jumps guard and drags Shulenberg to the mat. He's obviously going to be looking for submissions off his back.
The ref warns both fighters not to hold the cage as they work up against the meshing.
Shulenberg is standing up over Blue. Blue looks to escape but Shulenberg dives into side control.
Shulenberg misses with a strike but at least he's keeping busy, looking to cause some damage - that will still help him when it comes to the judges scorecards.
#T3#
Shulenberg just content to control the position.
It looks like Shulenberg might be adopting somewhat of a lay and pray gameplan here, which I'm sure won't go down too well with the paying fans in attendance... Or the ring announcers come to think of it.
The fighters are pressed up against the cage, both looking to find a bit of space to work.
Shulenberg wants to control but Blue is keeping him busy. #T4#
The crowd are getting on the fighters' backs, as the pace has dropped off in the last minute or so.
Shulenberg working away.
Blue is trying to buck Shulenberg off.
The referee asks Shulenberg politely if he wouldn't mind getting on with it and actually doing something. Shulenberg prefers to stall for the moment though.
Boooooooooooooooooooo!!! God, this has been a terrible round. Come on you two, sort yourselves out!#SU2#
Shulenberg stands up.
A really sloppy takedown attempt there from Shulenberg.
Blue tries to counter with a takedown but Shulenberg is quick to defend against it.
And that is the end of the round. The fighters go back to their corners.
Ryan Blue dominated that round.
Well, the break between rounds is over. Let's get back to the scrappin!#R2#
Blue fakes high and shoots in for a takedown but Shulenberg avoids it really well and circles away.
Shulenberg looks like he wanted to counter with a high kick but didn't throw it.
Shulenberg misses with a hook
and Blue counters with a nice low kick that buckles Shulenberg's knee momentarily.
Shulenberg slaps away a takedown attempt from Blue, before circling back to the center of the mat.
Shulenberg takes a head kick and keeps coming.
#CUT#It looks like Chris Shulenberg has been cut.
Blue leaves Shulenberg with his face pressed against the mat as he sprawls beautifully, defending against a solid takedown attempt.
We've had a slow start to the round here - hopefully the action picks up.
Blue defends well against a solid takedown attempt from Shulenberg.
Blue appears to be looking for a counter takedown.
Ryan Blue is looking to throw some combinations by the looks of things.
Blue tries to close the distance and clinch but Shulenberg swats him to one side with an open hand palm strike and circles away.
Shulenberg leaves Blue with his face pressed against the mat as he sprawls beautifully, defending against a solid takedown attempt.
That's three failed takedown attempts in the round for Ryan Blue. That's going to take a lot out of him.#T1##CL2#
Shulenberg gets a clinch.
Blue fails to pull the fight into his guard.
Blue is really dominating this fight. Is there anything that Shulenberg can do to turn this around?
Both guys are working to get underhooks.
Blue has dropped down and is looking to force the takedown but it's defended by Shulenberg after a bit of a struggle.
Blue landing knees to the body. They look like they could hurt.
Both fighters are absolutely exhausted here.#BC#
Blue breaks the clinch and we're back to striking at distance.
#CL2#
Shulenberg clinches.
Blue manages to get underhooks and slows down the pace for a moment.
The two fighters are working to gain dominance in the clinch.
The crowd are getting pretty annoyed with Blue for his constant stalling in the clinch and are voicing their displeasure.
Shulenberg tries to pull guard but Blue forces him back to his feet, against the cage.#T2#
Blue is trying to stall.
Shulenberg trying to control the position but instead, Blue has worked for underhooks and has pushed Shulenberg into the cage.
Blue is trying to pull guard but Shulenberg has him pressed against the cage.
Blue connects with a nasty looking knee right to Shulenberg's face.
Shulenberg wants to get back to striking at distance but Blue won't allow it.
Shulenberg has a body lock and is looking for a takedown. Blue is bouncing around trying to prevent the takedown and somehow he has indeed managed to stay on his feet.
Blue blocks an uppercut.
Blue gets double underhooks to prevent a takedown attempt from Shulenberg.
A bit of stalling here from Blue.
#T3##BC#
Blue's corner calls for him to break the clinch, which he does.
Blue shoots in with a takedown attempt and he has Shulenberg pinned against the cage. Shulenberg gets the underhooks and manages to circle away. #CL2#
Shulenberg moves into the clinch.#BC#
Blue's corner calls for him to break the clinch, which he does.#CL2#
Shulenberg takes the fight into the clinch.
Shulenberg takes a knee right on the jaw!
#BC#
Blue escapes the clinch and we're back to striking.
#CL2#
Blue tries to keep at a distance but Shulenberg has taken the fight into the clinch.
Ryan Blue has scored more points in the clinch so far.#T4##BC#
Blue breaks the clinch and we return to the middle of the mat.
Shulenberg throws a head kick but Blue moves out of range.
Shulenberg tries to land with a swinging hook to the body but Blue was well out of range. Poor timing from Shulenberg.
Blue lands with a slapping head kick.
Shulenberg circles away from the clinch attempt.
Blue tries to clinch there but Shulenberg circles away.
Blue tries to clinch but Shulenberg moves out of range.
Shulenberg throws a body kick but he wasn't in range.
The crowd cheering loudly, showing their appreciation for the quality fight we're seeing here.
The crowd thankful this round is nearly over.#CL2#
Shulenberg has taken the fight to the clinch.
Shulenberg is trying to work out of this bad position, with his back against the cage.#BC#
Blue breaks from the clinch.
And that is the end of the round. The fighters go back to their corners.
That was a close second round but I would say that Ryan Blue will probably get the nod.
The cut man is working on Chris Shulenberg's cut.
The fighters' corners scream their final instructions, as the referee calls time. Here we go, back to the action! This is the final round!#R3##CL#
Blue has closed the distance and engaged Shulenberg in a clinch.
Shulenberg misses the knee to the body. Nice hip positioning from Blue.
#TD#
Blue gets control of Shulenberg's arms and successfully pulls guard. Blue will no doubt be looking for submissions off his back.
Shulenberg is just sitting in guard, looking to avoid any submissions.
Blue is looking to get back to his feet but can't, whilst Shulenberg is controlling him.
We've had a slow start to the round here - hopefully the action picks up.#SU2#
Shulenberg gets to his feet - Blue follows without any prompting. #CL2#
Shulenberg gets to the clinch - let's see what his plan is here.#T1#
A short left from Blue.
Blue tries to pull guard but Shulenberg won't allow it.
Shulenberg wants to get back to striking at distance but Blue won't allow it.
Shulenberg can't get the takedown.
Shulenberg is trying to drag Blue to the mat but Blue just about manages to keep his footing. He used the cage to his advantage there.
Shulenberg tries to land a knee to the head but Blue blocks with his arms.
Blue can't get the takedown.
#TD#
Blue decides to pull guard.
Both fighters are breathing heavily.
Blue wants to get back to his feet but Shulenberg is in a dominant position and won't allow it.
Shulenberg sitting in guard, not really doing much. #T2#
Blue is trying to stand up but he's not managed so far.
Shulenberg engaging in some classic timewasting tactics.
Blue looking to sweep using the butterfly guard but Shulenberg puts pay to that idea as he passes nicely into half guard.
Blue on the receiving end of some nice ground and pound. #T3#
Shulenberg looks over to his corner - he wants some instructions but his corner are not responding.
Let's hope that Shulenberg has the urge to step up the pace any second now because for the last 15 or 20 seconds he's just been holding on tight.
It looks like the ref is thinking about a standup.#REF3#
The referee has decided to stand the fighters back up, so we'll restart on the feet.#T4#
My god... these two guys really need to pick up the pace or everyone will leave to go get a beer.#CL2#
Shulenberg has managed to clinch.
A right handed body shot lands from Blue.
Blue keeps the fight in the clinch, despite Shulenberg's efforts to push away.
Shulenberg tries to take the fight to the ground by pulling guard but can't manage it.
Ryan Blue has stuffed three takedown attempts in the round now. That's going to take a lot out of Chris Shulenberg.
Shulenberg tries to pull guard but Blue won't allow it.
#BC#
Blue breaks the clinch and we return to the middle of the mat.
Ryan Blue is winning the standup battle so far.
Blue lands with a kick to the temple. Shulenberg shrugs as if to say "is that all you've got?"
Blue shoots in but Shulenberg avoids the takedown attempt easily.
Ryan Blue is fighting for a decision here - he's started to take the cautious approach.
Boooooooooooooooooooo!!! God, this has been a terrible round. Come on you two, sort yourselves out!#TD2#
Shulenberg bobs and weaves into range and then changes levels and scores with a nice takedown into side control.
And that's the end of the fight!
That was a close round. You could make an argument for either fighter but I would give it to Ryan Blue.
Well I reckon that's a shut out for Blue, winning every round. Will the judges agree? They are the ones who matter, even if they are often depressingly incompetent. Over to the ring announcer for the scorecards.
Ladies and gentlemen, after 3 rounds of action, we go to the scorecards for a decision.
Judge Josh West scores the fight 30:28
Judge Colin Fray scores the fight 30:28
Judge Chris Saunders scores the fight 30:27
In favor of your winner, by unanimous decision... Ryan Blue! |
|
|
|
Event:
TWGC 37 (265+lbs, D4): Amsterdam Qualifier - Round 2
Date: Aug 20, 2022 |
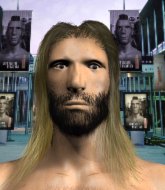
This TWGC bout is 1 fifteen minute round in the super heavyweight division. Introducing today's competitors. In the red corner, competing out of Montreal, with a TWGC record of 1 wins and 0 losses; Tsuyoi Empi! And in the blue corner, fighting out of Las Vegas, with a TWGC record of 1 wins and 0 losses; Chris Shulenberg!
The judges for this bout are Saam Ante, Paulsen Ambrosius and Wagner Zegers.
The fighters bow as they face eachother in the middle of the mat and we are under way.#CL#
Empi clinches up with Shulenberg and pushes him back against the cage.#TD#
Empi gets control of Shulenberg's arms and successfully pulls guard. Empi will no doubt be looking for submissions off his back.#SUB#
Empi has an active guard here but Shulenberg has managed to pass into half guard.
Empi wants to control but Shulenberg is keeping busy and won't allow it.
Shulenberg is pressing down on Empi's thigh, looking to free his foot. Empi is holding on for now.
Empi makes his way to full guard. A much better position for Empi.
We're hearing some news coming in from back stage. It's official - Shulenberg has eaten all the pies!#SUB2#
Shulenberg drops back for a leg but he's not going to get it - he lets go and Empi dives on top into guard. Score +2 for sweep to guard / half guard: Empi (2) vs (0) Shulenberg
We've had a slow start to the round here - hopefully the action picks up.
Empi trying to control the position from guard on top but Shulenberg is wriggling around, looking for whatever he can. #T1#
Empi's corner is telling him to maintain position.
Empi wants to control from the top but Shulenberg keeps moving.
Empi postures up.
Shulenberg managing to control the position. #SUB2#
Shulenberg looking for submissions from the bottom but instead Empi passes into half guard.
The ref warns both fighters not to hold the cage as they work up against the meshing.
Shulenberg makes his way to full guard. A much better position for Shulenberg.#T2#
Empi preventing the sweep.
Shulenberg keeping full guard, as Empi tries to pass.
Empi pushes down on Shulenberg's leg and manages to get into half guard.
Shulenberg has no desire to be mounted, so is trying to control. Empi is working away from the top position though.
Empi wants to pass to mount but Shulenberg is defending the position. #SUB#
Empi looking for a kimura but he'll have to free his other leg if he wants to finish that. Perhaps he's just using it as a distraction technique.
#T3#
Empi wants to pass the guard but Shulenberg is defending well.
Shulenberg is trying to control but can't.
Empi is looking to take a break and control but Shulenberg is keeping him honest, looking to work from the bottom.
Shulenberg is looking to regain full guard. Not this time though. #T4#
Shulenberg is staying active underneath Empi, who seems content to just control the action from this position.
Empi will need to keep those long limbs tucked in whilst he's on the ground, to prevent any submissions.#SUB#
Empi is trying a forearm choke
I don't think that's going to do much at this level of the game.
Empi is figuring out what he wants to do next.#SUB#
Empi is looking for a kimura but he's never going to get it from there. #T5#
Shulenberg is working for an escape here. He's hooked one of Empi's legs and he's managed to sneak out and take Empi's back! Score +4 for clean sweep to past guard: Empi (2) vs (4) Shulenberg
You can see the frustration on Empi's face
He knows he is in trouble unless he improves his position sooner rather than later.
#SUB2#
Shulenberg is working for the rear naked choke. He has one arm under the chin but Empi has hold of the other arm. A bit of a stalemate here.
Shulenberg gets his hands free as Empi looks to control.
Empi is really stuck here.
#T6#
Empi prevents Shulenberg from getting a body triangle.
Empi trying to control the hands but Shulenberg won't let him.
Empi turns into Shulenberg and is now in his guard.
Score +2 for sweep to guard / half guard: Empi (4) vs (4) Shulenberg
Empi is just sitting in guard, looking to avoid any submissions.
Empi wants to control from the top but Shulenberg keeps moving.
Empi slips nicely into half guard.#T7#
Shulenberg is refusing to be controlled, as Empi sits in half guard.
Shulenberg trying to control from the bottom.
Empi controlling the action here.
Empi's ground tactics aren't going to win him many fans. Let's hope he's got fireworks for us if he gets back to his feet because he's not doing much on the ground.#T8#
Empi is thwarting Shulenberg's attempts to control the position.#SUB2#
Shulenberg looking for submissions off his back.
Empi content to sit in half guard and control for a moment.
Shulenberg tries to get to full guard but Empi has control of the leg. #T9#
Shulenberg wants to control but Empi is keeping busy and won't allow it.
Empi controlling the pace.
Empi wants to pass the guard but Shulenberg is defending well.
Empi prevents Shulenberg from improving his position.
Shulenberg is looking to control Empi's leg but it's slowly edging free. Can Shulenberg avoid being mounted?#T10#
Shulenberg is trying to get back to full guard.#SUB#
Empi is sneakily working for an arm triangle but Shulenberg sees it coming and defends easily.
Shulenberg wants to control the action here but instead Empi manages to pass to full mount! Score +3 for passing guard: Empi (7) vs (4) Shulenberg
Shulenberg wants to control but Empi is having none of it.
Empi fails to move to back control.
Shulenberg is writhing around trying to get back to his feet. #T11##SUB#
Empi has hold of Shulenberg's left arm, perhaps looking for a submission. The two fighters tussle over control of the isolated limb and Shulenberg manages to get his arm back to his side and away from danger.
#SUB#
Empi looking to secure an arm triangle but Shulenberg defends it well.
Shulenberg prevents Empi from taking his back.
Shulenberg is writhing around trying to get back to his feet.
Empi sitting in mount, just looking to control for the moment. #T12#
Empi fails to take his opponent's back.
Shulenberg regains half guard.
Shulenberg makes his way to full guard. A much better position for Shulenberg.
Empi trying to control but Shulenberg is working from the bottom. #T13##SUB2#
Shulenberg looking for submissions off his back, moving his hips, looking for an opening.
#SUB2#
Shulenberg has an omoplata and is looking to use it perhaps as a submission or perhaps to transition. Empi is in a bit of discomfort here, but he's managed to free himself and has dived into side control! That didn't work out too well for Shulenberg. Score +3 for passing guard: Empi (10) vs (4) Shulenberg
Empi controls the position from side control.#SUB#
Empi tries for a kimura. Not really close to a finish though. #T14#
Empi trying to control the position but Shulenberg is working away.
Shulenberg prevents Empi from improving position.
Shulenberg tries to control but end up mounted... ooooh, that's bad. Score +2 for reaching mount: Empi (12) vs (4) Shulenberg
Boooooooooooooooooooo!!! God, this has been a terrible round. Come on you two, sort yourselves out!
Shulenberg has given up his back here.
Score +3 for taking back: Empi (15) vs (4) Shulenberg
Shulenberg trying to control but not successfully.
Shulenberg tries to escape the position - he's now mounted. Is that better or worse? Hard to tell!
And that's the end of the fight!
Empi takes the fight on points by 15 to 4. |
|
|
|
Event:
TWGC 37 (265+lbs, D4): Amsterdam Qualifier - Round 1
Date: Aug 19, 2022 |
This TWGC bout is 1 fifteen minute round in the super heavyweight division. Introducing today's competitors. In the red corner, competing out of Las Vegas, with a TWGC record of 0 wins and 0 losses; Chris Shulenberg! And in the blue corner, fighting out of New York, with a TWGC record of 0 wins and 0 losses; Liam LaFonsetta!
The judges for this bout are Daniel Blasius, Patrick Alders and Saam Ante.
The official calls the fighters to the middle and the contest is under way.
No luck for Shulenberg with that takedown attempt. #TD2#
LaFonsetta shoots in looking for a single leg takedown. Shulenberg is trying to defend but LaFonsetta finishes it well and ends up in half guard. Let's see if he can advance position further. Score +2 for takedown into guard / half guard: Shulenberg (0) vs (2) LaFonsetta#SUB2#
LaFonsetta is trying for a guillotine from the top but the pressure isn't in the right place so Shulenberg is just riding it out for now. LaFonsetta eventually gives up the hold.
Shulenberg gets full guard.
We've had a slow start to the round here - hopefully the action picks up.#SUB#
Shulenberg looking for submissions off his back, moving his hips, looking for an opening.
#SUB#
Shulenberg is looking for a guillotine. You can't force these things though and LaFonsetta defends well.#T1##SUB#
Shulenberg is looking for a triangle but LaFonsetta pushes his legs off easily.
#SUB#
Shulenberg working for a triangle but LaFonsetta defends it easily.
#SUB2#
LaFonsetta thinks about going for a leg but decides against it, in order to maintain the position.
LaFonsetta slows down the pace of the fight for a moment. He'll need to remain active if he doesn't want to see the fight stood back up.
Shulenberg has his hands on LaFonsetta's head, controlling the position.
Shulenberg keeping full guard, as LaFonsetta tries to pass. #T2##SUB#
Shulenberg throwing his legs up looking for a triangle.
Shulenberg manages to sweep nicely, so he's now on top. LaFonsetta manages to get himself to full guard.
Score +2 for sweep to guard / half guard: Shulenberg (2) vs (2) LaFonsetta#SUB2#
The fighters are starting to get a bit slippery now, which will make submissions a bit more difficult.
LaFonsetta throwing his legs up looking for a triangle.
LaFonsetta really doesn't want to stay on the ground with Shulenberg. If he can't get it back to his feet, it's only a matter of time before he'll be tapping out.
Shulenberg showing good wrestling skills to control the position. #SUB2#
Shulenberg got a little sloppy there for a moment and LaFonsetta has worked his way into a loose triangle - can he finish it?! No, Shulenberg has managed to get both his arms back between LaFonsetta's legs - danger averted.#T3##SUB2#
LaFonsetta throwing his legs up looking for a triangle.
#SUB2#
LaFonsetta looking for submissions from the bottom but instead Shulenberg passes into half guard.
LaFonsetta tries to roll over but Shulenberg keeps him under control.
Shulenberg could do with losing a few pounds - he looks very soft around the mid section, to put it politely.#SUB2#
LaFonsetta looking for submissions from an awkward position here.
LaFonsetta looks more muscular than last time we saw him. He must have been on the weights.
We get told so often about how wrestlers don't like to be on their backs. Let's see if LaFonsetta can do anything to dispel that myth.
Shulenberg is pressing down on LaFonsetta's thigh, looking to free his foot. LaFonsetta is holding on for now. #T4#
LaFonsetta is looking to improve his position.
Shulenberg wants to pass to mount but LaFonsetta is defending the position.
LaFonsetta is staying active underneath Shulenberg, who seems content to just control the action from this position.
Shulenberg looking to pass the half guard. Not this time.
Shulenberg passes the half guard and he's now in mount! Big trouble for LaFonsetta! Score +3 for passing guard: Shulenberg (5) vs (2) LaFonsetta#SUB#
Shulenberg is working on an americana here. Ooh, that looks pretty nasty! Nope, LaFonsetta has managed to escape the submission attempt.
LaFonsetta really trying hard to get back to half guard here.
#T5#
Shulenberg can't quite control the action as he would like just now, as LaFonsetta is looking to escape.
LaFonsetta is desperately trying to improve his position but Shulenberg has a good base and remains in mount.
LaFonsetta is still trying to improve position.#T6#
Shulenberg controlling from mount. #SUB#
Shulenberg jumps to side control looking for an arm triangle but LaFonsetta manages to avoid the submission attempt.
LaFonsetta tries to bench press Shulenberg off him but Shulenberg keeps the position.
LaFonsetta is not content to let Shulenberg control the position.
LaFonsetta is trying to get back to half guard.#T7#
Shulenberg tries to move into full mount but can't pass LaFonsetta's legs.
The ref warns both fighters not to hold the cage as they work up against the meshing.
LaFonsetta manages to work his way to half guard, despite Shulenberg's best efforts.
Shulenberg prevents LaFonsetta from improving his position.
Well, if Shulenberg is going to just lie there, perhaps we should talk about what we're having for dinner tonight
I'm having a ham and pineapple pizza
Yum. Can't wait.
#SUB2#
LaFonsetta is looking to sinch up a guillotine here but Shulenberg pulls his head out easily.
LaFonsetta wants to improve his position but Shulenberg is controlling well.
#T8#
LaFonsetta is persisting with the attempt to improve his position.#SUB#
Shulenberg is looking for a kimura but LaFonsetta is holding onto that half guard position, so it's hard for Shulenberg to get the leverage.
LaFonsetta is looking to regain full guard. Not this time though. #SUB2#
LaFonsetta looking for submissions from an awkward position here.
LaFonsetta is looking to regain full guard. Not this time though.
Shulenberg looks over to his corner - he wants some instructions but his corner are not responding.
LaFonsetta is looking to regain full guard. Not this time though. #T9##SUB#
LaFonsetta is defending against the submission attempts here by Shulenberg.
#SUB2#
LaFonsetta looking for submissions off his back.
Shulenberg wants to pass to mount but LaFonsetta is defending the position.
The fighters are pressed up against the cage, both looking to find a bit of space to work.
LaFonsetta is looking for a sweep. Shulenberg is wise to his cunning plan and keeps the top position.#SUB#
Shulenberg is looking for a kimura but he's never going to get it from there. #T10#
Shulenberg is looking to take a break and control but LaFonsetta is keeping him honest, looking to work from the bottom. #SUB2#
LaFonsetta actively working from the bottom here.
Shulenberg controlling the action here. #SUB2#
LaFonsetta actively working from the bottom here.#T11##SUB2#
LaFonsetta looking for submissions from an awkward position here.
LaFonsetta wants to get back to full guard.#SUB2#
LaFonsetta actively working from the bottom here.#SUB2#
LaFonsetta looking for submissions off his back.
Shulenberg controlling the action here. #SUB#
Shulenberg in half guard on the top. He's looking for a kimura... He's got it locked and he's managed to free his trapped foot. LaFonsetta tries to escape but it's on too tight and he has to tap! Great BJJ skills there from Shulenberg!
Ladies and gentlemen, after 12:18 of round 1, we have a winner by way of Submission (Kimura). Chris Shulenberg! |
|
|
|
|
|
|