|
Play
by Play - Fighter's Fight Commentary
|
Event:
SSG 164 Barnes vs Chai
Date: Jun 25, 2023 |
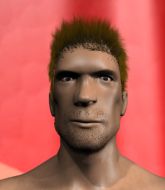
This TWGC bout is 1 fifteen minute round in the super heavyweight division. Introducing today's competitors. In the red corner, competing out of Amsterdam, with a TWGC record of 0 wins and 5 losses; Rory Gallagher! And in the blue corner, fighting out of Rio de Janeiro, with a TWGC record of 3 wins and 1 losses; Philip Roth!
The judges for this bout are Jorge Garcia, Eddie Farnsworth and Lou da Vinci.
The fighters bow as they face eachother in the middle of the mat and we are under way.
No luck with that takedown attempt from Gallagher.
Roth changes levels for a counter takedown but doesn't follow through with his attempt.#TD#
Gallagher shoots in for a takedown and gets it. Let's see what he's got on the mat. Score +2 for takedown into guard / half guard: Gallagher (2) vs (0) Roth
Roth tries to land a sweep but no joy. #SUB2#
Roth working for a triangle but Gallagher defends it easily.
Roth keeping moving, preventing Gallagher from controlling successfully.
We've had a slow start to the round here - hopefully the action picks up.#SUB2#
Roth looking for submissions from the bottom here. Moving his hips around, possibly looking for an armbar.
Gallagher trying to control but Roth is working from the bottom.
Roth has been taking part in the yoga sessions down at Soul Supremacy Rio. Presumably he's going to look for a slick submission... Or maybe he's looking to avoid one.#T1##SUB2#
Gallagher is sitting in close to Roth's body. Roth has gone for a guillotine from the bottom. Oh damn, that looks pretty tight! Gallagher is panicking - it looks like this one could be all over! Yes, Gallagher is tapping! That was a very nice submission by Roth.
Ladies and gentlemen, after 1:27 of round 1, we have a winner by way of Submission (Guillotine). Philip Roth! |
|
|
|
Event:
SSG 156 Kyng vs Banner
Date: Jun 11, 2023 |
This TWGC bout is 1 fifteen minute round in the super heavyweight division. Introducing today's competitors. In the red corner, competing out of London, with a TWGC record of 1 wins and 2 losses; Quinn Barnett! And in the blue corner, fighting out of Amsterdam, with a TWGC record of 0 wins and 4 losses; Rory Gallagher!
The judges for this bout are Dean Styles, Eddie Farnsworth and Jorge Garcia.
The official calls the fighters to the middle and the contest is under way.#TD#
Gallagher tries to sprawl but Barnett drives through with a takedown into half guard. Score +2 for takedown into guard / half guard: Barnett (2) vs (0) Gallagher
Neither fighter is being very active at the moment, with Barnett in particular looking to stall.
Barnett moves nicely into side control. Score +3 for passing guard: Barnett (5) vs (0) Gallagher
Barnett is looking to take a break and control but Gallagher is keeping him honest, looking to work from the bottom.
Gallagher seems a little lost for a moment, as Barnett dominates the positioning.
Barnett could do with losing a few pounds - he looks very soft around the mid section, to put it politely.#SUB#
Barnett is looking for a kimura. He might have it! No, Gallagher has escaped the position, nice work there.
Barnett moving around in side mount but really he's just happy to control for now.
The ref warns both fighters not to hold the cage as they work up against the meshing.
We've had a slow start to the round here - hopefully the action picks up.#SUB#
Barnett wants to work for a kimura but he's foiled early by Gallagher, who protects the arm well. #T1##SUB#
Barnett is looking to finish here, going for an Americana. Gallagher knows the correct defense though, so he's OK.
Gallagher looks winded!
You can see the frustration on Gallagher's face, being in this tough position on the bottom.#SUB#
Barnett looking for an arm triangle but it's way too loose to do anything.
Barnett taking a breather here. #SUB#
Barnett thinks about going for a far side armbar but bails out and retains the dominant position instead. #T2#
Gallagher is looking for a sweep.
Barnett takes a little break here. Gallagher wants to take advantage but he is being controlled well.
Barnett is looking to take a break and control but Gallagher is keeping him honest, looking to work from the bottom. #T3#
Barnett controlling the position.
Barnett trying to control the position but Gallagher is working away.
Barnett controls the position from side control.#SUB#
Barnett swings around for an armbar but Gallagher sees it coming a mile off and turns beautifully into Barnett's guard. Score +2 for sweep to guard / half guard: Barnett (5) vs (2) Gallagher
Barnett has his hands on Gallagher's head, controlling the position.
Barnett manages to sweep nicely, so he's now on top. Gallagher manages to get himself to full guard.
Score +2 for sweep to guard / half guard: Barnett (7) vs (2) Gallagher#T4#
Barnett is frustrating his opponent with some stalling tactics from top position.
Barnett wants to pass the guard but Gallagher is keeping the position.
Barnett content to stall in guard here.
Barnett trying to pass the guard but can't manage it just yet. #SUB2#
Gallagher is working actively off his back, looking to secure an arm or perhaps work for a triangle.
Barnett pushing down on Gallagher's thigh, trying to pass to half guard. He's managed it... Nice work. #T5#
Gallagher is not content to let Barnett control the position.
Barnett frees up his trapped foot and advances to mount. Score +3 for passing guard: Barnett (10) vs (2) Gallagher
The fighters are pressed up against the cage, both looking to find a bit of space to work.
Barnett fails to move to back control.
Gallagher is wriggling around here but as he tries to escape, Barnett has taken his back.
Score +3 for taking back: Barnett (13) vs (2) Gallagher#SUB#
Gallagher is trying to defend against the choke here but Barnett has an arm under his chin. This one might not last much longer. Barnett Tightens the hold and Gallagher taps out furiously! Barnett displays superior BJJ to win the fight.
Ladies and gentlemen, after 6:58 of round 1, we have a winner by way of Submission (RNC). Quinn Barnett!
An out of breath Quinn Barnett thanked his loyal fans in his post fight interview, giving them credit for his success over the course of his career. |
|
|
|
Event:
SSG 146 Cheese vs Chai
Date: May 21, 2023 |
This TWGC bout is 1 fifteen minute round in the super heavyweight division. Introducing today's competitors. In the red corner, competing out of Amsterdam, with a TWGC record of 0 wins and 3 losses; Rory Gallagher! And in the blue corner, fighting out of Montreal, with a TWGC record of 0 wins and 1 losses; Faster Adamz!
The judges for this bout are Paulo Santos, Matheus Silva and Leandro Rodrigues.
Let's get this grappling contest under way! Who will be victorious?
Adamz swats away the attempt to clinch by Gallagher.
Adamz darts in looking for a takedown but Gallagher gets double underhooks and turns Adamz into the cage. #TD#
Gallagher throws the overhand right but ducks down into a quick takedown attempt. Adamz was covering up waiting for the punch and Gallagher finishes the takedown easily into guard. Score +2 for takedown into guard / half guard: Gallagher (2) vs (0) Adamz#SUB2#
Gallagher is trying to tuck his arms in to keep them safe but Adamz has managed to isolate one of them and has got a loose triangle. Gallagher is looking to defend but Adamz has done well to lock his legs together - this could be big trouble for Gallagher! Adamz pulls down on the head and a little smile comes across his face - he knows he's got it. Yep, Gallagher taps out and this one is all over!
Ladies and gentlemen, after 0:42 of round 1, we have a winner by way of Submission (Triangle). Faster Adamz! |
|
|
|
Event:
SSG 142 Gaul vs Berendas
Date: May 07, 2023 |
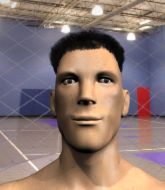
This TWGC bout is 1 fifteen minute round in the super heavyweight division. Introducing today's competitors. In the red corner, competing out of London, with a TWGC record of 0 wins and 1 losses; Cole Hunt! And in the blue corner, fighting out of Amsterdam, with a TWGC record of 0 wins and 2 losses; Rory Gallagher!
The judges for this bout are Ian Loll, Yves DeLean and Alec Ball.
The fighters bow as they face eachother in the middle of the mat and we are under way.
Gallagher misses with a takedown attempt - Hunt sprawls well and throws a nice strike on the way out which just misses.
Hunt tries to close the distance and clinch but Gallagher swats him to one side with an open hand palm strike and circles away.
And Gallagher tries to counter it with a takedown but Hunt pushes his down on his head and steps out.#TD#
Excellent takedown into side control there by Hunt. Score +4 for clean takedown past guard: Hunt (4) vs (0) Gallagher
Hunt could do with losing a few pounds - he looks very soft around the mid section, to put it politely.#SUB#
Hunt thinks about going for a far side armbar but bails out and retains the dominant position instead.
Hunt works to advance to full mount. Gallagher defends for a few seconds but eventually he succumbs. Score +2 for reaching mount: Hunt (6) vs (0) Gallagher
Gallagher tries to hold on but Hunt postures up.#SUB#
Gallagher defends a decent attempt at a guillotine from Hunt.
We've had a slow start to the round here - hopefully the action picks up.
Hunt is trying to take his opponent's back.
Hunt trying to control but he's not successful this time. #T1#
Hunt wants to take his opponent's back but Gallagher doesn't allow it. #SUB#
Hunt with some aggressive grappling here. He's looking for submissions here, rather than waiting for the opportunity to counter.
Gallagher keeping his composure momentarily, calmly looking to get back to half guard.
Gallagher prevents Hunt from taking his back.
Hunt is working hard here to advance position.#T2#
Hunt wants to control the pace but Gallagher is squirming around nicely. #SUB#
Hunt has hold of Gallagher's left arm, perhaps looking for a submission. The two fighters tussle over control of the isolated limb and Gallagher manages to get his arm back to his side and away from danger.
#SUB#
The fighters are starting to get a bit slippery now, which will make submissions a bit more difficult.
Hunt swings around for an armbar but it's a sloppy attempt and Gallagher is now in Hunt's guard. A big mistake from Hunt there, giving up the dominant position! Score +2 for sweep to guard / half guard: Hunt (6) vs (2) Gallagher
Gallagher preventing the sweep.
Hunt pulls Gallagher in to control the position. #T3#
Hunt is working the butterfly guard. He manages to land a nice scissor sweep and is now in half guard on the top. Nice move. Score +2 for sweep to guard / half guard: Hunt (8) vs (2) Gallagher
Hunt looking to pass the half guard. Not this time. #SUB#
Hunt is looking for an arm triangle, whilst trying to pass to side control. Gallagher doesn't seem that keen to cooperate though. No luck this time Hunt. #SUB#
Hunt is trying a forearm choke� I don't think that's going to do much at this level of the game.
Hunt looking to pass the half guard. Not this time. #T4##SUB#
Hunt is sneakily working for an arm triangle but Gallagher sees it coming and defends easily.
Hunt looking to pass the half guard. Not this time.
Hunt working to pass to mount. He's got his hand pressing down on Gallagher's thigh. Gallagher counters though and makes it back to full guard.
Hunt slips effortlessly into side control - very nice. Score +3 for passing guard: Hunt (11) vs (2) Gallagher
Hunt tries to advance to mount but can't.
A lull in the action here.#T5#
Hunt tries to move into full mount but can't pass Gallagher's legs. #SUB#
Hunt working hard here to secure a kimura but he's not really in the right position for it.
Gallagher prevents Hunt from improving position.
Hunt trying to control the position but Gallagher is working away. #T6#
Gallagher prevents Hunt from moving into mount.
Hunt has knee on belly and now moves to full mount! Trouble for Gallagher! Score +2 for reaching mount: Hunt (13) vs (2) Gallagher
Gallagher is wriggling around trying to escape.
The ref warns both fighters not to hold the cage as they work up against the meshing.
Gallagher looks winded!
Gallagher is squirming around, avoiding Hunt's attempts to control the action. #T7#
Hunt takes a little breather and maintains the position. The referee will be looking for him to stay active from such a dominant position though.#SUB#
Hunt looking for an armbar but decides to keep the dominant position instead. #SUB#
Hunt working from mount. He moves in close and looks like he might be going for an arm triangle... He's hopped off to the side and he's transitioned into an Anaconda choke. Gallagher turning a nasty shade of purple. He's refusing to tap but he's gone! He's out! The ref rips Hunt off and cradles Gallagher's limp body as Hunt celebrates with his corner.
Ladies and gentlemen, after 7:45 of round 1, we have a winner by way of Submission (Anaconda Choke). Cole Hunt!
Our winner, Cole Hunt, made sure he spent some time buttering up the crowd during his post fight interview, which will no doubt bring him a few more fans. |
|
|
|
Event:
SSG 134 Barnes vs Hlervu
Date: Apr 23, 2023 |
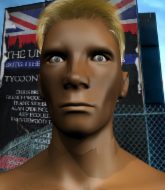
This TWGC bout is 1 fifteen minute round in the super heavyweight division. Introducing today's competitors. In the red corner, competing out of Las Vegas, with a TWGC record of 2 wins and 0 losses; Android Sixty Five! And in the blue corner, fighting out of Amsterdam, with a TWGC record of 0 wins and 1 losses; Rory Gallagher!
The judges for this bout are Emerson Jorge, Edson Gomes and Alexandre Firmino.
The fighters bow as they face eachother in the middle of the mat and we are under way.#TD#
Sixty Five shoots in for a takedown and gets it. Score +2 for takedown into guard / half guard: Sixty Five (2) vs (0) Gallagher
The fighters are pressed up against the cage, both looking to find a bit of space to work.
Sixty Five stalling.
Sixty Five moves into full mount! Gallagher won't be happy about that! Score +3 for passing guard: Sixty Five (5) vs (0) Gallagher
Sixty Five sitting in mount, just looking to control for the moment.
We've had a slow start to the round here - hopefully the action picks up.#T1#
Sixty Five seems to have a rather negative gameplan on the ground. He seems keen to just score the takedown and hold down Gallagher for as long as he can get away with.
Sixty Five has controlled the position for a good 20 seconds, which will no doubt be starting to frustrate his opponent.
Gallagher looks winded!
Sixty Five continues to stall.#T2#
Gallagher tries to hold on but Sixty Five pushes him away.
Sixty Five controlling the position easily from mount.
The ref warns both fighters not to hold the cage as they work up against the meshing.
Sixty Five's ground tactics aren't going to win him many fans. Let's hope he's got fireworks for us if he gets back to his feet because he's not doing much on the ground.#T3#
Sixty Five seems to be looking to move to his opponent's back but Gallagher is holding on tight.
Sixty Five sitting in mount, just looking to control for the moment.
Sixty Five wants to take his opponent's back but Gallagher doesn't allow it.
Sixty Five tucks in and makes sure he doesn't lose the dominant position. #T4##T5#
Sixty Five is dominating on the ground here - he's now on his opponent's back, looking to sink in the hooks. Gallagher is in real trouble.
Score +3 for taking back: Sixty Five (8) vs (0) Gallagher
Sixty Five slows the pace down here. Having a little breather whilst he's in a dominant position, looking to rest and regain some energy, ready to go for the finish.
Further stalling from Sixty Five.
More hug and hope from Sixty Five.
Gallagher is really stuck here.
Gallagher is being controlled on the ground here - he must escape this position otherwise surely the end is near.
If it seems like I'm not saying a lot, it's just because Sixty Five is stinking the place up with his stalling.#T6##T7##T8##T9##T10##T11##T12#
This is a sustained period of stalling by Sixty Five.
Gallagher rolls, trying to escape but Sixty Five keeps control of the position.
I would not like to be Gallagher right now.
Sixty Five continues to hold on tight.#T13##T14#
Boooooooooooooooooooo!!! God, this has been a terrible round. Come on you two, sort yourselves out!
And that's the end of the fight!
Sixty Five takes the fight on points by 8 to 0.
An out of breath Android Sixty Five thanked his loyal fans in his post fight interview, giving them credit for his success over the course of his career. |
|
|
|
Event:
SSG 132 Bandini vs Chai
Date: Apr 16, 2023 |
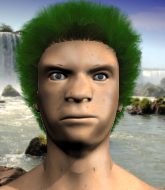
This TWGC bout is 1 fifteen minute round in the super heavyweight division. Introducing today's competitors. In the red corner, competing out of Amsterdam, with a TWGC record of 0 wins and 0 losses; Rory Gallagher! And in the blue corner, fighting out of Las Vegas, with a TWGC record of 0 wins and 0 losses; Yojizo Trismegistus!
The judges for this bout are Columbo Gatti, Joseph Jones and Alyssa Summers.
The fighters bow as they face eachother in the middle of the mat and we are under way.#CL2#
Trismegistus has managed to clinch.
Gallagher is looking for a takedown up against the cage. Trismegistus gets underhooks though and prevents the takedown attempt.
Trismegistus goes for a takedown attempt but Gallagher pushes him away and we're back to fighting at a distance.
Gallagher tries to clinch there but Trismegistus circles away.
Trismegistus drops down looking to force a counter takedown but Gallagher defends it well.#CL2#
Trismegistus closes the distance and clinches.
Gallagher jumps guard but his hands slip and he falls flat on his back. Well, he's made himself look a right mug there, as Trismegistus walks away with a smile on his face. Gallagher gets slowly back to his feet and shakes his head. #CL2#
Trismegistus closes the distance and clinches.#TD2#
Trismegistus tightens his grip and picks Gallagher up, before dumping him to the ground. Gallagher manages to land in guard. Score +2 for takedown into guard / half guard: Gallagher (0) vs (2) Trismegistus
Trismegistus pushes down on Gallagher's leg and manages to get into half guard.
Trismegistus is controlling the pace.
We've had a slow start to the round here - hopefully the action picks up.#T1##SUB#
Gallagher is looking to sinch up a guillotine here but Trismegistus pulls his head out easily.
Still in half guard, Trismegistus seems content to control.#T2##SUB#
Gallagher is looking to sinch up a guillotine here but Trismegistus pulls his head out easily.
Gallagher is breathing heavily.
Trismegistus with a momentary lay and pray from half guard.
Let's hope that Trismegistus has the urge to step up the pace any second now because for the last 15 or 20 seconds he's just been holding on tight.#T3#
We're seeing a lot of stalling here from Trismegistus.
The fighters are pressed up against the cage, both looking to find a bit of space to work.
Yet more stalling tactics from Trismegistus.
Trismegistus's corner are shouting for him to control the position and he seems happy to oblige.#T4#
Gallagher is in trouble now - Trismegistus has advanced to mount! Score +3 for passing guard: Gallagher (0) vs (5) Trismegistus
Trismegistus controlling his opponent.
Trismegistus wants to take Gallagher's back here but Gallagher is holding on to an arm, himself looking to escape.
#T5#
Trismegistus controlling from mount.
More stalling from Trismegistus.#T6#
It looks like Trismegistus might be adopting somewhat of a lay and pray gameplan here, which I'm sure won't go down too well with the paying fans in attendance... Or the ring announcers come to think of it.#T7#
Trismegistus is continuing to stall.#T8##T9#
Trismegistus with more of the same as he continues to hold on.
Trismegistus prevents Gallagher from getting the reversal.
Trismegistus should think about turning a few of those tyres round his middle into muscle if he wants people to take him seriously as an athlete.
Trismegistus controlling the pace for now. #T10#
Trismegistus is looking to work his way around to Gallagher's back. He needs to be careful though, as he's in danger of losing this dominant position.
Trismegistus controlling from mount.
Gallagher is desperately trying to improve his position but Trismegistus has a good base and remains in mount.
Trismegistus controlling from the full mount. #T11##T12#
The adventures of Trismegistus the control monster continue. Boring.
Gallagher has given up his back. Will we see Trismegistus going for some submissions?
Score +3 for taking back: Gallagher (0) vs (8) Trismegistus
Gallagher is very frustrated here, being controlled quite effectively by Trismegistus.
#T13##T14#
Boooooooooooooooooooo!!! God, this has been a terrible round. Come on you two, sort yourselves out!
And that's the end of the fight!
Trismegistus wins on points by 8 to 0.
A victorious Yojizo Trismegistus thanked his army of followers in his post fight interview, telling people to make sure they follow him on Twitter. |
|
|
|
|
|
|