|
Play
by Play - Fighter's Fight Commentary
|
Event:
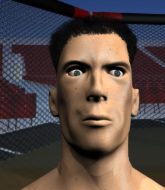
Summit Series - MMA Rd 1
Date: May 12, 2024 |
#R1#
The fighters circling - Brittle throws out the jab but it was never going to land.
Brittle looks to land a left hand but Robillard moved out of range nicely.
Brittle staying out of range there.
Robillard misses with an uppercut.
Brittle with a nice cross.
Nice defenses there by Brittle.
Brittle misses with a lunging right hand
and Robillard counters with a left to the body.
Brittle lunges in with an uppercut that skims his opponent's chin.#CL#
The fight moves into the clinch position.
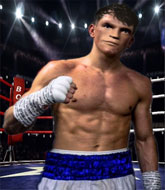
Robillard definitely looks more muscular than last time we saw him fight.
Brittle blocks an uppercut.
Robillard misses with a short punch on the inside.
Robillard lands a right uppercut that snaps the head of Brittle backwards. #BC2#
Brittle breaks the clinch.
Robillard uses good footwork to avoid the strikes from Brittle.
Brittle misses the body punch
and Brittle takes a counter punch right on the button for his troubles.
Jack Brittle seems to be the more aggressive standup fighter in this bout.
Fantastic stuff here - a very entertaining period of action, which has drawn cheers from the crowd.
Brittle misses with a jab and misses with a cross straight after too.
Robillard tries to land with a swinging hook to the body but Brittle was well out of range. Poor timing from Robillard.
Brittle throws a right hand that misses
#CL#
and Robillard counters by moving into the clinch. Good anticipation by Robillard.
Robillard tries a body shot but Brittle blocks it.
#T1#
Brittle wants to break the clinch but can't.
#BC2#
Brittle escapes the clinch and we're back to striking.
A telegraphed right hand from Brittle misses the target.
Brittle lands a powerful looking uppercut that connected with his opponent's jaw.
Brittle looks to score with a jab to the body but Robillard is just out of range.
Robillard seemed to be looking to counter by closing the distance.
Brittle misses with the combination.
Brittle misses with a looping left.
Brittle lands with a cross to side of his opponent's head.
Brittle throws a hard body shot but it just misses.
Robillard avoids the body shot from Brittle.
#CL#
Robillard takes the fight into the clinch.
Robillard tries a shoulder strike but it doesn't do any damage.
Robillard lands a body shot.
Brittle looks winded!
A short right from Robillard on the inside.
Robillard misses with a hook from the clinch.
Robillard swings wildly with an uppercut but Brittle uses good head movement to avoid it.
Brittle is trying to work out of this bad position, with his back against the cage.#T2#
Robillard lands with a left to the head.
The crowd are loving this. Great action here.
Robillard lands with a light punch inside.
Robillard fails to land with a short punch on the inside.
Brittle's head jolts backwards as he takes an uppercut right on the button!
Brittle blocks a body shot from Robillard.
Robillard keeps the fight in the clinch, despite Brittle's efforts to push away.
Robillard lands a body shot.
Robillard gets through Brittle's defenses to land a nice punch to the side of the head.
A short body shot lands from Robillard as the two fighters clinch.
A right hook to the body lands for Robillard.
A quick uppercut on the inside from Robillard.
Robillard lands with a right to the head.
Robillard works for underhooks and lands a body shot in the process.
Good body shot from Robillard.
A left hand lands to the body for Robillard.
Robillard stays in close to his opponent and throws a right hand to the body.
Robillard misses with a hook to the ribs.
Robillard lands a nice looking hook to the body, against the cage.
A body shot lands from Robillard.
A shot in the inside from Robillard.
Robillard lands a body shot.
Robillard lands with a short punch from the clinch.
#ROC#Brittle is rocked!#T3#
Robillard lands a right hand.
Brittle is still on wobbly legs! Can Robillard finish him?
Robillard scores with a shoulder strike.
Robillard creates some distance for himself and unleashes a massive uppercut that sends Brittle's eyes rolling into the back of his head! Brittle drops to his knees and Robillard pours it on with more strikes until the referee steps in to end the bout!
Ladies and gentlemen, after 3:14 of round 1, we have a winner by way of TKO (Strikes). Michel Robillard! |
|
|
|
Event:
Summit Series - KT Rd 4
Date: Apr 28, 2024 |
#R1#
Brittle uses decent footwork to sidestep a right hand from Birdwhistle.
Birdwhistle lands with a nice low kick. That'll leave a bruise.
Brittle fails with an attempt to clinch.
#CL#
Brittle moves into the clinch.#BC#
Brittle's corner calls for him to break the clinch, which he does.#CL#
Brittle has taken the fight to the clinch.
#BC#
Brittle escapes the clinch and we're back to striking.
Sloppy strikes from Birdwhistle. Those never looked like landing.
Brittle tries to clinch up.
Brittle doesn't manage to clinch there - Birdwhistle circles away.
Brittle moves in looking to clinch but Birdwhistle pushes him off.#CL#
Brittle closes the distance and presses his opponent up against the ropes.
Brittle's head jolts backwards as he takes an uppercut right on the button!#BC#
Brittle breaks the clinch.
Birdwhistle throws a jab when Brittle was well out of range.#CL#
Brittle closes the distance and clinches.
The crowd are loving this. Great action here.
Birdwhistle tries a body shot but Brittle blocks it.
Birdwhistle misses with some punches.
Birdwhistle trying to land knees to the body.
#BC#
Brittle breaks the clinch and we're back to striking at distance.
#CL#
Brittle moves into range and clinches up with Birdwhistle.#T1##BC#
Brittle's corner calls for him to break the clinch, which he does.
Brittle moves in looking to clinch but Birdwhistle pushes him off.
The fight stays on the outside here - Brittle looks like he's thinking about clinching though.
Birdwhistle swings wildly with a right hand that was never going to find it's target.
Brittle wants to take advantage of his opponent's missed offense by moving into the clinch.
Birdwhistle tries to land with a swinging hook to the body but Brittle was well out of range. Poor timing from Birdwhistle.
Brittle tries to counter by clinching up but Birdwhistle breaks away and moves out of range.
Brittle doesn't manage to clinch there - Birdwhistle circles away.
Brittle steps to the side to avoid the strikes from Birdwhistle.
Birdwhistle punishes Brittle's body with a nice straight punch.
Birdwhistle looks more muscular than last time we saw him. He must have been on the weights.
Brittle is looking to clinch. #CL#
Brittle gets to the clinch - let's see what his plan is here.#BC#
Brittle breaks the clinch.
Birdwhistle scores with a nice right hand.
Brittle moves in looking to clinch but Birdwhistle pushes him off.#CL#
Brittle instigates a clinch.
Birdwhistle tries a body shot but Brittle blocks it.
#BC#
Brittle escapes the clinch and we're back to striking.
Birdwhistle connects with a lovely jab that went straight through the gap between Brittle's hands.
Birdwhistle keeps the fight on the outside.#CL#
Brittle moves into the clinch.#T2#
Fantastic stuff here - a very entertaining period of action, which has drawn cheers from the crowd.#BC#
Brittle breaks the clinch.
Brittle wants to clinch.
Birdwhistle swats away the attempt to clinch by Brittle.#CL#
Brittle has taken the fight to the clinch.
#BC2#
Birdwhistle breaks from the clinch.
Brittle tries to clinch up.
Brittle tries to close the distance and clinch up against the ropes but Birdwhistle paws at him with a jab and circles away.
Brittle tries to clinch up
and Birdwhistle counters with a quick right hand to the jaw.
The fight stays on the outside here - Brittle looks like he's thinking about clinching though.
Brittle keeping a good distance there, avoiding the body shot.
Brittle tries to close the distance and clinch up but Birdwhistle swats him away and circles back towards the center.
Birdwhistle misses with a body shot.
Brittle tries to clinch but Birdwhistle moves out of range. #T3#
Nice defenses there by Brittle.#CL#
Brittle clinches with his opponent.
Brittle blocks a couple of punches on the inside.
Birdwhistle misses with a hook to the ribs.
#BC#
Brittle breaks the clinch.
The fight stays on the outside here - Brittle looks like he's thinking about clinching though.
Birdwhistle connects with a hook to the side of his opponent's head.
Brittle tries to clinch up against the ropes, rushing in to close the distance. Birdwhistle manages to break the clinch and circles back to the middle of the mat.
Birdwhistle keeps the fight on the outside.
Birdwhistle cracks Brittle with a nice right hand that draws applause from the crowd.
Brittle's hands are dropping dangerously low here and Birdwhistle connects clean with a right hook that sends him down to one knee! Brittle scrambles back to his feet.
Brittle moves in looking to clinch but Birdwhistle pushes him off.
Brittle tries to close the distance and clinch but Birdwhistle swats him to one side with an open hand palm strike and circles away.
Brittle is looking to clinch.
Brittle is looking to clinch.
Brittle tries to clinch up but Birdwhistle circles away and keeps his distance.
Birdwhistle fails to land with the punch combination there - jab, cross, hook, miss, miss, miss.
Brittle is looking to counter the offense by Birdwhistle and move into the clinch.#CL#
Brittle forces Birdwhistle back against the ropes and clinches.#T4##BC#
Brittle breaks the clinch and we return to the middle of the mat.
Wooooo! Give it up for these two warriors! They are putting on a show!
Birdwhistle throws a hook to the body but it doesn't connect.
Brittle tries to clinch but Birdwhistle is having none of it.
Brittle tries to clinch but Birdwhistle moves out of range. #CL#
The fight moves into the clinch position.#BC#
Brittle breaks the clinch and we're back to striking at distance.
Nice jab there from Birdwhistle. #CL#
Brittle has taken the fight to the clinch.
#BC#
Brittle pushes off and circles away, back to the middle of the mat.
Brittle tries to close the distance and clinch up but Birdwhistle swats him away and circles back towards the center.
Birdwhistle keeps the fight on the outside.
Brittle tries to close the distance and clinch up but Birdwhistle swats him away and circles back towards the center.
A head kick misses from Birdwhistle.
Brittle tries to clinch but is not successful on this occasion.
Birdwhistle misses with a jab and misses with a cross straight after too.
Brittle tries to close the distance and clinch up against the ropes but Birdwhistle paws at him with a jab and circles away.
Brittle tries to clinch but Birdwhistle is having none of it.
The fight stays on the outside here - Brittle looks like he's thinking about clinching though.
And that is the end of the round. The fighters go back to their corners.
Lysander Birdwhistle dominated that round.
The referee calls time. The cornermen exit stage left and we're back to business.#R2#
Brittle is looking to take this fight into the clinch.#CL#
Brittle closes the distance and clinches.
Brittle is working hard here but doesn't seem to be able to control effectively, up against the ropes. #BC#
Brittle breaks the clinch and we return to the middle of the mat.
Brittle tries to close the distance and clinch up against the ropes but Birdwhistle paws at him with a jab and circles away.
Lysander Birdwhistle seems to be getting the better of the standup.
Brittle tries to clinch there but Birdwhistle circles away.
#CL#
Brittle gets to the clinch - let's see what his plan is here.
An uppercut on the inside fails to land for Birdwhistle.
Brittle blocks a body shot from Birdwhistle. #BC#
Brittle breaks the clinch and we're back to striking at distance.
We've had a slow start to the round here - hopefully the action picks up.
Brittle tries to close the distance and clinch but Birdwhistle swats him to one side with an open hand palm strike and circles away. #CL#
Brittle gets to the clinch - let's see what his plan is here.
Birdwhistle misses with a shot to the kidneys.
Birdwhistle is trying to push Brittle away but Brittle has him pressed against the ropes, so he's going nowhere.#BC#
Brittle pushes off and circles away, back to the middle of the mat.#CL#
Brittle fakes with an overhand right and moves in to clinch with Birdwhistle, pushing him back against the ropes.
Brittle blocks an elbow strike.#T1##BC2#
Birdwhistle's corner calls for him to break the clinch, which he does.
Brittle tries to clinch but Birdwhistle moves out of range.
Brittle tries to clinch but Birdwhistle is having none of it.
Jack Brittle seems to be the more aggressive standup fighter in this bout.
Birdwhistle avoids the clinch attempt nicely.
Brittle tries to clinch up against the ropes, rushing in to close the distance. Birdwhistle manages to break the clinch and circles back to the middle of the mat.#CL#
Brittle gets a clinch.
Brittle is stalling here. The referee will be looking to step in if he doesn't pick up the pace.
Brittle avoiding damage as Birdwhistle throws knees to the body.
A head punch blocked on the inside by Brittle. #BC#
Brittle breaks the clinch.
Birdwhistle swats away the attempt to clinch by Brittle.
Brittle tries to clinch but is not successful on this occasion.
Birdwhistle keeps the fight on the outside.
Birdwhistle throws a big shot that misses.#CL#
Brittle closes the distance and clinches.#BC#
Brittle pushes off and circles away, back to the middle of the mat.
Birdwhistle throws an overhand right that lands on Brittle's shoulder, as Brittle tries to avoid the shot. #T2#
Brittle tries to close the distance and clinch but Birdwhistle swats him to one side with an open hand palm strike and circles away.
Birdwhistle tries a head kick but it misses.
Brittle tries to clinch up.#CL#
Brittle moves into the clinch.#BC#
Brittle breaks the clinch and we return to the middle of the mat.
Brittle tries to close the distance and clinch but Birdwhistle swats him to one side with an open hand palm strike and circles away.
Birdwhistle swings away but doesn't land with a series of punches.
The crowd cheering loudly, showing their appreciation for the quality fight we're seeing here.
Birdwhistle connects with a solid leg kick.
Brittle tries to clinch but Birdwhistle is having none of it.
Brittle tries to clinch up.
Brittle is looking to clinch but Birdwhistle is avoiding it.
Brittle tries to clinch there but Birdwhistle circles away.
Brittle tries to clinch but is not successful on this occasion.
Brittle is looking to clinch.
A telegraphed right hand from Birdwhistle misses the target. #CL#
Brittle fakes with an overhand right and moves in to clinch with Birdwhistle, pushing him back against the ropes.
Good body shot from Birdwhistle.
#BC#
Brittle manages to break the clinch.
#CL#
Brittle closes the distance and presses his opponent up against the ropes. #T3#
Birdwhistle working some nice short punches in the clinch.#BC#
Brittle pushes off and circles away, back to the middle of the mat.
Brittle slips under a jab from Birdwhistle.
Birdwhistle scores with a jab to the head.
Brittle moves in looking to clinch but Birdwhistle pushes him off.
Brittle is looking to take this fight into the clinch.
Birdwhistle throws out a counter right but Brittle avoids it with no problem.
Brittle blocks a head kick by Birdwhistle.
Brittle uses decent footwork to sidestep a right hand from Birdwhistle.
Brittle tries to clinch there but Birdwhistle circles away.
Brittle ducks under a wild hook from Birdwhistle.
Brittle tries to clinch up.
Birdwhistle circles away from the clinch attempt.
Brittle tries to close the distance and clinch but Birdwhistle swats him to one side with an open hand palm strike and circles away.
Brittle tries to clinch up against the ropes, rushing in to close the distance. Birdwhistle manages to break the clinch and circles back to the middle of the mat.
Birdwhistle throws a hook to the side of Brittle's head but Brittle sees it coming and ducks under it beautifully.
Birdwhistle jabbing away but nothing is landing. #CL#
The fight moves into the clinch position.#BC#
Brittle escapes the clinch and we're back to striking.
#T4#
Brittle tries to clinch there but Birdwhistle circles away.
Brittle tries to clinch up but Birdwhistle circles away and keeps his distance.
Brittle tries to clinch but Birdwhistle moves out of range. #CL#
Brittle moves into the clinch.
Fantastic stuff here - a very entertaining period of action, which has drawn cheers from the crowd.
Birdwhistle has a couple of punches blocked by Brittle.
#BC#
Brittle breaks the clinch.
Brittle is looking to clinch.
Brittle tries to clinch up but Birdwhistle circles away and keeps his distance.
Brittle tries to clinch but is not successful on this occasion.
Brittle tries to close the distance and clinch up against the ropes but Birdwhistle paws at him with a jab and circles away.
Birdwhistle looks like he wants to counter punch here.
Birdwhistle pushing out the jab but it's not landing.
Brittle doesn't manage to clinch there - Birdwhistle circles away.
Brittle takes a step back and watches a body kick go sailing past his mid section.
Birdwhistle avoids the clinch attempt nicely.
Birdwhistle throws the left hand but Brittle avoids the punch easily.#CL#
Brittle closes the distance and clinches.
Birdwhistle throws a head punch that misses.
And that is the end of the round. The fighters go back to their corners.
A close second round but Lysander Birdwhistle will probably get the nod - 10:9.
The minute break is over - no more time for sponges and pep talks - back to the action! So, we enter the final round. Let's see if either fighter can bring us a finish, or whether we're going to the judges scorecards.#R3#
A head kick misses from Birdwhistle.
Birdwhistle swats away the attempt to clinch by Brittle.
Birdwhistle misses with a looping right.
Brittle fails with an attempt to clinch.
Birdwhistle has been the more effective fighter overall so far.
Brittle tries to clinch but Birdwhistle is having none of it.
Brittle fails with an attempt to clinch.
Birdwhistle avoids the clinch attempt nicely.
Brittle wants to clinch up but Birdwhistle keeps it at a distance.
Birdwhistle misses with a hook. Brittle ducked under it nicely.
Brittle blocks a head kick by Birdwhistle.
Brittle tries to clinch up.
Brittle moves in looking to clinch but Birdwhistle pushes him off.
Brittle wants to clinch.
We've had a slow start to the round here - hopefully the action picks up.#CL#
Brittle closes the distance and clinches. #BC#
Brittle's corner calls for him to break the clinch, which he does.#T1##CL#
Brittle darts in and clinches Birdwhistle up against the ropes.#BC#
Brittle breaks the clinch.
Birdwhistle keeps the fight on the outside.
Birdwhistle misses with a hook.
Brittle is looking to clinch.
Birdwhistle is loading up here, looking for a big counter of his own.
Birdwhistle throws a right hand that Brittle ducks under and follows up with a left that Brittle also avoids with ease.
Brittle tries to clinch but is not successful on this occasion.
Brittle is looking to take this fight into the clinch.
Brittle is looking to take this fight into the clinch.
Brittle tries to clinch but Birdwhistle moves out of range.
Brittle backing away here, and Birdwhistle unleashes a leg kick that just misses.#CL#
Brittle gets in close and instigates a clinch. #BC2#
Birdwhistle pushes off and circles away, back to the middle of the mat.
Birdwhistle throws a hook to the side of Brittle's head but Brittle sees it coming and ducks under it beautifully.#CL#
Brittle instigates a clinch. #BC#
Brittle pushes off and circles away, back to the middle of the mat.
Brittle keeping a good distance there, avoiding the body shot.
Brittle doesn't manage to clinch there - Birdwhistle circles away.
#T2##CL#
Brittle moves into the clinch successfully.
Birdwhistle misses with a shot to the kidneys.
#BC#
Brittle escapes the clinch and we're back to striking.
Brittle tries to clinch but Birdwhistle is having none of it.
We've seen a great period of action over the last minute or so - credit to both fighters for going all out!
Birdwhistle looks to land a right hand but Brittle moved out of range.
Brittle is looking to counter the offense by Birdwhistle and move into the clinch.
Brittle tries to clinch but is not successful on this occasion.
Birdwhistle looks to land a left hand but Brittle moved out of range nicely.
Brittle tries to clinch but is not successful on this occasion.
Birdwhistle misses with an uppercut.
Birdwhistle takes a big intake of breath there - he's definitely tired.
Birdwhistle tries to bum rush Brittle with a series of wild strikes but Brittle uses good footwork to avoid the assault.
Birdwhistle takes a swing at Brittle's ribcage but misses.
Brittle is looking to clinch but Birdwhistle is avoiding it.
Birdwhistle misses with a half-hearted attempt at a head kick.
Brittle tries to clinch but Birdwhistle is having none of it.
Birdwhistle misses with a straight left.
Brittle fails with an attempt to clinch.
Brittle fails in his attempt to clinch.
Brittle tries to clinch up but Birdwhistle circles away and keeps his distance.
Brittle tries to clinch up but Birdwhistle circles away and keeps his distance.#T3##CL#
Brittle closes the distance and clinches. #BC2#
Birdwhistle manages to break the clinch.
#CL#
Brittle forces Birdwhistle back against the ropes and clinches.
Brittle stalling here - the referee won't stand for too much of that.
#BC#
Brittle breaks the clinch.
Brittle tries to clinch up.
Birdwhistle looks like he wants to counter punch here.
Brittle tries to clinch up against the ropes, rushing in to close the distance. Birdwhistle manages to break the clinch and circles back to the middle of the mat.
Birdwhistle throws a jab when Brittle was well out of range.
Lysander Birdwhistle is fighting for a decision here - he's started to take the cautious approach.
A jab from Birdwhistle misses.
Brittle is looking to counter the offense by Birdwhistle and move into the clinch.#CL#
Brittle has closed the distance and engaged Birdwhistle in a clinch.
Brittle taking a breather.
Birdwhistle tries a body shot but Brittle blocks it.
#BC#
Brittle breaks from the clinch.
Brittle steps to the side to avoid the strikes from Birdwhistle.#T4#
Brittle looks to clinch
and Brittle takes a counter punch right on the button for his troubles.
The fighters circling - Birdwhistle throws out the jab but it was never going to land.
Brittle uses decent footwork to sidestep a right hand from Birdwhistle.
Brittle tries to clinch up.
Birdwhistle swings away with a counter right hand but no contact made.
Birdwhistle avoids the clinch attempt nicely.
Decent striking displayed by Birdwhistle there.
Birdwhistle takes a swing at Brittle's ribcage but misses.
Wooooo! Give it up for these two warriors! They are putting on a show!
Brittle dodges the punch combination from Birdwhistle.
Birdwhistle pushing out the jab but it's not landing.
Brittle seemed to be looking to counter by closing the distance.
Brittle tries to clinch there but Birdwhistle circles away.
#CL#
Brittle instigates a clinch. #BC#
Brittle breaks the clinch.
Birdwhistle throws the left hand but Brittle avoids the punch easily.
Brittle tries to clinch but is not successful on this occasion.
Brittle is looking to clinch.
Birdwhistle throws out a counter right but Brittle avoids it with no problem.
Jack Brittle has stepped it up - he knows he needs a finish here!
Brittle doesn't manage to clinch there - Birdwhistle circles away.
Brittle tries to close the distance and clinch but Birdwhistle swats him to one side with an open hand palm strike and circles away.
And that's the end of the fight!
Lysander Birdwhistle comfortably won the final round on my scorecard.
I've got Birdwhistle winning every round here. Surely the decision will go his way and he'll pick up a well deserved decision victory. Over to the ring announcer for the scorecards.
Ladies and gentlemen, after 3 rounds of action, we go to the scorecards for a decision.
Judge Yasuomi Hirokawa scores the fight for Lysander Birdwhistle!
Judge Ren Mimura scores the fight for Lysander Birdwhistle!
Judge Yukihiro Yamamoto scores the fight for Lysander Birdwhistle!
Lysander Birdwhistle wins by unanimous decision!
An out of breath Lysander Birdwhistle thanked his loyal fans in his post fight interview, giving them credit for his success over the course of his career. |
|
|
|
Event:
Summit Series - KT Rd 3
Date: Apr 14, 2024 |
#R1#
Brittle tries to clinch but is not successful on this occasion.
Blood swung with a counter right hand that didn't connect.
Brittle staying out of range there.
Brittle takes a body punch but keeps moving.
Blood missing with a left hand there. Brittle was out of range so wasted energy throwing that one. #CL2#
Brittle has closed the distance and engaged Blood in a clinch.
Brittle keeps the fight in the clinch, despite Blood's efforts to push away.#BC2#
Brittle manages to break the clinch.
Blood looks to have improved his striking defense since last time we saw him fight.
Blood swings for the body but Brittle moves out of range.
The fight stays on the outside here - Brittle looks like he's thinking about clinching though.
Brittle tries to clinch there but Blood circles away.
Brittle doesn't manage to clinch there - Blood circles away.
Blood throws an uppercut from half a mile away. Brittle sees it coming and avoids it easily.
Brittle tries to clinch up.
We've had a slow start to the round here - hopefully the action picks up.
Blood looks to throw the jab but Brittle is out of range.
Blood missing with a left hand there. Brittle was out of range so wasted energy throwing that one.
Brittle tries to close the distance and clinch up but Blood swats him away and circles back towards the center.
Blood thows a left - swing and a miss!
Brittle tries to close the distance and clinch up but Blood swats him away and circles back towards the center.
Brittle uses good head movement to avoid the hook from Blood.
Brittle defending well as Blood loads up on a big left hand.
Blood tests Brittle's chin there with a solid looking shot.#T1#
Blood misses with a double jab.
A swing and a miss from Blood.
Brittle tries to counter with a clinch but Blood shakes him off and moves away.
Blood is really head hunting here, hardly looking to strike to the body at all.
A looping hook to the body misses from Blood. Brittle does a little dance to reset his feet.
Brittle is looking to clinch.
A little feinted left hand from Blood on the counter but he doesn't commit to it.
Brittle moves out of range of the strikes.
Blood comes forward and lands a shot to the body, then darts back out of range.
Blood misses with a looping left.#CL2#
Brittle instigates a clinch. #BC2#
Brittle breaks from the clinch.
#CL2#
Brittle has closed the distance and engaged Blood in a clinch.
#BC2#
Brittle breaks the clinch and we return to the middle of the mat.
Brittle tries to clinch but is not successful on this occasion.
The fight stays on the outside here - Brittle looks like he's thinking about clinching though.
Brittle tries to clinch up.
Blood misses with a hook.
Blood loads up on a big right hand but Brittle slips the punch.
Blood throws the left hand but Brittle avoids the punch easily.
Blood looks to throw the jab but Brittle is out of range.
Blood avoids the clinch attempt nicely.
Wow, both these guys are really going for it!
Danga de danga de dang - Blood scores with a four punch combination!
We've seen a great period of action over the last minute or so - credit to both fighters for going all out!
Brittle tries to clinch but Blood moves out of range. #CL2#
Brittle forces Blood back against the ropes and clinches.#T2#
Brittle keeps control of Blood as he tries to wriggle out of the double underhooks.
Blood misses with the head strike.
#BC2#
Brittle escapes the clinch and we're back to striking.
Brittle avoids a lazy jab quite easily.
A telegraphed right hand from Blood misses the target.
Brittle is trying to avoid his opponent's strikes and get into the clinch.
Brittle wants to clinch.
Brittle moves away from the strike by Blood.
Blood swats away the attempt to clinch by Brittle.
Blood circles away from the clinch attempt.
Blood throwing a counter right hand but Brittle manages to avoid it.
A swing and a miss from Blood.
Blood misses with a jab, cross combination.
A jab from Blood misses.
Brittle wants to clinch.
Brittle defending well as Blood loads up on a big left hand.
Brittle uses good head movement to avoid the hook from Blood.
Brittle slips under a jab.#T3##CL2#
The fight moves into the clinch position.#BC2#
Brittle breaks the clinch and we return to the middle of the mat.
Blood lands a jab to the nose.#CL2#
Brittle rushes Blood and pushes him back against the ropes in a clinch.#BC2#
Brittle manages to break the clinch.
Blood misses with a looping left.
Brittle has his hands up protecting his head but a hook from Blood finds it's way round the side to connect with Brittle's head.
Brittle keeping his hands up high there, blocking the jab from Blood.
Brittle slips a straight right by Blood.
Brittle moves in looking to clinch but Blood pushes him off.
Blood swung with a counter right hand that didn't connect.#CL2#
Brittle has Blood up against the ropes in a clinch.
Blood throws a head punch that misses. #BC2#
Brittle breaks from the clinch.
Blood throws a hook but Brittle blocks it.#CL2#
Brittle takes the fight into the clinch.
This has been an exciting period of action!#BC2#
Brittle breaks the clinch.
Brittle takes a jab on the nose. He smiles like he loves it and keeps coming.#T4#
Brittle fails in his attempt to clinch.
Blood swung with a counter right hand that didn't connect.
Blood pushing out the jab but it's not landing.
Brittle wants to clinch up but Blood keeps it at a distance.
Blood throws an overhand right that lands on Brittle's shoulder, as Brittle tries to avoid the shot.
Blood connects with a body shot that sends Brittle's belly button to the back.
Blood works his jab well there, keeping his opponent at a distance.#CL2#
Brittle drives through and clinches with Blood against the ropes.
#BC2#
Brittle escapes the clinch and we're back to striking.
Brittle is looking to clinch. #CL2#
Brittle closes the distance and clinches.#BC2#
Brittle breaks the clinch and we're back to striking at distance.
Brittle tries to clinch but Blood moves out of range. #CL2#
Brittle gets in close and instigates a clinch. #BC2#
Brittle breaks the clinch and we return to the middle of the mat.
The fighters circle momentarily. Blood darts into range and connects with a nice straight punch.#CL2#
Brittle closes the distance and presses his opponent up against the ropes.
The crowd applaud the fighters' efforts here as the round comes to an end.#BC2#
Brittle breaks the clinch and we're back to striking at distance.
Blood bobs and weaves and throws out a fast jab that snaps Brittle's head backwards.
Blood throws a nice hook to the body that draws an oooh from the crowd.
Brittle tries to clinch up against the ropes, rushing in to close the distance. Blood manages to break the clinch and circles back to the middle of the mat.#CL2#
Brittle rushes Blood and pushes him back against the ropes in a clinch.
And that is the end of the round. The fighters go back to their corners.
Young Blood dominated that round.
The minute break is over - no more time for sponges and pep talks - back to the action!#R2#
Blood throws a jab but it's blocked by Brittle. #CL2#
Brittle moves into range and clinches up with Blood.#BC2#
Brittle manages to break the clinch.
Blood works Brittle's body with a nice hook.
Brittle fails in his attempt to clinch.
Blood throwing a counter right hand but Brittle manages to avoid it.
Brittle tries to clinch there but Blood circles away.
Brittle ducks under a wild hook from Blood.
Blood lands a jab, followed by a cross and another cross, as Brittle backs up against the ropes.
Brittle walks straight into a jab right on the nose. That one stung - he's blinking and trying to clear his head.
Blood is really dominating this fight. Is there anything that Brittle can do to turn this around?
Brittle wants to clinch up but Blood keeps it at a distance.#CL2#
Brittle pushes Blood up against the ropes in a clinch.#BC2#
Brittle breaks from the clinch.
Blood throws a jab but it's blocked by Brittle.
Brittle tries to clinch up.
Blood connects with a single shot there.
This is a great period of action - very entertaining stuff!
Brittle tries to clinch but Blood moves out of range.
Blood throws a jab when Brittle was well out of range.
The fighters are starting to perspire pretty heavily.
Brittle is looking to take this fight into the clinch.
Blood missing with a left hand there. Brittle was out of range so wasted energy throwing that one. #CL2#
The fight moves into the clinch position.
Jack Brittle seems to be working more effectively in the clinch in the fight so far.
Blood is trying to push Brittle away but Brittle has him pressed against the ropes, so he's going nowhere.#T1#
Blood tries to break the clinch but Brittle is controlling the position.
Blood tries a shoulder strike but it doesn't do any damage. #BC2#
Brittle breaks the clinch and we're back to striking at distance.
Good standup being displayed there by Blood as he connects with a hook.
Brittle tries to clinch up against the ropes, rushing in to close the distance. Blood manages to break the clinch and circles back to the middle of the mat.
Brittle tries to clinch up.
Blood jabbing away but nothing is landing.
Brittle ducks under a wild hook from Blood.
Brittle blocks a jab.
Brittle tries to counter by closing the distance.#CL2#
Brittle gets in close and instigates a clinch.
With the fighters clinched against the ropes, Blood creates a bit of distance for himself and scores with a nice uppercut. #BC2#
Brittle manages to break the clinch.
Brittle steps to the side to avoid the strikes from Blood.
Brittle tries to clinch there but Blood circles away.
Blood swings for the body but Brittle moves out of range.
Brittle is trying to avoid his opponent's strikes and get into the clinch.
Blood keeps the fight on the outside.
Blood throws a hook but Brittle avoids it easily.
Blood throws a hook but Brittle blocks it.#T2#
Blood swats away the attempt to clinch by Brittle.
Blood fails to land with a series of punches.
Young Blood is winning the standup battle so far.
Blood throws a series of strikes that have Brittle backpedaling.
The crowd are loving this. Great action here.
Blood throws a jab when Brittle was well out of range.
Blood lands with an overhand left.#CL2#
Brittle drives through and clinches with Blood against the ropes.
Blood fails to land with a short punch on the inside.
#BC2#
Brittle breaks from the clinch.
Brittle keeping his hands up high there, blocking the jab from Blood.
Brittle wants to clinch.#CL2#
Brittle takes the fight into the clinch. #BC2#
Brittle breaks from the clinch.
Blood throws an overhand right that lands on Brittle's shoulder, as Brittle tries to avoid the shot.
Brittle tries to clinch but is not successful on this occasion.
Blood is looking to counter punch.
Blood throws a monster uppercut resembling something out of street fighter but it doesn't land.
Brittle steps in looking to clinch after the strikes miss from Blood.#T3#
Brittle uses decent footwork to sidestep a right hand from Blood.
Brittle tries to close the distance and clinch up but Blood swats him away and circles back towards the center.
A little feinted left hand from Blood on the counter but he doesn't commit to it.
Brittle tries to clinch up but Blood circles away and keeps his distance.
Brittle uses decent footwork to sidestep a right hand from Blood.
Blood throws a hook to the body but it doesn't connect.
Brittle tries to grapple but his opponent circles
and Blood counters with a lovely straight right hand!
Blood swings wildly with a hook that is half blocked by Brittle.
Nice jab there from Blood.
Blood scores with a hook.
Brittle is looking to clinch but Blood is avoiding it.
Blood avoids the clinch attempt nicely.
Blood was looking to counter that move with a punch but didn't quite pull the trigger.
Blood circles away from the clinch attempt.
Brittle doesn't manage to clinch there - Blood circles away.
Blood will need to tighten up his combinations if he doesn't want to gas himself out, swinging at thin air.
Blood looks to land a right hand but Brittle moved out of range.
Brittle tries to clinch but Blood moves out of range.
Blood throws a looping overhand right but Brittle ducks down to avoid it.
Brittle takes an uppercut right on the jaw but it doesn't phase him.
Fantastic stuff here - a very entertaining period of action, which has drawn cheers from the crowd.
The fight stays on the outside here - Brittle looks like he's thinking about clinching though.#T4##CL2#
Brittle clinches up with Blood and pushes him back against the ropes.#BC2#
Brittle breaks the clinch and we're back to striking at distance.
Brittle is looking to clinch but Blood is avoiding it.
Brittle is looking to clinch.
Blood lands a really nice looking cross but Brittle seems unphased.
Blood lands with a cross to side of his opponent's head.
Blood scores with a jab to the jaw of his opponent.
Brittle fails in his attempt to clinch.
Brittle has a pretty nasty looking mouse under his right eye.
Brittle tries to clinch up against the ropes, rushing in to close the distance. Blood manages to break the clinch and circles back to the middle of the mat.
Blood misses with an uppercut. Brittle saw that one coming.
Brittle tries to clinch but is not successful on this occasion.
Blood throws an overhand right that lands on Brittle's shoulder, as Brittle tries to avoid the shot.
Blood ducks down and throws a hook to the body but Brittle moves away.
Blood keeps his opponent at a distance with a nice jab.
The fight stays on the outside here - Brittle looks like he's thinking about clinching though.
The crowd applaud the fighters' efforts here as the round comes to an end.
Blood throws a body shot but no joy.
Blood misses with a looping right.
Brittle tries to clinch there but Blood circles away.
Blood swats away the attempt to clinch by Brittle.
And that is the end of the round. The fighters go back to their corners.
Young Blood dominated that second round.
That's time! Back to the action! The crowd applaud as we get ready to start the final round!#R3##CL2#
Brittle has taken the fight to the clinch.
#BC2#
Brittle manages to break the clinch.
Brittle takes an uppercut right on the jaw but it doesn't phase him.
Blood tests Brittle's chin there with a solid looking shot.
Brittle is looking to clinch but Blood is avoiding it.
#CL2#
Brittle darts in and clinches Blood up against the ropes.#BC2#
Brittle breaks the clinch and we return to the middle of the mat.
A big right from Blood misses.
A jab from Blood does it's job there.
Blood keeps the fight on the outside.#CL2#
Brittle clinches up against the ropes.#BC2#
Brittle's corner calls for him to break the clinch, which he does.
Brittle takes a big uppercut there. He seems a bit wobbly but no, he's OK.
Fantastic stuff here - a very entertaining period of action, which has drawn cheers from the crowd.
Blood works Brittle's body with a nice hook.
Brittle uses decent footwork to sidestep a right hand from Blood.
Brittle slips a jab and a cross from Blood.
Blood looks to land a right hand but Brittle moved out of range.#CL2#
The fight moves into the clinch position.
Blood working aggressively here.
#T1#
The referee calls for Brittle to work.
#BC2#
Brittle escapes the clinch and we're back to striking.
A jab lands there for Blood.
Blood clobbers Brittle with an overhand right that has the crowd gasping. That made a horrendous noise. #ROC#Brittle is rocked!
Blood avoids the clinch attempt nicely.
Brittle fails in his attempt to clinch.
Brittle closes the distance but Blood moves to the side
and Blood counters with a straight right hand.
Brittle is still on wobbly legs! Can Blood finish him?#CL2#
Blood gets tackled into the ropes by Brittle. Brittle maintains the clinch.
Brittle seems to have recovered his senses.
Blood swings wildly with an uppercut but Brittle uses good head movement to avoid it. #BC2#
Brittle breaks the clinch and we're back to striking at distance.
Brittle uses good footwork to avoid the strikes from Blood.#CL2#
Brittle closes the distance and clinches.
Blood misses with the head strike.
Blood misses with a punch on the inside.
#T2#
Brittle blocks a punch to the side of the head.
Blood swings away with an uppercut that misses.
Blood has a couple of punches blocked by Brittle.
#BC2#
Brittle breaks the clinch and we return to the middle of the mat.
The fans in attendance giving it up for the two fighters, who have really let it all hang out in the last minute or so!
Brittle takes a jab right on the nose. That must have hurt but he shrugs his shoulders and looks to return the favor.
Blood moves into range and throws a combination. A nice jab followed by a hook to the body.
Brittle uses good footwork to avoid the strikes from Blood.
Brittle takes a shot to the nose. Hopefully that hasn't broken it. #CL2#
Brittle moves into range and clinches up with Blood.#BC2#
Brittle escapes the clinch and we're back to striking.
Brittle moves out of range as Blood strikes.
Brittle tries to close the distance and clinch but Blood swats him to one side with an open hand palm strike and circles away.
A big right from Blood misses. #CL2#
Brittle closes the distance and pushes Blood back into the ropes.#BC2#
Brittle breaks the clinch.
Brittle moves away from the strike by Blood.
Blood misses with a hook. Brittle ducked under it nicely.
Blood lands an overhand right.
Blood fakes high and swings low for a body shot but Brittle manages to avoid it.#T3#
Brittle moves in looking to clinch but Blood pushes him off.
Brittle keeping his hands up high there, blocking the jab from Blood.
Brittle tries to counter with a clinch but Blood shakes him off and moves away.
Brittle tries to close the distance and clinch but Blood swats him to one side with an open hand palm strike and circles away. #CL2#
Brittle moves into the clinch successfully.
#BC#
Blood's corner calls for him to break the clinch, which he does.
Blood swinging wildly here.
Blood connects with a right hand. Brittle shakes it off.
A swing and a miss from Blood.
Blood throws out a loose jab but Brittle uses good head movement to avoid it.
Brittle wants to counter the offense by Blood and move into the clinch position.
Brittle fails with an attempt to clinch.
Brittle tries to move into range but Blood moves to the side and lands with a nice right hand.
Blood throws a jab when Brittle was well out of range.
Brittle is looking to clinch but Blood is avoiding it.
Blood was looking to counter that move with a punch but didn't quite pull the trigger.#CL2#
Brittle forces Blood back against the ropes and clinches.
Blood swings away with an uppercut that misses.
Brittle's corner are urging him to control the action in the clinch for a moment, rather than mount any serious offense. I'm sure the crowd appreciate those instructions... not.
A nice left hand lands by Blood.
#T4#
Blood working aggressively here.
This is a great period of action - very entertaining stuff!#BC2#
Brittle breaks the clinch.
Blood avoids the clinch attempt nicely.
#CL2#
Blood tries to keep at a distance but Brittle has taken the fight into the clinch.#BC2#
Brittle breaks the clinch and we're back to striking at distance.
Blood throws the left hand but Brittle avoids the punch easily.
Blood works his jab well there, keeping his opponent at a distance.
Brittle uses good footwork to avoid the strikes from Blood.
Brittle tries to close the distance and clinch but Blood swats him to one side with an open hand palm strike and circles away.
Blood is looking to counter punch.
Brittle steps to the side to avoid the strikes from Blood.
Brittle tries to close the distance and clinch up but Blood swats him away and circles back towards the center.
The crowd applaud the fighters' efforts here as the round comes to an end.
Brittle tries to clinch up but Blood circles away and keeps his distance.
Brittle tries to clinch there but Blood circles away.
Blood misses the jab.
Jack Brittle has stepped it up - he knows he needs a finish here!
Young Blood is fighting for a decision here - he's started to take the cautious approach.
Jab, jab by Brittle - just one landing.
Blood lands the left hand.
And that's the end of the fight!
Young Blood showed his dominance in that final round.
Well I reckon that's a shut out for Blood, winning every round. Will the judges agree? They are the ones who matter, even if they are often depressingly incompetent. Over to the ring announcer for the scorecards.
Ladies and gentlemen, after 3 rounds of action, we go to the scorecards for a decision.
Judge Ren Mimura scores the fight for Young Blood!
Judge Yasuomi Hirokawa scores the fight for Young Blood!
Judge Kenichi Hosakawa scores the fight for Young Blood!
Young Blood wins by unanimous decision!
A relieved looking Young Blood thanked the fans for their support and gave the usual line about them being amazing. They seemed to believe that he actually meant it. |
|
|
|
Event:
Summit Series - KT Rd 2
Date: Mar 31, 2024 |
#R1##CL#
Brittle gets a clinch.
A frustrated look appears on Brittle's face as he tries to break the clinch.
Brittle is trying to break the clinch but Nunez is controlling him.
Nunez misses with a punch to the body.
Brittle tries to break free but Nunez pushes him back against the ropes.
Brittle is trying to break the clinch but Nunez is controlling him.
Brittle wants to strike at distance but he can't break free of the clinch.
Nunez can't find room to land a body shot as Brittle controls the action.
Nunez misses with a hook to the ribs.
Brittle prevents a body shot from Nunez.
Brittle taking a break, stalling in the clinch.
Nunez working aggressively here.
Nunez misses with the head strike.
Nunez has a couple of punches blocked by Brittle.
#BC#
Brittle's corner calls for him to break the clinch, which he does.#CL#
Brittle rushes Nunez and pushes him back against the ropes in a clinch.
We've had a slow start to the round here - hopefully the action picks up.
Nunez lands a right hand that snaps the head of Brittle backwards.
Nunez misses with the head strike.
Brittle pushes Nunez back against the ropes and lands a hook to the side of the head.
A right handed body shot lands from Nunez.
Brittle is trying to push Nunez away but Nunez has him pressed against the ropes, so he's going nowhere.
A shot in the inside from Nunez.
Brittle is looking to break free of the clinch but Nunez has double underhooks. #T1#
Nunez lands a shoulder strike.
A head punch blocked on the inside by Brittle.
Brittle is trying to slow down the pace of the fight but Nunez is keeping busy.
Good body shot from Nunez.
Brittle is trying to break the clinch but Nunez has him pressed against the ropes.
Brittle has had enough of the clinch and is looking to separate.
Nunez has a couple of punches blocked by Brittle.
Nunez working some nice short punches in the clinch.
Brittle is trying to break the clinch but Nunez is controlling him.
A shot in the inside from Nunez.
Nunez swings wildly with an uppercut but Brittle uses good head movement to avoid it.
Brittle blocks a couple of punches on the inside.
Brittle is trying to break free.
Good body shot from Nunez.
Brittle prevents a body shot from Nunez.
Nunez tries a shoulder strike but it doesn't do any damage.
Nunez trying to stall but Brittle improves his position.
Nunez has a couple of punches blocked by Brittle.
#T2#
Nunez can't find room to land a body shot as Brittle controls the action.
A frustrated look appears on Brittle's face as he tries to break the clinch.
Nunez lands a right hand that snaps the head of Brittle backwards.
Brittle prevents a body shot from Nunez.
Brittle blocking some punches.
Nunez prevents Brittle from breaking the clinch.
Brittle holding his opponent close, against the ropes.
Nunez scores with a shot to the side of Brittle's head.
The crowd are loving this. Great action here.
Brittle tries to break free but Nunez pushes him back against the ropes.
Brittle blocks a punch to the side of the head.
Nunez pushes Brittle back against the ropes and unloads with a body punch. #BC#
Brittle breaks the clinch.
Nunez connects with a jab.#CL#
Brittle moves into the clinch.
Nunez digs a right hand into Brittle's ribs. Those have got to be taking their toll on Brittle's gas tank.
Brittle is breathing heavily.
A nice right hand lands inside from Nunez.
Nunez misses with a hook to the ribs.
Nunez lands a hook to the side of the head.
Brittle working hard to break the clinch.
And that is the end of the round. The fighters go back to their corners.
Rogelio Nunez dominated that round.
The referee calls time. The cornermen exit stage left and we're back to business.#R2##CL#
Brittle clinches up against the ropes.
Nunez goes for a body shot but it's blocked.
Nunez misses with some punches.
Brittle is trying to push Nunez away but Nunez has him pressed against the ropes, so he's going nowhere.
Nunez lands a nice looking hook to the body, against the ropes.#BC#
Brittle breaks from the clinch.
#CL2#
Nunez takes the fight into the clinch.
A short right from Nunez.
Nunez has been the more effective fighter overall so far.
Nunez lands a nice shot to the body.
A short left from Nunez. #ROC2#Brittle is rocked!#KD2#
Nunez creates a bit of space and cracks Brittle with an uppercut that drops him to the canvas! Brittle is wobbled and seems to be struggling to get back to his feet. 3,4,5. He's up! Phew, his manager will be relieved but they're no doubt wondering whether he'll be able to recover properly and get back in the fight!
Oh Brittle is still all over the place! His legs are completely gone! Will he be able to recover?!!
The crowd cheering loudly, showing their appreciation for the quality fight we're seeing here.#CL2#
Nunez forces Brittle back against the ropes and clinches.
Nunez scores with a shoulder strike.
Nunez avoiding damage.
Nunez is leaning against Brittle and scores with a nice uppercut to the body.
Nunez lands an uppercut.
Nunez lands a right hand.
Both fighters are absolutely exhausted here.
Some stalling of biblical proportions here from Nunez.
Brittle is looking to score with knees to the body. Maybe he'll change it up and go body then head. Nunez is defending well for now.#T1#
A battle for position here, against the ropes.
Nunez is leaning against Brittle and scores with a nice uppercut to the body.
Nunez lands a shot to the body.
Nunez lands a hook to the side of the head.
Nunez lands a body shot in the clinch.
Nunez cracks Brittle with a big uppercut, right up the middle and Brittle goes down! Oh, he's hurt! He's bigtime hurt! The referee is giving him a chance to get back to his feet - 4,5,6,7, no, he's called it off! Brittle wasn't going to make it and the fight is over!
Ladies and gentlemen, after 1:27 of round 2, we have a winner by way of TKO (Punch). Rogelio Nunez! |
|
|
|
Event:
Summit Series - KT Rd 1
Date: Mar 17, 2024 |
#R1##CL2#
Brittle clinches with his opponent.
Brittle holding his opponent close, against the ropes.
Brittle is looking to break free of the clinch but Brown has double underhooks.
An uppercut on the inside fails to land for Brown.
Brittle blocking some punches.
Brittle blocks a punch to the side of the head.
A head punch on the inside from Brown fails to land.
Brown swings wildly with an uppercut but Brittle uses good head movement to avoid it.
A head punch on the inside from Brown fails to land.
Brown misses with a shot to the kidneys.
Brittle wants to break free. God knows he wants to breaaaak freeee.
A head punch on the inside from Brown fails to land.
Brown throws a punch but it's blocked by Brittle.
Brittle working hard to break the clinch.
We've had a slow start to the round here - hopefully the action picks up.
Brittle is trying to break the clinch but Brown has him pressed against the ropes.
Brittle blocks an uppercut.
#BC2#
Brittle manages to break the clinch.
Brittle throws a predictable looking body shot
and Brown counters with a lovely straight right hand!#CL2#
Brittle moves into the clinch.
Brown swings away with an uppercut that misses.
Brittle is trying to break free.#T1##BC2#
Brittle breaks the clinch and we return to the middle of the mat. #CL2#
The fight moves into the clinch position.
Brown misses with the head strike.
Brittle is trying to break free.
Brittle is trying to break free.
Brown working aggressively here.
#BC2#
Brittle breaks the clinch and we return to the middle of the mat.
Brown pushing out the jab but it's not landing.
Brittle blocks a jab.#CL2#
Brittle gets to the clinch - let's see what his plan is here.
Brittle blocks a punch to the side of the head.
#BC2#
Brittle breaks the clinch and we return to the middle of the mat.
A slow jab from Brown misses its intended target.
Brittle tries to clinch up against the ropes, rushing in to close the distance. Brown manages to break the clinch and circles back to the middle of the mat.
Brown circles away from the clinch attempt.
#CL2#
Brittle has closed the distance and engaged Brown in a clinch.
Brown prevents Brittle from breaking the clinch.#T2#
Brown throws a head punch that misses.
Brown lands a right uppercut that snaps the head of Brittle backwards.
Brittle tries to stall but Brown uses the opportunity to gain a better position.
Brittle is trying to break the clinch but Brown has him pressed against the ropes.
Brown has Brittle pressed against the ropes, preventing Brittle from circling away and getting back to striking at range.
Brown fails to land with a short punch on the inside.
Brittle has had enough of the clinch and is looking to separate.
Brown tries a shoulder strike but it doesn't do any damage.
Brown throws a hook to the body. More of an arm punch but it's all scoring with the judges.
This is a great period of action - very entertaining stuff!
Brown misses with a hook from the clinch. #BC2#
Brittle breaks from the clinch.
#CL2#
Brittle moves into the clinch successfully.
A body shot lands from Brown.
Brittle blocks a couple of punches on the inside.
Brown fails to land with a short punch on the inside.
Both guys are working to get underhooks.
Brown misses with a hook to the ribs.
Brown lands with a short head shot on the inside.
Brown misses with the head strike.
Brown misses with the head strike.
And that is the end of the round. The fighters go back to their corners.
Frank Brown dominated that round.
The minute break is over - no more time for sponges and pep talks - back to the action!#R2##CL2#
Brittle takes the fight into the clinch.
Brown fails to land with a short punch on the inside.
Brittle blocks a punch to the side of the head.
An uppercut on the inside fails to land for Brown.
Brown working aggressively here.
Brittle is trying to break the clinch but Brown has him pressed against the ropes.
A hook to the body from Brown.
Brittle is looking to break free of the clinch but Brown has double underhooks.
Brown tries a shoulder strike but it doesn't do any damage.
Brown working aggressively here.
Brown is trying to slow down the pace of the fight but Brittle is keeping busy.
Brittle is trying to break the clinch but Brown has him pressed against the ropes.
We've had a slow start to the round here - hopefully the action picks up.
Brittle blocks a punch to the side of the head.
Brittle wants to push off and get back to the center of the mat but Brown has him pressed against the ropes.
A head punch on the inside from Brown fails to land.
Brown misses with some punches.
A head punch blocked on the inside by Brittle.
Brown has Brittle pressed against the ropes, preventing Brittle from circling away and getting back to striking at range.
Brittle blocks a couple of punches on the inside.
#T1#
Brittle has had enough of the clinch but Brown keeps him there for the moment.
A head punch on the inside from Brown fails to land. #BC2#
Brittle breaks from the clinch.
Brittle tries to clinch up but Brown circles away and keeps his distance.#CL2#
Brittle rushes Brown and presses him up against the ropes.
Brown throws a head punch that misses.
Brown misses with a punch on the inside.
#BC2#
Brittle pushes off and circles away, back to the middle of the mat.
Brittle looks to clinch
and Brown cracks him with a counter punch right on the button.
Brown swats away the attempt to clinch by Brittle.#CL2#
Brittle rushes Brown and presses him up against the ropes.
Brown working on landing some head shots here - that one got through nicely.
Brittle is trying to break the clinch but Brown is controlling him.
A head punch blocked on the inside by Brittle.
Brown misses with the head strike.
An uppercut on the inside fails to land for Brown. #T2#
Brittle has Brown pushed against the ropes.
Brittle blocks a couple of punches on the inside.
Brittle looks like he'd prefer to be striking at range right now.
Brown misses with a hook from the clinch.
Brown tries a shoulder strike but it doesn't do any damage.
Brittle wants to get back to striking at distance but Brown won't allow it.
#BC2#
Brittle manages to break the clinch.
#CL2#
Brittle rushes Brown and pushes him back against the ropes in a clinch.
The crowd cheering loudly, showing their appreciation for the quality fight we're seeing here.
Brittle blocks a punch to the side of the head.
#BC2#
Brittle's corner calls for him to break the clinch, which he does.
Brittle tries to clinch
and Brown counters with a lovely straight right hand!
Brittle fails in his attempt to clinch.
Brittle wants to clinch.
A counter left hand to the body from Brown misses its target.#CL2#
Brittle drives through and clinches with Brown against the ropes.
And that is the end of the round. The fighters go back to their corners.
Frank Brown dominated that second round.
The minute break is over - no more time for sponges and pep talks - back to the action! This is the final round!#R3##CL2#
Brittle clinches.
Brown keeps the fight in the clinch, despite Brittle's efforts to push away.
Brown swings wildly with an uppercut but Brittle uses good head movement to avoid it. #BC2#
Brittle escapes the clinch and we're back to striking.
Brown looks to have improved his striking defense since last time we saw him fight.#CL#
Brown forces Brittle back against the ropes and clinches.
Brown is really dominating this fight. Is there anything that Brittle can do to turn this around?
Brittle tries to break the clinch but Brown is controlling the position.
Brittle wants to break free. God knows he wants to breaaaak freeee.
Frank Brown is fighting for a decision here - he's started to take the cautious approach.
Brown has Brittle pressed against the ropes, preventing Brittle from circling away and getting back to striking at range.
Brittle trying to control the position but instead, Brown has worked for underhooks and has pushed Brittle into the ropes.
Brittle tries to break the clinch but Brown is controlling the position.
We've had a slow start to the round here - hopefully the action picks up.
Brown has Brittle pressed against the ropes, preventing Brittle from circling away and getting back to striking at range.
Brittle wants to break the clinch but can't.
#T1##BC2#
Brittle's corner calls for him to break the clinch, which he does.
Brittle darts in trying to clinch
and Brown counters with a nice uppercut.
Brittle tries to close the distance and clinch but Brown swats him to one side with an open hand palm strike and circles away.
Brown misses with a straight right.
Brittle is looking to clinch but Brown is avoiding it.
Brown throwing a counter right hand but Brittle manages to avoid it.
Brittle tries to clinch
and Brown cracks him with a counter punch right on the button.
Brittle tries to grapple but his opponent circles
and Brown counters with a stiff right hand.
Brittle is looking to take this fight into the clinch.
Brittle doesn't manage to clinch there - Brown circles away.
A little feinted left hand from Brown on the counter but he doesn't commit to it.#CL2#
Brittle has Brown up against the ropes in a clinch.
#T2#
Brown keeps the fight in the clinch, despite Brittle's efforts to push away.
Good anti-grappling being displayed by Brown as Brittle tries to tie him up.
Brittle tries to break the clinch but Brown is controlling the position.
Brown keeps the fight in the clinch, despite Brittle's efforts to push away.
Brown doesn't land with the attempted body shot.
Boooooooooooooooooooo!!! God, this has been a terrible round. Come on you two, sort yourselves out!
Brittle is looking to break free of the clinch but Brown has double underhooks.
Brittle tries to break free but Brown pushes him back against the ropes.
Jack Brittle has stepped it up - he knows he needs a finish here!
Brittle is looking to score with knees to the body. Maybe he'll change it up and go body then head. Brown is defending well for now.
And that's the end of the fight!
Frank Brown showed his dominance in that final round.
Well Brown has outscored his opponent in every aspect of the fight today. Only a scarily incompetent judge or two will keep him from a well deserved win... Over to the ring announcer for the scorecards.
Ladies and gentlemen, after 3 rounds of action, we go to the scorecards for a decision.
Judge Shigeki Fujiwara scores the fight for Frank Brown!
Judge Sosuke Kotani scores the fight for Frank Brown!
Judge Shirou Masuda scores the fight for Frank Brown!
Frank Brown wins by unanimous decision!
An out of breath Frank Brown thanked his loyal fans in his post fight interview, giving them credit for his success over the course of his career. |
|
|
|
Event:
Summit Series - Grappling Rd 8
Date: Mar 03, 2024 |
This TWGC bout is 1 fifteen minute round in the light heavyweight division. Introducing today's competitors. In the red corner, competing out of Los Angeles, with a TWGC record of 2 wins and 5 losses; Tinashe Chukwuma! And in the blue corner, fighting out of Tokyo, with a TWGC record of 2 wins and 5 losses; Jack Brittle!
The judges for this bout are Yuuki Gou, Tatsuya Matsuyama and Taro Takaoka.
The official calls the fighters to the middle and the contest is under way.
Brittle wants to clinch.#TD#
Chukwuma fakes a strike and closes the distance, dragging Brittle to the ground. Chukwuma is now in Brittle's guard. Score +2 for takedown into guard / half guard: Chukwuma (2) vs (0) Brittle#SUB2#
Brittle working for a triangle but Chukwuma defends it easily.
Brittle looking to sweep here. No luck so far. #SUB2#
Brittle throwing his legs up looking for a triangle.
We've had a slow start to the round here - hopefully the action picks up.
Brittle keeping moving, preventing Chukwuma from controlling successfully.
Brittle wants to sweep here but Chukwuma controlling him for the moment. #T1#
Chukwuma controlling from the top position.
We get told so often about how wrestlers don't like to be on their backs. Let's see if Brittle can do anything to dispel that myth.
Chukwuma has controlled the position for a good 20 seconds, which will no doubt be starting to frustrate his opponent.#SUB#
Chukwuma drops back, looking for a kneebar! Brittle looks panicked! The fighters roll across the mat, one looking to finish, one looking to escape. Brittle looks to have wriggled free... Yes, he's got his leg free and he's dived into side control! Good work there from Brittle! Score +4 for clean sweep to past guard: Chukwuma (2) vs (4) Brittle
Chukwuma stops Brittle from passing to mount.
Brittle really doesn't want to stay on the ground with Chukwuma. If he can't get it back to his feet, it's only a matter of time before he'll be tapping out.
Chukwuma manages to get one leg in to regain half guard.
Brittle trying to control the action but Chukwuma is working from the bottom. #T2#
Chukwuma won't allow Brittle to pass to mount.
Chukwuma wants to improve his position but Brittle is controlling well.
The fighters are going at a pretty good pace and they're both starting to sweat now.
Chukwuma is controlling Brittle's trapped leg to prevent Brittle from advancing to side control.
Chukwuma wants to control but Brittle is keeping busy.
Chukwuma tries to get to full guard but Brittle has control of the leg.
Brittle wants to pass the guard but Chukwuma is defending well.
Chukwuma is looking for a sweep. Brittle is wise to his cunning plan and keeps the top position.
Chukwuma trying to control from the bottom.
Brittle passes to side control. Score +3 for passing guard: Chukwuma (2) vs (7) Brittle#T3#
Chukwuma manages to work his way to half guard, despite Brittle's best efforts.
Chukwuma is working for an escape here. He's hooked one of Brittle's legs and he's managed to sneak out and take Brittle's back! Score +4 for clean sweep to past guard: Chukwuma (6) vs (7) Brittle
The fighters are trapped in the ropes so we're going to have a reposition here. The ref calls for a break and repositions the fighters in the center of the ring.
Brittle prevents Chukwuma from getting a body triangle.
Chukwuma keeps control of the position as Brittle tries to break free.
The fighters are tangled up in the ropes here. We might need a restart if the fighters can't break free themselves.#SUB#
Chukwuma is persistently looking for the submission but Brittle is defending it well.
#SUB#
Chukwuma looking to break Brittle's wrist control so he can sink in the choke. Brittle remaining controlled and patient though - he really has to keep calm otherwise Chukwuma will wrap this one up with the rear naked choke!#SUB#
Brittle is staying cool under pressure, defending well against the rear naked choke attempt from his opponent.
Brittle tries to break free.
#T4#
Brittle is persisting with the attempt to improve his position.#SUB#
Chukwuma is remaining active here, looking for the choke. The more discerning members of the crowd will appreciate his efforts.
Brittle is trying to break free.
Chukwuma tries to keep control of the position but Brittle is staying busy.#SUB#
Chukwuma working for a choke but Brittle is defending well.
Brittle tries to roll but Chukwuma sticks to his back.
#SUB#
Chukwuma looking to break Brittle's wrist control so he can sink in the choke. Brittle remaining controlled and patient though - he really has to keep calm otherwise Chukwuma will wrap this one up with the rear naked choke!#T5#
I really don't envy Brittle right now.
#SUB#
Brittle is trying to defend against the choke here but Chukwuma has an arm under his chin. This one might not last much longer. Chukwuma Tightens the hold and Brittle taps out furiously! Chukwuma displays superior BJJ to win the fight.
Ladies and gentlemen, after 5:25 of round 1, we have a winner by way of Submission (RNC). Tinashe Chukwuma! |
|
|
|
Event:
Summit Series - Grappling Rd 7
Date: Feb 25, 2024 |
This TWGC bout is 1 fifteen minute round in the light heavyweight division. Introducing today's competitors. In the red corner, competing out of Tokyo, with a TWGC record of 1 wins and 5 losses; Jack Brittle! And in the blue corner, fighting out of Sydney, with a TWGC record of 3 wins and 3 losses; Michel Robillard!
The judges for this bout are Hirohito Nitta, Shirou Masuda and Shigeki Fujiwara.
The fighters bow as they face eachother in the middle of the mat and we are under way.#CL#
Brittle drives through and clinches with Robillard against the ropes.
Robillard tries for a takedown but Brittle manages to get underhooks.
#TD#
Brittle has managed to pull guard. Let's see whether he can work an aggressive guard. It will also be interesting to see what tactics Robillard uses from the top position.
Robillard postures up.
Brittle has a closed guard, preventing anything of note from happening. Perhaps he's looking to stall.
Brittle is trying to control the position but Robillard postures up.
Brittle looking for a sweep. Not yet Brittle, not yet.
There's a bit of a scramble here and now Brittle is on top in guard.
Score +2 for sweep to guard / half guard: Brittle (2) vs (0) Robillard
The fighters are tangled up in the ropes here. We might need a restart if the fighters can't break free themselves.
Brittle advances to half guard.
We've had a slow start to the round here - hopefully the action picks up.
Brittle wants to pass to mount but Robillard is defending the position.
Robillard really doesn't want to stay on the ground with Brittle. If he can't get it back to his feet, it's only a matter of time before he'll be tapping out.#T1##SUB#
Brittle is working for submissions here but there's nothing on.
Brittle passes to full mount! Score +3 for passing guard: Brittle (5) vs (0) Robillard#SUB#
Brittle is going oldschool here, as he tries to force Robillard to tap using a forearm choke. This isn't 1993 though, so Robillard shrugs it off.
Brittle wants to take Robillard's back but he can't do it this time. #SUB#
Brittle wants to finish this one by submission but Robillard is holding onto his waist, trying to prevent any attacks from Brittle. #SUB#
Brittle with some aggressive grappling here. He's looking for submissions here, rather than waiting for the opportunity to counter.
Brittle fails to move to back control. #T2##SUB#
Brittle is going oldschool here, as he tries to force Robillard to tap using a forearm choke. This isn't 1993 though, so Robillard shrugs it off.
Brittle forces the positional change into back control. Score +3 for taking back: Brittle (8) vs (0) Robillard#SUB#
Brittle patiently working for the choke. Which fighter will keep their nerve here?
Brittle is hanging on to Robillard's back as he tries to escape.
#SUB#
Robillard defends a rear naked choke attempt by controlling one of Brittle's arms. #SUB#
Brittle patiently working for the choke. Which fighter will keep their nerve here?#T3#
The crowd hopeful of a finish here - Brittle's supporters are on their feet, screaming for him to go for the rear naked choke.
#SUB#
Robillard defending nicely against the rear naked choke attempt.
Brittle has the hooks in. Robillard is trying to push off one leg but he has to do so cautiously to avoid being submitted. #SUB#
Robillard is displaying good submission defense - not really looking in danger of submitting to the rear naked choke at the moment. That could change in an instant of course if Brittle gets his way!
#SUB#
Brittle is staying calm and holding on to the back position, whilst working on a rear naked choke. Robillard is defending well though. Brittle let's go of the attempt for now.
Robillard trying to control the action but Brittle just sinks the hooks in. #T4##SUB#
Brittle looking for the choke from the back.
Brittle trying to control momentarily.
The fighters are trapped in the ropes so we're going to have a reposition here. The ref calls for a break and repositions the fighters in the center of the ring.#SUB#
Brittle is remaining active here, looking for the choke. The more discerning members of the crowd will appreciate his efforts.
#SUB#
Brittle is looking for the choke from the back position but Robillard is controlling his hands well. #SUB#
Brittle looking for the RNC. #SUB#
Brittle is working really hard to secure the rear naked choke. Robillard defends successfully for a significant amount of time. Both fighters are looking very determined. #SUB#
Brittle patiently working for the choke. Which fighter will keep their nerve here?#T5##SUB#
Brittle is working for the rear naked choke. He has one arm under the chin but Robillard has hold of the other arm. A bit of a stalemate here. #SUB#
Brittle is looking to finish the fight by rear naked choke. Robillard knows exactly what he's got planned though, so he's defending well. Maybe a few strikes would soften Robillard for a finish. #SUB#
Robillard is displaying good submission defense - not really looking in danger of submitting to the rear naked choke at the moment. That could change in an instant of course if Brittle gets his way!
#SUB#
Brittle looking to break Robillard's wrist control so he can sink in the choke. Robillard remaining controlled and patient though - he really has to keep calm otherwise Brittle will wrap this one up with the rear naked choke!#SUB#
Brittle has his opponent's back and is working for the choke. #T6##SUB#
Brittle is looking to finish the fight by rear naked choke. Robillard knows exactly what he's got planned though, so he's defending well. Maybe a few strikes would soften Robillard for a finish.
Brittle avoiding Robillard 's attempts to control his hands. #SUB#
Brittle is looking to finish the fight by rear naked choke. Robillard knows exactly what he's got planned though, so he's defending well. Maybe a few strikes would soften Robillard for a finish. #SUB#
Brittle working for the choke.
Robillard tries to roll but Brittle sticks to his back.
#T7#
Robillard prevents Brittle from getting a body triangle.#SUB#
Robillard is displaying good submission defense - not really looking in danger of submitting to the rear naked choke at the moment. That could change in an instant of course if Brittle gets his way!
Brittle is hanging on to Robillard's back as he tries to escape.
#SUB#
Brittle looking to break Robillard's wrist control so he can sink in the choke. Robillard remaining controlled and patient though - he really has to keep calm otherwise Brittle will wrap this one up with the rear naked choke!#SUB#
Brittle is working really hard to secure the rear naked choke. Robillard defends successfully for a significant amount of time. Both fighters are looking very determined.
Brittle trying to control momentarily.
Brittle not allowing Robillard to control his hands. #T8##SUB#
Brittle is looking for the choke from the back position but Robillard is controlling his hands well.
Robillard trying to control the hands but Brittle breaks the grip. #SUB#
Brittle is persistently looking for the submission but Robillard is defending it well.
#SUB#
Robillard preventing the rear naked choke attempt from Brittle. #SUB#
Brittle patiently working for the choke. Which fighter will keep their nerve here?
Robillard is in bad spot here.
#SUB#
Brittle working for a RNC but it's not happening just yet. #T9##SUB#
Robillard fending off the submission attempt from Brittle. #SUB#
Robillard is displaying good submission defense - not really looking in danger of submitting to the rear naked choke at the moment. That could change in an instant of course if Brittle gets his way!
#SUB#
Brittle patiently working for the choke. Which fighter will keep their nerve here?#SUB#
Brittle patiently working for the choke. Which fighter will keep their nerve here?#SUB#
Brittle looking for the choke from the back. #SUB#
Robillard is staying cool under pressure, defending well against the rear naked choke attempt from his opponent.
#T10##SUB#
Robillard is displaying good submission defense - not really looking in danger of submitting to the rear naked choke at the moment. That could change in an instant of course if Brittle gets his way!
Robillard just trying to survive but Brittle is wriggling into a better position, looking to finish. #SUB#
Robillard fending off the submission attempt from Brittle.
Brittle tries to keep control of the position but Robillard is staying busy.#T11##SUB#
Robillard fending off the submission attempt from Brittle. #SUB#
Brittle is looking to finish the fight by rear naked choke. Robillard knows exactly what he's got planned though, so he's defending well. Maybe a few strikes would soften Robillard for a finish. #SUB#
Robillard is displaying good submission defense - not really looking in danger of submitting to the rear naked choke at the moment. That could change in an instant of course if Brittle gets his way!
#SUB#
Robillard fending off the submission attempt from Brittle. #SUB#
Brittle is persistently looking for the submission but Robillard is defending it well.
#T12##SUB#
Robillard defends a rear naked choke attempt by controlling one of Brittle's arms.
Brittle controls the action.#SUB#
Brittle is working for the rear naked choke. He has one arm under the chin but Robillard has hold of the other arm. A bit of a stalemate here.
Robillard tries to break free.
#T13##SUB#
Brittle is remaining active here, looking for the choke. The more discerning members of the crowd will appreciate his efforts.
You can see the frustration on Robillard's face� He knows he is in trouble unless he improves his position sooner rather than later.
#SUB#
Brittle is persistently looking for the submission but Robillard is defending it well.
#SUB#
Brittle has his opponent's back and is working for the choke. #SUB#
Brittle has his opponent's back and is working for the choke.
Robillard trying to control but he's just got himself in more trouble. #T14##SUB#
Brittle working for a choke but Robillard is defending well. #SUB#
Brittle working for a choke but Robillard is defending well. #SUB#
Brittle has his opponent's back and is working for the choke.
Boooooooooooooooooooo!!! God, this has been a terrible round. Come on you two, sort yourselves out!#SUB#
Robillard defending nicely against the rear naked choke attempt.
And that's the end of the fight!
Brittle takes the fight on points by 8 to 0. |
|
|
|
Event:
Summit Series - Grappling Rd 6
Date: Feb 18, 2024 |
This TWGC bout is 1 fifteen minute round in the light heavyweight division. Introducing today's competitors. In the red corner, competing out of London, with a TWGC record of 5 wins and 0 losses; Lysander Birdwhistle! And in the blue corner, fighting out of Tokyo, with a TWGC record of 1 wins and 4 losses; Jack Brittle!
The judges for this bout are Shirou Masuda, Taro Takaoka and Kenichi Hosakawa.
The fighters bow as they face eachother in the middle of the mat and we are under way.#CL2#
Brittle instigates a clinch.
Birdwhistle definitely looks more muscular than last time we saw him fight.
Birdwhistle tries for a takedown. No joy.
Birdwhistle is working for takedown but Brittle is calmly controlling the position for now.
Birdwhistle is looking for a takedown up against the ropes. Brittle gets underhooks though and prevents the takedown attempt.
That's three failed takedown attempts in the round for Lysander Birdwhistle. That's going to take a lot out of him.
Brittle tries to pull guard but Birdwhistle holds him up against the ropes and eventually Brittle drops back down to his feet.
#TD2#
Brittle successfully pulls guard.
#SUB2#
Brittle throwing his legs up looking for a triangle.
#SUB#
Birdwhistle drops back for a leg here. A bit of a high risk move... He's looking for a kneebar by the looks of things. Now both of them are looking for submissions. Birdwhistle seems to have locked his on tight now - Brittle screams in pain and taps out furiously! It certainly was a high risk move but it's paid off for Birdwhistle, as he picks up the win!
Ladies and gentlemen, after 0:40 of round 1, we have a winner by way of Submission (Kneebar). Lysander Birdwhistle!
A victorious Lysander Birdwhistle thanked his army of followers in his post fight interview, telling people to make sure they follow him on Twitter. |
|
|
|
Event:
Summit Series - Grappling Rd 5
Date: Feb 11, 2024 |
This TWGC bout is 1 fifteen minute round in the light heavyweight division. Introducing today's competitors. In the red corner, competing out of Tokyo, with a TWGC record of 1 wins and 3 losses; Jack Brittle! And in the blue corner, fighting out of Las Vegas, with a TWGC record of 4 wins and 0 losses; Jone White!
The judges for this bout are Taro Takaoka, Sosuke Kotani and Yukihiro Shimada.
The official calls the fighters to the middle and the contest is under way.#CL2#
White takes the fight into the clinch. #TD#
Brittle jumps guard and drags White to the mat. He's obviously going to be looking for submissions off his back. #SUB2#
White drops back looking for a leg! Brittle is in trouble here! The fighters roll with the hold and Brittle manages to kick White off! White jumps back into Brittle's guard.
White seems content to control from guard here. He's going to have to remain active though if he doesn't want to get stood back up. #SUB2#
White drops back for a leg! It's a sloppy attempt though and White jumps back into guard quickly, to retain the dominant position.
White's corner is telling him to maintain position.
Brittle looking for a sweep. Not yet Brittle, not yet.
We've had a slow start to the round here - hopefully the action picks up.
White sitting in guard, not really doing much.
Brittle not looking particularly offensive just at the moment.
#SUB#
Brittle looking for submissions off his back, moving his hips, looking for an opening.
Brittle trying to keep a closed guard but White is proving a slippery customer.
#T1#
White stays in close to Brittle's body and controls the position.
White trying to control but Brittle is working from the bottom. #SUB#
Brittle had isolated an arm as going for a kimura. White defends it easily.
The fighters are trapped in the ropes so we're going to have a reposition here. The ref calls for a break and repositions the fighters in the center of the ring.
White stays in close to Brittle's body and controls the position.
White trying to control but Brittle is working from the bottom.
Brittle being controlled here, momentarily.
Brittle looking to sweep here. No luck so far.
Brittle keeping moving, preventing White from controlling successfully. #T2#
Brittle looking to sweep here. No luck so far.
Brittle being controlled here, momentarily.
White won't allow Brittle to sweep him here. #SUB#
Brittle had isolated an arm as going for a kimura. White defends it easily.
Brittle tries to land a sweep but no joy. #SUB2#
White drops back for a leg! It's a sloppy attempt though and White jumps back into guard quickly, to retain the dominant position.
Brittle looking to sweep here. No luck so far. #SUB2#
White drops back looking for a leg! Brittle is in trouble here! The fighters roll with the hold and Brittle manages to kick White off! White jumps back into Brittle's guard. #T3#
White preventing the sweep.
Brittle knows he needs to get back to his feet asap. He's simply no match for White on the ground.
White slows down the pace of the fight for a moment. He'll need to remain active if he doesn't want to see the fight stood back up.
Brittle keeping moving, preventing White from controlling successfully. #SUB2#
White drops back for a leg! It's a sloppy attempt though and White jumps back into guard quickly, to retain the dominant position.
White trying to control the position from guard on top but Brittle is wriggling around, looking for whatever he can. #SUB#
Brittle has a loose triangle. He'll be looking to tighten that up but White can see exactly what he's planning and manages to posture up and free himself.
White won't allow Brittle to sweep him here. #SUB2#
White drops back looking for a leg! Brittle is in trouble here! The fighters roll with the hold and Brittle manages to kick White off! White jumps back into Brittle's guard.
Brittle on his back here. We all know that wrestlers don't like being on their back so let's see if Brittle tries to get out of the position.#SUB#
White avoids a guillotine attempt easily.
#T4#
White is pushing down on Brittle's leg trying to pass to half guard. Brittle is fighting to maintain full guard but White has managed to sneak the leg through.#SUB2#
White is looking for a kimura but he's never going to get it from there.
Brittle is looking to control White's leg but it's slowly edging free. Can Brittle avoid being mounted?#SUB2#
White is working for a submission of some sort.
White seems very keen to just sit and control from half guard but Brittle does not like that idea so much and is remaining active off his back.
Brittle is looking to improve his position.
White is figuring out what he wants to do next.
White is trying to control. Brittle wants to improve his position but can't escape this time. #T5#
White is in a good position here but he's just trying to control... And he's not even managing to do that successfully.
Brittle might be looking to lock onto one of his opponent's long limbs for a submission, whilst we're on the ground.
Brittle is looking to improve his position.
#SUB2#
White is sneakily working for an arm triangle but Brittle sees it coming and defends easily.#SUB2#
White is trying for a guillotine from the top but the pressure isn't in the right place so Brittle is just riding it out for now. White eventually gives up the hold.
White with a momentary lay and pray from half guard.
White trying to control the action but Brittle is working from the bottom.
Brittle wants to improve his position but White is controlling well.
Brittle is staying active underneath White, who seems content to just control the action from this position. #T6#
Brittle is looking to regain full guard. Not this time though.
White slows the pace down in half guard.
White works his foot free and advances to mount. Score +3 for passing guard: Brittle (0) vs (3) White
White wants to control the pace but Brittle is squirming around nicely. #SUB2#
White throws some shoulder strikes here and then postures up. Oh, he's gone for an armbar! Brittle has his hands clasped together but White breaks the hold and Brittle is forced to tap! This one is aaaaaaaaaaall over! That was lightning fast by White!
Ladies and gentlemen, after 6:54 of round 1, we have a winner by way of Submission (Armbar). Jone White! |
|
|
|
Event:
Summit Series - Grappling Rd 4
Date: Feb 04, 2024 |
This TWGC bout is 1 fifteen minute round in the light heavyweight division. Introducing today's competitors. In the red corner, competing out of Tokyo, with a TWGC record of 1 wins and 2 losses; Jack Brittle! And in the blue corner, fighting out of New York, with a TWGC record of 2 wins and 1 losses; Hung Young Wang!
The judges for this bout are Yuuki Gou, Taro Takaoka and Shirou Masuda.
The fighters bow as they face eachother in the middle of the mat and we are under way.#CL2#
Wang rushes Brittle and presses him up against the ropes.#TD2#
Wang has managed to pull guard. Let's see whether he can work an aggressive guard. It will also be interesting to see what tactics Brittle uses from the top position.
Brittle stands up and looks to throw the legs aside to pass to side control. Wang swivels though and keeps the full guard.
Wang looks more muscular than last time we saw him. He must have been on the weights.#SUB2#
Brittle sitting in guard doing not very much at all here. Wang doesn't need a second invitation though! He's locked up a guillotine and he's squeezing tight! That is tiiiiiiiiight! Brittle paying the price for stalling here - he's pushing hard on the arm trying to free himself but it's no use! He's tapped! WOW, quick submission from Wang - great work!
Ladies and gentlemen, after 0:26 of round 1, we have a winner by way of Submission (Guillotine). Hung Young Wang! |
|
|
|
Event:
Summit Series - Grappling Rd 3
Date: Jan 28, 2024 |
This TWGC bout is 1 fifteen minute round in the light heavyweight division. Introducing today's competitors. In the red corner, competing out of Los Angeles, with a TWGC record of 1 wins and 1 losses; Summit Panda! And in the blue corner, fighting out of Tokyo, with a TWGC record of 1 wins and 1 losses; Jack Brittle!
The judges for this bout are Shigeki Fujiwara, Kenichi Hosakawa and Tatsuya Matsuyama.
The fighters connect hands in the middle of the mat and we are under way.#TD#
Panda shoots in looking for a single leg takedown. Brittle is trying to defend but Panda finishes it well and ends up in half guard. Let's see if he can advance position further. Score +2 for takedown into guard / half guard: Panda (2) vs (0) Brittle
Brittle tries to roll over but Panda keeps him under control.
Brittle slips a foot under and gets full guard. Nice work.
Brittle looking for a sweep. Not yet Brittle, not yet.
We've had a slow start to the round here - hopefully the action picks up.
Panda pressing down on his opponent's thigh, looking to pass guard. Brittle is keeping the position for now.
Brittle really doesn't want to stay on the ground with Panda. If he can't get it back to his feet, it's only a matter of time before he'll be tapping out.#SUB2#
Brittle working away from the bottom but not quite defensive enough there because Panda has passed into half guard!
Panda prevents Brittle from improving his position.#T1#
Panda is looking to take a break and control but Brittle is keeping him honest, looking to work from the bottom.
Brittle is looking for a sweep. Panda is wise to his cunning plan and keeps the top position.
The fighters are tangled up in the ropes here. We might need a restart if the fighters can't break free themselves.#SUB#
Panda is trying to work for a kimura. This could be trouble! No, Brittle has managed to free his arm - good work.
Brittle slips a foot under and gets full guard. Nice work.
Brittle wants to sweep here but Panda controlling him for the moment.
Panda trying to control but Brittle is working from the bottom.
Panda might be looking to lock onto one of his opponent's long limbs for a submission, whilst we're on the ground.#T2#
Brittle tries to land a sweep but no joy. #SUB#
Panda thinks about going for a leg but decides against it, in order to maintain the position.
Brittle looking to sweep using the butterfly guard but Panda puts pay to that idea as he passes nicely into half guard.
Brittle tries to get to full guard but Panda has control of the leg.
Brittle is not content to let Panda control the position.
Brittle moves his hips nicely and gets into full guard.#SUB2#
Brittle working for submissions but it's allowed Panda to get to half guard.
The fighters are battling for position here. Brittle manages to regain full guard. Nice work. #T3#
Brittle can't keep his opponent in guard - Panda advances to half guard, no doubt looking to mount.
Brittle is looking to improve his position.
Brittle gets back to full guard.
Panda wants to control from the top but Brittle keeps moving.
Panda won't allow Brittle to sweep him here.
The fighters are trapped in the ropes so we're going to have a reposition here. The ref calls for a break and repositions the fighters in the center of the ring.#SUB2#
Brittle escapes his hips to the side and looks to be working for an armbar. Panda gives him a little smile and shakes his head. No chance.
Brittle wants to improve his position but instead Panda has moved into half guard.
#T4##SUB#
Panda is trying to work for a kimura but Brittle is defending well.
The fighters are battling for position here. Brittle manages to regain full guard. Nice work.
Panda preventing the sweep.
Brittle keeping moving, preventing Panda from controlling successfully. #SUB2#
Brittle working from the bottom, still in full guard. He's managed to get a loose triangle. Panda doesn't seem to be doing much to defend here, obviously he feels comfortable in the position. Panda manages to throw the legs off his shoulder and he's back into guard - no problem.
Panda wants to control from the top but Brittle keeps moving. #T5##SUB#
Panda drops back looking for a leg! Brittle is in trouble here! The fighters roll with the hold and Brittle manages to kick Panda off! Panda jumps back into Brittle's guard.
Panda looking to sit in guard and control but Brittle gets the butterfly guard and sweeps. He's now in the guard on the top. Score +2 for sweep to guard / half guard: Panda (2) vs (2) Brittle
Brittle trying to pass the guard. He's being very persistent here but Panda manages to land a sweep and now he's on top! Score +2 for sweep to guard / half guard: Panda (4) vs (2) Brittle
Panda preventing the sweep. #SUB#
Panda is holding a leg here, probably looking for an ankle lock - he drops back and goes for it! Brittle is in trouble! Is it all over??? No! Brittle has escaped and now he's on top! Score +2 for sweep to guard / half guard: Panda (4) vs (4) Brittle
Brittle trying to pass the guard but can't manage it just yet. #T6#
Brittle passes Panda's right leg, so he's now in half guard. #SUB2#
Brittle seems to be working for a kimura but Panda defends the submission attempt.
Brittle seems very keen to just sit and control from half guard but Panda does not like that idea so much and is remaining active off his back.
Panda slips a foot under and gets full guard. Nice work.
Brittle trying to pass the guard but can't manage it just yet.
Brittle postures up.
Panda keeping moving, preventing Brittle from controlling successfully.
Brittle pressing down on his opponent's thigh, looking to pass guard. Panda is keeping the position for now. #T7#
Panda keeping moving, preventing Brittle from controlling successfully.
Panda is working from a closed guard but he's struggling to control his opponent.
Brittle trying to control the position from guard on top but Panda is wriggling around, looking for whatever he can.
Brittle advances to half guard.
Brittle tries to pass to full mount but Panda defends it.
Panda slips a foot under and gets full guard. Nice work.
Brittle preventing the sweep.
Brittle must be cautious of submissions here, given that his opponent has the superior Jiu Jitsu.#T8##SUB2#
Brittle drops back looking for a heel hook - he quickly realises he's not going to get it but Panda manages to dive on top of him before he can escape and now Brittle has Panda in his guard. Score +2 for sweep to guard / half guard: Panda (6) vs (4) Brittle#SUB#
Panda is trying to work a guillotine from the top, or something like that? Don't know how he thinks he's going to get a finish from there.
Brittle wants to improve his position but instead Panda has moved into half guard.
#SUB#
Brittle is defending against the submission attempts here by Panda.
Brittle wants to improve his position but Panda is controlling well.
#T9#
Panda moves into full mount! Brittle won't be happy about that! Score +3 for passing guard: Panda (9) vs (4) Brittle
Brittle is in all sorts of trouble here.
Panda manages to capitalize on a mistake by Brittle to take his back! Score +3 for taking back: Panda (12) vs (4) Brittle
Brittle is trying to break free.
Brittle manages to reverse the position and now he's in Panda's guard. Nice work there by Brittle.
Score +2 for sweep to guard / half guard: Panda (12) vs (6) Brittle
Brittle looking to control the position here, rather than advance.
Panda on his back here. We all know that wrestlers don't like being on their back so let's see if Panda tries to get out of the position.
Panda is trying to control the position but Brittle postures up. #T10#
Brittle trying to control the position from guard on top but Panda is wriggling around, looking for whatever he can.
Panda lands a beautiful sweep and he's now moved into his opponent's guard. Score +2 for sweep to guard / half guard: Panda (14) vs (6) Brittle
Panda stopping the sweep attempt from Brittle.
Panda works a leg free and moves into half guard.
Panda prevents Brittle from improving his position.
Panda frees up his trapped foot and advances to mount. Score +3 for passing guard: Panda (17) vs (6) Brittle
Brittle is trying to escape the mount.
#T11#
Brittle bucks up and manages to get a nice reversal! He's in guard on the top - nicely done! Score +2 for sweep to guard / half guard: Panda (17) vs (8) Brittle
Panda keeping full guard, as Brittle tries to pass.
Panda wants to sweep here but Brittle controlling him for the moment.
Brittle stands up and looks to throw the legs aside to pass to side control. Panda swivels though and keeps the full guard.
Brittle keeps trying to improve his position.
Panda is trying to keep Brittle in close.
Brittle advances to half guard. #T12#
Panda regains full guard. Nicely done.
Brittle trying to control but Panda is working from the bottom.
Brittle looking to pass the guard. #SUB2#
Brittle is holding a leg here, probably looking for an ankle lock - he drops back and goes for it! Panda is in trouble! Is it all over??? No! Panda has escaped and now he's on top! Score +2 for sweep to guard / half guard: Panda (19) vs (8) Brittle
Panda trying to control but Brittle is working from the bottom.
Brittle tries to land a sweep but no joy.
Brittle not looking particularly offensive just at the moment.
#T13##SUB2#
Panda got a little sloppy there for a moment and Brittle has worked his way into a loose triangle - can he finish it?! No, Panda has managed to get both his arms back between Brittle's legs - danger averted.
Brittle wants to sweep but no luck. #SUB2#
Brittle has an active guard here but Panda has managed to pass into half guard.
Brittle looks winded!
Brittle is looking to improve his position.
Panda trying to control from half guard but Brittle is working away.
Brittle regains full guard. Nicely done. #T14#
Panda trying to control but Brittle is working from the bottom.
Panda pushes down on Brittle's leg and manages to get into half guard.
Brittle is looking to regain full guard. Not this time though. #SUB#
Brittle is looking to regain full guard. He's left an arm up in the air though and Panda has latched onto it... Big trouble! Panda pivots for an armbar - it's in tight and it Brittle is tapping in no time flat! Great counter grappling there from Panda!
Ladies and gentlemen, after 14:56 of round 1, we have a winner by way of Submission (Armbar). Summit Panda! |
|
|
|
Event:
Summit Series - Grappling Rd 2
Date: Jan 21, 2024 |
This TWGC bout is 1 fifteen minute round in the light heavyweight division. Introducing today's competitors. In the red corner, competing out of Tokyo, with a TWGC record of 0 wins and 1 losses; Jack Brittle! And in the blue corner, fighting out of Los Angeles, with a TWGC record of 0 wins and 1 losses; Young Blood!
The judges for this bout are Shirou Masuda, Tatsuya Matsuyama and Shigeki Sano.
Let's get this grappling contest under way! Who will be victorious?
Brittle tries to shoot in for a takedown. He's got hold of a leg but Blood swivels and escapes.
Blood drops down looking to force a counter takedown but Brittle defends it well.
Brittle shoots in looking for a double leg takedown. Blood defends it nicely.
And Blood tries to counter it with a takedown but Brittle pushes his down on his head and steps out.
Brittle shoots in for a takedown. He's persisting with it as Blood sprawls well. Blood wins this battle and keeps the fight standing. Brittle gets slowly back to his feet.
That's three failed takedown attempts in the round for Jack Brittle. That's going to take a lot out of him.
We've had a slow start to the round here - hopefully the action picks up.
Brittle shoots in for a takedown - he's clinched up with Blood but Blood pushes him off and we're back to square one.
Blood drops down looking to force a counter takedown but Brittle defends it well.#T1##CL#
Brittle has closed the distance and engaged Blood in a clinch.
#TD#
Brittle pulls guard.
Brittle keeping full guard, as Blood tries to pass.
Blood trying to control but Brittle is working from the bottom.
There's a bit of a scramble here and now Brittle is on top in guard.
Score +2 for sweep to guard / half guard: Brittle (2) vs (0) Blood
Brittle pressing down on his opponent's thigh, looking to pass guard. Blood is keeping the position for now. #T2#
Brittle trying to control the position from guard on top but Blood is wriggling around, looking for whatever he can.
Blood is trying to control the position from the bottom.
Blood is in a good position here but he's just trying to control... And he's not even managing to do that successfully.
Brittle advances to half guard.
Brittle prevents Blood from improving his position.
Brittle is thwarting Blood's attempts to control the position.#SUB#
Brittle wants to work for an arm triangle but Blood is really keeping half guard well and defending the submission attempt.
Brittle wants to lay and pray for a moment but Blood keeps working. #T3#
Brittle is thwarting Blood's attempts to control the position.#SUB#
Brittle is looking for a kimura but he's never going to get it from there.
Blood tries to roll over but Brittle keeps him under control.
Blood moves into full guard.
Blood keeping full guard, as Brittle tries to pass.
Brittle trying to control the position from guard on top but Blood is wriggling around, looking for whatever he can. #T4#
Brittle wants to pass the guard but Blood is keeping the position.
Blood wants to sweep here but Brittle controlling him for the moment. #SUB#
Brittle drops back looking for a leg! Blood is in trouble here! The fighters roll with the hold and Blood manages to kick Brittle off! Brittle jumps back into Blood's guard.
Blood looking to hit a scissor sweep but Brittle is one step ahead there.
Brittle trying to pass the guard but can't manage it just yet.
Blood not looking particularly offensive just at the moment.
Blood keeping moving, preventing Brittle from controlling successfully. #T5##SUB#
Brittle drops back for a leg but he's not going to get it - he lets go and Blood dives on top into guard. Score +2 for sweep to guard / half guard: Brittle (2) vs (2) Blood
Blood wants to control from the top but Brittle keeps moving.
Blood won't allow Brittle to sweep him here.
Blood trying to control the position from guard on top but Brittle is wriggling around, looking for whatever he can.
Brittle manages to sweep nicely, so he's now on top. Blood manages to get himself to full guard.
Score +2 for sweep to guard / half guard: Brittle (4) vs (2) Blood
Brittle sneaks a leg through and gets to half guard. That was like a knife through butter how easily he passed Blood's guard.
Brittle is pressing down on Blood's thigh, looking to free his foot. Blood is holding on for now. #SUB#
Brittle is trying to work for a kimura but Blood is defending well.
Brittle wants to free his trapped foot but Blood is holding on for dear life with his legs. #T6#
Blood is looking to improve his position.
Brittle performing his best blanket impression for a moment.
Blood has a hand on Brittle's thigh, trying to get back to full guard. Brittle takes advantage of the position though and mounts him! Score +3 for passing guard: Brittle (7) vs (2) Blood#SUB#
Brittle with some aggressive grappling here. He's looking for submissions here, rather than waiting for the opportunity to counter.
Blood tries to reverse the position but Brittle maintains control.
Brittle pushing the pace here, looking to move to his opponents back and work for a finish.
Blood tries to reverse the position but Brittle maintains control.#T7#
Brittle wants to take his opponent's back but he's not managed it. #SUB#
Brittle jumps to the side looking to secure the arm triangle�. Ooooh, that looks tight� Blood is gargling but he's managed to escape! Nice work there by Blood and Brittle has given up the dominant position trying to land that submission.
#SUB#
Brittle thinks about going for a far side armbar but bails out and retains the dominant position instead. #SUB#
Brittle is trying to get an arm triangle but Blood is defending well.
Brittle tries to advance position but instead Blood slips a leg back in to half guard.
Blood is refusing to be controlled, as Brittle sits in half guard. #T8#
Blood is pressing down on Brittle's left leg trying to get back to full guard. He's managed it.
Blood keeping moving, preventing Brittle from controlling successfully.
Brittle looking to pass the guard.
Brittle trying to control the position from guard on top but Blood is wriggling around, looking for whatever he can.
Blood is trying to control the position but Brittle postures up.
Brittle trying to control the position from guard on top but Blood is wriggling around, looking for whatever he can.
Brittle won't allow Blood to sweep him here. #SUB#
Brittle thinks about going for a leg but decides against it, in order to maintain the position.
Blood trying to keep a closed guard but Brittle is proving a slippery customer.
#T9##SUB#
Brittle is trying to work a guillotine from the top, or something like that? Don't know how he thinks he's going to get a finish from there.
Brittle engaging in some classic timewasting tactics.
The fighters are tangled up in the ropes here. We might need a restart if the fighters can't break free themselves.
Brittle trying to pass the guard but can't manage it just yet.
Brittle wants to control from the top but Blood keeps moving.
Brittle stopping the sweep attempt from Blood.
Blood trying to control the position.
#T10#
Blood keeping full guard, as Brittle tries to pass.
Blood tries to land a sweep but no joy.
Brittle wants to control from the top but Blood keeps moving.
Brittle tries to free his leg and advance position but Blood is retaining full guard.
Blood is working from a closed guard but he's struggling to control his opponent.
Blood manages to sweep nicely, so he's now on top. Brittle manages to get himself to full guard.
Score +2 for sweep to guard / half guard: Brittle (7) vs (4) Blood#SUB#
Brittle has his foot on Blood's thigh. He's trying to push off and get in position for a triangle, I think. Blood works his way back into a safe position though.
Blood passes into half guard.
Brittle is not content to let Blood control the position.#T11#
Brittle gets back to full guard.
Blood wants to control from the top but Brittle keeps moving.
Brittle controlling Blood's posture. #SUB#
Brittle escapes his hips to the side and looks to be working for an armbar. Blood gives him a little smile and shakes his head. No chance.
Blood trying to control but Brittle is working from the bottom. #SUB#
Brittle has his foot on Blood's thigh. He's trying to push off and get in position for a triangle, I think. Blood works his way back into a safe position though.
Blood trying to control but Brittle is working from the bottom. #T12#
Brittle is trying to control the position but Blood postures up.
Blood wants to control from the top but Brittle keeps moving. #SUB#
Brittle is looking for a triangle but Blood pushes his legs off easily.
Blood tries to free his leg and advance position but Brittle is retaining full guard.
Brittle has his hands on Blood's head, controlling the position.
Brittle tries to land a sweep but no joy.
Blood pushes down on Brittle's leg and manages to get into half guard.
Blood seems very keen to just sit and control from half guard but Brittle does not like that idea so much and is remaining active off his back.
The fighters are trapped in the ropes so we're going to have a reposition here. The ref calls for a break and repositions the fighters in the center of the ring.
Brittle regains full guard. Nicely done. #T13#
Blood is stalling in the full guard.
Blood wants to control from the top but Brittle keeps moving.
Brittle wants to sweep but no luck. #SUB#
Brittle looking for submissions from the bottom here. Moving his hips around, possibly looking for an armbar.
Blood trying to pass the guard but can't manage it just yet.
Brittle on his back here. We all know that wrestlers don't like being on their back so let's see if Brittle tries to get out of the position.#SUB#
Brittle throwing his legs up looking for a triangle.
Brittle wants to sweep but no luck.
Blood pressing down on his opponent's thigh, looking to pass guard. Brittle is keeping the position for now.
Blood wants to control from the top but Brittle keeps moving. #T14#
Brittle looking to sweep here. No luck so far.
Brittle keeping moving, preventing Blood from controlling successfully.
Blood stopping the sweep attempt from Brittle.
Brittle keeping full guard, as Blood tries to pass.
Brittle looking to control.
Brittle tries to land a sweep but no joy. #SUB#
Brittle escapes his hips to the side and looks to be working for an armbar. Blood gives him a little smile and shakes his head. No chance.
Brittle keeping moving, preventing Blood from controlling successfully.
Boooooooooooooooooooo!!! God, this has been a terrible round. Come on you two, sort yourselves out!
Brittle is working the butterfly guard. He manages to land a nice scissor sweep and is now in half guard on the top. Nice move. Score +2 for sweep to guard / half guard: Brittle (9) vs (4) Blood
Brittle tries to pass to full mount but Blood defends it.
And that's the end of the fight!
Brittle takes the fight on points by 9 to 4. |
|
|
|
Event:
Summit Series - Grappling Rd 1
Date: Jan 14, 2024 |
This TWGC bout is 1 fifteen minute round in the light heavyweight division. Introducing today's competitors. In the red corner, competing out of Montreal, with a TWGC record of 0 wins and 0 losses; Rogelio Nunez! And in the blue corner, fighting out of Tokyo, with a TWGC record of 0 wins and 0 losses; Jack Brittle!
The judges for this bout are Ren Mimura, Shigeki Sano and Yukihiro Shimada.
The fighters bow as they face eachother in the middle of the mat and we are under way.
Nunez stuffs the takedown.
Brittle has a takedown stuffed.#CL#
The fight moves into the clinch position.#TD#
Nunez works for the underhooks and manages to get a trip takedown into guard. Score +2 for takedown into guard / half guard: Nunez (2) vs (0) Brittle
Brittle is working the butterfly guard. He manages to land a nice scissor sweep and is now in half guard on the top. Nice move. Score +2 for sweep to guard / half guard: Nunez (2) vs (2) Brittle
Brittle stalling away here and it's allowed Nunez to slip out his trapped foot and regain full guard.
The fighters are tangled up in the ropes here. We might need a restart if the fighters can't break free themselves.
Brittle pressing down on his opponent's thigh, looking to pass guard. Nunez is keeping the position for now.
We've had a slow start to the round here - hopefully the action picks up.
Nunez is working from a closed guard but he's struggling to control his opponent.
Brittle wants to pass the guard but Nunez is keeping the position.#T1#
Nunez is trying to keep Brittle in close.
Nunez wants to sweep but no luck. #SUB2#
Brittle drops back, looking for a kneebar! Nunez looks panicked! The fighters roll across the mat, one looking to finish, one looking to escape. Nunez looks to have wriggled free... Yes, he's got his leg free and he's dived into side control! Good work there from Nunez! Score +4 for clean sweep to past guard: Nunez (6) vs (2) Brittle
Brittle tries to improve position but can't.
Brittle can't do much from the bottom here.
Brittle is looking for a sweep.
We get told so often about how wrestlers don't like to be on their backs. Let's see if Brittle can do anything to dispel that myth.#T2#
Brittle is letting Nunez control him for a moment.
Brittle is trying to get back to half guard.#T3#
Nunez is looking to take a break and control but Brittle is keeping him honest, looking to work from the bottom.
The fighters are trapped in the ropes so we're going to have a reposition here. The ref calls for a break and repositions the fighters in the center of the ring.
Brittle is looking to reverse the position.
Nunez gets to mount! Brittle was on the offensive and wasn't defending properly. Score +2 for reaching mount: Nunez (8) vs (2) Brittle
Brittle is trying to escape the mount.
Brittle is writhing around trying to get back to his feet.
Brittle looking to escape from mount but he's given up his back! Score +3 for taking back: Nunez (11) vs (2) Brittle
You can see the frustration on Brittle's face� He knows he is in trouble unless he improves his position sooner rather than later.
#T4#
Nunez really has the hooks in deep now - there seems like no escape for Brittle.
Nunez is hanging on to Brittle's back as he tries to escape.
Brittle is persisting with the attempt to improve his position.
Nunez gets his hands free as Brittle looks to control.
I really don't envy Brittle right now.
Nunez doesn't have the hooks in and Brittle manages to turn into his guard.
Score +2 for sweep to guard / half guard: Nunez (11) vs (4) Brittle
Nunez keeping moving, preventing Brittle from controlling successfully.
Nunez pulls Brittle in to control the position. #T5#
Brittle trying to pass the guard but can't manage it just yet.
Nunez keeping moving, preventing Brittle from controlling successfully.
Nunez is pulling down on Brittle's head to control his posture.
Brittle stopping the sweep attempt from Nunez.
Nunez is working hard here to advance position.
Brittle postures up.
Nunez looks to be in better condition than last time we saw him fight. Obviously he's been working hard on his cardio.#T6#
Nunez is doing well to control the posture of his opponent and prevent any damage.
Nunez keeping moving, preventing Brittle from controlling successfully.
Brittle being controlled here momentarily.
Nunez is working from a closed guard but he's struggling to control his opponent.
Brittle pressing down on his opponent's thigh, looking to pass guard. Nunez is keeping the position for now.
Nunez wants to sweep here but Brittle controlling him for the moment. #T7#
Brittle controlling from the top position.
Nunez trying to control the position here. #SUB2#
Brittle has gone for a leg lock! Nunez slips out almost immediately though and dives into Brittle's guard. Score +2 for sweep to guard / half guard: Nunez (13) vs (4) Brittle
Brittle looking to hit a scissor sweep but Nunez is one step ahead there. #SUB2#
Brittle throws his legs up looking to secure a triangle. Oh, that looks pretty tight, I gotta say! Nunez escapes and throws Brittle's legs to the side, diving into side control! Score +3 for passing guard: Nunez (16) vs (4) Brittle#T8#
Brittle is positioning himself to get back to half guard.
Nunez wants to control but Brittle is keeping him busy.
Brittle is looking to reverse the position.
Brittle tries to slip a leg under to move to half guard but Nunez presses down on the leg and jumps into full mount! Score +2 for reaching mount: Nunez (18) vs (4) Brittle#T9#
Nunez wants to control the pace but Brittle is squirming around nicely.
Brittle tries to reverse the position but Nunez maintains control.
Brittle wants to control but Nunez is having none of it.
Brittle is looking to improve his position but Nunez isn't that keen on the idea.
Nunez tucks in and makes sure he doesn't lose the dominant position. #T10#
Brittle can't escape the position.
Brittle keeps trying to improve his position.
Brittle is still trying to improve position.#T11#
Brittle looking to escape from mount but he's given up his back! Score +3 for taking back: Nunez (21) vs (4) Brittle
A bit of a pause in the action here. Nunez controlling the positon.
I really don't envy Brittle right now.
Brittle trying to control but not successfully.
Brittle might have to switch it up a bit here because his efforts to control Nunez haven't been going to plan, at least at the current moment in time.#T12#
Nunez keeps control of the position as Brittle tries to break free.
Nunez biding his time, looking for the opening.
Nunez has the hooks in. Brittle is trying to push off one leg but he has to do so cautiously to avoid being submitted.
Nunez keeps control of the position easily here as Brittle tries to buck him off.
Brittle tries to escape but Nunez has the hooks in and won't let him break free. #T13#
Nunez is looking cool and calm here, just waiting for a good opportunity to attack and finish the fight from this dominant position.
I really don't envy Brittle right now.
Nunez has good solid back control here.
Brittle tries to escape but Nunez has the hooks in and won't let him break free. #T14#
Brittle looking very determined here, making life difficult for Nunez.
Brittle tries to break free.
Boooooooooooooooooooo!!! God, this has been a terrible round. Come on you two, sort yourselves out!
And that's the end of the fight!
Nunez takes the fight on points by 21 to 4. |
|
|
|
|
|
|