 |
NJMMA Friday Night Fights 7 PBP Commentary |
Undercard bout
|
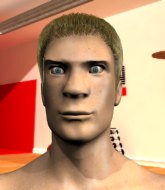
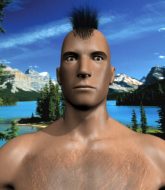
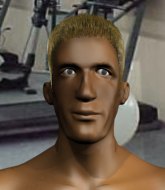
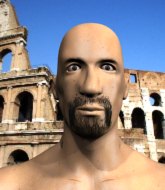
Coming up we have a bantamweight MMA rules bout between Cayson McDevlin (ranked 7992 p4p, 309 weight class) and Ben Dover (ranked 4477 p4p, 214 weight class). Ben Dover will no doubt be looking to use his reach advantage to good effect.
 |
|
 |
| 178 cm
21
147 lbs
0 - 2 - 0 |
|
190 cm
26
144 lbs
2 - 4 - 0 |
BJJ White Belt
Excellent boxer
Big right hand |
|
Decent wrestler
Decent boxing
Granite chin |
|
| |
|
Ladies and gentlemen. This fight is 3 rounds, in the bantamweight division.
Introducing the fighter to my left, fighting out of the red corner.
With a record of
0 - 2 - 0, fighting out of Las Vegas, Cayson McDevlin!
And introducing the fighter to my right, fighting out of the blue corner.
With a record of
2 - 4 - 0, fighting out of London, Ben Dover!
The judges for this bout are Eddie Farnsworth, Anthony Taglia and Russell Pearce.

The bell rings for round one and we are underway!
McDevlin fails to land with the punch combination there - jab, cross, hook, miss, miss, miss.
Dover doesn't fully commit to the body shot counter.
McDevlin misses with the combination.
Dover looks like he wants to counter punch here.
McDevlin tries to score a power double leg takedown but Dover sees that one coming and sprawls well. That will dishearten McDevlin somewhat.
Dover takes a shot to the nose. Hopefully that hasn't broken it.
McDevlin misses with the combination.
Dover lets it all go there with a big combo counter but none of the punches connected.
McDevlin swings away with a body shot that misses
and Dover counters with a nice body shot.
We've had a slow start to the round here - hopefully the action picks up.
Dover connects with a crisp jab.
McDevlin looks for a takedown but Dover sprawls well.
McDevlin shoots in for a takedown but Dover shows good takedown defense.
That's three failed takedown attempts in the round for Cayson McDevlin. That's going to take a lot out of him.
Dover misses with a few strikes there.
Dover misses the shot to the body.

That's one minute gone in the round.
A jab from Dover finds it's way through McDevlin's defenses.
Dover misses with a body shot.
McDevlin throws a left and a right that both miss
and Dover counters with a shot to the ribs. That looked like it hurt.
McDevlin with a poor takedown
and Dover counters with a straight right hand.
Some wild striking there from McDevlin.
McDevlin fails with a takedown attempt.
Dover keeps the fight standing with a nice sprawl.
McDevlin swings and misses with a hook to the body.
Dover now looks to counter with a shot at the body.
McDevlin throws a right hand that Dover ducks under and follows up with a left that Dover also avoids with ease.
McDevlin needs to keep his hands up - Dover had a free shot at his head there.
Dover is using his reach advantage to land shots from outside his opponent's range.
Jab by Dover.
McDevlin takes a body punch that cleary hurt but he's trying not to show any weakness.
This has been an exciting period of action!
McDevlin tries to shoot in for a takedown. He's got hold of a leg but Dover swivels and escapes.
McDevlin is breathing heavily.

That's two minutes gone in the round.
Dover throws a body shot but no joy.
McDevlin misses with a hook. Dover ducked under it nicely.
McDevlin misses with a takedown attempt. He shot from a bit too far out.
Dover is clearly trying to counter these attacks from McDevlin with a body shot.
Dover bobs and weaves and unloads with a good uppercut.
McDevlin has his takedown stuffed
and Dover counters with a nice body shot.
McDevlin uses some good footwork to avoid the body shot by Dover.
Dover is throwing a lot of body shots here, looking to wear down McDevlin rather than just go for the knockout.
A really sloppy takedown attempt there from McDevlin.
Dover appears to be waiting to throw a counter punch to the body.
Dover looks more muscular than last time we saw him. He must have been on the weights.
McDevlin with a lazy takedown attempt
and Dover counters with a left to the body.
Dover misses with a body shot. Nice footwork from McDevlin.
McDevlin lands with a good body shot.
McDevlin has his takedown stuffed
and Dover counters with a lovely shot to the body.

That's three minutes gone in the round.
Dover ducks down and throws a hook to the body but McDevlin moves away.
McDevlin on the wrong end of a vicious looking body shot.
Dover throws a hard body shot but it just misses.
Dover is a painfully thin specimen of a man. You do wonder whether a good body kick would snap him clean in two.
Dover swings for the body but McDevlin moves out of range.
Ben Dover is looking to keep the fight on the feet at all costs.
McDevlin cracks Dover with a nice right hand that draws applause from the crowd.
McDevlin throws an ugly left hook that misses
and McDevlin takes a counter punch right on the button for his troubles.
Dover lands a nice looking body shot.
Dover scores with a jab to the body.
McDevlin takes a solid shot to the body. That one hurt him but he's trying not to show it.
Dover digs a good body shot into McDevlin's ribs.
McDevlin keeps his opponent at a distance with a nice jab.
McDevlin throws a nice looking combination but Dover bobs and weaves to avoid any damage.
The crowd are loving this. Great action here.
Dover throws a wild combination but nothing lands.
Dover works McDevlin's body with a nice hook.
McDevlin avoids the body shot from Dover.
Dover avoids the body shot from McDevlin.

That's four minutes gone in the round.
McDevlin shoots in for a takedown but doesn't get it.
McDevlin dives in for a single leg takedown but Dover sprawls and the fighters end up clinched against the cage.
Dover has used his reach advantage pretty well so far tonight.
Dover smiles there as he lands a nice right hand right on the button.
Dover listening to his corner there, landing a nice uppercut.

McDevlin is rocked!
Jab by Dover.
Oh McDevlin is still all over the place! His legs are completely gone! Will he be able to recover?!!
Dover is pawing at McDevlin, trying to feel the distance before throwing out a cross that crashes into McDevlin's nose. McDevlin is badly hurt! Dover pounces, throwing wild strikes as both fighters end up on the ground! McDevlin tries desperately to hold on but Dover is relentless in his assault! As McDevlin receives an ever increasing number of unanswered strikes the referee pulls Dover away and this one is in the books!
Ladies and gentlemen, after 4:26 of round 1, we have a winner by way of TKO (Strikes). Ben Dover!
A very excited looking Ben Dover made sure he remembered to thank all the fans both in the arena and on the internet. He said all the coolest people spend all day on MMA websites, which got a big reaction.
|
|
|
|
|
|
|
|
|
|
|
|
|
|
|
|
|
|
|
|
|
|
|
| S |
C
A |
G |
S |
C
B |
G |
|
S |
C |
G |
|
energy
A | B |
|
hype
A | B |
|
pop
A | B |
|
mgr
A | B |
|
FIGHT
RATING
56% |
|
|
|
|
|
|
|
Undercard bout
|
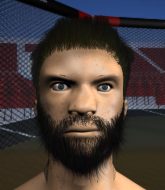
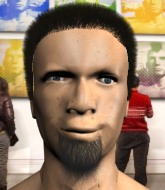
Coming up we have a lightweight MMA rules bout between Armin Schulz (ranked 4474 p4p, 481 weight class) and Nick Cause (ranked 3074 p4p, 348 weight class). Both fighters look fresh as a daisy as they make their way towards the cage.
 |
|
 |
| 170 cm
19
165 lbs
1 - 2 - 0 |
|
179 cm
20
150 lbs
2 - 1 - 0 |
BJJ Purple Belt
Solid boxing
Cardio machine |
|
BJJ Purple Belt
Decent boxing
Powerful |
|
| |
|
Ladies and gentlemen. This fight is 3 rounds, in the lightweight division.
Introducing the fighter to my left, fighting out of the red corner.
With a record of
1 - 2 - 0, fighting out of New York, Armin Schulz!
And introducing the fighter to my right, fighting out of the blue corner.
With a record of
2 - 1 - 0, fighting out of New York, Nick Cause!
The judges for this bout are Reed Andrews, Eddie Farnsworth and Alyssa Summers.
The bell rings for round one and we are underway!
Schulz throws out a token jab with nothing on it.
Cause looks like he wanted to counter with a high kick but didn't throw it.
Cause tries to score with a leg kick but it misses it's target.
A quick step to the side and Schulz tries to counter with a shot to the body but it doesn't connect.
Cause throws a monster uppercut resembling something out of street fighter but it doesn't land.
A head kick misses from Cause.
Cause takes a solid shot to the body. That one hurt him but he's trying not to show it.
Schulz misses with a body shot.
Schulz scores with a sloppy right hand. Cause should have avoided that one.
Cause has been spending a lot of time sparring his boxing in the run up to the fight, trying to sharpen up those hands and look for a knockout.
Cause needs to keep his hands up - Schulz had a free shot at his head there.
Schulz stuns Cause with a nice body shot, before stepping back out of range.
Nice cross by Schulz.
Cause gets cracked there but stands up to it.
Cause throws a lazy right hand but Schulz sees it coming a mile off and sidesteps it easily.
Schulz lands with a right hand.
The crowd cheering loudly, showing their appreciation for the quality fight we're seeing here.
Cause drops his hands momentarily and Schulz takes advantage with a crisp shot to the head.
Cause keeping a good distance there, avoiding the body shot.
Schulz slips under a jab from Cause.
Cause bobs and weaves and unloads with a good uppercut.
Boom, another hit is landed. "You're gunna get knocked out" taunts Schulz, as that shot connected.

Cause is rocked!
Schulz throws a pinpoint strike between Cause's hands that connects right on the jaw and sends Cause crashing to the floor! He's out before he even hits the mat and Schulz scores a great knockout victory!
Ladies and gentlemen, after 1:05 of round 1, we have a winner by way of KO (Punch). Armin Schulz!
After winning the bout, Armin Schulz thanked all his fans and promised he'd do even better in his next fight. The crowd seemed to love his humility.
|
|
|
|
|
|
|
|
|
|
|
|
|
|
|
|
|
|
|
|
|
|
|
| S |
C
A |
G |
S |
C
B |
G |
|
S |
C |
G |
|
energy
A | B |
|
hype
A | B |
|
pop
A | B |
|
mgr
A | B |
|
FIGHT
RATING
81% |
|
|
|
|
|
|
|
Undercard bout
|
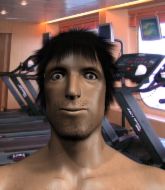
Coming up we have a featherweight MMA rules bout between Augustine Tupper (ranked 22903 p4p, 550 weight class) and Henkka Virtanen (ranked 6203 p4p, 431 weight class). Over to our ring announcer for the fighter introductions!
 |
|
 |
| 167 cm
21
139 lbs
0 - 1 - 0 |
|
176 cm
18
152 lbs
0 - 0 - 0 |
Abu Dhabi Champ
Good knees
KO power |
|
BJJ White Belt
Excellent MT
Determined |
|
| |
|
Ladies and gentlemen. This fight is 3 rounds, in the featherweight division.
Introducing the fighter to my left, fighting out of the red corner.
With a record of
0 - 1 - 0, fighting out of Las Vegas, Augustine Tupper!
And introducing the fighter to my right, fighting out of the blue corner.
With a record of
0 - 0 - 0, fighting out of Los Angeles, Henkka Virtanen!
The judges for this bout are Jorge Garcia, Joseph Jones and David Schapiro.
The bell rings for round one and we are underway!
Virtanen fails with a takedown attempt from distance.
Virtanen shoots in and drives through. Tupper sprawls well.
Virtanen shoots for a double leg takedown but Tupper sprawls well. He's pushed Virtanen's face into the mat and manages to get back to his feet relatively easily.
It appears Tupper was looking to counter with a kick there.
Augustine Tupper has stuffed three takedown attempts in the round now. That's going to take a lot out of Henkka Virtanen.
Tupper swings and misses with a hook to the body.
Both fighters circling a little - Tupper finishes the exchange with a kick to the body.
Tupper lunges in with an uppercut that skims his opponent's chin.

It looks like Henkka Virtanen has been cut.
and Tupper counters with a massive uppercut that badly hurts Virtanen! He's just covering up as Tupper starts to tee off till the referee steps in and stops the fight!
Ladies and gentlemen, after 0:33 of round 1, we have a winner by way of TKO (Strikes). Augustine Tupper!
Our winner, Augustine Tupper, made sure he spent some time buttering up the crowd during his post fight interview, which will no doubt bring him a few more fans.
|
|
|
|
|
|
|
|
|
|
|
|
|
|
|
|
|
|
|
|
|
|
|
| S |
C
A |
G |
S |
C
B |
G |
|
S |
C |
G |
|
energy
A | B |
|
hype
A | B |
|
pop
A | B |
|
mgr
A | B |
|
FIGHT
RATING
100% |
|
|
|
|
|
|
|
Undercard bout
|
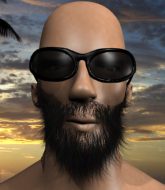
Coming up we have a middleweight MMA rules bout between Cody Brinks (ranked 4753 p4p, 497 weight class) and Tom Drogo (ranked 22928 p4p, 718 weight class). Tom Drogo is the more experienced fighter, so let's see if that makes a difference tonight.
 |
|
 |
| 185 cm
19
196 lbs
1 - 1 - 0 |
|
194 cm
25
186 lbs
5 - 7 - 0 |
BJJ Blue Belt
Excellent MT
Very strong |
|
BJJ Blue Belt
Solid Muay Thai
Solid chin |
|
| |
|
Ladies and gentlemen. This fight is 3 rounds, in the middleweight division.
Introducing the fighter to my left, fighting out of the red corner.
With a record of
1 - 1 - 0, fighting out of Las Vegas, Cody Brinks!
And introducing the fighter to my right, fighting out of the blue corner.
With a record of
5 - 7 - 0, fighting out of Las Vegas, Tom Drogo!
The judges for this bout are Lou da Vinci, Bruno Lombardi and Joseph Jones.
The bell rings for round one and we are underway!
Brinks scores with a jab. Drogo acknowledges it with a nod of the head.
It looks like Tom Drogo has been cut.
Brinks lands with a nice low kick. That'll leave a bruise.
Brinks punishes Drogo's body with a nice straight punch.
Drogo has done a lot of speed work in the buildup to this fight.
The crowd cheers as Brinks lands an impressive looking overhand right. Drogo doesn't seem phased though.
Brinks works his jab well there, keeping his opponent at a distance.
Brinks definitely looks more muscular than last time we saw him fight.
Brinks lands a powerful looking uppercut that connected with his opponent's jaw.
Drogo looks winded!
Brinks scores with a punch to the head.
Brinks cracks Drogo on the jaw with a powerful right hand and Drogo falls backwards against the cage. Brinks follows up with more strikes that drop Drogo to his knees. Brinks keeps the pressure on and the referee jumps in to save Drogo! This one is all over!
Ladies and gentlemen, after 0:35 of round 1, we have a winner by way of TKO (Strikes). Cody Brinks!
Cody Brinks decided to go for the less than humble approach in his post fight interview, telling everyone how he is going to conquer the world. The crowd seemed to like it when really that sort of approach could have gone either way.
|
|
|
|
|
|
|
|
|
|
|
|
|
|
|
|
|
|
|
|
|
|
|
| S |
C
A |
G |
S |
C
B |
G |
|
S |
C |
G |
|
energy
A | B |
|
hype
A | B |
|
pop
A | B |
|
mgr
A | B |
|
FIGHT
RATING
100% |
|
|
|
|
|
|
|
Undercard bout
|
Coming up we have a middleweight MMA rules bout between Chief Wolf (ranked 3676 p4p, 411 weight class) and Brandon Robinson (ranked 3840 p4p, 428 weight class). Over to our ring announcer for the fighter introductions!
 |
|
 |
| 190 cm
26
199 lbs
5 - 2 - 0 |
|
183 cm
27
190 lbs
4 - 1 - 1 |
Powerful takedowns
Brawler
Very quick |
|
BJJ White Belt
Excellent boxer
Heavy handed |
|
| |
|
Ladies and gentlemen. This fight is 3 rounds, in the middleweight division.
Introducing the fighter to my left, fighting out of the red corner.
With a record of
5 - 2 - 0, fighting out of Las Vegas, Chief Wolf!
And introducing the fighter to my right, fighting out of the blue corner.
With a record of
4 - 1 - 1, fighting out of London, Brandon Robinson!
The judges for this bout are Eddie Farnsworth, Chad Campbell and Joseph Jones.
The bell rings for round one and we are underway!
Wolf tries to land with a swinging hook to the body but Robinson was well out of range. Poor timing from Wolf.
Wolf dives in for a single leg takedown but Robinson sprawls and the fighters end up clinched against the cage.
Chief Wolf seems to be the more aggressive standup fighter in this bout.
Wolf shoots in with a takedown attempt and he has Robinson pinned against the cage. Robinson gets the underhooks and manages to circle away.
Wolf has been talking about how he's improved his wrestling in the run up to the fight so let's see if that's enough to sway the balance.

Wolf fakes an overhand right and shoots for a takedown. Robinson sprawls well initially but Wolf persists and gets the takedown into half guard.
Robinson wants to get back to full guard.

Wolf is trying for a kimura here. Robinson looks like he's in a lot of pain... and he's tapping out! Wolf wins by kimura!
Ladies and gentlemen, after 0:48 of round 1, we have a winner by way of Submission (Kimura). Chief Wolf!
Chief Wolf took to the mic after the fight and begged the organizational hierarchy for a shot at the title.
|
|
|
|
|
|
|
|
|
|
|
|
|
|
|
|
|
|
|
|
|
|
|
| S |
C
A |
G |
S |
C
B |
G |
|
S |
C |
G |
|
energy
A | B |
|
hype
A | B |
|
pop
A | B |
|
mgr
A | B |
|
FIGHT
RATING
100% |
|
|
|
|
|
|
|
Undercard bout
|
Coming up we have a lightweight MMA rules bout between Practice Test (ranked 4252 p4p, 461 weight class) and Roberto Sanchez (ranked 3746 p4p, 413 weight class). Test comes into the arena with For your entertainment blaring out of the sound system. Practice Test could well score a knockout today. He has the power to get to Roberto Sanchez's chin.
 |
|
 |
| 170 cm
25
154 lbs
1 - 2 - 0 |
|
188 cm
26
158 lbs
4 - 5 - 0 |
BJJ White Belt
Great elbows
KO power |
|
BJJ Blue Belt
Excellent boxer
Knockout power |
|
| |
|
Ladies and gentlemen. This fight is 3 rounds, in the lightweight division.
Introducing the fighter to my left, fighting out of the red corner.
With a record of
1 - 2 - 0, fighting out of New York, Practice Test!
And introducing the fighter to my right, fighting out of the blue corner.
With a record of
4 - 5 - 0, fighting out of Los Angeles, Roberto Sanchez!
The judges for this bout are Joseph Jones, Dean Styles and Jorge Garcia.
The bell rings for round one and we are underway!

Test moves into the clinch.
Come on Test - let's have some action - none of this stalling nonsense.
Test leaning his opponent against the cage.
Test gets double underhooks to prevent a takedown attempt from Sanchez.
Test landing knees to the body. They look like they could hurt.
Test lands a nice elbow.
Test comes over the top with an elbow. That landed flush.
It looks like Roberto Sanchez has been cut.

Test breaks from the clinch.
Test darts in and clinches Sanchez up against the cage.
We've had a slow start to the round here - hopefully the action picks up.
Test manages to break the clinch.
Test has taken the fight to the clinch.

Test drops Sanchez with a big knee straight up the middle! Sanchez is covering up against the cage but manages to escape and gets back to his feet!
Sanchez is rocked!
This is a great period of action - very entertaining stuff!
The fight moves into the clinch position.
Sanchez is still on wobbly legs! Can Test finish him?
Test lands a big knee! That's hurt Sanchez! Oh, he's all over the place! Test lands another knee that sends Sanchez to the floor and the referee steps in to end the fight!
Ladies and gentlemen, after 1:56 of round 1, we have a winner by way of TKO (Strikes). Practice Test!
Practice Test made sure to give a little speech post fight, saying 'Ladies ladies ladies there is enough of me to go around because I'm the best'.
|
|
|
|
|
|
|
|
|
|
|
|
|
|
|
|
|
|
|
|
|
|
|
| S |
C
A |
G |
S |
C
B |
G |
|
S |
C |
G |
|
energy
A | B |
|
hype
A | B |
|
pop
A | B |
|
mgr
A | B |
|
FIGHT
RATING
85% |
|
|
|
|
|
|
|
Undercard bout
|
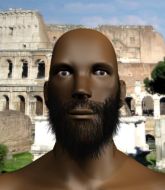
Coming up we have a lightweight MMA rules bout between Egyptian Embalmer (ranked 2461 p4p, 294 weight class) and Damien The Omen (ranked 801 p4p, 97 weight class). Embalmer comes to the cage accompanied by Katy Perry - Dark Horse ft. Juicy J. The Omen has chosen Number of the Beast - Iron Maiden as his entrance music. These two fighters really are very evenly matched on the feet - it will be fascinating to see who can assert themselves in that aspect of the fight.
 |
|
 |
| 187 cm
28
169 lbs
14 - 8 - 0 |
|
177 cm
19
165 lbs
9 - 3 - 0 |
Good wrestling
Excellent boxer
Cardio machine |
|
Good wrestler
World class boxer
Good gas tank |
|
| |
|
Ladies and gentlemen. This fight is 3 rounds, in the lightweight division.
Introducing the fighter to my left, fighting out of the red corner.
With a record of
14 - 8 - 0, fighting out of St Petersburg, Egyptian Embalmer!
And introducing the fighter to my right, fighting out of the blue corner.
With a record of
9 - 3 - 0, fighting out of London, Damien The Omen!
The judges for this bout are Joseph Jones, John Kavanagh and Anthony Taglia.
The bell rings for round one and we are underway!
Embalmer misses with a takedown attempt
and The Omen connects with a straight left hand counter down the middle.
The Omen takes an uppercut right on the button but keeps his composure.
The Omen stuns Embalmer with a nice body shot, before stepping back out of range.
The Omen gets caught on his heels momentarily as he allows Embalmer to score an easy takedown into full guard.
The Omen is looking to stand back up... there's a bit of a scramble and Embalmer dives into side control.
We've been hearing that Embalmer has been drilling a lot of ground and pound in training, so let's see if he get the finish.

We could do with one of the fighters taking the initiative a bit more on the ground - they're both waiting to capitalize on a mistake.
An elbow from Embalmer crashes against the mat.
Embalmer throws an elbow but The Omen slips to the side and avoids it well.
Embalmer has been looking to land a fair amount of strikes on the ground. He might be looking to soften his opponent up in order to work for a submission.
Embalmer is looking for a kimura. He might have it! No, The Omen has escaped the position, nice work there.
The Omen has found himself in a tricky position here. He's been working his transitions in training so let's see if he can work his way out of it.
The Omen is trying to get back to half guard. He's pushing on Embalmer's leg. He's managed it. Nice work.
Fantastic stuff here - a very entertaining period of action, which has drawn cheers from the crowd.
Embalmer prevents The Omen from improving his position.
That's one minute gone in the round.
Embalmer thows a huge punch but The Omen dodges it nicely.
Embalmer not throwing his punches with enough precision this time.
The Omen makes his way to full guard. A much better position for The Omen.
Embalmer won't allow The Omen to sweep him here.
The Omen bucks up whilst keeping hold of a body lock, managing to reverse the position. Now he's in top in Embalmer's guard.
Embalmer looking to hit a scissor sweep but The Omen is one step ahead there.
A big thud reverberates around the arena there as The Omen accidentally thumps the mat. Hopefully he's not broken his hand.
The Omen controls from within his opponent's guard.
That's two minutes gone in the round.
Embalmer keeping moving, preventing The Omen from controlling successfully.
Embalmer looking for a guillotine here but The Omen defends easily.
The fighters are pressed up against the cage, both looking to find a bit of space to work.
The fighters are going at a pretty good pace and they're both starting to sweat now.
Embalmer is trying to control the position from the bottom.
Embalmer has a loose triangle. He'll be looking to tighten that up but The Omen can see exactly what he's planning and manages to posture up and free himself.
Embalmer is throwing his legs up, looking for submissions. The Omen is aware though and is defending well.
The Omen trying to control the position from guard on top but Embalmer is wriggling around, looking for whatever he can.
That's three minutes gone in the round.
The Omen sneaks a leg through and gets to half guard. That was like a knife through butter how easily he passed Embalmer's guard.
The ref warns both fighters not to hold the cage as they work up against the meshing.
Embalmer is not content to let The Omen control the position.
The Omen misses with a head shot. Embalmer uses the momentum to regain guard.
The Omen pressing down on his opponent's thigh, looking to pass guard. Embalmer is keeping the position for now.
Embalmer is looking for a triangle here but The Omen uses the submission attempt to pass into side control.
The Omen throwing strikes but missing, from side control.
Embalmer is trying to improve his position.
That's four minutes gone in the round.
The Omen trying to control the action but Embalmer is working from the bottom.
Embalmer throws a couple of punches but he's in a bad position and they don't land.
Embalmer sneaks a leg under to get back to half guard.
Embalmer wants to improve his position but The Omen is controlling well.
The Omen is working hard to pass the guard. He's done it - he's now in full mount! Trouble for Embalmer!
The Omen misses with a head shot.
The Omen content just to control the position here.
The crowd thankful this round is nearly over.
The Omen trying to control but he's not successful this time.
The Omen throwing sloppy strikes, which aren't doing any damage.
And thats the end of the round the fighters go back to their corners.
Damien The Omen dominated that round.
Well, the break between rounds is over. Let's get back to the scrappin!

Embalmer steps to the side to avoid the strikes from The Omen.
Embalmer fails with a takedown attempt.
The Omen throws out a counter right but Embalmer avoids it with no problem.
The Omen connects with a lovely right hand, straight down the pipe.
The Omen wings a very wild body shot but it does the job and lands to the midsection.
The Omen wants to clinch up but Embalmer keeps it at a distance.
Jab, cross, leg kick. Nice combination by The Omen!
The Omen has been the more effective fighter overall so far.
Embalmer shoots in for a double leg but The Omen sprawls well. That's going to sap some energy.
The Omen misses with a straight left.
The Omen throws a hook to the body but it doesn't connect.
Embalmer throws a hook but The Omen blocks it.
The Omen changes levels and scores with a jab to the body.
Nice takedown defense from The Omen. No joy for Embalmer on that attempt.
That's three failed takedown attempts in the round for Egyptian Embalmer. That's going to take a lot out of him.
Embalmer takes a body punch that cleary hurt but he's trying not to show any weakness.
We've seen a great period of action over the last minute or so - credit to both fighters for going all out!
Embalmer throws a predictable looking body shot
and The Omen counters with a lovely straight right hand!
Embalmer looks shocked there as he takes a right hand to the temple.
The Omen throws a right hand that Embalmer ducks under and follows up with a left that Embalmer also avoids with ease.
Wow, both these guys are really going for it!
The Omen ducks down and throws a hook to the body.
Embalmer fails with a takedown attempt.
Both fighters are absolutely exhausted here.
That's one minute gone in the round.
Embalmer gets cracked there but stands up to it.
Embalmer is rocked!
The Omen cracks Embalmer with a big right hand that sees him stumbling back against the cage! Embalmer falls to his knees and The Omen doesn't need a second invitatation - he rushes in and fires off several unanswered shots that force the referee to stop the fight! This one is all over!
Ladies and gentlemen, after 1:20 of round 2, we have a winner by way of TKO (Strikes). Damien The Omen!
After winning the bout, Damien The Omen thanked all his fans and promised he'd do even better in his next fight. The crowd seemed to love his humility.
Egyptian Embalmer spoke after the fight, saying 'This fucking blind referee is friends with the fucking biased judges who are both paid by my PED-using opponent's manager. Fuck them and fuck the haters! What are you looking at asshole? Come at me, I'll mash you like potatoes!!
Mommy!! They are threatening me! 😭'.
|
|
|
|
|
|
|
|
|
|
|
|
|
|
|
|
|
|
|
|
|
|
|
| S |
C
A |
G |
S |
C
B |
G |
|
S |
C |
G |
|
energy
A | B |
|
hype
A | B |
|
pop
A | B |
|
mgr
A | B |
|
FIGHT
RATING
41% |
|
|
|
|
|
|
|
Undercard bout
|
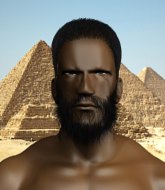
Coming up we have a middleweight MMA rules bout between Tiago Gomes Da Rocha (ranked 666 p4p, 87 weight class) and Ares Zylo (ranked 2404 p4p, 287 weight class). Rumors backstage are that the fighters have been paid to keep it standing but we know that would never happen in MMA!
 |
|
 |
| 188 cm
21
195 lbs
8 - 1 - 0 |
|
188 cm
21
200 lbs
5 - 3 - 0 |
BJJ Purple Belt
Excellent boxer
Cardio machine |
|
Good wrestler
Dangerous knees
Heavy handed |
|
| |
|
Ladies and gentlemen. This fight is 3 rounds, in the middleweight division.
Introducing the fighter to my left, fighting out of the red corner.
With a record of
8 - 1 - 0, fighting out of Helsinki, Tiago Gomes Da Rocha!
And introducing the fighter to my right, fighting out of the blue corner.
With a record of
5 - 3 - 0, fighting out of Las Vegas, Ares Zylo!
The judges for this bout are Reed Andrews, John Roberts and Lou da Vinci.
The bell rings for round one and we are underway!
Da Rocha misses with a hook. Zylo ducked under it nicely.
Zylo tries to clinch but Da Rocha moves out of range.
Da Rocha scores with a decent looking hook.
Da Rocha has been talking about how he's improved his wrestling in the run up to the fight so let's see if that's enough to sway the balance.
Zylo swings for the body but Da Rocha moves out of range.
Zylo swings for the body but Da Rocha moves out of range.
A combination from Da Rocha does no damage.
It seemed like Zylo was going to counter with the hook but didn't fully commit to it.
Da Rocha uses decent footwork to sidestep a right hand from Zylo.
Zylo ducks down and throws a hook to the body but Da Rocha moves away.
Zylo moves in looking to clinch but Da Rocha pushes him off.
A little feinted left hand from Da Rocha on the counter but he doesn't commit to it.
We've been informed that Zylo has been sparring a lot of Muay Thai in the buildup to this fight so let's see if that has an impact on the result.
We've had a slow start to the round here - hopefully the action picks up.
A telegraphed right hand from Zylo misses the target.
Zylo scores with a sloppy right hand. Da Rocha should have avoided that one.
Da Rocha lands a jab-cross combination.
Zylo pushing out the jab but it's not landing.
A telegraphed right hand from Zylo misses the target.
Da Rocha swung with a counter right hand that didn't connect.
That's one minute gone in the round.
Zylo jabs at Da Rocha's body.
Zylo swings away with a body shot that misses
and Da Rocha counters with a crisp one two that drops Zylo! Da Rocha thinks about following him to the mat for a moment but instead steps back and waves Zylo to his feet! Zylo is in big trouble!
Zylo is rocked!
Zylo scores with a nice head shot.
Da Rocha misses with a body shot. Nice footwork from Zylo.
Zylo missing with a left hand there. Da Rocha was out of range so wasted energy throwing that one.
Zylo lands a powerful looking uppercut that connected with his opponent's jaw.
Zylo misses with a looping right.
Zylo lands with a shot to the body.
Zylo misses with a telegraphed body shot
and Da Rocha counters with a stiff right hand.
The crowd cheering loudly, showing their appreciation for the quality fight we're seeing here.
Zylo lands a pitter patter jab to the forehead of his opponent.
Zylo ducks down and throws a hook to the body.
Ares Zylo seems to be the more aggressive standup fighter in this bout.
That's two minutes gone in the round.
Zylo connects with a jab.
Da Rocha bobs and weaves well there to avoid the strikes.
Zylo scores with a jab. Da Rocha acknowledges it with a nod of the head.
Zylo is looking to clinch but Da Rocha is avoiding it.
Zylo swings away with a body shot that misses
and Da Rocha counters with a stiff right hand.
Zylo loads up on a big right hand but Da Rocha slips the punch.
Da Rocha throws a jab but it's blocked by Zylo.
Zylo swings away with a counter right hand but no contact made.
Da Rocha showing good head movement there, avoiding the strikes from Zylo.
Da Rocha avoids the body shot from Zylo.
A jab from Zylo finds it's way through Da Rocha's defenses.

Zylo has taken the fight to the clinch.
Zylo looking to throw knees to the head but Da Rocha is blocking nicely.
That's three minutes gone in the round.
Zylo throws a vicious knee straight up the middle but Da Rocha blocks it with crossed arms.
Zylo blocks a body shot from Da Rocha.
A quick uppercut on the inside from Da Rocha.
Zylo tries a knee to the head but he's missed.
Zylo looking to throw knees to the head but Da Rocha is blocking nicely.
A knee to the head by Zylo.
Da Rocha lands with a good tight uppercut to the head.
Zylo misses with a punch to the body.
Da Rocha misses with a short punch on the inside.
Da Rocha leaning against his opponent.
Zylo blocking some punches.
Da Rocha scores with a hook to the body.
Da Rocha is trying to pull guard but Zylo turns him against the cage and we stay in the clinch.
Da Rocha is trying to slow down the pace of the fight but Zylo is keeping busy.
Both guys are working to get underhooks.
A short body shot lands from Da Rocha as the two fighters clinch.
Zylo looks winded!
Da Rocha misses with a hook from the clinch.
Zylo swings away with an uppercut that misses.
A right handed body shot lands from Da Rocha.
That's four minutes gone in the round.
Da Rocha is working Zylo over against the cage.
Da Rocha lands with a short head shot on the inside.
This is a great period of action - very entertaining stuff!
Both guys are working to get underhooks.
Da Rocha works on Zylo's body with a couple of short punches.
Da Rocha throws a punch but it's blocked by Zylo.
Da Rocha lands a body shot in the clinch.
Da Rocha gets through Zylo's defenses to land a nice punch to the side of the head.
Zylo missing with knees to the body.
Da Rocha lands a body punch in the clinch.
Da Rocha jumps guard but Zylo stands there with Da Rocha around his waist. Da Rocha gives up and drops back to his feet. We remain in the clinch.
Da Rocha tries to pull guard but Zylo forces him back to his feet, against the cage.
That's three failed takedown attempts in the round for Tiago Gomes Da Rocha. That's going to take a lot out of him.
Da Rocha is stalling here. The referee will be looking to step in if he doesn't pick up the pace.
Da Rocha digs a right hand underneath Zylo's ribcage. Zylo let out a lung full of air as it connected.
Da Rocha wants to stall.
Zylo fails to land with a short punch on the inside.
Zylo connects with a knee to the head.
And thats the end of the round the fighters go back to their corners.
Ares Zylo dominated that round.
Well, the break between rounds is over. Let's get back to the scrappin!
Zylo rushes in with a sloppy looking punch
letting Da Rocha counter with a right hand.
It looks like Ares Zylo has been cut.
Zylo bobs and weaves and unloads with a good uppercut.
A swing and a miss from Zylo.
Da Rocha swung with a counter right hand that didn't connect.
Zylo uses good footwork to get in and out, landing a nice hook.
Zylo misses the shot to the body.
Zylo throws out a loose jab but Da Rocha uses good head movement to avoid it.
Zylo throws a jab when Da Rocha was well out of range.
Zylo jabs Da Rocha right on the nose. Da Rocha blinks but takes it well.
We've had a slow start to the round here - hopefully the action picks up.
The fight stays on the outside here - Da Rocha looks like he's thinking about clinching though.
A lazy left from Zylo finds it's target.
That's one minute gone in the round.
Zylo tries to clinch but Da Rocha moves out of range.
Da Rocha throwing a counter right hand but Zylo manages to avoid it.
Da Rocha throws the left hand but Zylo avoids the punch easily.
Zylo closes the distance looking to clinch
and Da Rocha counters with a crisp one two that drops Zylo! Da Rocha thinks about following him to the mat for a moment but instead steps back and waves Zylo to his feet! Zylo is in big trouble!
Zylo is still on wobbly legs! Can Da Rocha finish him?
Da Rocha punishes Zylo's body with a nice straight punch.
Zylo gets clipped by a big right hand and goes down spinning to the canvas! Da Rocha gets the back mount and begins to drop bombs on his rocked foe! Zylo is too out of it to defend against the strikes and the referee jumps in to save him from the beatdown!
Ladies and gentlemen, after 1:35 of round 2, we have a winner by way of TKO (Strikes). Tiago Gomes Da Rocha!
|
|
|
|
|
|
|
|
|
|
|
|
|
|
|
|
|
|
|
|
|
|
|
| S |
C
A |
G |
S |
C
B |
G |
|
S |
C |
G |
|
energy
A | B |
|
hype
A | B |
|
pop
A | B |
|
mgr
A | B |
|
FIGHT
RATING
57% |
|
|
|
|
|
|
|
Co-main event
|
Coming up we have a welterweight MMA rules bout between Shane MacGowan (ranked 760 p4p, 101 weight class) and Trevor Burrows (ranked 1373 p4p, 174 weight class). MacGowan comes to the cage accompanied by The Pogues - Streams of Whiskey. Burrows has chosen Calm - No problem as his entrance music. Over to our ring announcer for the fighter introductions!
 |
|
 |
| 185 cm
21
180 lbs
9 - 2 - 1 |
|
177 cm
21
171 lbs
7 - 2 - 0 |
Good wrestling
Excellent boxer
Cardio machine |
|
Good wrestler
Decent boxing
Good gas tank |
|
| |
|
Ladies and gentlemen. This fight is 3 rounds, in the welterweight division.
Introducing the fighter to my left, fighting out of the red corner.
With a record of
9 - 2 - 1, fighting out of Amsterdam, Shane MacGowan!
And introducing the fighter to my right, fighting out of the blue corner.
With a record of
7 - 2 - 0, fighting out of Helsinki, Trevor Burrows!
The judges for this bout are Russell Pearce, Anthony Taglia and Columbo Gatti.
The bell rings for round one and we are underway!
MacGowan closes this distance looking for a takedown but Burrows circles away.
Burrows swinging wildly here.
Burrows has been spending a lot of time sparring his boxing in the run up to the fight, trying to sharpen up those hands and look for a knockout.
MacGowan bobbing and weaving, closes the distance and lands a hook to the side of Burrows's head.
The fighters circling - Burrows throws out the jab but it was never going to land.
MacGowan digs a good body shot into Burrows's ribs.
MacGowan shoots in for a takedown! He's got it and he's managed to land in side control! That's better than MacGowan was expecting from the takedown attempt, I'm sure!
Burrows is looking to regain half guard here but MacGowan keeps moving and retains side control.
MacGowan advances nicely into full mount.
MacGowan throwing sloppy strikes here. Perhaps if he tightened up his striking from such a dominant position, he'd be able to finish easier.
The crowd growing excited in anticipation of a finish here! Right on cue, MacGowan cracks his opponent with a massive right hand that draws loud cheers!
This has been an exciting period of action!
Burrows is working to get back to half guard.
That's one minute gone in the round.
MacGowan unloading with bombs!
We've been hearing that MacGowan has been drilling a lot of ground and pound in training, so let's see if he get the finish.
MacGowan working Burrows over with strikes here.
Burrows can't escape the position.
MacGowan landing punches.
MacGowan punching from mount but Burrows doing a good job of avoiding damage.
Burrows is working to get back to half guard.
MacGowan misses with a head shot.
MacGowan is in full mount, looking to secure a guillotine but Burrows is surviving well by controlling MacGowan's body position as best he can.
MacGowan unloading with bombs!
Burrows tries to hold on but MacGowan postures up.
We've seen a great period of action over the last minute or so - credit to both fighters for going all out!
MacGowan throwing sloppy strikes here. Perhaps if he tightened up his striking from such a dominant position, he'd be able to finish easier.
MacGowan scoring with strikes but Burrows is staying in there.
MacGowan with shots to the head and body - Burrows looks very uncomfortable down there.
Burrows is rocked!
MacGowan scoring with strikes but Burrows is staying in there.
Burrows is still in real trouble! Can MacGowan finish him?
That's two minutes gone in the round.
MacGowan connects with a bit shot that sees Burrows covering up! More strikes from MacGowan and the referee jumps in to stop the fight! MacGowan is our winner by TKO!
Ladies and gentlemen, after 2:19 of round 1, we have a winner by way of TKO (Strikes). Shane MacGowan!
A very excited looking Shane MacGowan made sure he remembered to thank all the fans both in the arena and on the internet. He said all the coolest people spend all day on MMA websites, which got a big reaction.
|
|
|
|
|
|
|
|
|
|
|
|
|
|
|
|
|
|
|
|
|
|
|
| S |
C
A |
G |
S |
C
B |
G |
|
S |
C |
G |
|
energy
A | B |
|
hype
A | B |
|
pop
A | B |
|
mgr
A | B |
|
FIGHT
RATING
72% |
|
|
|
|
|
|
|
Main event
|
Coming up we have a welterweight MMA rules bout between Suicide Bunny (ranked 2493 p4p, 285 weight class) and Hungarian Hotdog (ranked 2745 p4p, 312 weight class). Hotdog is bobbing his head along to his entrance song: George Ezra - Budapest. Suicide Bunny has the better chin. Will he look to stand and bang today?
 |
|
 |
| 185 cm
27
180 lbs
8 - 2 - 0 |
|
191 cm
28
182 lbs
6 - 4 - 0 |
BJJ White Belt
Excellent MT
Granite chin |
|
BJJ White Belt
Excellent MT
Powerful |
|
| |
|
Ladies and gentlemen. This fight is 3 rounds, in the welterweight division.
Introducing the fighter to my left, fighting out of the red corner.
With a record of
8 - 2 - 0, fighting out of New York, Suicide Bunny!
And introducing the fighter to my right, fighting out of the blue corner.
With a record of
6 - 4 - 0, fighting out of St Petersburg, Hungarian Hotdog!
The judges for this bout are Dean Styles, Steve Montenegro and Chad Campbell.
The bell rings for round one and we are underway!
Hotdog swats away the attempt to clinch by Bunny.
Hotdog swings away with a counter right hand but no contact made.
Bunny avoids the body shot from Hotdog.
The fight stays on the outside here - Bunny looks like he's thinking about clinching though.
Hotdog connects with a body shot that sends Bunny's belly button to the back.
Hotdog avoids the clinch attempt nicely.
Bunny slips a jab from Hotdog.
Hotdog lands a jab-cross combination.
Hotdog paws at his opponent with the jab and then lunges in with a straight, right on the button.
Hotdog ducks under an overhand right and circles away with a smile on his face.
Hotdog waving his hands out in front of him, looking to distract Bunny.
Bunny tries to clinch there but Hotdog circles away.
Hotdog scores with a shot to the body.
Bunny moves out of range as Hotdog strikes.
Bunny was looking to counter that move with a punch but didn't quite pull the trigger.
Bunny tries to close the distance and clinch but Hotdog swats him to one side with an open hand palm strike and circles away.
Hotdog throws a lazy right hand but Bunny sees it coming a mile off and sidesteps it easily.
A little feinted left hand from Bunny on the counter but he doesn't commit to it.
We've seen a great period of action over the last minute or so - credit to both fighters for going all out!
Bunny fails in his attempt to clinch.
Hotdog fakes low and throws an overhand right that catches Bunny on the side of the head.
That's one minute gone in the round.
Bunny closes the distance looking to clinch
and Hotdog counters with a quick right hand to the jaw.
Hotdog digs a good body shot into Bunny's ribs.
Bunny tries to clinch there but Hotdog circles away.
Hotdog uses good footwork to avoid the strikes from Bunny.
Hotdog has been working on his striking defense in training and it's paying off as Bunny is landing a low percentage of strikes.
Bunny doesn't react quick enough there as he takes a shot to the body.
Bunny throws out a powerful jab.
Hotdog misses the jab.
Hotdog getting the better of the striking in that exchange.
Hotdog lands a jab to Bunny's midsection.
The fight stays on the outside here - Bunny looks like he's thinking about clinching though.
Hotdog throws a looping overhand right but Bunny ducks down to avoid it.
Bunny closes the distance looking to clinch
and Hotdog counters with a stiff right hand.
The crowd are loving this. Great action here.
Hotdog connects with a lovely jab that went straight through the gap between Bunny's hands.
That's two minutes gone in the round.
Hotdog scores with a punch to the head.
A jab from Hotdog misses.
Bunny instigates a clinch.
Bunny throws a head punch that misses.
Good body shot from Bunny.
Bunny lands a hook that snaps the head of Hotdog backwards.
Bunny tries to land a shot to the body but it's blocked.
Bunny tried to land a shot to the body but connects with Hotdog's elbow.
Bunny prevents a body shot from Hotdog.
Hotdog misses with a body punch.
Hotdog wants to break the clinch but can't.
Hotdog misses with a body punch.
Bunny blocks a couple of punches on the inside.
Hotdog is trying to push Bunny away but Bunny has him pressed against the cage, so he's going nowhere.
A head punch on the inside from Bunny fails to land.
A head punch on the inside from Bunny fails to land.
Bunny throws a punch but it's blocked by Hotdog.
That's three minutes gone in the round.
Hotdog fails to pull guard.
Bunny misses with a hook to the ribs.
Hotdog lands a body shot in the clinch.

Hotdog manages to break the clinch.
Bunny is looking to take this fight into the clinch.
Hotdog jabbing away but nothing is landing.
Hotdog lands an overhand left. A wild punch that just about connected.
Hotdog swats away the attempt to clinch by Bunny.
A big left from Hotdog misses.
Hotdog is landing a lot of head punches in this opening round! Bunny had better start moving his head a bit unless he wants his face to turn into pâté.
Bunny takes a shot to the body in his stride.
Bunny avoids the body shot from Hotdog.
Bunny tries to clinch but Hotdog moves out of range.
Hotdog looks to score with a jab to the body but Bunny is just out of range.
Bunny lands a slapping body shot.
Bunny tries to clinch but Hotdog moves out of range.
Suicide Bunny seems to be the more aggressive standup fighter in this bout.
Hotdog scores with a crisp jab that stopped Bunny in his tracks.
That's four minutes gone in the round.
Hotdog swats away the attempt to clinch by Bunny.
Bunny smiles there as he lands a nice right hand right on the button.
We've seen a great period of action over the last minute or so - credit to both fighters for going all out!
Bunny takes a hook to the side of the head. I wonder if that's got his ears ringing.
Bunny slips under a jab from Hotdog.
Bunny closes the distance and clinches.
Hotdog's corner calls for him to break the clinch, which he does.
Bunny steps to the side to avoid the strikes from Hotdog.
Hotdog avoids the clinch attempt nicely.
Bunny tries to clinch
letting Hotdog counter with a right hand.
Bunny tries to clinch but fails miserably
and Hotdog counters with a stiff right hand.
Bunny is looking to take this fight into the clinch.
A jab from Hotdog misses.
Bunny is looking to take this fight into the clinch.
Bunny tries to clinch up.
And thats the end of the round the fighters go back to their corners.
Hungarian Hotdog dominated that round.
The minute break is over - no more time for sponges and pep talks - back to the action!
Hotdog misses the jab.
Hotdog scores with a decent looking hook.
Hotdog fakes and then throws a beautiful body shot. Bunny looks a bit winded and takes a step backwards to take a breath.
Bunny tries to grapple but his opponent circles
and Hotdog counters with a nice jab to the body that keeps Bunny thinking.
Bunny closes the distance but Hotdog moves to the side
and Hotdog counters with a stiff right hand.
Bunny tries to clinch up.
Hotdog has been the more effective fighter overall so far.
Bunny tries to clinch up against the cage, rushing in to close the distance. Hotdog manages to break the clinch and circles back to the middle of the mat.
Hotdog appears to be waiting to throw a counter punch to the body.
Hotdog cracks Bunny with a nice right hand that draws applause from the crowd.
Bunny is looking to clinch but Hotdog is avoiding it.
We've had a slow start to the round here - hopefully the action picks up.

Hotdog drops Bunny with a hook right on the temple. He thinks about going to the ground but Bunny looks back up at him and smiles so Hotdog waves him back to his feet - he obviously thinks he can knock him out after that shot landed.
Bunny is rocked!
The fans in attendance giving it up for the two fighters, who have really let it all hang out in the last minute or so!
Hotdog closes the distance and lands a brutal uppercut that knocks Bunny out! We're looking at the replay now - he was out before he hit the floor!
Ladies and gentlemen, after 0:49 of round 2, we have a winner by way of KO (Punch). Hungarian Hotdog!
During a confident post fight interview, Hungarian Hotdog thanked all his fans. He seemed very genuine when describing how motivated his fans keep him.
|
|
|
|
|
|
|
|
|
|
|
|
|
|
|
|
|
|
|
|
|
|
|
| S |
C
A |
G |
S |
C
B |
G |
|
S |
C |
G |
|
energy
A | B |
|
hype
A | B |
|
pop
A | B |
|
mgr
A | B |
|
FIGHT
RATING
62% |
|
|
|
|
|
|
|
|
|
|

