 |
Sucker Punch 265# CSS RD2 PBP Commentary |
Undercard bout
|
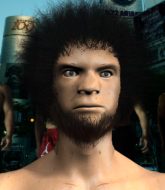
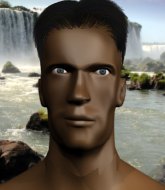
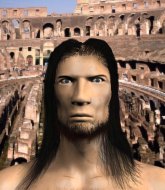
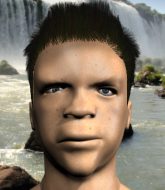
Coming up we have a super heavyweight MMA rules bout between Emmit Smith (ranked 5057 p4p, 112 weight class) and Behanzin Hossu Bowelle (ranked 4911 p4p, 111 weight class). We have two fighters making their debuts here, so let's see who comes out of this one with their first professional victory.
 |
|
 |
| 175 cm
18
183 lbs
0 - 0 - 0 |
|
180 cm
18
185 lbs
0 - 0 - 0 |
Good wrestling
Counter fighter
Cuts easily |
|
BJJ White Belt
Excellent MT
Tends to cut |
|
| |
|
Ladies and gentlemen. This fight is 1 rounds, in the super heavyweight division.
Introducing the fighter to my left, fighting out of the red corner.
With a record of
0 - 0 - 0, fighting out of Montreal, Emmit Smith!
And introducing the fighter to my right, fighting out of the blue corner.
With a record of
0 - 0 - 0, fighting out of London, Behanzin Hossu Bowelle!
The judges for this bout are Donatello Bradman, Eliza Hachem and Francis DeMontford.

The bell rings for round one and we are underway!
Smith takes a thudding leg kick, right into the meat of the thigh.
Bowelle looks to land a combination. Smith sees it coming but can only parry a couple of the shots.
Bowelle throws a lazy uppercut

and Smith counters with a nice double leg into half guard.

Smith is looking for a kimura but Bowelle is holding onto that half guard position, so it's hard for Smith to get the leverage.
Smith passes the half guard and he's now in mount! Big trouble for Bowelle!
Smith looking for an armbar but decides to keep the dominant position instead.
Smith looking for an armbar but decides to keep the dominant position instead.
The crowd cheering loudly, showing their appreciation for the quality fight we're seeing here.
Bowelle stops Smith from taking his back. Still, being mounted isn't any better.
Smith looks like he's working for a submission but he's not found anything just yet.
Smith avoids the attempt from Bowelle to control.

That's one minute gone in the round.
Smith is thinking about an arm triangle here, looking to tighten it up before moving to side control. Bowelle can see it coming though and defends well with a couple of strikes to the head and some good arm positioning.
Smith is looking to secure an arm. He's managed it! He's pivoting for an armbar - that looks tight! But Bowelle has managed to get out of it and now he's in a dominant position. Nice work from Bowelle!
Bowelle has a momentary lapse of concentration, allowing Smith to throw up a leg and lock on what appears to be a pretty tight triangle! Bowelle is fighting it off but it's all too little too late - Smith pulls down on the head and he's put Bowelle to sleep! This one is all over!
Ladies and gentlemen, after 1:45 of round 1, we have a winner by way of Submission (Triangle). Emmit Smith!
Emmit Smith seemed lost for words in his post fight interview but he remembered to thank his fans and directed everyone to his website.
|
|
|
|
|
|
|
|
|
|
|
|
|
|
|
|
|
|
|
|
|
|
|
| S |
C
A |
G |
S |
C
B |
G |
|
S |
C |
G |
|
energy
A | B |
|
hype
A | B |
|
pop
A | B |
|
mgr
A | B |
|
FIGHT
RATING
96% |
|
|
|
|
|
|
|
Undercard bout
|
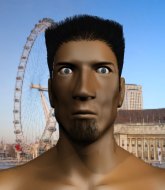
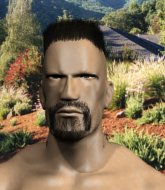
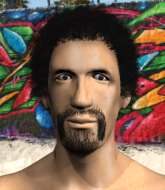
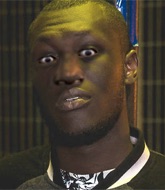
Coming up we have a heavyweight MMA rules bout between Donald The Donald (ranked 7399 p4p, 546 weight class) and Rick Hatton (ranked 25265 p4p, 597 weight class). Over to our ring announcer for the fighter introductions!
 |
|
 |
| 192 cm
18
245 lbs
0 - 1 - 0 |
|
198 cm
17
261 lbs
0 - 3 - 0 |
BJJ White Belt
Solid boxing
Cuts easily |
|
BJJ White Belt
Excellent boxer
Solid chin |
|
| |
|
Ladies and gentlemen. This fight is 3 rounds, in the heavyweight division.
Introducing the fighter to my left, fighting out of the red corner.
With a record of
0 - 1 - 0, fighting out of London, Donald The Donald!
And introducing the fighter to my right, fighting out of the blue corner.
With a record of
0 - 3 - 0, fighting out of Amsterdam, Rick Hatton!
The judges for this bout are Hugh Johnson, Ben Hemmingworth and Bruno Hogan.
The bell rings for round one and we are underway!
Hatton with a jab.

It looks like Donald The Donald has been cut.
Hatton misses with a wild combination.
Hatton fakes a jab and then connects with a hook.
The fighters circle momentarily. The Donald darts into range and connects with a nice straight punch.
The Donald is the aggressor but that punch slipped nicely by Hatton.
Despite the aggression on Hatton's face he doesn't fully commit to the counter.
Hatton throws an overhand right from the outside, which connects and sends The Donald stumbling backwards into the cage! The Donald bounces back off the cage towards Hatton, who cracks him with a two punch combination that drops him to his knees! Hatton lands two more shots before the referee has chance to intervene - what a finish! Hatton celebrates with his corner as the crowd cheer loudly.
Ladies and gentlemen, after 0:26 of round 1, we have a winner by way of TKO (Punches). Rick Hatton!
|
|
|
|
|
|
|
|
|
|
|
|
|
|
|
|
|
|
|
|
|
|
|
| S |
C
A |
G |
S |
C
B |
G |
|
S |
C |
G |
|
energy
A | B |
|
hype
A | B |
|
pop
A | B |
|
mgr
A | B |
|
FIGHT
RATING
100% |
|
|
|
|
|
|
|
Undercard bout
|
|
|
|
Undercard bout
|
Coming up we have a heavyweight MMA rules bout between Drizzy Haze (ranked 6284 p4p, 507 weight class) and Andrejs Medvedevs (ranked 7867 p4p, 569 weight class). Andrejs Medvedevs is the more experienced fighter, so let's see if that makes a difference tonight.
 |
|
 |
| 197 cm
23
269 lbs
5 - 1 - 0 |
|
225 cm
20
280 lbs
2 - 5 - 0 |
BJJ White Belt
Excellent boxer
Granite chin |
|
BJJ Blue Belt
Brawler
Determined |
|
| |
|
Ladies and gentlemen. This fight is 3 rounds, in the heavyweight division.
Introducing the fighter to my left, fighting out of the red corner.
With a record of
5 - 1 - 0, fighting out of London, Drizzy Haze!
And introducing the fighter to my right, fighting out of the blue corner.
With a record of
2 - 5 - 0, fighting out of St Petersburg, Andrejs Medvedevs!
The judges for this bout are Ron Honeybunn, Hugh Johnson and Summer Carpenter.
The bell rings for round one and we are underway!
Medvedevs pulls out of a head kick attempt.

Medvedevs closes the distance and presses his opponent up against the cage.
Medvedevs can't get the takedown.

Medvedevs jumps guard.
Haze is looking to stand up but Medvedevs won't let him.
Haze wants to stand and escape but instead Medvedevs has hit a sweep and he's now on top in guard.

Medvedevs looking to control the position here, rather than advance.
We've had a slow start to the round here - hopefully the action picks up.
Medvedevs missing there with some ground and pound from the guard.
That's one minute gone in the round.
Haze avoiding any damage from the ground and pound.
Medvedevs stands up and looks to throw the legs aside to pass to side control. Haze swivels though and keeps the full guard.
Haze being controlled here, momentarily.
Medvedevs stopping the sweep attempt from Haze.
Medvedevs looking to control the position here, rather than advance.

That's two minutes gone in the round.
Neither fighter has done anything of merit for a good minute or two here and the crowd are not happy about it.
Medvedevs passes Haze's right leg, so he's now in half guard.
Medvedevs tries to stand and escape but Haze is controlling the position.
Medvedevs is figuring out what he wants to do next.
Medvedevs throws a strike but Haze avoids it easily and moves to full guard.
Haze can't do much from the bottom at the moment, as Medvedevs controls the pace.

The ref stands the fighters back up due to a lack of activity.
Haze looks to be in better condition than last time we saw him fight. Obviously he's been working hard on his cardio.
Drizzy Haze is looking to keep the fight on the feet at all costs.

That's three minutes gone in the round.
Haze connects with the punch.
The fighters circling - Medvedevs throws out the jab but it was never going to land.
Medvedevs takes a jab right on the kisser.
Medvedevs shoots in for a takedown but Haze shows good takedown defense.
Medvedevs throws a combination but it was largely blocked by Haze.
Medvedevs looks frustrated there after his takedown attempt is stuffed easily.
Drizzy Haze has stuffed three takedown attempts in the round now. That's going to take a lot out of Andrejs Medvedevs.
Medvedevs shoots for a double leg takedown but Haze sprawls well. He's pushed Medvedevs's face into the mat and manages to get back to his feet relatively easily.
Haze drops down looking for a counter takedown but Medvedevs sprawls and moves away.

That's four minutes gone in the round.
The fight stays on the outside here - Medvedevs looks like he's thinking about clinching though.
Haze with a nice cross.
Medvedevs is looking to clinch but Haze is avoiding it.
Medvedevs dives in for a single leg takedown but Haze sprawls and the fighters end up clinched against the cage.
Medvedevs takes a jab on the nose there. A little bit of blood seems to be coming out. Hopefully that won't affect his breathing.
Medvedevs tries to score a power double leg takedown but Haze sees that one coming and sprawls well. That will dishearten Medvedevs somewhat.
Boooooooooooooooooooo!!! God, this has been a terrible round. Come on you two, sort yourselves out!
Haze dips down and scores with a jab to the body.
And thats the end of the round the fighters go back to their corners.
That was a close round but I would say that Drizzy Haze will probably get the nod.
The corners get their ten second warning. Both fighters stand from their stools and stare eachother down, ready to get back to the action.

Medvedevs shoots in for a double leg but Haze sprawls well. That's going to sap some energy.
Andrejs Medvedevs is looking to throw some combinations by the looks of things.
A left lands for Haze.
Medvedevs takes one on the chin but seems OK.
Drizzy Haze is winning the standup battle so far.
Medvedevs needs to keep his hands up - Haze had a free shot at his head there.
Haze scores with a jab. Medvedevs acknowledges it with a nod of the head.
Medvedevs shoots in for a takedown but doesn't get it.
A slow jab from Haze misses its intended target.
Haze is really dominating this fight. Is there anything that Medvedevs can do to turn this around?
Haze connects with a looping right hand.
We've had a slow start to the round here - hopefully the action picks up.
Medvedevs on the wrong end of a nice hook.
Medvedevs shoots in for a takedown but Haze shows good takedown defense.
Drizzy Haze has stuffed three takedown attempts in the round now. That's going to take a lot out of Andrejs Medvedevs.
This fight brought to you by 5M nutrition - it's mmmmm tasty. Nice jab by Haze.
That's one minute gone in the round.
Haze uses good footwork to get in and out and land a nice right hand before Medvedevs has time to react.
Haze with a nice cross.
Haze scores with a jab. Medvedevs acknowledges it with a nod of the head.
Medvedevs gets cracked there but stands up to it.
Medvedevs throws a right and a left that Haze avoids nicely.
Medvedevs misses with a takedown attempt - Haze sprawls well and throws a nice strike on the way out which just misses.
Haze tries to counter with a takedown but Medvedevs is quick to defend against it.
Haze throws out a loose jab but Medvedevs uses good head movement to avoid it.
Medvedevs shoots in for a takedown but Haze shows good takedown defense there and keeps this one on the feet.
Haze changes levels looking for a counter takedown but doesn't commit.
Medvedevs is breathing heavily.
Haze dodges the punch combination from Medvedevs.
That's two minutes gone in the round.
Medvedevs shoots in and drives through. Haze sprawls well.
Medvedevs ducks right into an uppercut from Haze.
Haze scores with a hook.
The crowd are loving this. Great action here.
Haze lands a powerful looking uppercut that connected with his opponent's jaw.
Haze lands a nice looking body shot.
Medvedevs has his hands up protecting his head but a hook from Haze finds it's way round the side to connect with Medvedevs's head.
Haze cracks Medvedevs with a right hand to the side of the head.

Medvedevs is rocked!
Jab, jab by Haze - just one landing.
Medvedevs is still on wobbly legs! Can Haze finish him?
Medvedevs tries to shoot in for a takedown. He's got hold of a leg but Haze swivels and escapes.
Haze tries to counter with a takedown but Medvedevs is quick to defend against it.
Medvedevs scores with a kick to the body.
That's three minutes gone in the round.
Medvedevs will have to do better than that with his takedown attempts.
Medvedevs seems to have recovered his senses.
Haze lands a vicious shot with the stealth of a sniper and the strength of a viper. Are vipers that strong? I can think of lots of things that are stronger than a viper - not many rhyme with sniper though.
Haze catches Medvedevs with a nice straight right. He seems pissed - ooooh, it's on now! On like donkey kong!
Medvedevs closes the distance looking to clinch
and Haze counters with a shoot takedown into half guard.
Haze tries to stand but his arm is trapped.

Haze escapes and gets back to his feet.
Haze bobbing and weaving, closes the distance and lands a hook to the side of Medvedevs's head.
That's four minutes gone in the round.
Medvedevs closes the distance and takes a jab right on the nose as he does so.
Haze smiles there as he lands a nice right hand right on the button.
The crowd are loving this. Great action here.
Medvedevs gets cracked there but stands up to it.
A swing and a miss from Haze.
Medvedevs dives in for a single leg takedown but Haze sprawls and the fighters end up clinched against the cage.
Medvedevs tries to drive through with a takedown attempt but Haze defends well and Medvedevs ends up having to push Haze into the cage where they will battle it out in the clinch.
Haze cracks Medvedevs with a nice right hand that draws applause from the crowd.
Haze bobs and weaves and unloads with a good uppercut.
Medvedevs darts in looking for a takedown but Haze gets double underhooks and turns Medvedevs into the cage.
Haze scores with a hook.
And thats the end of the round the fighters go back to their corners.
Drizzy Haze dominated that second round.
OK. That's time! The bell goes and we're back to the action. This is the final round!

Medvedevs walks straight into a right hand from Haze - that's dropped him! Haze jumps into mount and starts pounding away - can he finish?! More strikes go undefended and the referee has to dive in to save Medvedevs from any more punishment! Medvedevs complains about the stoppage but falls over as he tries to stand back up, so it was clearly a good stoppage.
Ladies and gentlemen, after 0:05 of round 3, we have a winner by way of TKO (Punches). Drizzy Haze!
|
|
|
|
|
|
|
|
|
|
|
|
|
|
|
|
|
|
|
|
|
|
|
| S |
C
A |
G |
S |
C
B |
G |
|
S |
C |
G |
|
energy
A | B |
|
hype
A | B |
|
pop
A | B |
|
mgr
A | B |
|
FIGHT
RATING
47% |
|
|
|
|
|
|
|
Undercard bout
|
Coming up we have a heavyweight MMA rules bout between Rob Gaunce (ranked 4146 p4p, 405 weight class) and Curley Cal (ranked 25522 p4p, 588 weight class). Gaunce comes to the cage accompanied by Special Ops. Rob Gaunce could well score a knockout today. He has the power to get to Curley Cal's chin.
 |
|
 |
| 195 cm
21
230 lbs
2 - 0 - 0 |
|
200 cm
18
245 lbs
0 - 2 - 0 |
BJJ White Belt
Solid boxing
Hates pizza |
|
BJJ White Belt
Good kicks
Tends to cut |
|
| |
|
Ladies and gentlemen. This fight is 3 rounds, in the heavyweight division.
Introducing the fighter to my left, fighting out of the red corner.
With a record of
2 - 0 - 0, fighting out of Montreal, Rob Gaunce!
And introducing the fighter to my right, fighting out of the blue corner.
With a record of
0 - 2 - 0, fighting out of Los Angeles, Curley Cal!
The judges for this bout are Topper Green, Chris Dean and Ron Honeybunn.
The bell rings for round one and we are underway!

Gaunce gets a clinch.
Gaunce controlling the action here for a moment.
Gaunce definitely looks more muscular than last time we saw him fight.
Gaunce pulls guard effortlessly.
We could do with one of the fighters taking the initiative a bit more on the ground - they're both waiting to capitalize on a mistake.
Cal stands up over his opponent, looking to dive in with a big punch. Here he comes, superman style! Oh, the punch misses and Gaunce has got him in a triangle choke for good measure! Oh no! Cal manages to get his head free but now Gaunce has transitioned to an armbar! Cal grimaces and is forced to tap! Beautiful Jiu Jitsu from Gaunce! I'd be surprised if that didn't end up as submission of the night!
Ladies and gentlemen, after 0:34 of round 1, we have a winner by way of Submission (Armbar). Rob Gaunce!
Rob Gaunce bigged himself up after the win. The crowd seemed to love it.
|
|
|
|
|
|
|
|
|
|
|
|
|
|
|
|
|
|
|
|
|
|
|
| S |
C
A |
G |
S |
C
B |
G |
|
S |
C |
G |
|
energy
A | B |
|
hype
A | B |
|
pop
A | B |
|
mgr
A | B |
|
FIGHT
RATING
100% |
|
|
|
|
|
|
|
Undercard bout
|
Coming up we have a heavyweight MMA rules bout between Thoth Chontamenti (ranked 3245 p4p, 328 weight class) and Abu Al Suman The Second Mohammed Bin Akbar (ranked 25610 p4p, 609 weight class). Mohammed Bin Akbar has chosen Eidha Al Menhali - Ya Tareshy as his entrance music. Abu Al Suman The Second Mohammed Bin Akbar is the more experienced fighter, so let's see if that makes a difference tonight.
 |
|
 |
| 204 cm
20
275 lbs
1 - 1 - 0 |
|
190 cm
21
266 lbs
2 - 1 - 0 |
BJJ Purple Belt
Excellent MT
Very quick |
|
BJJ Blue Belt
Brawler
Determined |
|
| |
|
Ladies and gentlemen. This fight is 3 rounds, in the heavyweight division.
Introducing the fighter to my left, fighting out of the red corner.
With a record of
1 - 1 - 0, fighting out of London, Thoth Chontamenti!
And introducing the fighter to my right, fighting out of the blue corner.
With a record of
2 - 1 - 0, fighting out of St Petersburg, Abu Al Suman The Second Mohammed Bin Akbar!
The judges for this bout are Chris Dean, Ben Hemmingworth and John Mangel.
The bell rings for round one and we are underway!
Chontamenti with a nice looking leg kick. You could hear that one land in a back row.
Chontamenti lands a nice hook to Mohammed Bin Akbar's body. Mohammed Bin Akbar takes it in his stride and looks to land his own strikes.
Chontamenti seems to be moving with more speed, compared to his last bout. He must have been working on that in the gym.
Mohammed Bin Akbar shoots in and gets a takedown into Chontamenti's guard.
Chontamenti has his foot on Mohammed Bin Akbar's thigh. He's trying to push off and get in position for a triangle, I think. Mohammed Bin Akbar works his way back into a safe position though.
Mohammed Bin Akbar is looking to work some ground and pound but Chontamenti has wrist control.
Mohammed Bin Akbar got a little sloppy there for a moment and Chontamenti has worked his way into a loose triangle - can he finish it?! No, Mohammed Bin Akbar has managed to get both his arms back between Chontamenti's legs - danger averted.
Mohammed Bin Akbar really doesn't want to stay on the ground with Chontamenti. If he can't get it back to his feet, it's only a matter of time before he'll be tapping out.
Chontamenti is working actively off his back, looking to secure an arm or perhaps work for a triangle.
The crowd are loving this. Great action here.
Chontamenti is working actively off his back, looking to secure an arm or perhaps work for a triangle.
Mohammed Bin Akbar got a little sloppy there for a moment and Chontamenti has worked his way into a loose triangle - can he finish it?! No, Mohammed Bin Akbar has managed to get both his arms back between Chontamenti's legs - danger averted.
Mohammed Bin Akbar got a little sloppy there for a moment and Chontamenti has worked his way into a loose triangle - can he finish it?! No, Mohammed Bin Akbar has managed to get both his arms back between Chontamenti's legs - danger averted.
The fighters are pressed up against the cage, both looking to find a bit of space to work.
Mohammed Bin Akbar working some strikes from top position.
Mohammed Bin Akbar avoids a guillotine attempt easily.
Chontamenti working from the bottom, still in full guard. He's managed to get a loose triangle. Mohammed Bin Akbar doesn't seem to be doing much to defend here, obviously he feels comfortable in the position. Mohammed Bin Akbar manages to throw the legs off his shoulder and he's back into guard - no problem.
That's one minute gone in the round.
Mohammed Bin Akbar trying to control the position from guard on top but Chontamenti is wriggling around, looking for whatever he can.
Chontamenti is active off his back here, looking for submissions.
Mohammed Bin Akbar postures up to throw the ground and pound strikes but they don't connect.
Mohammed Bin Akbar must be cautious of submissions here, given that his opponent has the superior Jiu Jitsu.
Chontamenti is throwing his legs up, looking for submissions. Mohammed Bin Akbar is aware though and is defending well.
Mohammed Bin Akbar avoids a guillotine attempt easily.
Chontamenti is looking for a guillotine. You can't force these things though and Mohammed Bin Akbar defends well.
The fighters are starting to get a bit slippery now, which will make submissions a bit more difficult.
Mohammed Bin Akbar makes a bit of distance and scores with some ground and pound, still in guard.
Chontamenti keeping moving, preventing Mohammed Bin Akbar from controlling successfully.
Chontamenti had isolated an arm as going for a kimura. Mohammed Bin Akbar defends it easily.
That's two minutes gone in the round.

Mohammed Bin Akbar drops back for a leg! It's a sloppy attempt though and Mohammed Bin Akbar jumps back into guard quickly, to retain the dominant position.
Chontamenti looking for a triangle here. Mohammed Bin Akbar is fighting it but it looks tight! Chontamenti pulls the arm across and this one won't last much longer! Nope, Mohammed Bin Akbar is tapping out - this one is all over!
Ladies and gentlemen, after 2:30 of round 1, we have a winner by way of Submission (Triangle Choke). Thoth Chontamenti!
In defeat, Abu Al Suman The Second Mohammed Bin Akbar stepped up to the mic, saying '"It is not in my power to cause you harm, or to bring you to right conduct."
Quran 72:21'.
|
|
|
|
|
|
|
|
|
|
|
|
|
|
|
|
|
|
|
|
|
|
|
| S |
C
A |
G |
S |
C
B |
G |
|
S |
C |
G |
|
energy
A | B |
|
hype
A | B |
|
pop
A | B |
|
mgr
A | B |
|
FIGHT
RATING
69% |
|
|
|
|
|
|
|
Undercard bout
|
Coming up we have a heavyweight MMA rules bout between Aron Egomi (ranked 3751 p4p, 367 weight class) and Jack Ripper (ranked 5361 p4p, 466 weight class). Egomi comes to the cage accompanied by Hand of doom by Manowar. Both fighters will be looking to make this an exciting fight for the fans, I'm sure!
 |
|
 |
| 190 cm
19
250 lbs
2 - 4 - 0 |
|
198 cm
21
250 lbs
4 - 1 - 0 |
BJJ Blue Belt
Basic striking
Experienced |
|
Decent wrestler
Brawler
Can Moonwalk |
|
| |
|
Ladies and gentlemen. This fight is 3 rounds, in the heavyweight division.
Introducing the fighter to my left, fighting out of the red corner.
With a record of
2 - 4 - 0, fighting out of St Petersburg, Aron Egomi!
And introducing the fighter to my right, fighting out of the blue corner.
With a record of
4 - 1 - 0, fighting out of London, Jack Ripper!
The judges for this bout are Darius Henderson, Donatello Bradman and Topper Green.
The bell rings for round one and we are underway!
Egomi tests Ripper's chin there with a solid looking shot.
We've been told by Egomi's head coaches at Hell Warriors Gym that he's been working on his takedown defense in preparation for this fight.
A lazy left from Egomi finds it's target.
A jab from Egomi finds it's way through Ripper's defenses.
Egomi throws a shot to the body.
Egomi stuns Ripper with a nice body shot, before stepping back out of range.
A nice inside leg kick there by Egomi. That's going to slow Ripper down.
Ripper has managed to clinch.
Egomi working hard to break the clinch.
Egomi wants to break the clinch but can't.
Ripper is trying to pull guard but being pressed up against the cage enables Egomi to keep the fight standing.

Ripper breaks from the clinch.
Egomi bobbing and weaving, closes the distance and lands a hook to the side of Ripper's head.
Ripper shoots in with a takedown attempt and he has Egomi pinned against the cage. Egomi gets the underhooks and manages to circle away.
We've seen a great period of action over the last minute or so - credit to both fighters for going all out!
Ripper drops his hands momentarily and Egomi takes advantage with a crisp shot to the head.
Egomi connects with a nice looking jab.
That's one minute gone in the round.
Ripper tries to drive through with a takedown attempt but Egomi defends well and Ripper ends up having to push Egomi into the cage where they will battle it out in the clinch.
Aron Egomi has stuffed three takedown attempts in the round now. That's going to take a lot out of Jack Ripper.
Egomi throws the kick towards the body but Ripper avoids it.
Aron Egomi is looking to keep the fight on the feet at all costs.
Egomi tests Ripper's chin there with a solid looking shot.
Egomi dips to his left and cracks Ripper with an uppercut!
Ripper doesn't succeed with the takedown
and Egomi counters with a good right hand that lands right on the jaw.
Whack! Egomi lands a heavy head kick that drops Ripper. The ref tackles Egomi to stop the fight - a great save by the referee because Ripper was done.
Ladies and gentlemen, after 1:30 of round 1, we have a winner by way of TKO (Head Kick). Aron Egomi!
Aron Egomi thanked the fans post fight for their support.
|
|
|
|
|
|
|
|
|
|
|
|
|
|
|
|
|
|
|
|
|
|
|
| S |
C
A |
G |
S |
C
B |
G |
|
S |
C |
G |
|
energy
A | B |
|
hype
A | B |
|
pop
A | B |
|
mgr
A | B |
|
FIGHT
RATING
65% |
|
|
|
|
|
|
|
Undercard bout
|
Coming up we have a heavyweight MMA rules bout between Bigga Baddaboom (ranked 3634 p4p, 359 weight class) and Victor Ballsawash (ranked 7386 p4p, 544 weight class). Both fighters look fresh as a daisy as they make their way towards the cage.
 |
|
 |
| 194 cm
26
263 lbs
1 - 0 - 0 |
|
183 cm
20
273 lbs
0 - 1 - 0 |
Good wrestling
Basic striking
Cardio machine |
|
BJJ Blue Belt
Counter fighter
Good gas tank |
|
| |
|
Ladies and gentlemen. This fight is 3 rounds, in the heavyweight division.
Introducing the fighter to my left, fighting out of the red corner.
With a record of
1 - 0 - 0, fighting out of Sydney, Bigga Baddaboom!
And introducing the fighter to my right, fighting out of the blue corner.
With a record of
0 - 1 - 0, fighting out of St Petersburg, Victor Ballsawash!
The judges for this bout are Ben Watson, Hugh Johnson and John Mangel.
The bell rings for round one and we are underway!
Ballsawash tries to land a leg kick but Baddaboom saw it coming and moves away.
Ballsawash swinging wildly here.
Baddaboom tries to counter by clinching up but Ballsawash breaks away and moves out of range.
Ballsawash throws a leg kick but Baddaboom checks it.
Ballsawash shoots in for a takedown - he's clinched up with Baddaboom but Baddaboom pushes him off and we're back to square one.
Ballsawash shoots in but Baddaboom avoids the takedown attempt easily.
Baddaboom scores with a sloppy right hand. Ballsawash should have avoided that one.
We've had a slow start to the round here - hopefully the action picks up.
Ballsawash avoids the head kick by Baddaboom.
Ballsawash misses with a double jab.
Baddaboom wants to take advantage of his opponent's missed offense by moving into the clinch.
A really sloppy takedown attempt there from Ballsawash.
Bigga Baddaboom has stuffed three takedown attempts in the round now. That's going to take a lot out of Victor Ballsawash.
That's one minute gone in the round.
Baddaboom works his jab well there, keeping his opponent at a distance.

It looks like Victor Ballsawash has been cut.
Ballsawash shoots in and drives through. Baddaboom sprawls well.
Baddaboom misses with a straight left.
Baddaboom lands with a right hand.
Baddaboom throws a lazy right hand but Ballsawash sees it coming a mile off and sidesteps it easily.
Ballsawash dives in for a single leg takedown but Baddaboom sprawls and the fighters end up clinched against the cage.
Baddaboom throwing a counter right hand but Ballsawash manages to avoid it.
Nice shot lands for Baddaboom.
Baddaboom lands an overhand left. A wild punch that just about connected.
Baddaboom throws a hook but Ballsawash avoids it easily.
Baddaboom misses with a body shot.
That's two minutes gone in the round.
Baddaboom throws a monster uppercut resembling something out of street fighter but it doesn't land.
Baddaboom lands with a nice low kick. That'll leave a bruise.
Baddaboom moves out of range as Ballsawash throws a body kick.
Baddaboom tries to counter by clinching up but Ballsawash breaks away and moves out of range.
A left and a right from Ballsawash both land. Nice combination.
Fantastic stuff here - a very entertaining period of action, which has drawn cheers from the crowd.
No luck for Ballsawash with that takedown attempt.
Ballsawash misses with a leg kick.
Ballsawash shoots in but doesn't get the takedown
and Baddaboom cracks him with a counter punch right on the button.
A telegraphed takedown attempt from Ballsawash is defended easily by Baddaboom.
That's three minutes gone in the round.
Baddaboom throws a low kick but Ballsawash moves out of range easily.
A looping hook to the body misses from Baddaboom. Ballsawash does a little dance to reset his feet.
Bigga Baddaboom is looking to keep the fight on the feet at all costs.
A telegraphed takedown attempt from Ballsawash is defended easily by Baddaboom.
Ballsawash shoots in looking for a double leg takedown. Baddaboom defends it nicely.
Ballsawash on the wrong end of a nice jab.
No joy there for Ballsawash, who threw a few shots but didn't land.
That's four minutes gone in the round.
Ballsawash shoots in looking for a takedown but Baddaboom manages to keep the fight standing, pushing Ballsawash's face into the canvas for good measure before circling away.
Ballsawash tries to shoot in for a takedown. He's got hold of a leg but Baddaboom swivels and escapes.
Ballsawash looks for a takedown here. Will he get it? Baddaboom is fending him off so far but Ballsawash persists. Nope, Baddaboom circles away and we're back to standing.
Ballsawash goes for a double leg but Baddaboom avoids the attempt and the two fighters end up clinched against the cage as Baddaboom continues to drive forward.
Baddaboom buckles his opponent's knee momentarily with a nice leg kick.
Baddaboom throws a body kick but he was well out of range there.
Nice sprawl there from Baddaboom as Ballsawash shoots in.
This fight brought to you by 5M nutrition - it's mmmmm tasty. Nice jab by Baddaboom.
Baddaboom definitely looks more muscular than last time we saw him fight.
Ballsawash gets his head snapped back by a nice shot there.
Baddaboom stuffs a takedown. It's all about dictating where the fight takes place and Baddaboom wants it to stay on the feet.
This is a great period of action - very entertaining stuff!
Ballsawash misses with a body kick.
Baddaboom is looking to counter punch.
Good standup being displayed there by Baddaboom as he connects with a hook.
And thats the end of the round the fighters go back to their corners.
Bigga Baddaboom dominated that round.
The cut man is working on Victor Ballsawash's cut.
The fighters' corners scream their final instructions, as the referee calls time. Here we go, back to the action!
Ballsawash's hands are dropping dangerously low here and Baddaboom connects clean with a right hook that sends him down to one knee! Ballsawash scrambles back to his feet.
Ballsawash shoots in for a takedown. "Ole!" shouts Baddaboom as he jumps to the side.
A big right from Baddaboom misses.
Ballsawash moves forwards but Baddaboom connects with a nice, crisp jab.
Baddaboom moves into range and connects with a jab.
Ballsawash is rocked!
Ballsawash misses with a series of wild punches.
Baddaboom is trying to close the distance and clinch up, after that failed offence from Ballsawash.
We've had a slow start to the round here - hopefully the action picks up.
Baddaboom slips a jab and a cross from Ballsawash.
Baddaboom is using his reach advantage well here, landing the more effective single shots from range.
Baddaboom misses the shot to the body.
A slapping body kick lands there for Baddaboom.
Ballsawash will have to do better than that with his takedown attempts.
That's one minute gone in the round.
Ballsawash stumbles momentarily as he takes a strong leg kick from Baddaboom.
Baddaboom leaves Ballsawash with his face pressed against the mat as he sprawls beautifully, defending against a solid takedown attempt.
Bigga Baddaboom has stuffed three takedown attempts in the round now. That's going to take a lot out of Victor Ballsawash.
Baddaboom keeps the fight standing with a nice sprawl.
Ballsawash avoids the body shot from Baddaboom.
Baddaboom scores with a shot to the body.
Baddaboom stuffs a takedown. It's all about dictating where the fight takes place and Baddaboom wants it to stay on the feet.
Baddaboom is really dominating this fight. Is there anything that Ballsawash can do to turn this around?
Ballsawash fakes high and shoots in for a takedown but Baddaboom avoids it really well and circles away.
Baddaboom pushes Ballsawash away with a front kick.
Both these guys seem content to just stand up and trade with eachother but Ballsawash might want to think about changing up his gameplan a bit because over the course of the fight, Baddaboom has got the better of the exchanges.
Ballsawash is breathing heavily.
That's two minutes gone in the round.
Baddaboom lands with a shot to the body.
Ballsawash avoids the body shot from Baddaboom.
Baddaboom drives through and clinches with Ballsawash against the cage.
Baddaboom is using his height advantage well here, landing a good percentage of his punches.
Ballsawash is trying to force a seperation but Baddaboom has the dominant position.
A short left from Baddaboom.
Baddaboom tries a body shot but Ballsawash blocks it.
Baddaboom digs a right hand into Ballsawash's ribs. Those have got to be taking their toll on Ballsawash's gas tank.
Baddaboom lands a hook to the side of the head.
The crowd cheering loudly, showing their appreciation for the quality fight we're seeing here.
Baddaboom lands a hook to the side of the head.
Baddaboom presses Ballsawash against the cage and delivers a mid-strength body shot.
Baddaboom lands a short shot on the inside that snaps the head of Ballsawash backwards.
That's three minutes gone in the round.
Baddaboom pushes Ballsawash back against the cage and lands a hook to the side of the head.
Baddaboom tries to throw a body punch but Ballsawash avoids it by throwing Baddaboom back against the cage.
Nice body punch from Baddaboom - that landed with a thud.
Baddaboom pushes Ballsawash back against the cage and lands a hook to the side of the head.
Baddaboom softening up his opponent with strikes, against the cage.
Baddaboom lands a shoulder strike.
Baddaboom lands a body punch in the clinch.
Nice body punch from Baddaboom - that landed with a thud.
Baddaboom pushes Ballsawash back against the cage and lands a hook to the side of the head.
Ballsawash is still on wobbly legs! Can Baddaboom finish him?
Some stalling of biblical proportions here from Baddaboom.
A hook to the body from Baddaboom.
Ballsawash seems to have recovered his senses.
Baddaboom lands a left hand that snaps the head of Ballsawash backwards.
Baddaboom stalling here - the referee won't stand for too much of that.

Baddaboom drops Ballsawash onto one knee with a big uppercut from the clinch! Ballsawash is propped up by the cage and works his way back to his feet!
That's four minutes gone in the round.
This is a great period of action - very entertaining stuff!
Baddaboom is muscling Ballsawash up against the cage and as Ballsawash bounces back off, Baddaboom cracks him with a huge right hand! Ballsawash crumples to the mat - he's out cold! This one is all over!
Ladies and gentlemen, after 4:11 of round 2, we have a winner by way of KO (Punch). Bigga Baddaboom!
A victorious Bigga Baddaboom thanked his army of followers in his post fight interview, telling people to make sure they follow him on Twitter.
|
|
|
|
|
|
|
|
|
|
|
|
|
|
|
|
|
|
|
|
|
|
|
| S |
C
A |
G |
S |
C
B |
G |
|
S |
C |
G |
|
energy
A | B |
|
hype
A | B |
|
pop
A | B |
|
mgr
A | B |
|
FIGHT
RATING
52% |
|
|
|
|
|
|
|
Co-main event
|
Coming up we have a heavyweight MMA rules bout between Rumble Johnson (ranked 3443 p4p, 344 weight class) and Bomb Squad Lighting Hands (ranked 6143 p4p, 501 weight class). Johnson comes to the cage accompanied by Where The Hood At?. These two fighters really are very evenly matched on the feet - it will be fascinating to see who can assert themselves in that aspect of the fight.
 |
|
 |
| 190 cm
25
255 lbs
2 - 1 - 0 |
|
195 cm
19
245 lbs
1 - 2 - 0 |
BJJ Blue Belt
Solid boxing
Big heart |
|
BJJ Blue Belt
Excellent boxer
Very confident |
|
| |
|
Ladies and gentlemen. This fight is 3 rounds, in the heavyweight division.
Introducing the fighter to my left, fighting out of the red corner.
With a record of
2 - 1 - 0, fighting out of Hilo, Rumble Johnson!
And introducing the fighter to my right, fighting out of the blue corner.
With a record of
1 - 2 - 0, fighting out of London, Bomb Squad Lighting Hands!
The judges for this bout are John Mangel, Topper Green and Damien Edna.
The bell rings for round one and we are underway!
Lighting Hands connects with a looping left hand that seems like it dazed Johnson momentarily.
Lighting Hands throws a nice looking combination but Johnson bobs and weaves to avoid any damage.
Johnson pushes Lighting Hands up against the cage in a clinch.
Johnson is working for a takedown up against the cage. He can't get it on this occasion though.
We've been hearing reports that Johnson has been drilling takedowns in recent sessions so let's see if that has an impact on the result of this fight.
Johnson lands a right hand that snaps the head of Lighting Hands backwards.
Lighting Hands wants to get back to striking at distance but Johnson won't allow it.
Johnson pushes Lighting Hands back against the cage and lands a hook to the side of the head.
It looks like Bomb Squad Lighting Hands has been cut.
Johnson lands a right uppercut that snaps the head of Lighting Hands backwards.
Lighting Hands is trying to break the clinch but Johnson is controlling him.
Johnson pushes Lighting Hands back against the cage and lands a hook to the side of the head.
Johnson keeps the fight in the clinch, despite Lighting Hands's efforts to push away.
Lighting Hands is looking to score with knees to the body. Maybe he'll change it up and go body then head. Johnson is defending well for now.
Nice body punch from Johnson.
Lighting Hands looks winded!
Johnson connects with a big uppercut there that sends Lighting Hands tumbling to the ground! Johnson follows him down into his guard.
Lighting Hands is rocked!
The crowd cheering loudly, showing their appreciation for the quality fight we're seeing here.
Johnson is trying to work a guillotine from the top, or something like that? Don't know how he thinks he's going to get a finish from there.
Lighting Hands is still in real trouble! Can Johnson finish him?
Johnson postures up, still in guard. A huge hammer fist lands that bounces Lighting Hands's head off the mat! Lighting Hands is out! He's out! Johnson jumps to his feet and celebrates with his corner!
Ladies and gentlemen, after 1:55 of round 1, we have a winner by way of KO (Strikes). Rumble Johnson!
Rumble Johnson thanked the fans post fight for their support.
|
|
|
|
|
|
|
|
|
|
|
|
|
|
|
|
|
|
|
|
|
|
|
| S |
C
A |
G |
S |
C
B |
G |
|
S |
C |
G |
|
energy
A | B |
|
hype
A | B |
|
pop
A | B |
|
mgr
A | B |
|
FIGHT
RATING
100% |
|
|
|
|
|
|
|
Main event
|
Coming up we have a heavyweight MMA rules bout between Random Lik (ranked 2655 p4p, 279 weight class) and Mike Tyson (ranked 6723 p4p, 522 weight class). Random Lik has the edge in experience - let's see if he can make that count tonight.
 |
|
 |
| 190 cm
25
260 lbs
3 - 0 - 0 |
|
160 cm
18
230 lbs
0 - 1 - 0 |
Decent wrestler
Brawler
Good chin |
|
BJJ White Belt
Excellent boxer
Powerful |
|
| |
|
Ladies and gentlemen. This fight is 3 rounds, in the heavyweight division.
Introducing the fighter to my left, fighting out of the red corner.
With a record of
3 - 0 - 0, fighting out of Amsterdam, Random Lik!
And introducing the fighter to my right, fighting out of the blue corner.
With a record of
0 - 1 - 0, fighting out of New York, Mike Tyson!
The judges for this bout are Donatello Bradman, Steve Erwin and Ron Honeybunn.
The bell rings for round one and we are underway!
Tyson misses with a double jab
and Lik counters with a single leg into guard. Tyson didn't expect that.
Tyson looks really tired already! That doesn't bode well for a good, competitive fight!
Lik looking to control the position here, rather than advance.
Lik lands a couple of elbows.
Lik has been looking to land a fair amount of strikes on the ground. He might be looking to soften his opponent up in order to work for a submission.
Lik content to stall in guard here.
The ref warns both fighters not to hold the cage as they work up against the meshing.
Lik lands a couple of digs.
We've had a slow start to the round here - hopefully the action picks up.
Lik scoring with some ground and pound.
That's one minute gone in the round.
Lik is stalling in the full guard.
Lik working some strikes from top position.
Lik scoring with some ground and pound.
Lik postures up and scores with a shot to the body and a follow up elbow to the head.
Lik sitting in guard, not really doing much.
Lik distracts Tyson with his right hand and drops a big elbow with his other arm.
Tyson really doesn't want to stay on the ground with Lik. If he can't get it back to his feet, it's only a matter of time before he'll be tapping out.
Lik stands up over Tyson, holding his feet. He dives back in and lands a decent shot to the head.
Lik is working the ground and pound from guard. He might want to try advancing position though to get more of an impact.
That's two minutes gone in the round.
Lik sitting in guard here, content to control.
Tyson has momentary wrist control but Lik slips an elbow through the middle.
Lik working some strikes from top position.
Tyson is rocked!
Lik slows down the pace of the fight for a moment. He'll need to remain active if he doesn't want to see the fight stood back up.
Tyson is still in real trouble! Can Lik finish him?
Lik with a nice head shot there.
Lik arches his back and unloads with a massive left and a right! Tyson's eyes roll back into his head, he's out cold! The ref dives in to stop the fight - wow, they were hard shots!
Ladies and gentlemen, after 2:51 of round 1, we have a winner by way of KO (Strikes). Random Lik!
|
|
|
|
|
|
|
|
|
|
|
|
|
|
|
|
|
|
|
|
|
|
|
| S |
C
A |
G |
S |
C
B |
G |
|
S |
C |
G |
|
energy
A | B |
|
hype
A | B |
|
pop
A | B |
|
mgr
A | B |
|
FIGHT
RATING
34% |
|
|
|
|
|
|
|
|
|
|
