|
|
PBP Commentary |
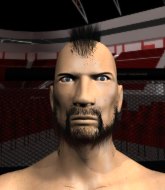
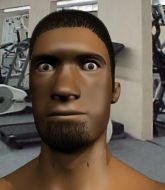
Coming up we have a heavyweight MMA rules bout between Peter Steel (ranked 4893 p4p, 482 weight class) and Mustafa Al Mombasa (ranked 8019 p4p, 603 weight class). Steel comes to the cage accompanied by Excuse Me. Al Mombasa is bouncing up and down as he enters the arena, backed by Capone-N-Noreaga & Tragedy Khadafi - T.O.N.Y.. Fingers crossed for an exciting fight - I'm sure both fighters are looking for a nice under the table bonus!
 |
|
 |
| 196 cm
19
280 lbs
1 - 1 - 0 |
|
193 cm
19
280 lbs
1 - 1 - 0 |
Decent wrestler
Brawler
Cardio machine |
|
BJJ White Belt
Excellent boxer
Solid chin |
|
| |
|
Ladies and gentlemen. This fight is 3 rounds, in the heavyweight division.
Introducing the fighter to my left, fighting out of the red corner.
With a record of
1 - 1 - 0, fighting out of New York, Peter Steel!
And introducing the fighter to my right, fighting out of the blue corner.
With a record of
1 - 1 - 0, fighting out of Sydney, Mustafa Al Mombasa!
The judges for this bout are Bruno Hogan, Skip Squint and John Mangel.

The bell rings for round one and we are underway!
Steel takes a body punch that cleary hurt but he's trying not to show any weakness.
Al Mombasa throws a looping overhand right but Steel ducks down to avoid it.
An attempted straight right counter from Steel misses the target.
Al Mombasa takes a solid shot to the body. That one hurt him but he's trying not to show it.
Al Mombasa slips a straight right by Steel.
Steel looks to have improved his striking defense since last time we saw him fight.
Steel lands the left hand.

It looks like Mustafa Al Mombasa has been cut.
Al Mombasa jabbing away but nothing is landing.
Nice sprawl there from Al Mombasa as Steel shoots in.
And an attempted straight right on the counter from Al Mombasa! But no joy.
Al Mombasa misses with a looping left.

Steel throws the overhand right but ducks down into a quick takedown attempt. Al Mombasa was covering up waiting for the punch and Steel finishes the takedown easily into guard.

Al Mombasa has butterfly guard. He's looking to stand up here. He pushes Steel off him and springs to his feet nicely. The crowd applauds.
Al Mombasa looks more muscular than last time we saw him. He must have been on the weights.
We've seen a great period of action over the last minute or so - credit to both fighters for going all out!
Steel gets cracked there but stands up to it.

It looks like Peter Steel has been cut.
Al Mombasa scores with a sloppy right hand. Steel should have avoided that one.
Mustafa Al Mombasa seems to be the more aggressive standup fighter in this bout.
Steel takes a body punch but keeps moving.
Al Mombasa moving in and out of range nicely, whilst landing the scoring shot.
Steel walks into a left hand.
Steel jabbing away but nothing is landing.
Al Mombasa keeping a good distance there, avoiding the body shot.

That's one minute gone in the round.
Al Mombasa misses with an uppercut.
Steel drives through with a takedown into Al Mombasa's guard. Let's see what he can do from the top position.
Al Mombasa trying to keep a closed guard but Steel is proving a slippery customer.
Al Mombasa working the defensive guard well to avoid strikes from Steel.
Steel looking to pass the guard.
The fighters are pressed up against the cage, both looking to find a bit of space to work.
Al Mombasa trying to keep a closed guard but Steel is proving a slippery customer.
Steel sitting in guard, not really doing much.
Al Mombasa preventing the ground and pound from doing any damage.
Steel in full guard, throwing the ground and pound. No damage this time.
Steel has decided he wants to stand but the closed guard of Al Mombasa is proving hard to escape from.
Al Mombasa controlling the position.

That's two minutes gone in the round.
Steel throws a big right hand that misses.
Al Mombasa avoiding any damage from the ground and pound.
Steel throwing shots from guard but he's hitting more mat than opponent.
Steel is in close to Al Mombasa's body, working some short punches and elbows.
Steel throwing strikes but missing.
Al Mombasa not looking particularly offensive just at the moment.
Steel forces his way into half guard.
Steel throwing shots but Al Mombasa is blocking nicely.
Steel thows a huge punch but Al Mombasa dodges it nicely.
Steel throwing punches and elbows but they're not doing any damage.
Al Mombasa tries to get to full guard but Steel has control of the leg.
Al Mombasa tries to kick Steel off but Steel keeps his base steady and stays in half guard.
Steel throwing punches and elbows but they're not doing any damage.
Al Mombasa is looking for a sweep. Steel is wise to his cunning plan and keeps the top position.
Al Mombasa keeping control of the leg, stopping his opponent passing to mount.

That's three minutes gone in the round.
Steel prevents Al Mombasa from improving his position.
Al Mombasa wants to control but Steel is keeping busy.
Al Mombasa is trying to get back to full guard.
Steel working some ground and pound from close in. He's looking to maintain this position and strike for a while by the looks of things... although he'll probably advance to full mount in a minute now I've said that.
Al Mombasa makes his way to full guard. A much better position for Al Mombasa.
Steel trying to pass the guard but can't manage it just yet.
We get told so often about how wrestlers don't like to be on their backs. Let's see if Al Mombasa can do anything to dispel that myth.

Steel drops back for a leg! It's a sloppy attempt though and Steel jumps back into guard quickly, to retain the dominant position.
Al Mombasa looking to control.
Steel wants to control from the top but Al Mombasa keeps moving.
Al Mombasa looking to control but Steel passes into half guard.

That's four minutes gone in the round.
Al Mombasa is refusing to be controlled, as Steel sits in half guard.
Al Mombasa is pressing down on Steel's left leg trying to get back to full guard. He's managed it.
Steel preventing the sweep.
Al Mombasa working the defensive guard well to avoid strikes from Steel.
Al Mombasa looking to control but Steel passes into half guard.
Steel missing with some ground and pound from the half guard.
Steel wants to stand but Al Mombasa has hold of a leg and an arm, so he's trapped for now.
Steel throwing shots but they're hitting the canvas more than the man.
Steel wants to lay and pray for a moment but Al Mombasa keeps working.
Steel not landing any meaningful shots this time.
Steel thows a wild elbow that connects with the canvas.
Steel is scoring with some nice ground and pound from the dominant position.
Al Mombasa is looking to regain full guard. Not this time though.
And thats the end of the round the fighters go back to their corners.
That was a close round but I would say that Peter Steel will probably get the nod.
Both fighters have cut men working on them during the interval.
The fighters' corners scream their final instructions, as the referee calls time. Here we go, back to the action!

Al Mombasa takes a hook to the side of the head. I wonder if that's got his ears ringing.

Al Mombasa ducks straight into an uppercut from Steel and tumbles to the canvas! Its a flash knockdown though - Al Mombasa manages to regain guard straight away.

Al Mombasa is rocked!
Steel throws a big elbow that misses.
Al Mombasa is still in real trouble! Can Steel finish him?
Al Mombasa manages to sweep nicely, so he's now on top. Steel manages to get himself to full guard.

We've seen a great period of action over the last minute or so - credit to both fighters for going all out!
Al Mombasa throws an elbow that misses. Steel uses the momentum to reverse the position. He's now in Al Mombasa's guard. Nice move by Steel!

There's a bit of a scramble here and now Al Mombasa is on top in guard.
Steel avoiding any damage from the ground and pound.
Al Mombasa seems to have recovered his senses.
There's a bit of a scramble here and now Steel is on top in guard.
Al Mombasa tries to land a sweep but no joy.
Steel postures up.
Steel throwing shots from guard but he's hitting more mat than opponent.
Al Mombasa utilising some decent striking defenses from the guard, preventing the ground and pound.
Al Mombasa avoiding any damage from the ground and pound.
Al Mombasa trying to control the position.
Steel with a flurry of punches that miss.
That's one minute gone in the round.
Steel engaging in some classic timewasting tactics.
Al Mombasa controls Steel momentarily but Steel frees himself.
Steel slips effortlessly into side control - very nice.
Steel postures up a little and throws a couple of hammerfists but they don't connect properly.
You can see the frustration on Al Mombasa's face, being in this tough position on the bottom.
Al Mombasa is looking to reverse the position.
Steel lands an elbow.
Steel creates some space and throws a big elbow, but Al Mombasa sees it coming and moves his head just enough to avoid the strike.
Al Mombasa can't do much from the bottom here.
The strikes coming from Steel are missing the target in this wave of attacks.
Al Mombasa is trying to escape the position but Steel is controlling the position.
That's two minutes gone in the round.
Al Mombasa is positioning himself to get back to half guard.
Steel throws a knee to the body but it doesn't do much damage.
A bit of a lull in the action. I'm sure it will pick up again soon... even if the ref has to physically pick them up and put them back on their feet.
Steel throws a strike aimed at the side of Al Mombasa's head but Al Mombasa avoids it well.
Steel wants to control but Al Mombasa is keeping him busy.
Steel tries to score with some ground and pound. Al Mombasa controls his posture well this time though and the shots don't do any damage.
Al Mombasa sneaks back into half guard.
Steel scores with a couple of good hammerfists.
Steel sitting in half guard, looking to land shots. Al Mombasa defending well though.
Steel sitting in half guard, looking to land shots. Al Mombasa defending well though.
Steel throwing shots but they're hitting the canvas more than the man.
Al Mombasa works his way to full guard. Good work.
Steel stays in close to Al Mombasa's body and controls the position.
Steel postures up.
That's three minutes gone in the round.
Steel with a flurry of punches that miss.
Peter Steel overall seems to be getting the better of the ground position in the fight so far.
Steel would like to get this fight back to the feet but can't get free from the closed guard.
Al Mombasa wants to hit a switch here but Steel passes into full mount! Oh no, disaster for Al Mombasa there!
Steel sends his fist crashing into the mat - the crowd let out a collective ooooooh. Let's hope he's not broken it!
Steel landing strikes, looking to finish!
Steel lands a couple of nice shots there from mount.
That has opened up Mustafa Al Mombasa's cut even more.
Steel cracks Al Mombasa with a big head shot that has him covering up instantly! He's rolled onto his side and the referee has seen enough - this one is aaaaaaaaaaall over!
Ladies and gentlemen, after 3:53 of round 2, we have a winner by way of TKO (Strikes). Peter Steel!
Peter Steel decided to thank the fans in attendance for making a great atmosphere. It seemed to go down pretty well.
|
|
|
|
|
|
|
|
|
|
|
|
|
|
|
|
|
|
|
|
|
|
|
| S |
C
A |
G |
S |
C
B |
G |
|
S |
C |
G |
|
energy
A | B |
|
hype
A | B |
|
pop
A | B |
|
mgr
A | B |
|
FIGHT
RATING
56% |
|
|
|
|
|
|

