 |
The House of Asa PBP Commentary |
Undercard bout
|
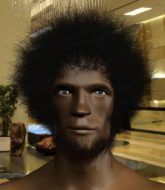
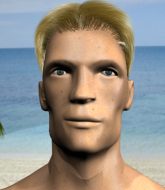
Coming up we have a light heavyweight MMA rules bout between Roz Dee (ranked 0 p4p, 0 weight class) and Izzy BH (ranked 0 p4p, 0 weight class). Well, the cameraman is lingering on a pretty young lady for a bit too long there. Keep your eyes on the fighters buddy or you'll miss the fighter intros!
 |
|
 |
| 194 cm
22
207 lbs
3 - 0 - 0 |
|
190 cm
23
210 lbs
2 - 0 - 0 |
BJJ Purple Belt
Solid boxing
Big heart |
|
BJJ White Belt
Decent boxing
Intelligent |
|
| |
|
Ladies and gentlemen. This fight is 3 rounds, in the light heavyweight division.
Introducing the fighter to my left, fighting out of the red corner.
With a record of
3 - 0 - 0, fighting out of Hilo, Roz Dee!
And introducing the fighter to my right, fighting out of the blue corner.
With a record of
2 - 0 - 0, fighting out of Hilo, Izzy BH!
The judges for this bout are Micheangelo Fripello, Chris Saunders and Paul Gruel.

The bell rings for round one and we are underway!
Dee takes a punch right to his stomach. That took the wind out of him momentarily.
Dee tries a switch kick but it misses it's target.
Roz Dee seems to be the more aggressive standup fighter in this bout.
BH jabs Dee right on the nose. Dee blinks but takes it well.
BH lands a nice looking body shot.
Dee looks for a takedown here. Will he get it? BH is fending him off so far but Dee persists. Nope, BH circles away and we're back to standing.
BH lands a straight punch to the body, keeping Dee at a distance.
Dee closes the distance and takes a jab right on the nose as he does so.
BH takes a shot right to the liver - Bas would have been proud of that punch.
We've seen a great period of action over the last minute or so - credit to both fighters for going all out!
Dee takes a jab on the nose. He smiles like he loves it and keeps coming.
Dee shoots in for a double leg but BH sprawls well. That's going to sap some energy.
Dee shoots in for a takedown. "Ole!" shouts BH as he jumps to the side.
That's three failed takedown attempts in the round for Roz Dee. That's going to take a lot out of him.
BH changes levels and scores with a jab to the body.
Dee is breathing heavily.
Dee will have to do better than that with his takedown attempts.
Dee shakes his hands off, looking to compose himself, but takes a jab to the jaw whilst he does it.
BH scores with a jab to the jaw.
BH lands with a hook. Dee tried to avoid it but it clipped the top of his head.

Dee is rocked!

BH sends Dee crashing to the mat with a devastating uppercut! BH is motioning to the referee to let Dee up. He wants to try and finish this one on the feet!
Oh Dee is still all over the place! His legs are completely gone! Will he be able to recover?!!
BH ducks down into range and throws a picture perfect right hook that connects with Dee's jaw. Dee's eyes stare off into space as he falls to the mat, out cold! BH does the decent thing and steps back, rather than landing any shots to his unconscious opponent.
Ladies and gentlemen, after 0:50 of round 1, we have a winner by way of KO (Punch). Izzy BH!
Izzy BH decided to go for the less than humble approach in his post fight interview, telling everyone how he is going to conquer the world. The crowd seemed to like it when really that sort of approach could have gone either way.
|
|
|
|
|
|
|
|
|
|
|
|
|
|
|
|
|
|
|
|
|
|
|
| S |
C
A |
G |
S |
C
B |
G |
|
S |
C |
G |
|
energy
A | B |
|
hype
A | B |
|
pop
A | B |
|
mgr
A | B |
|
FIGHT
RATING
100% |
|
|
|
|
|
|
|
Undercard bout
|
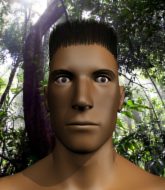
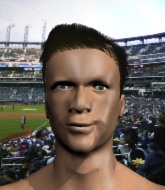
Coming up we have a lightweight MMA rules bout between Adam West (ranked 0 p4p, 0 weight class) and Jim Taker (ranked 0 p4p, 0 weight class). West kept the crowd waiting but all that was forgotten when his ring entrance music started. The incomparable musical genius that is Bat-man. Adam West has the better chin. Will he look to stand and bang today?
 |
|
 |
| 171 cm
19
160 lbs
4 - 0 - 0 |
|
178 cm
19
160 lbs
1 - 0 - 0 |
Good takedowns
Basic striking
Good chin |
|
Good wrestler
Brawler
Powerful |
|
| |
|
Ladies and gentlemen. This fight is 3 rounds, in the lightweight division.
Introducing the fighter to my left, fighting out of the red corner.
With a record of
4 - 0 - 0, fighting out of Hilo, Adam West!
And introducing the fighter to my right, fighting out of the blue corner.
With a record of
1 - 0 - 0, fighting out of Hilo, Jim Taker!
The judges for this bout are Paul Gruel, Roger Salmon and Ryoma Takatsuka.
The bell rings for round one and we are underway!
A punch combination from Taker misses.
West shoots in for a takedown but Taker shows good takedown defense.

West fakes a strike and closes the distance, dragging Taker to the ground. West is now in Taker's guard.
The referee looks like he's ready to step in and stand the fighters back up.

Taker has his feet on West's hips. He pushes off and gets to his feet. Nice work.
Taker thuds his right hand into West's forehead from close range. That could be painful for both fighters.
West fails in his attempt to clinch.
Wow, both these guys are really going for it!
West shoots in and gets a takedown into half guard. West showed some decent athleticism there.
Taker tries to kick West off but West keeps his base steady and stays in half guard.
This is a great period of action - very entertaining stuff!
West wants to free his trapped foot but Taker is holding on for dear life with his legs.
Taker taking some punishment here, with West in his half guard.

West is sneakily working for an arm triangle but Taker sees it coming and defends easily.
The fighters are pressed up against the cage, both looking to find a bit of space to work.
Taker keeping his head moving to avoid the ground and pound.
West landing with strikes to the body and head, softening up his opponent.
Taker trying to control but West postures up.
Taker really doesn't want to stay on the ground with West. If he can't get it back to his feet, it's only a matter of time before he'll be tapping out.
Taker is trying to get back to full guard.

That's one minute gone in the round.
Taker flails away from the bottom but he's not doing any damage.
West throwing shots but they're hitting the canvas more than the man.
West prevents Taker from standing back up.
West wants to pass the guard but Taker is defending well.
The referee walks around the fighters to get a better view of the action. West lands a nice short elbow.
Taker trying to control from the bottom.
Taker controlling the position well.
Both fighters really going for it on the ground here!
West not throwing his punches with enough precision this time.
West thows a wild elbow that connects with the canvas.
West looks towards his corner to check for any instructions. The corner give him nothing to work with, so he cracks Taker with a short hammerfist. I guess that's as good as any advice he could get in this position.
West has been looking to land a fair amount of strikes on the ground. He might be looking to soften his opponent up in order to work for a submission.
Taker is concentrating on defense, preventing West from advancing position.
West missing with some ground and pound from the half guard.
West working some ground and pound from close in. He's looking to maintain this position and strike for a while by the looks of things... although he'll probably advance to full mount in a minute now I've said that.
West seems to be looking for submissions.
West working Taker over with strikes.

That's two minutes gone in the round.
Nice strikes from West there.
We've seen a great period of action over the last minute or so - credit to both fighters for going all out!
West thumps the canvas. Not on purpose obviously - he just missed Taker's head.
The fighters are starting to perspire pretty heavily.
Taker wants to improve his position but West is controlling well.
Taker looks like he's trying to stand up.
We get told so often about how wrestlers don't like to be on their backs. Let's see if Taker can do anything to dispel that myth.
West is looking to take a break and control but Taker is keeping him honest, looking to work from the bottom.
Taker is trying to get back to full guard.
West thows a wild elbow that connects with the canvas.
Taker is looking to control West's leg but it's slowly edging free. Can Taker avoid being mounted?
Taker is looking to regain full guard. Not this time though.
West is keen to just control but Taker is a slippery customer.
The ref warns both fighters not to hold the cage as they work up against the meshing.

That's three minutes gone in the round.

It looks like we're going to have a standup here. Neither fighter is doing enough on the ground.
West gets the takedown into side control.
Taker throwing some weak shots from the bottom that do no damage.
Taker is not content to let West control the position.
West lands a few punches from side control.
West lands a knee to the body and follows it up with some ground and pound to the head. That will wear Taker down.
West tries to advance to mount but can't.
Taker is not in a great position here, taking some shots.
Taker tries to get back to half guard but can't.
West wants to lay and pray for a moment but Taker keeps working.
Taker is trying to get back to half guard.
Taker wants to control but West postures up.

That's four minutes gone in the round.
West trying to control the position but Taker is working away.
The crowd cheering loudly, showing their appreciation for the quality fight we're seeing here.
Taker wants to control but West postures up.
West is working Taker over with some ground and pound from side control.
West working away.
West controlling the position from side mount.
West lands some shots froms side control.
Taker tries to improve position but can't.
The crowd are going absolutely nuts as the round comes to an end - what a fantastic round of action!
West has knee on belly and now moves to full mount! Trouble for Taker!
West landing strikes from the mount.
West lands with some vicious ground and pound - can Taker hang on?
West punishing his opponent with strikes.
And thats the end of the round the fighters go back to their corners.
Adam West dominated that round.
The referee calls time. The cornermen exit stage left and we're back to business.

Taker's jab looks to have found its range, popping West under the eye.
Taker lands with a nice body kick.
Taker tried to score with a low kick but West checks it.
A momentary lapse in concentration from Taker enables West to shoot in and score with a neat double leg. Taker manages to secure a closed guard as the fighters hit the mat.
Adam West overall seems to be getting the better of the ground position in the fight so far.
Taker working the defensive guard well to avoid strikes from West.
Taker lands a beautiful switch and he's in full mount! That could spell trouble for West!
West is desperately trying to get back to half guard.
Taker lands a nice shot to the head.
Fantastic stuff here - a very entertaining period of action, which has drawn cheers from the crowd.
West working to try and regain half guard.
Taker lands a shot to the body, followed up by a shot to the exposed head of his trapped opponent.
Taker working the ground and pound effectively.
West regains half guard.
That's one minute gone in the round.
West wants to control but Taker is keeping busy and won't allow it.
Taker working the head and body with strikes.
West avoiding damage under a succession of punches from Taker.
West trying to control from the bottom.
Taker slips a nice elbow through West's hands, connecting with West's forehead.
Taker throwing punches and elbows but they're not doing any damage.
West moves into full guard.
Taker scores with a decent looking elbow strike.
West controls Taker momentarily but Taker frees himself.
West wants to sweep but no luck.
Taker wants to control from the top but West keeps moving.
Taker would like to get this fight back to the feet but can't get free from the closed guard.
That's two minutes gone in the round.
West is working from a closed guard but he's struggling to control his opponent.
Taker must be cautious of submissions here, given that his opponent has the superior Jiu Jitsu.
It looks like the ref is thinking about a standup.
Well, the referee has seen enough. Neither fighter is active enough on the ground so he's stood them back up.
Taker throws the left hand but West avoids the punch easily.
Taker lands a vicious shot with the stealth of a sniper and the strength of a viper. Are vipers that strong? I can think of lots of things that are stronger than a viper - not many rhyme with sniper though.
Jim Taker seems to be the more aggressive standup fighter in this bout.
The crowd cheering loudly, showing their appreciation for the quality fight we're seeing here.

Taker clinches up against the cage.

Taker manages to break the clinch.
West stuffs the takedown.
Taker moves into the clinch successfully.
West misses with a knee strike.
West tries a knee to the head but Taker blocks it.
Taker is looking for a takedown up against the cage. West gets underhooks though and prevents the takedown attempt.
West with the Thai clinch. He's looking to land a big knee but he's not managed it this time.
Taker throws a head punch that misses.
Good anti-grappling being displayed by Taker as West tries to tie him up.
Taker breaks the clinch.
That's three minutes gone in the round.
West moves out of range of the body kick from Taker.
West wants to clinch.
Taker fakes with a right hand and throws a good leg kick, right into the thigh. That had to hurt West.
No luck for West with that takedown attempt.
Both fighters are absolutely exhausted here.
West fails with a takedown attempt from distance.
West misses with a takedown
and Taker counters with a big head kick but West shrugs it off.
That's three failed takedown attempts in the round for Adam West. That's going to take a lot out of him.
West avoids the head kick by Taker.
Taker scores with a shot to the body.
Taker closes the distance and clinches.
West has Taker pressed against the cage, preventing Taker from circling away and getting back to striking at range.
West tries to stall but Taker uses the opportunity to gain a better position.
Taker tries a shoulder strike but it doesn't do any damage.
Taker escapes the clinch and we're back to striking.
West tries to clinch but Taker is having none of it.
That's four minutes gone in the round.
West will have to do better than that with his takedown attempts.
Taker ducks down and throws a hook to the body but West moves away.
This is a great period of action - very entertaining stuff!
Taker throws the kick towards the body but West avoids it.
Taker rushes West and pushes him back against the cage in a clinch.
Taker lands a hook to the side of the head.
Taker has hold of a leg and is looking for a trip takedown. West avoids it nicely though and we remain in the clinch.
West is looking to score with knees to the body. Maybe he'll change it up and go body then head. Taker is defending well for now.
Taker wants a takedown but no success here.
Taker wants a takedown.
Taker working hard to break the clinch.
West prevents Taker from breaking the clinch.
West pulls Taker into guard.
West wants to sweep but no luck.
The crowd are going absolutely nuts as the round comes to an end - what a fantastic round of action!
Taker loading up with the ground and pound but he's missing more than he's landing in this flurry.
West looking to control.
Taker cracks West with a solid left hand.
West is working the butterfly guard. He manages to land a nice scissor sweep and is now in half guard on the top. Nice move.
And thats the end of the round the fighters go back to their corners.
Jim Taker showed his class in that round. I'd imagine he'll take it on all the scorecards.
The referee calls time. The cornermen exit stage left and we're back to business. This is the final round!

Taker throws a nice looking combination but West bobs and weaves to avoid any damage.
West shoots in looking for a double leg takedown. Taker defends it nicely.
Taker throws a head kick but West moves out of range.
Nice sprawl there from Taker as West shoots in.
West shoots in with a takedown attempt and he has Taker pinned against the cage. Taker gets the underhooks and manages to circle away.
That's three failed takedown attempts in the round for Adam West. That's going to take a lot out of him.
West shoots in for a takedown but doesn't get it.
Taker looks to land a body kick but West moved away.
Taker fakes high and swings low for a body shot but West manages to avoid it.
West wants to clinch up but Taker keeps it at a distance.
Jim Taker seems to be getting the better of the standup.
West uses good footwork to avoid the strikes from Taker.
Taker is looking to land body kicks.
Taker fakes a head shot and lands one to the body.
Both fighters are breathing heavily.

West closes the distance and clinches.
Good anti-grappling being displayed by Taker as West tries to tie him up.
That's one minute gone in the round.
West stalls.
West is looking to score with knees to the body. Maybe he'll change it up and go body then head. Taker is defending well for now.
Taker goes for a body shot but it's blocked.
West with the Thai clinch. He's looking to land a big knee but he's not managed it this time.
Taker is trying to force a seperation but West has the dominant position.
West looking to stall.
Taker is trying to break free.
Both fighters working to control the clinch.
Taker is trying to push West away but West has him pressed against the cage, so he's going nowhere.
Taker tries a shoulder strike but it doesn't do any damage.
Taker throws a punch but it's blocked by West.
West working aggressively here.
West is working for a takedown up against the cage. He can't get it on this occasion though.
West misses with a knee to the head.
That's two minutes gone in the round.
A left hand lands to the body for Taker.
West is pressed up against the cage. Taker has hold of a leg and is looking to drag West down to the mat. West avoids the attempt though and has circled away. We're back to striking at a distance.
Taker delivers a nice body kick.
Adam West is looking to throw some combinations by the looks of things.
A punch combination from Taker misses.
Taker thows a body shot but no joy.
West is trying hard to land a takedown here. Taker sprawls well and keeps this one on the feet.
Taker throws a head kick that misses.
A punch combination from Taker misses.
This is a great period of action - very entertaining stuff!
West needs to keep his hands up - Taker had a free shot at his head there.
A left lands for Taker.
West doesn't succeed with the takedown
and Taker counters with a nice body shot.
Taker throws a low kick but it's checked well by West.
West checks a leg kick.
West changes levels and looks for a double leg takedown. Taker tries to avoid it but West manages to keep hold of a leg and drag Taker to the ground. Taker escapes though and pops straight back up to his feet.
Taker throws a hard body shot but it just misses.
A good leg kick by Taker.
Taker circles away from the clinch attempt.
That's three minutes gone in the round.
West shoots in for a double leg but Taker sprawls well. That's going to sap some energy.
Taker darts in and clinches West up against the cage.
Taker lands with a light punch inside.
An uppercut to the body lands inside from Taker.
Taker lands a hook to the side of the head.
Taker misses with some punches.

Taker has West pressed up against the cage. He's trying to work for a single leg takedown. Taker pulls back from the cage and twists to the side, sending West tumbling to the mat - Taker dives into West's guard.
Taker landing some decent shots from guard.
Taker is intent on slowing down the pace of the fight, simply looking to control.
West controls Taker momentarily but Taker frees himself.
That's four minutes gone in the round.
Taker is working West over from the guard. He should look to pass the guard and do a little more damage with these strikes.
Wooooo! Give it up for these two warriors! They are putting on a show!
Taker postures up and scores with a shot to the body and a follow up elbow to the head.
A big thud reverberates around the arena there as Taker accidentally thumps the mat. Hopefully he's not broken his hand.
Taker wants to stand but West has a closed guard, so he can't escape.
West tries to land a sweep but no joy.
West is trying to control the position but Taker postures up.
Taker works over West with some ground and pound from guard.
West tries to land a sweep but no joy.
As the round comes to an end the crowd are showing their appreciation for a great round of action.
Taker throws a big right hand that misses.
Taker missing there with some ground and pound from the guard.
Taker pushing down on West's thigh, trying to pass to half guard. He's managed it... Nice work.
The fighters are battling for position here. West manages to regain full guard. Nice work.
And that's the end of the fight!
Jim Taker comfortably won the final round on my scorecard.
I think Taker has won this one but let's see whether the judges agree with me. Over to the ring announcer for the scorecards.
Ladies and gentlemen, after 3 rounds of action, we go to the scorecards for a decision.
Judge Paul Gruel scores the fight 28:29
Judge Roger Salmon scores the fight 28:29
Judge Ryoma Takatsuka scores the fight 28:29
In favor of your winner, by unanimous decision... Jim Taker!
|
|
|
|
|
|
|
|
|
|
|
|
|
|
|
|
|
|
|
|
|
|
|
| S |
C
A |
G |
S |
C
B |
G |
|
S |
C |
G |
|
energy
A | B |
|
hype
A | B |
|
pop
A | B |
|
mgr
A | B |
|
FIGHT
RATING
100% |
|
|
|
|
|
|
|
Undercard bout
|
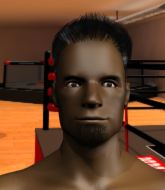
Coming up we have a heavyweight MMA rules bout between Dante Cartwright (ranked 0 p4p, 0 weight class) and Roger Gracie (ranked 0 p4p, 0 weight class). Gracie is bobbing his head along to his entrance song: Im On One. These two fighters really are very evenly matched on the feet - it will be fascinating to see who can assert themselves in that aspect of the fight.
 |
|
 |
| 185 cm
21
250 lbs
2 - 3 - 0 |
|
225 cm
19
250 lbs
1 - 2 - 0 |
Decent wrestler
Brawler
Cuts easily |
|
BJJ Brown Belt
Basic striking
Enjoys gardening |
|
| |
|
Ladies and gentlemen. This fight is 3 rounds, in the heavyweight division.
Introducing the fighter to my left, fighting out of the red corner.
With a record of
2 - 3 - 0, fighting out of Hilo, Dante Cartwright!
And introducing the fighter to my right, fighting out of the blue corner.
With a record of
1 - 2 - 0, fighting out of Hilo, Roger Gracie!
The judges for this bout are Jeff Smith, Josh West and Micheangelo Fripello.
The bell rings for round one and we are underway!
Gracie lands with a good body shot.
Cartwright instigates a clinch.
Cartwright throws a blind hook that connects with the side of Gracies head.
Gracie is trying to pull guard but Cartwright turns him against the cage and we stay in the clinch.
Gracie tries to pull guard but Cartwright forces him back to his feet, against the cage.
Cartwright prevents Gracie from breaking the clinch.
Gracie jumps into guard, dragging Cartwright to the mat.
Cartwright with a flurry of punches that miss.
The ref warns both fighters not to hold the cage as they work up against the meshing.

Gracie escapes his hips to the side and looks to be working for an armbar. Cartwright gives him a little smile and shakes his head. No chance.
The fighters are pressed up against the cage, both looking to find a bit of space to work.
Gracie has thrown up a leg looking for a triangle. Cartwright doesn't defend quickly enough and Gracie has managed to lock this one up! Can Cartwright escape?! NO! He's tapping out! Damn, that was a quick submission - congrats to Gracie on a fantastic submission victory.
Ladies and gentlemen, after 0:39 of round 1, we have a winner by way of Submission (Triangle). Roger Gracie!
Roger Gracie was full of energy after the big win and talked about how he thinks he can do big things in this sport. The crowd were appreciative of his determination to succeed.
|
|
|
|
|
|
|
|
|
|
|
|
|
|
|
|
|
|
|
|
|
|
|
| S |
C
A |
G |
S |
C
B |
G |
|
S |
C |
G |
|
energy
A | B |
|
hype
A | B |
|
pop
A | B |
|
mgr
A | B |
|
FIGHT
RATING
95% |
|
|
|
|
|
|
|
Undercard bout
|
Coming up we have a super heavyweight MMA rules bout between Ramires Santos Do Nascimento (ranked 0 p4p, 0 weight class) and Yasuhiro Yamashita (ranked 0 p4p, 0 weight class). Both these guys have really solid chins. Will we see a standup war or will they both decide that a knockout is unlikely and try to win the fight elsewhere?
 |
|
 |
| 201 cm
25
296 lbs
1 - 0 - 0 |
|
180 cm
25
290 lbs
2 - 1 - 0 |
BJJ White Belt
Excellent boxer
Granite chin |
|
Good takedowns
Basic striking
Solid chin |
|
| |
|
Ladies and gentlemen. This fight is 3 rounds, in the super heavyweight division.
Introducing the fighter to my left, fighting out of the red corner.
With a record of
1 - 0 - 0, fighting out of Hilo, Ramires Santos Do Nascimento!
And introducing the fighter to my right, fighting out of the blue corner.
With a record of
2 - 1 - 0, fighting out of Hilo, Yasuhiro Yamashita!
The judges for this bout are Jeff Smith, Micheangelo Fripello and Chris Saunders.
The bell rings for round one and we are underway!
Yamashita looks to throw the jab but Santos Do Nascimento is out of range.

Santos Do Nascimento drops Yamashita with a beautiful combination! Yamashita stares up at his opponent, who ushers him back to his feet - Santos Do Nascimento is looking for the KO!

It looks like Yasuhiro Yamashita has been cut.
The crowd are loving this. Great action here.
Yamashita swings widly with a right hand
and Santos Do Nascimento counters nicely by changing levels and landing a hook to the body.
Yamashita bobs and weaves into range and then changes levels and scores with a nice takedown into side control.
If this pace continues, the referee will definitely step in and force a standup.
Santos Do Nascimento is trying to get back to half guard.
Yamashita is trying to get an arm triangle but Santos Do Nascimento is defending well.
Santos Do Nascimento is looking for a sweep.
We're hearing some news coming in from back stage. It's official - Yamashita has eaten all the pies!
Yamashita advances nicely into full mount.
Yamashita is thinking about an arm triangle here, looking to tighten it up before moving to side control. Santos Do Nascimento can see it coming though and defends well with a couple of strikes to the head and some good arm positioning.
Yamashita is thinking about an arm triangle here, looking to tighten it up before moving to side control. Santos Do Nascimento can see it coming though and defends well with a couple of strikes to the head and some good arm positioning.
Yamashita is working on an americana here. Ooh, that looks pretty nasty! Nope, Santos Do Nascimento has managed to escape the submission attempt.
That's one minute gone in the round.
Santos Do Nascimento is desperately trying to improve his position but Yamashita has a good base and remains in mount.
Yamashita tries to control but Santos Do Nascimento wriggling away.
Santos Do Nascimento defends a decent attempt at a guillotine from Yamashita.
Yamashita throws some shoulder strikes here and then postures up. Oh, he's gone for an armbar! Santos Do Nascimento has his hands clasped together but Yamashita breaks the hold and Santos Do Nascimento is forced to tap! This one is aaaaaaaaaaall over! That was lightning fast by Yamashita!
Ladies and gentlemen, after 1:49 of round 1, we have a winner by way of Submission (Armbar). Yasuhiro Yamashita!
|
|
|
|
|
|
|
|
|
|
|
|
|
|
|
|
|
|
|
|
|
|
|
| S |
C
A |
G |
S |
C
B |
G |
|
S |
C |
G |
|
energy
A | B |
|
hype
A | B |
|
pop
A | B |
|
mgr
A | B |
|
FIGHT
RATING
100% |
|
|
|
|
|
|
|
Undercard bout
|
Coming up we have a light heavyweight MMA rules bout between Morgan Jones (ranked 0 p4p, 0 weight class) and Daniel Cook (ranked 0 p4p, 0 weight class). I don't know about you partner, but I'm pumped for this one!
 |
|
 |
| 183 cm
18
213 lbs
1 - 1 - 0 |
|
180 cm
20
210 lbs
0 - 2 - 0 |
BJJ Purple Belt
Brawler
Good chin |
|
BJJ White Belt
Counter striker
Very confident |
|
| |
|
Ladies and gentlemen. This fight is 3 rounds, in the light heavyweight division.
Introducing the fighter to my left, fighting out of the red corner.
With a record of
1 - 1 - 0, fighting out of Hilo, Morgan Jones!
And introducing the fighter to my right, fighting out of the blue corner.
With a record of
0 - 2 - 0, fighting out of Hilo, Daniel Cook!
The judges for this bout are Roger Salmon, Ryoma Takatsuka and Micheangelo Fripello.
The bell rings for round one and we are underway!
Jones tries for a takedown but Cook sees it coming a mile off and avoids it easily.
Cook displays good takedown defense there as he swats away a double leg from Jones.
Jones scores with a nice takedown into half guard. Let's see what he's got on the ground.
We get told so often about how wrestlers don't like to be on their backs. Let's see if Cook can do anything to dispel that myth.
Jones wants to pass the guard but Cook is defending well.
Jones stalling.
Jones is working for a submission of some sort.
Jones wants to pass the guard but Cook is defending well.
That's one minute gone in the round.
Cook looks like he's trying to stand up.
Cook looks gassed!
Jones wants to lay and pray for a moment but Cook keeps working.
Cook tries to kick Jones off but Jones keeps his base steady and stays in half guard.
That's two minutes gone in the round.
There's not a lot going on here and the crowd are letting the fighters know they're not willing to tolerate a lack of action.
Jones is looking for an arm triangle, whilst trying to pass to side control. Cook doesn't seem that keen to cooperate though. No luck this time Jones.
Jones seems content to maintain position for now, rather than mounting any offense.
Jones not throwing his punches with enough precision this time.
That's three minutes gone in the round.
Jones performing his best blanket impression for a moment.
Cook really doesn't want to stay on the ground with Jones. If he can't get it back to his feet, it's only a matter of time before he'll be tapping out.
Jones thows a wild elbow that connects with the canvas.
Jones missing with some ground and pound from the half guard.
Jones seems like he's working for an arm triangle here. He's freed his trapped foot and he's rotating nicely. Cook is in big trouble! He's tapping out! This one is aaaaaaaaaaaall over!
Ladies and gentlemen, after 4:56 of round 1, we have a winner by way of Submission (Arm Triangle). Morgan Jones!
Morgan Jones seemed lost for words in his post fight interview but he remembered to thank his fans and directed everyone to his website.
|
|
|
|
|
|
|
|
|
|
|
|
|
|
|
|
|
|
|
|
|
|
|
| S |
C
A |
G |
S |
C
B |
G |
|
S |
C |
G |
|
energy
A | B |
|
hype
A | B |
|
pop
A | B |
|
mgr
A | B |
|
FIGHT
RATING
19% |
|
|
|
|
|
|
|
Undercard bout
|
Coming up we have a heavyweight MMA rules bout between Steve McQueen (ranked 0 p4p, 0 weight class) and Jaakko Parantainen (ranked 0 p4p, 0 weight class). Parantainen has chosen JEDI MIND TRICKS FEAT. YOUNG ZEE & PACEWON as his entrance music, which hasn't gone down very well with the crowd. Steve McQueen has the better chin. Will he look to stand and bang today?
 |
|
 |
| 198 cm
28
266 lbs
6 - 4 - 0 |
|
194 cm
21
290 lbs
2 - 1 - 0 |
BJJ White Belt
Excellent boxer
Granite chin |
|
Good wrestler
Excellent boxer
Good gas tank |
|
| |
|
Ladies and gentlemen. This fight is 3 rounds, in the heavyweight division.
Introducing the fighter to my left, fighting out of the red corner.
With a record of
6 - 4 - 0, fighting out of Hilo, Steve McQueen!
And introducing the fighter to my right, fighting out of the blue corner.
With a record of
2 - 1 - 0, fighting out of Hilo, Jaakko Parantainen!
The judges for this bout are Paul Gruel, Jeff Smith and Chris Saunders.
The bell rings for round one and we are underway!
Parantainen tries to close the distance and clinch up against the cage but McQueen paws at him with a jab and circles away.
McQueen misses with a lunging right hand
and Parantainen makes him pay by landing a nice hook to the body before moving out of range.
Sloppy strikes from McQueen. Those never looked like landing.
McQueen misses with a body shot. Nice footwork from Parantainen.
McQueen misses with a telegraphed body shot
and Parantainen counters with a crisp hook to the side of the head.
Parantainen dives in and scores a takedown into McQueen's guard.
Parantainen trying to land body shots but he keeps hitting the mat.
Parantainen cracks McQueen with a solid left hand.
Parantainen looking to control the position here, rather than advance.
Parantainen is working the ground and pound from guard. He might want to try advancing position though to get more of an impact.
This has been an exciting period of action!
Parantainen lands a couple of digs.
Parantainen is working the ground and pound from guard. He might want to try advancing position though to get more of an impact.
That's one minute gone in the round.
McQueen wants to stand up but Parantainen is controlling him.
Parantainen slips effortlessly into side control - very nice.
Parantainen working the ground and pound.
Parantainen lands some shots froms side control.
This is a great period of action - very entertaining stuff!
Parantainen working the head and body with strikes.
Parantainen throwing strikes but missing, from side control.
Parantainen fails to land a wild elbow strike.
Parantainen scoring with punches from side control.
Parantainen lands an elbow.
McQueen is breathing heavily.
Parantainen trying to control the action but McQueen is working from the bottom.
That's two minutes gone in the round.
Parantainen tries for a kimura but McQueen is defending well.
McQueen on the wrong end of some ground and pound.
Parantainen cracks McQueen with an elbow. That is naaassty.
Sloppy strikes there by Parantainen.
Parantainen in side control lands a decent elbow.
The ref warns both fighters not to hold the cage as they work up against the meshing.
Parantainen moving around in side mount but really he's just happy to control for now.
The fighters are pressed up against the cage, both looking to find a bit of space to work.
McQueen is working to avoid the ground and pound but Parantainen connects with a decent elbow.
That's three minutes gone in the round.
Parantainen is pausing for a moment. What's he doing? It looks like he's clearing his nose. Oh dude! He's shot a load of snot all down McQueen's shoulder. That is not cool.
McQueen parries the strikes from Parantainen easily there. Parantainen is wary of posturing up too much because it might enable McQueen to escape.
Parantainen has an Americana. McQueen didn't react quickly enough there and he's in big trouble now! He tries to squirm out but is forced to tap! Parantainen is delighted and gyrates in front of the ring girls. They seem to like the attention - it'll be interesting to see if Parantainen hooks up with any of them at the after show party.
Ladies and gentlemen, after 3:35 of round 1, we have a winner by way of Submission (Americana). Jaakko Parantainen!
A loyal slave to those sponsorship dollars, Jaakko Parantainen made sure he mentioned SPARTA FIGHTWARE-GTI, along with how happy he was to win his fight.
|
|
|
|
|
|
|
|
|
|
|
|
|
|
|
|
|
|
|
|
|
|
|
| S |
C
A |
G |
S |
C
B |
G |
|
S |
C |
G |
|
energy
A | B |
|
hype
A | B |
|
pop
A | B |
|
mgr
A | B |
|
FIGHT
RATING
72% |
|
|
|
|
|
|
|
Undercard bout
|
Coming up we have a middleweight MMA rules bout between Anderson Mondello (ranked 0 p4p, 0 weight class) and Markus O Malley (ranked 0 p4p, 0 weight class). O Malley has chosen Dropkick Murphy's - I'm Shipping Up to Boston as his entrance music. We have two fighters making their debuts here, so let's see who comes out of this one with their first professional victory.
 |
|
 |
| 183 cm
18
193 lbs
0 - 0 - 0 |
|
188 cm
22
185 lbs
0 - 0 - 0 |
BJJ Blue Belt
Dangerous knees
Very strong |
|
BJJ Blue Belt
Excellent MT
Granite chin |
|
| |
|
Ladies and gentlemen. This fight is 3 rounds, in the middleweight division.
Introducing the fighter to my left, fighting out of the red corner.
With a record of
0 - 0 - 0, fighting out of Hilo, Anderson Mondello!
And introducing the fighter to my right, fighting out of the blue corner.
With a record of
0 - 0 - 0, fighting out of Hilo, Markus O Malley!
The judges for this bout are Paul Gruel, Roger Salmon and Micheangelo Fripello.
The bell rings for round one and we are underway!
Mondello gets his takedown attempt stuffed easily
and O Malley counters with a body kick that stops Mondello in his tracks momentarily.
Mondello misses with a half-hearted attempt at a head kick.
Mondello tries for a takedown but O Malley sees it coming a mile off and avoids it easily.
O Malley leaves Mondello with his face pressed against the mat as he sprawls beautifully, defending against a solid takedown attempt.
That's three failed takedown attempts in the round for Anderson Mondello. That's going to take a lot out of him.
Mondello has his takedown stuffed
and O Malley moves into the clinch.
O Malley changes levels and goes for a takedown here. Mondello fights it off and pushes away nicely.
O Malley moves in looking to clinch but Mondello pushes him off.
A decent looking body kick lands there for O Malley.
O Malley tries to close the distance and clinch up against the cage but Mondello paws at him with a jab and circles away.
Some wild striking there from Mondello.
That's one minute gone in the round.
Mondello gets his takedown attempt stuffed easily
and O Malley counters with a leg kick.
Mondello will have to do better than that with his takedown attempts.
O Malley tries to clinch but fails miserably
and Mondello counters with a nice double leg into guard.
Mondello has decided he wants to stand but the closed guard of O Malley is proving hard to escape from.
Mondello trying to control but O Malley is working from the bottom.
Mondello wants to get up but he can't break O Malley's closed guard. He needs to be careful trying to break the legs open, as he's open to submissions here.
O Malley looking to control.
Mondello trying to move into half guard but instead O Malley has managed to sweep!
That's two minutes gone in the round.
O Malley wants to get up but he can't break Mondello's closed guard. He needs to be careful trying to break the legs open, as he's open to submissions here.
Wooooo! Give it up for these two warriors! They are putting on a show!

The ref stands the fighters back up. Anderson Mondello wasn't doing enough on the ground.
O Malley displays good takedown defense there as he swats away a double leg from Mondello.
Mondello shoots in for a takedown. "Ole!" shouts O Malley as he jumps to the side.
O Malley gets to the clinch - let's see what his plan is here.
O Malley goes for a takedown attempt but Mondello pushes him away and we're back to fighting at a distance.
Markus O Malley is looking to keep the fight on the feet at all costs.
Mondello blocks a head kick by O Malley.
Mondello has managed to clinch.
That's three minutes gone in the round.

Mondello breaks from the clinch.
Mondello gets in close and instigates a clinch.
Mondello's corner calls for him to break the clinch, which he does.
Mondello tries to score a power double leg takedown but O Malley sees that one coming and sprawls well. That will dishearten Mondello somewhat.
Mondello looks for the body kick but O Malley saw that one coming.
Mondello misses with a takedown
and O Malley counters with a kick to the head that grazes his opponent. Mondello is lucky that one didn't land flush.
O Malley fails with an attempt to clinch.
O Malley throws a nice head kick!
O Malley throws a head kick that Mondello semi-blocks.
That's four minutes gone in the round.
O Malley throws a head kick that misses and slips in the process. He scrambles back to his feet and the fighters circle.
Mondello pushes O Malley up against the cage in a clinch.
O Malley wants a takedown but no success here.
O Malley drops down looking for an ankle pick but Mondello pulls his leg out and moves away.
Mondello fails with a takedown attempt.
A head kick by Mondello misses
and O Malley counters with a head kick.
Mondello shoots and misses
and O Malley counters with a kick to the head that grazes his opponent. Mondello is lucky that one didn't land flush.
The fans in attendance giving it up for the two fighters, who have really let it all hang out in the last minute or so!
As the round comes to an end the crowd are showing their appreciation for a great round of action.
Mondello goes for a spinning back kick but it misses.
O Malley tries to clinch up against the cage, rushing in the close the distance. Mondello manages to break the clinch and circles back to the middle of the mat.
Mondello misses with a half-hearted attempt at a head kick.
And thats the end of the round the fighters go back to their corners.
Anderson Mondello dominated that round.
OK. That's time! The bell goes and we're back to the action.
Mondello misses with a takedown
and O Malley counters with a head kick.
Anderson Mondello seems to be the more aggressive standup fighter in this bout.
O Malley tries to clinch there but Mondello circles away.
O Malley wants to clinch up but Mondello keeps it at a distance.
Mondello looks frustrated there after his takedown attempt is stuffed easily.
Mondello will have to do better than that with his takedown attempts.
That's three failed takedown attempts in the round for Anderson Mondello. That's going to take a lot out of him.
Mondello tries to score a power double leg takedown but O Malley sees that one coming and sprawls well. That will dishearten Mondello somewhat.
O Malley closes the distance and clinches.
O Malley has a body lock and is looking for a takedown. Mondello is bouncing around trying to prevent the takedown and somehow he has indeed managed to stay on his feet.
That's one minute gone in the round.
Mondello drops to a knee looking for a takedown but O Malley gets the underhooks and prevents it.
Mondello gets the body lock takedown. After a quick scramble, O Malley regains guard.
Mondello has decided he wants to stand but the closed guard of O Malley is proving hard to escape from.
O Malley wriggles free and stands up.
Mondello gets his takedown attempt stuffed easily
and O Malley counters with a head kick.
That's two minutes gone in the round.
O Malley tries to clinch up against the cage, rushing in the close the distance. Mondello manages to break the clinch and circles back to the middle of the mat.
O Malley rushes Mondello and pushes him back against the cage in a clinch.
Mondello breaks the clinch and we return to the middle of the mat.
O Malley leaves Mondello with his face pressed against the mat as he sprawls beautifully, defending against a solid takedown attempt.
O Malley defends well against a solid takedown attempt from Mondello.
Both fighters are absolutely exhausted here.
O Malley tries to close the distance and clinch up against the cage but Mondello paws at him with a jab and circles away.
Mondello throws a sloppy head kick
and O Malley counters with a head kick. That will keep Mondello thinking before he tries any more sloppy attacks!
Wooooo! Give it up for these two warriors! They are putting on a show!
O Malley leaves Mondello with his face pressed against the mat as he sprawls beautifully, defending against a solid takedown attempt.
Mondello avoids the head kick by O Malley.
O Malley misses with a half-hearted attempt at a head kick.
That's three minutes gone in the round.
Mondello misses with a looping left.
O Malley throws a head kick but Mondello moves out of range.
O Malley plants his feet and lands a nice head kick!
O Malley tries to clinch but Mondello moves out of range.
Mondello keeps the fight on the outside.
Mondello drives through and clinches with O Malley against the cage.
O Malley drops down looking for an ankle pick but Mondello pulls his leg out and moves away.
Markus O Malley seems to be getting the better of the standup.
Mondello shoots in for a takedown but doesn't get it.
Anderson Mondello is looking to throw some combinations by the looks of things.
Mondello shoots in but doesn't get the takedown
and O Malley counters by moving into the clinch. Good anticipation by O Malley.
That's four minutes gone in the round.
Mondello pushes off and circles away, back to the middle of the mat.
A telegraphed takedown attempt from Mondello is defended easily by O Malley.
Mondello will have to do better than that with his takedown attempts.
Mondello shoots in for a takedown. "I don't think so" says O Malley as he avoids it easily.
Mondello doesn't succeed with the takedown
and O Malley counters with a flying knee. Nice.
The crowd applaud the fighters efforts here as the round comes to an end.
The fight stays on the outside here - Mondello looks like he's thinking about clinching though.
O Malley tries to clinch up against the cage, rushing in the close the distance. Mondello manages to break the clinch and circles back to the middle of the mat.
And thats the end of the round the fighters go back to their corners.
A close second round but Markus O Malley will probably get the nod - 10:9.
That's time! Mondello's corner gives him a slap on the ass as he gets ready to fight. Let's get this one finished - here comes the final round!
O Malley closes the distance but Mondello moves to the side
and Mondello counters with a shoot takedown into half guard.
The fighters are battling for position here. O Malley manages to regain full guard. Nice work.

Mondello decides to stand up and beckons his opponent to follow.
Mondello fails with a takedown attempt.
Mondello moves in looking to clinch but O Malley pushes him off.
Mondello with a poor takedown
and O Malley counters with a body kick that stops Mondello in his tracks momentarily.
Both fighters are breathing heavily.
O Malley tries to clinch but is not successful on this occasion.
Mondello sees a low kick coming and goes to check it, but it's actually a body kick and it thuds into his unprotected ribs.
That's one minute gone in the round.
O Malley wants to clinch but Mondello slips to the side
and Mondello counters by moving into the clinch. Good anticipation by Mondello.
O Malley looking for a takedown.
Mondello with the Thai clinch. He's looking to land a big knee but he's not managed it this time.
Mondello's corner calls for him to break the clinch, which he does.
O Malley darts in trying to clinch
and Mondello decides to take the opportunity to score a takedown. He's landed in O Malley's guard.
Mondello gets to his feet. O Malley looking to butt scoot but the ref puts an end to that. On your feet son!
Mondello is looking to take this fight into the clinch.
Nice uppercut there from Mondello.
It looks like Markus O Malley has been cut.
That's two minutes gone in the round.
Wooooo! Give it up for these two warriors! They are putting on a show!
O Malley tries to close the distance and clinch up but Mondello swats him away and circles back towards the center.
O Malley tries to clinch up against the cage, rushing in the close the distance. Mondello manages to break the clinch and circles back to the middle of the mat.
O Malley is looking to clinch but Mondello is avoiding it.
O Malley avoids the head kick by Mondello.
Mondello throws a leg kick
and O Malley counters with a big head kick but Mondello shrugs it off.
Nice body kick from O Malley.
Mondello misses with a leg kick
and O Malley counters with a flying knee. Nice.
A head kick misses from O Malley.
Mondello gets his takedown attempt stuffed easily
and O Malley counters with a nice body kick.
That's three failed takedown attempts in the round for Anderson Mondello. That's going to take a lot out of him.
Mondello tries to close the distance and clinch up but O Malley swats him away and circles back towards the center.
That's three minutes gone in the round.
Mondello gets to the clinch - let's see what his plan is here.
O Malley tries to score a body lock takedown but Mondello shows good agility there to stay on his feet.
Mondello drops down for a takedown but doesn't get it.
Mondello pushes off and circles away, back to the middle of the mat.
Mondello doesn't succeed with the takedown
and O Malley counters with a head kick.
Mondello throws a head kick that misses.
O Malley misses with a head kick.
That's four minutes gone in the round.
O Malley is looking to clinch but Mondello is avoiding it.
Mondello fails with a takedown attempt.
Mondello will be looking to protect his midsection after taking some solid kicks to the body.
O Malley throws a sloppy head kick and Mondello moves out of range easily.
Mondello shoots in for a takedown. He's persisting with it as O Malley sprawls well. O Malley wins this battle and keeps the fight standing. Mondello gets slowly back to his feet.
O Malley tries to close the distance and clinch up against the cage but Mondello paws at him with a jab and circles away.
As the round comes to an end the crowd are showing their appreciation for a great round of action.
O Malley swats away the attempt to clinch by Mondello.
O Malley throws a head kick but Mondello moves out of range.
And that's the end of the fight!
Anderson Mondello showed his dominance in that final round.
I think Mondello has won this one but let's see what the judges have to say. Over to the ring announcer for the scorecards.
Ladies and gentlemen, after 3 rounds of action, we go to the scorecards for a decision.
Judge Paul Gruel scores the fight 29:28
Judge Roger Salmon scores the fight 29:28
Judge Micheangelo Fripello scores the fight 29:28
In favor of your winner, by unanimous decision... Anderson Mondello!
|
|
|
|
|
|
|
|
|
|
|
|
|
|
|
|
|
|
|
|
|
|
|
| S |
C
A |
G |
S |
C
B |
G |
|
S |
C |
G |
|
energy
A | B |
|
hype
A | B |
|
pop
A | B |
|
mgr
A | B |
|
FIGHT
RATING
53% |
|
|
|
|
|
|
|
Co-main event
|
Coming up we have a light heavyweight MMA rules bout between Alucard Darkim (ranked 0 p4p, 0 weight class) and Gunnar Bjornsson (ranked 0 p4p, 0 weight class). Darkim's ring entrance music is that housewives' favourite, I'm new in da city. Bjornsson is bouncing up and down as he enters the arena, backed by Einherjer - Berserkergang. Over to our ring announcer for the fighter introductions!
 |
|
 |
| 178 cm
22
198 lbs
6 - 1 - 0 |
|
186 cm
26
212 lbs
3 - 3 - 0 |
Good wrestling
Solid boxing
Granite chin |
|
BJJ Blue Belt
Excellent boxer
Heavy handed |
|
| |
|
Ladies and gentlemen. This fight is 3 rounds, in the light heavyweight division.
Introducing the fighter to my left, fighting out of the red corner.
With a record of
6 - 1 - 0, fighting out of Hilo, Alucard Darkim!
And introducing the fighter to my right, fighting out of the blue corner.
With a record of
3 - 3 - 0, fighting out of Hilo, Gunnar Bjornsson!
The judges for this bout are Ryoma Takatsuka, Micheangelo Fripello and Josh West.
The bell rings for round one and we are underway!
Bjornsson throws a couple of head shots and lands with the final one - a decent hook, which struck Darkim on the side of the head.
Bjornsson missing with a left hand there. Darkim was out of range so wasted energy throwing that one.
Bjornsson swings away but doesn't land with a series of punches.
Bjornsson connects with the punch.
Bjornsson uses good head movement to avoid the hook from Darkim.
Darkim defending well as Bjornsson loads up on a big left hand.
Bjornsson just misses with a punch to the body.
Darkim lands the left hand.
A big left from Bjornsson misses.
A left lands for Bjornsson.
Darkim avoids a lazy jab quite easily.
Darkim tries to land with a swinging hook to the body but Bjornsson was well out of range. Poor timing from Darkim.
Bjornsson loads up on a big right hand but Darkim slips the punch.
This has been an exciting period of action!
Bjornsson misses with a low kick.
Bjornsson gets cracked with a nice right hand there by Darkim.
Darkim will need to tighten up his combinations if he doesn't want to gas himself out, swinging at thin air.
Darkim lunges in with an uppercut that skims his opponent's chin.
Bjornsson defends well against a solid takedown attempt from Darkim.
That's one minute gone in the round.
Bjornsson lands a nice shot that snaps Darkim's head back.
No joy there for Bjornsson, who threw a few shots but didn't land.
Darkim moves into the clinch.
Darkim working on landing some head shots here - that one got through nicely.
Bjornsson has a couple of punches blocked by Darkim.
Bjornsson displaying some good clinch control by pressing Darkim up against the cage.
Darkim tried to land a shot to the body but connects with Bjornsson's elbow.
Darkim taking a break, stalling in the clinch.
Darkim looking for a takedown.
Darkim is stalling here.
Darkim misses with a body punch.
Darkim pushes Bjornsson back against the cage and unloads with a body punch.
A battle for position here, against the cage.
That's two minutes gone in the round.
Darkim lands with a light punch inside.
Bjornsson is trying to stall.
Darkim is trying to pull guard but being pressed up against the cage enables Bjornsson to keep the fight standing.
That's three failed takedown attempts in the round for Alucard Darkim. That's going to take a lot out of him.
Darkim gets the body lock takedown. After a quick scramble, Bjornsson regains guard.
Wooooo! Give it up for these two warriors! They are putting on a show!
Bjornsson looking to sweep here. No luck so far.
Bjornsson working a defensive guard here.
Darkim trying to control but Bjornsson is working from the bottom.
Darkim slips nicely into half guard.
Darkim looking for a kimura but he'll have to free his other leg if he wants to finish that. Perhaps he's just using it as a distraction technique.
Darkim drops an elbow to the side of Bjornsson's head.
That's three minutes gone in the round.
Darkim wants to work for an arm triangle but Bjornsson is really keeping half guard well and defending the submission attempt.
The fighters are pressed up against the cage, both looking to find a bit of space to work.
Bjornsson is defending against the submission attempts here by Darkim.
Darkim is keeping good posture, landing some ground and pound.
Bjornsson misses with some strikes from the bottom.
Darkim is trying to work for a kimura but Bjornsson is defending well.
The fighters are going at a pretty good pace and they're both starting to sweat now.
Darkim is pressing down on Bjornsson's thigh, looking to free his foot. Bjornsson is holding on for now.
That's four minutes gone in the round.
Bjornsson keeping his head moving to avoid the ground and pound.
Bjornsson avoiding damage under a succession of punches from Darkim.
Darkim not throwing his punches with enough precision this time.
Darkim is working for a submission here. He's got hold of the far side arm and he's looking for a kimura. He's cranking on the arm and he's got it! Bjornsson is tapping out! Ouch, that looked like it hurt!
Ladies and gentlemen, after 4:34 of round 1, we have a winner by way of Submission (Kimura). Alucard Darkim!
Alucard Darkim made sure to give a little speech post fight, saying 'I want my belt back. The man who owns the title now is not a true champ. Give me a title shot... '.
|
|
|
|
|
|
|
|
|
|
|
|
|
|
|
|
|
|
|
|
|
|
|
| S |
C
A |
G |
S |
C
B |
G |
|
S |
C |
G |
|
energy
A | B |
|
hype
A | B |
|
pop
A | B |
|
mgr
A | B |
|
FIGHT
RATING
47% |
|
|
|
|
|
|
|
Main event
|
Coming up we have a lightweight MMA rules bout between Ba Lil II (ranked 0 p4p, 0 weight class) and Jay Wilkins (ranked 0 p4p, 0 weight class). Wilkins has chosen Sans Pression- Numero 1 as his entrance music. The atmosphere really building for this one as we go over to our ring announcer for the fighter introductions!
 |
|
 |
| 175 cm
21
150 lbs
6 - 0 - 0 |
|
182 cm
24
158 lbs
10 - 8 - 0 |
Good wrestling
Counter striker
Insanely flexible |
|
Good wrestler
Excellent boxer
Powerful |
|
| |
|
Ladies and gentlemen. This fight is 5 rounds, for the lightweight championship of the world!
Introducing the champion to my left, fighting out of the red corner.
With a record of
6 - 0 - 0, fighting out of Hilo, Ba Lil II!
And introducing the challenger to my right, fighting out of the blue corner.
With a record of
10 - 8 - 0, fighting out of Hilo, Jay Wilkins!
The judges for this bout are Roger Salmon, Ryoma Takatsuka and Micheangelo Fripello.
The bell rings for round one and we are underway!
Lil II misses with a looping left.
Wilkins staying out of range there.
Wilkins is looking for a takedown here. He's shot in and has managed to get it, finishing up in Lil II's half guard.
Wilkins prevents Lil II from improving his position.
Wilkins is looking for a kimura but he's never going to get it from there.
Lil II looking for submissions from an awkward position here.
Lil II is looking to control Wilkins's leg but it's slowly edging free. Can Lil II avoid being mounted?
Lil II moves into full guard.
Lil II wants to sweep but no luck.
Wilkins throws a big right hand that misses.
Wilkins trying to pass the guard but can't manage it just yet.
Lil II preventing the ground and pound from doing any damage.
Lil II throwing his legs up looking for a triangle.
That's one minute gone in the round.
Wilkins throwing elbows and punches but not connecting, as Lil II works some decent striking defense from the bottom.
Wilkins is working the ground and pound from guard. He might want to try advancing position though to get more of an impact.
Wilkins drops back looking for a heel hook - he quickly realises he's not going to get it but Lil II manages to dive on top of him before he can escape and now Wilkins has Lil II in his guard.
Lil II wants to pass the guard but Wilkins is keeping the position.
Wilkins wants to sweep here but Lil II controlling him for the moment.
Lil II wants to control from the top but Wilkins keeps moving.
Wilkins is looking to stand up but Lil II isn't so interested in that idea.
Wilkins preventing the ground and pound from doing any damage.
That's two minutes gone in the round.
The fighters are starting to perspire pretty heavily.
Wilkins is active off his back here, looking for submissions.
Lil II wants to control from the top but Wilkins keeps moving.
Wilkins looking to sweep here. No luck so far.
Wilkins working a defensive guard here.
Lil II pushing down on Wilkins's thigh, trying to pass to half guard. He's managed it... Nice work.
Wilkins won't allow Lil II to pass to mount.
This has been an exciting period of action!
Lil II takes a deep breath and rests his weight momentarily on top of his opponent, to control the position.
Wilkins is refusing to be controlled, as Lil II sits in half guard.
Wilkins looking for submissions from an awkward position here.
Wilkins slips a foot under and gets full guard. Nice work.
That's three minutes gone in the round.
Hammerfist, elbow! yells Lil II's corner. There ya go! There ya go!
Wilkins avoiding any damage from the ground and pound.
Wilkins tries to land a sweep but no joy.
Wilkins has a closed guard, preventing anything of note from happening. Perhaps he's looking to stall.
Lil II stands up over Wilkins, holding his feet. He dives back in and lands a decent shot to the head.
Lil II pushes down on Wilkins's leg and manages to get into half guard.
Wilkins trying to control from the bottom.
Lil II thumps the canvas. Not on purpose obviously - he just missed Wilkins's head.
Lil II landing with strikes to the body and head, softening up his opponent.
Lil II lands with an elbow from half guard - that looked like it hurt.
Lil II thows a huge punch but Wilkins dodges it nicely.
That's four minutes gone in the round.
Wilkins moves his hips nicely and gets into full guard.
Wilkins manages to land a sweep and now he's in mount on top!
This is a great period of action - very entertaining stuff!
Lil II is writhing around trying to get back to his feet.
Lil II sneaks a leg back under and regains half guard and is working straight away to try and get back to guard. He hasn't managed just yet though.
Lil II is trying to get back to full guard.
Wilkins is trying for a kimura here. Lil II looks like he's in a lot of pain... and he's tapping out! Wilkins wins by kimura!
Ladies and gentlemen, after 4:47 of round 1, we have a winner by way of Submission (Kimura). Jay Wilkins!
Jay Wilkins is the new lightweight champion!
Jay Wilkins took to the mic in his post fight interview and said 'I wanna thank my fans and my loyal sponsors, Conviction and Valhalla. I prepared for this fight in a different gym, alongside Chuck Wagon, who helped me improve my wrestling. I will continue improving and giving you guys better fights. Im here to stay! '.
|
|
|
|
|
|
|
|
|
|
|
|
|
|
|
|
|
|
|
|
|
|
|
| S |
C
A |
G |
S |
C
B |
G |
|
S |
C |
G |
|
energy
A | B |
|
hype
A | B |
|
pop
A | B |
|
mgr
A | B |
|
FIGHT
RATING
55% |
|
|
|
|
|
|
|
|
|
|

