 |
SPFT-4: PBP Commentary |
Undercard bout
|
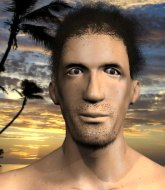
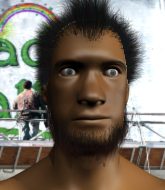
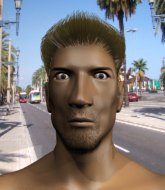
Coming up we have a welterweight MMA rules bout between Jake Shields (ranked 0 p4p, 0 weight class) and Russian Experiment II (ranked 0 p4p, 0 weight class). Experiment II has chosen Terminator 2 - Bad to the Bone as his entrance music. Russian Experiment II acknowledges the crowd's support as he enters the cage.
 |
|
 |
| 182 cm
28
176 lbs
8 - 4 - 0 |
|
185 cm
33
186 lbs
26 - 21 - 0 |
Good wrestling
Counter striker
Cardio machine |
|
Good wrestler
World class boxer
Good gas tank |
|
| |
|
Ladies and gentlemen. This fight is 3 rounds, in the welterweight division.
Introducing the fighter to my left, fighting out of the red corner.
With a record of
8 - 4 - 0, fighting out of Los Angeles, Jake Shields!
And introducing the fighter to my right, fighting out of the blue corner.
With a record of
26 - 21 - 0, fighting out of Los Angeles, Russian Experiment II!
The judges for this bout are Don Winkell, and Jack Bonds.

The bell rings for round one and we are underway!
Experiment II misses with a straight right.
Experiment II jabbing away but nothing is landing.

Shields shoots in for a takedown and gets it. Let's see what he's got on the mat.
We've had a lack of effective grappling in the last minute or so, which could well see a referee standup.
Shields postures up in Experiment II's guard and throws a big left but Experiment II blocks it.
Shields postures up to throw the ground and pound strikes but they don't connect.
Shields trying to pass the guard. He's being very persistent here but Experiment II manages to land a sweep and now he's on top!
Experiment II sitting in guard, not really doing much.
Experiment II pressing down on his opponent's thigh, looking to pass guard. Shields is keeping the position for now.

Shields is active off his back here, looking for submissions.

That's one minute gone in the round.
Experiment II trying to control but Shields is working from the bottom.
Shields has a loose triangle. He'll be looking to tighten that up but Experiment II can see exactly what he's planning and manages to posture up and free himself.
Experiment II pushes down on Shields's leg and manages to get into half guard.
Shields looking for submissions off his back.
Shields looking for submissions off his back.

That's two minutes gone in the round.
Shields looking to work for a kimura from the bottom.

Experiment II stands up from half guard... He's had enough of that ground malarky for the time being.
This fight brought to you by 5M nutrition - it's mmmmm tasty. Nice jab by Experiment II.
Shields looks for a takedown but Experiment II sprawls well.
Some wild striking there from Experiment II.
Russian Experiment II seems to be the more aggressive standup fighter in this bout.

That's three minutes gone in the round.
Shields walks into a stiff left hand from Experiment II.
Shields avoids a lazy jab quite easily.
Shields shoots for a double leg takedown but Experiment II sprawls well. He's pushed Shields's face into the mat and manages to get back to his feet relatively easily.
Experiment II lands with a straight right. Shields didn't see that one coming.
Shields shoots in for a takedown but Experiment II shows good takedown defense there and keeps this one on the feet.
That's three failed takedown attempts in the round for Jake Shields. That's going to take a lot out of him.
A slow jab from Experiment II misses its intended target.
Shields uses good footwork to avoid the strikes from Experiment II.
Shields shoots in but no luck this time.

That's four minutes gone in the round.
Experiment II stuns Shields with a nice body shot, before stepping back out of range.
Experiment II scores with a hook.
Shields keeping a good distance there, avoiding the body shot.
Wooooo! Give it up for these two warriors! They are putting on a show!
Experiment II misses with a lunging right hand

and Shields counters by clinching up.

Experiment II breaks the clinch and we return to the middle of the mat.
Experiment II lands an overhand right.
Shields dives in and grabs Experiment II's left leg, looking for a takedown. Experiment II pushes down on Shields's head and hops out.
Russian Experiment II is looking to keep the fight on the feet at all costs.
As the round comes to an end the crowd are showing their appreciation for a great round of action.
Experiment II lands a beauty of a right hand that gets the crowd cheering.
Experiment II connects with a body shot that sends Shields's belly button to the back.
And that�s the end of the round � the fighters go back to their corners.
Russian Experiment II dominated that round.
The referee calls time. The cornermen exit stage left and we're back to business.

Shields shoots in for a takedown - he's clinched up with Experiment II but Experiment II pushes him off and we're back to square one.
Shields fails miserably with a takedown attempt.
Shields on the wrong end of a vicious looking body shot.
Shields tries to grapple but his opponent circles
and Experiment II counters with a straight right hand.
Shields slips under a jab.
Nice body punch from Experiment II.
That's one minute gone in the round.
Shields wants to clinch
and Experiment II counters nicely by changing levels and landing a hook to the body.
Shields walks into a straight right hand from Experiment II.
Experiment II's corner calls for a 1-2. Experiment II obliges with the 1 part as he scores the single shot and moves back out of range.
Shields closes the distance but Experiment II moves to the side
and Experiment II cracks him with a counter punch right on the button.
Experiment II throws a good cross that connects.
Shields fails with a rather predictable takedown attempt.
That's three failed takedown attempts in the round for Jake Shields. That's going to take a lot out of him.
Shields tries to clinch up but Experiment II circles away and keeps his distance.
That's two minutes gone in the round.
Experiment II connects with the punch.
Fantastic stuff here - a very entertaining period of action, which has drawn cheers from the crowd.
Experiment II defends well against a solid takedown attempt from Shields.
Russian Experiment II seems to be getting the better of the standup.
Experiment II's corner calls for a 1, 2 combination and Experiment II duly obliges.
Experiment II defends well against a solid takedown attempt from Shields.
Experiment II defends well against a solid takedown attempt from Shields.
Experiment II fakes a jab and then connects with a hook.
Experiment II scores with a nice head shot.
Shields gets his takedown attempt stuffed easily
and Experiment II makes him pay by landing a nice hook to the body before moving out of range.
That's three minutes gone in the round.
Experiment II with a nice cross.
Experiment II lands with a jab that stuns his opponent. Shields is looking to close the distance but Experiment II sees it coming and throws a beautiful knee! Shields crumbles to the mat and that's all she wrote! Let's hope Shields is OK because that was naaaaaasty!
Ladies and gentlemen, after 3:24 of round 2, we have a winner by way of KO (Knee). Russian Experiment II!
Russian Experiment II decided to thank the fans in attendance for making a great atmosphere. It seemed to go down pretty well.
|
|
|
|
|
|
|
|
|
|
|
|
|
|
|
|
|
|
|
|
|
|
|
| S |
C
A |
G |
S |
C
B |
G |
|
S |
C |
G |
|
energy
A | B |
|
hype
A | B |
|
pop
A | B |
|
mgr
A | B |
|
FIGHT
RATING
36% |
|
|
|
|
|
|
|
Co-main event
|
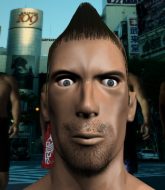
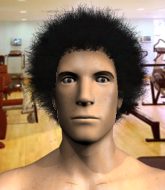
Coming up we have a middleweight MMA rules bout between Mark Keefer (ranked 0 p4p, 0 weight class) and Sterling Archer (ranked 0 p4p, 0 weight class). Mark Keefer has the edge in experience - let's see if he can make that count tonight.
 |
|
 |
| 189 cm
30
185 lbs
13 - 10 - 0 |
|
185 cm
22
187 lbs
2 - 0 - 0 |
Good wrestling
Excellent boxer
Cardio machine |
|
Good wrestler
Excellent boxer
Good gas tank |
|
| |
|
Ladies and gentlemen. This fight is 3 rounds, in the middleweight division.
Introducing the fighter to my left, fighting out of the red corner.
With a record of
13 - 10 - 0, fighting out of Los Angeles, Mark Keefer!
And introducing the fighter to my right, fighting out of the blue corner.
With a record of
2 - 0 - 0, fighting out of Los Angeles, Sterling Archer!
The judges for this bout are , Don Winkell and Timothy Bukovac.
The bell rings for round one and we are underway!
Some wild striking there from Keefer.
Keefer lands with a head kick! That's gotta hurt.

It looks like Sterling Archer has been cut.
Keefer takes a thudding leg kick, right into the meat of the thigh.
Keefer looks to score with a combo but nothing lands.
Archer connects with a leg kick. He turned his hip over nicely there.
Good work by Keefer as he checks the leg kick.
Archer looks to land a body kick but Keefer moved away.
Keefer misses with a double jab
and Archer counters with a nice uppercut.
Keefer throws a series of punches but Archer moves out of range.
Archer looks to land a body kick but Keefer moved away.
Keefer looking to throw a kick but he's pulled out of it.
We've seen a great period of action over the last minute or so - credit to both fighters for going all out!
Archer with a body punch. A glancing blow.
That's one minute gone in the round.
Archer scores with a spinning back kick!
Archer misses with a body kick.
Archer looks for a takedown here. Will he get it? Keefer is fending him off so far but Archer persists. Nope, Keefer circles away and we're back to standing.
Keefer throws a hook to the body but it doesn't connect.
Archer connects with a body shot that sends Keefer's belly button to the back.
That kick from Keefer tenderised Archer's leg. Archer is trying to keep his angry face on.
Keefer swings and misses with a shot to the body
and Archer counters with a low kick, right behind Keefer 's knee.
Mark Keefer is looking to keep the fight on the feet at all costs.
Archer scores to the head and body with a nice combination!
Fantastic stuff here - a very entertaining period of action, which has drawn cheers from the crowd.
Keefer throws a body kick but he was well out of range there.
Archer fails with a rather predictable takedown attempt.
Keefer thumps Archer with a low kick.
That's two minutes gone in the round.
Keefer throws a right hand that Archer ducks under and follows up with a left that Archer also avoids with ease.
Archer swings away but doesn't land with a series of punches.
Archer lands with a hook. Keefer tried to avoid it but it clipped the top of his head.
Archer lands a really nice looking cross but Keefer seems unphased.
Archer throws a body kick but he wasn't in range.
Archer pushing out the jab but it's not landing.
Archer fakes the leg kick and cracks Keefer in the body.
Keefer throws a jab, cross combination which is slipped
and Archer makes him pay by landing a nice hook to the body before moving out of range.
Keefer ducks right into an uppercut from Archer.
Archer shoots in but Keefer avoids the takedown attempt easily.
Mark Keefer has stuffed three takedown attempts in the round now. That's going to take a lot out of Sterling Archer.
Archer doesn't succeed with the takedown
and Keefer counters with a nice body kick.
That's three minutes gone in the round.
Keefer scores with a sloppy right hand. Archer should have avoided that one.
Archer misses with a takedown attempt - Keefer sprawls well and throws a nice strike on the way out which just misses.
Archer shoots in for a takedown. He's persisting with it as Keefer sprawls well. Keefer wins this battle and keeps the fight standing. Archer gets slowly back to his feet.
Keefer throws a head kick that looked like it stung.
Sterling Archer seems to be the more aggressive standup fighter in this bout.
Keefer jabs Archer to the body, keeping him at a distance.
Keefer misses with a double jab.
Archer misses with a straight right.
Keefer misses with a half-hearted attempt at a head kick.
That's four minutes gone in the round.
Archer showing good head movement there, avoiding the strikes from Keefer.
Archer keeps his opponent at a distance with a nice jab.
Well, he's not going to score with shots like that. A lazy body kick attempt from Archer.
Archer fakes a head punch and goes low to the body. Nicely done.
Fantastic stuff here - a very entertaining period of action, which has drawn cheers from the crowd.
Archer misses with a kick to the body
and Keefer counters with a nice body shot.
Keefer uses good footwork to avoid the strikes from Archer.
Keefer cracks a nice hook into Archer's ribs.
The crowd are going absolutely nuts as the round comes to an end - what a fantastic round of action!
Archer dips down and scores with a jab to the body.
Keefer tries a head kick but it misses.
Keefer falls off balance throwing a combination
and Archer counters with a solid body kick.
And that�s the end of the round � the fighters go back to their corners.
Sterling Archer dominated that round.
The cut man is working on Sterling Archer's cut.
The corners get their ten second warning. Both fighters stand from their stools and stare eachother down, ready to get back to the action.
Keefer misses with a head kick.
Keefer keeping a good distance there, avoiding the body shot.
Keefer pulls out of a head kick attempt.
Archer looks to land a right hand but Keefer moved out of range.
Keefer blocks the body kick.
Nice body kick from Keefer.
Archer looking to throw a kick but he's pulled out of it.
Keefer throws a hard body shot but it just misses.
Archer takes a shot right to the liver - Bas would have been proud of that punch.
Keefer lets the fists fly and connects with a left straight followed by a right hook.
Keefer swinging wildly here.
Archer throws a jab but it's blocked by Keefer.
That's one minute gone in the round.
Keefer thuds a mid kick into his opponent's body. That will wear on Archer if he has to take too many more of those.
Archer tries to bum rush Keefer with a series of wild strikes but Keefer uses good footwork to avoid the assault.
Keefer tries a head kick but it misses.
Archer throws a jab to the body, straight down the pipe. Boom. That sent Keefer stumbling backwards but he manages to regain his composure quickly.
Archer doesn't succeed with the takedown
and Keefer counters with a nice uppercut.
Archer fakes a head shot and lands one to the body.
Keefer fails to land with the punch combination there - jab, cross, hook, miss, miss, miss.
Some bone on bone action there as Keefer checks a low kick. Luckily it wasn't a particularly hard one.
Archer lands a leg kick and bounces back out of range.
That's two minutes gone in the round.
Archer throws a quick head kick that skims the top of Keefer's head.
We've seen a great period of action over the last minute or so - credit to both fighters for going all out!
Keefer has a nice red mark on his side after a thudding body kick by Archer.
Archer shoots in for a double leg but Keefer sprawls well. That's going to sap some energy.
Archer throws a sloppy head kick and Keefer moves out of range easily.
Keefer swings away but doesn't land with a series of punches.
Some wild striking there from Keefer.
Nice body kick from Archer.
Keefer moves out of range of the strikes.

A momentary lapse in concentration from Keefer enables Archer to shoot in and score with a neat double leg. Keefer manages to secure a closed guard as the fighters hit the mat.
We could do with one of the fighters taking the initiative a bit more on the ground - they're both waiting to capitalize on a mistake.
We've had a lack of effective grappling in the last minute or so, which could well see a referee standup.
Archer wants to pass the guard but Keefer is keeping the position.
The ref warns both fighters not to hold the cage as they work up against the meshing.
That's three minutes gone in the round.
Keefer is working an open guard here, looking to improve his position. No doubt that will leave him open to counters but at least he's being more offensive.
Keefer being controlled here, momentarily.
Keefer had isolated an arm as going for a kimura. Archer defends it easily.
Keefer wants to sweep here but Archer controlling him for the moment.
Keefer bucks up whilst keeping hold of a body lock, managing to reverse the position. Now he's in top in Archer's guard.
That's four minutes gone in the round.
Keefer postures up.
Keefer trying to control the position from guard on top but Archer is wriggling around, looking for whatever he can.
Archer has Keefer pulled in close to control his posture.
Keefer postures up to throw the ground and pound strikes but they don't connect.
As the round comes to an end the crowd are showing their appreciation for a great round of action.
Keefer preventing the sweep.

It looks like we're going to have a standup here. Neither fighter is doing enough on the ground.
Keefer lunges in with swinging rights and lefts but Archer circles away quickly and effectively.
Archer takes a solid shot to the body. That one hurt him but he's trying not to show it.
And that�s the end of the round � the fighters go back to their corners.
Sterling Archer showed his class in that round. I'd imagine he'll take it on all the scorecards.
The cut man is working on Sterling Archer's cut.
That's time! Back to the action! The crowd applaud as we get ready to start the final round!

Archer works his jab well there, keeping his opponent at a distance.
Keefer throws a right and a left that Archer avoids nicely.
Keefer fails to land with a series of punches.
Archer takes a kick to the side of the head.
Archer shoots in looking for a takedown but Keefer manages to keep the fight standing, pushing Archer's face into the canvas for good measure before circling away.
Keefer misses the shot to the body.
Keefer throws a head kick that misses and slips in the process. He scrambles back to his feet and the fighters circle.
Archer has his hands up protecting his head but a hook from Keefer finds it's way round the side to connect with Archer's head.
Archer blocks a head kick by Keefer.
Keefer needs to keep his hands up - Archer had a free shot at his head there.
Keefer stuffs the takedown.
Keefer throws a sloppy head kick and Archer moves out of range easily.
That's one minute gone in the round.
Archer lands a lovely overhand right.
Archer misses with a takedown attempt - Keefer sprawls well and throws a nice strike on the way out which just misses.
Mark Keefer has stuffed three takedown attempts in the round now. That's going to take a lot out of Sterling Archer.
Keefer throws a combination that misses
and Archer counters with an outside leg kick.
Both fighters are breathing heavily.
Archer swings wildly with a right hand that was never going to find it's target.
Archer uses good footwork to get in and out, landing a nice hook.
Archer looks frustrated there after his takedown attempt is stuffed easily.
Keefer misses with a double jab.
Archer avoids the head kick by Keefer.
Archer shoots in for a takedown. "Ole!" shouts Keefer as he jumps to the side.
That's two minutes gone in the round.
Archer works Keefer's body with a nice hook.
A solid body kick from Keefer.
Keefer swings and misses with a hook to the body.
Some wild striking there from Keefer.
Keefer throws a series of punches but Archer avoids them all with ease.
Archer moves into range and lands a nice leg kick.
Fantastic stuff here - a very entertaining period of action, which has drawn cheers from the crowd.
Archer jabs Keefer to the body, keeping him at a distance.
Archer lands a jab-cross combination.
Mark Keefer is looking to throw some combinations by the looks of things.
Keefer misses with a double jab.
That's three minutes gone in the round.
Archer swats away the attempt to clinch by Keefer.
Archer throws a nice hook to the body that draws an oooh from the crowd.
Archer throws a half hearted mid kick.
Keefer throws a head kick that misses and slips in the process. He scrambles back to his feet and the fighters circle.
Archer goes for a high kick. It partially lands.
Archer wants to land a leg kick but Keefer is out of range.
A big left from Archer misses.
Keefer misses with a few strikes there.
Keefer misses with a series of wild punches.
That's four minutes gone in the round.
Archer misses with a body shot. Nice footwork from Keefer.
Keefer ducks under a wild hook from Archer.
Mark Keefer has stepped it up - he knows he needs a finish here!
Keefer pulls out of a head kick attempt.
Archer fakes a jab and scores with a low kick.
A lazy left from Archer finds it's target.
Archer throws a lazy uppercut
and Keefer counters with a kick to the head that grazes his opponent. Archer is lucky that one didn't land flush.
The crowd are loving this. Great action here.
Keefer takes one on the chin but seems OK.
Sterling Archer is fighting for a decision - hopefully he's judged it right and he's actually winning the fight.
As the round comes to an end the crowd are showing their appreciation for a great round of action.
Archer is looking to slow Keefer down with leg kicks.
Keefer misses with a head kick.
Nice cross by Archer.
And that's the end of the fight!
Sterling Archer comfortably won the final round on my scorecard.
Well Archer has outworked and out performed his opponent in all aspects of the game today. He was simply too good and the decision should be no more than a formality. Over to the ring announcer for the scorecards.
Ladies and gentlemen, after 3 rounds of action, we go to the scorecards for a decision.
Judge Percy O'Donnell scores the fight 27:30
Judge Don Winkell scores the fight 27:30
Judge Timothy Bukovac scores the fight 27:30
In favor of your winner, by unanimous decision... Sterling Archer!
Sterling Archer seemed lost for words in his post fight interview but he remembered to thank his fans and directed everyone to his website.
|
|
|
|
|
|
|
|
|
|
|
|
|
|
|
|
|
|
|
|
|
|
|
| S |
C
A |
G |
S |
C
B |
G |
|
S |
C |
G |
|
energy
A | B |
|
hype
A | B |
|
pop
A | B |
|
mgr
A | B |
|
FIGHT
RATING
75% |
|
|
|
|
|
|
|
Main event
|
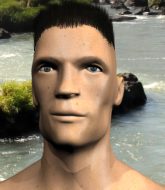
Coming up we have a middleweight MMA rules bout between Billa Bong (ranked 0 p4p, 0 weight class) and Abel N Willan (ranked 0 p4p, 0 weight class). Bong comes to the cage accompanied by Bite Marks - Screeching Weasel. Billa Bong is staring across the cage at his opponent, tweaking his nipples... Tweaking his own nipples that is.
 |
|
 |
| 180 cm
31
200 lbs
20 - 8 - 1 |
|
185 cm
22
190 lbs
3 - 1 - 0 |
Good wrestling
Lethal high kicks
Cardio machine |
|
BJJ Brown Belt
Good kicks
Heavy handed |
|
| |
|
Ladies and gentlemen. This fight is 5 rounds, for the middleweight championship of the world!
Introducing the champion to my left, fighting out of the red corner.
With a record of
20 - 8 - 1, fighting out of Los Angeles, Billa Bong!
And introducing the challenger to my right, fighting out of the blue corner.
With a record of
3 - 1 - 0, fighting out of Los Angeles, Abel N Willan!
The judges for this bout are Timothy Bukovac, Frank Antenori and Don Winkell.
The bell rings for round one and we are underway!
Bong gets in close and instigates a clinch.
Bong turns his back and goes for a hip toss. It's a bit messy but it gets the job done and Bong manages to end up in side control.

Bong has had enough of the ground for now and decides to stand.
Willan circles away from the clinch attempt.
Bong instigates a clinch.
Willan has had enough of the clinch but Bong keeps him there for the moment.
Bong has dropped down and is working for a takedown. Willan is trying to keep an underhook but Bong manages to get the takedown into half guard.
Bong working over Willan with some ground and pound. Willan looks like he wants out of this position, which is understandable.
Fantastic stuff here - a very entertaining period of action, which has drawn cheers from the crowd.
Willan is looking for a sweep. Bong is wise to his cunning plan and keeps the top position.
Bong looking for a kimura but he'll have to free his other leg if he wants to finish that. Perhaps he's just using it as a distraction technique.
Bong is trying to control the action in half guard but Willan is working away on the bottom, looking perhaps to get back to full guard.
The two fighters exchange a few words. I couldn't hear what they were saying but maybe it's more fun if you make it up yourself. Bong connects with a nice short shot to Willan's temple.
That's one minute gone in the round.
Bong not throwing his punches with enough precision this time.
Bong sitting in half guard, looking to land shots. Willan defending well though.
Bong is keeping good posture, landing some ground and pound.
Bong scores with a couple of good hammerfists.
Willan gets back to full guard.
A big thud reverberates around the arena there as Bong accidentally thumps the mat. Hopefully he's not broken his hand.
Bong trying to pass the guard but can't manage it just yet.
Bong scoring with punches to the head and body.
This has been an exciting period of action!
Bong with a flurry of punches that miss.
Bong is working the ground and pound from guard. He might want to try advancing position though to get more of an impact.
Willan keeping moving, preventing Bong from controlling successfully.
Bong is working Willan over from the guard. He should look to pass the guard and do a little more damage with these strikes.
Willan keeping moving, preventing Bong from controlling successfully.
Willan avoiding any damage from the ground and pound.
That's two minutes gone in the round.
Bong gets to his feet. Willan looking to butt scoot but the ref puts an end to that. On your feet son!
No luck for Bong with that takedown attempt.
Bong fails with a takedown attempt from distance.
Willan throws a body punch but Bong moves out of range.
Willan slaps away a takedown attempt from Bong, before circling back to the center of the mat.
That's three failed takedown attempts in the round for Billa Bong. That's going to take a lot out of him.
Bong looks to land a combination but Willan avoids it well.
Willan connects with a solid leg kick.
A clash of legs there as Bong blocks the low kick.
Bong shoots in looking for a takedown but Willan manages to keep the fight standing, pushing Bong's face into the canvas for good measure before circling away.
A nice leg kick lands there from Willan.
Bong drives through and clinches with Willan against the cage.
Bong lands a right uppercut that snaps the head of Willan backwards.
Bong prevents a body shot from Willan.
That's three minutes gone in the round.
Willan prevents a takedown attempt there.
Willan tries to stall but Bong uses the opportunity to gain a better position.
Bong unloads a knee to the mid-section.
Bong gets a nice trip takedown into half guard.
Bong passes the guard and advances to mount!
Willan looks gassed!
Willan is working to get back to half guard.
Bong controlling his opponent.
Bong fakes a shot to the body and cracks his opponent in the head. Nice ground and pound there!
The fighters are pressed up against the cage, both looking to find a bit of space to work.
Bong pausing momentarily but resumes with a couple of decent strikes that do a bit of damage.

Willan is rocked!
That's four minutes gone in the round.
The fans in attendance giving it up for the two fighters, who have really let it all hang out in the last minute or so!
Willan takes a big shot to the dome and his eyes have rolled back in his head! Bong's killer instinct has kicked in as he finishes the fight with more strikes. Impressive finish.
Ladies and gentlemen, after 4:20 of round 1, we have a winner by way of TKO (Strikes). Billa Bong!
Billa Bong is the new middleweight champion!
Billa Bong gave a mention to SPARTA FIGHTWARE-GTI in his post fight interview. That will please them (and hopefully generate some sales).
|
|
|
|
|
|
|
|
|
|
|
|
|
|
|
|
|
|
|
|
|
|
|
| S |
C
A |
G |
S |
C
B |
G |
|
S |
C |
G |
|
energy
A | B |
|
hype
A | B |
|
pop
A | B |
|
mgr
A | B |
|
FIGHT
RATING
69% |
|
|
|
|
|
|
|
|
|
|
