 |
TRFC78 PBP Commentary |
Undercard bout
|
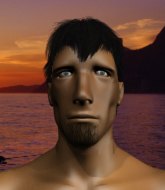
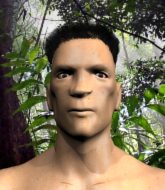
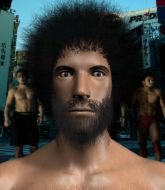
Coming up we have a middleweight MMA rules bout between Roberto Mendes (ranked 0 p4p, 0 weight class) and Jason James (ranked 0 p4p, 0 weight class). James has chosen Ambitionz Az A Ridah as his entrance music. Jason James has the better chin. Will he look to stand and bang today?
 |
|
 |
| 190 cm
18
190 lbs
1 - 2 - 0 |
|
190 cm
18
185 lbs
0 - 1 - 0 |
BJJ Blue Belt
Basic striking
Cuts easily |
|
BJJ Blue Belt
Brawler
Prefers standup |
|
| |
|
Ladies and gentlemen. This fight is 3 rounds, in the middleweight division.
Introducing the fighter to my left, fighting out of the red corner.
With a record of
1 - 2 - 0, fighting out of Rio de Janeiro, Roberto Mendes!
And introducing the fighter to my right, fighting out of the blue corner.
With a record of
0 - 1 - 0, fighting out of Hilo, Jason James!
The judges for this bout are Yuuki Gou, Shirou Masuda and Sosuke Kotani.

The bell rings for round one and we are underway!
Mendes fails with a takedown attempt from distance.
James throws a series of punches but Mendes moves out of range.
James will need to tighten up his combinations if he doesn't want to gas himself out, swinging at thin air.
Mendes tries to counter with a takedown but James is quick to defend against it.
We can't be sure of the tactics at this early stage but we have heard that James has been working on his takedowns a lot in the buildup to the fight and we can only assume he's going to look to take this to the mat.
Mendes wants to clinch up but James keeps it at a distance.
James throws a counter combo.
Mendes tries to close the distance and clinch up against the cage but James paws at him with a jab and circles away.
Mendes slips a jab and a cross from James.
James closes the distance and lands a one-two.
James throws a left and a right that both miss

and Mendes counters with a nice double leg into side control. James won't be happy with that.
This is a great period of action - very entertaining stuff!

Mendes wants to work for a kimura but he's foiled early by James, who protects the arm well.
Mendes is looking to finish here, going for an Americana. James knows the correct defense though, so he's OK.
James is not content to let Mendes control the position.

That's one minute gone in the round.
James is pushing Mendes's head away, looking to escape. Mendes manages to hold on to the position though.
Mendes wants to lay and pray for a moment but James keeps working.
James is pushing Mendes's head away, looking to escape. Mendes manages to hold on to the position though.
Mendes wants to work for a kimura but he's foiled early by James, who protects the arm well.
Mendes wants to control but James is keeping him busy.

That's two minutes gone in the round.
A few boos can be heard. I'm sure they will multiply if the fighters don't pick up the pace.
Mendes looking for an arm triangle but it's way too loose to do anything.
James is not content to let Mendes control the position.
The ground and pound from Mendes seems to be hitting the mat more than his opponent.
James wants to escape from the position here - easier said than done!
Mendes tries for an arm triangle. That looks pretty tight to me. Is this one over!?! Possibly, maybe, no Mendes has let go of the choke. Obviously it wasn't as tight as we thought!

That's three minutes gone in the round.
Mendes swings around for an armbar but James sees it coming a mile off and turns beautifully into Mendes's guard.
The fighters are starting to perspire pretty heavily.
Mendes is working actively off his back, looking to secure an arm or perhaps work for a triangle.
James would like to get this fight back to the feet but can't get free from the closed guard.

James stands and steps away. Mendes gets to his feet too and we're back to the striking game.
James throws a combination but it was largely blocked by Mendes.
Jason James is looking to keep the fight on the feet at all costs.

That's four minutes gone in the round.

Mendes instigates a clinch.
James manages to get underhooks and slows down the pace for a moment.
Mendes lands a takedown into guard.
Mendes is pushing down on James's leg trying to pass to half guard. James is fighting to maintain full guard but Mendes has managed to sneak the leg through.
Mendes is working for submissions here but there's nothing on.

James has one foot on Mendes's thigh - he pushes off and manages to get back to his feet.
Jason James seems to be the more aggressive standup fighter in this bout.
The fans in attendance giving it up for the two fighters, who have really let it all hang out in the last minute or so!
James throws a series of strikes that have Mendes backpedaling.
Mendes is looking to take this fight into the clinch.
Mendes dodges the punch combination from James.
And that�s the end of the round � the fighters go back to their corners.
Jason James dominated that round.
OK. That's time! The bell goes and we're back to the action.

Mendes moves in looking to clinch but James pushes him off.
James throws a combination but comes up with nothing but fresh air.
Mendes fails with the takedown.
James fails to land with a series of punches.
Mendes darts in and clinches James up against the cage.
Mendes fails to pull guard.
James wants to push off and get back to the center of the mat but Mendes has him pressed against the cage.
An uppercut on the inside fails to land for Mendes.
Mendes drops down looking for an ankle pick but James pulls his leg out and moves away.
That's three failed takedown attempts in the round for Roberto Mendes. That's going to take a lot out of him.
We've had a slow start to the round here - hopefully the action picks up.
James misses with a jab, cross combination.
Mendes slips a jab and a cross from James.
Mendes bobs and weaves into range and then changes levels and scores with a nice takedown into side control.
James throws his opponent off and manages to get back to his feet! Nicely done!
Jason James seems to be getting the better of the standup.
Fantastic stuff here - a very entertaining period of action, which has drawn cheers from the crowd.
James looks to score with a combo but nothing lands.
That's one minute gone in the round.
James misses with a jab, cross combination.
A combination from James does no damage.
Mendes seem to be loading up, looking for a big counter.
James is breathing heavily.
Mendes has taken the fight to the clinch.

Mendes manages to break the clinch.
Mendes lands a body shot.
James misses with the combination.
Mendes is trying to close the distance and clinch up, after that failed offence from James.
James throws a nice looking combination but Mendes bobs and weaves to avoid any damage.
Nice sprawl there from James as Mendes shoots in.
James unleashes a big counter combination but Mendes bobs and weaves and avoids any damage.
Mendes takes the fight into the clinch.
James has been the more effective fighter overall so far.
James softening up his opponent with strikes, against the cage.
Mendes manages to break the clinch.
Mendes gets the takedown into side control.
James tries to get back to his feet but has found himself mounted instead. Damn, that's gotta suck.
That's two minutes gone in the round.
The crowd cheering loudly, showing their appreciation for the quality fight we're seeing here.
Mendes trying to control but he's not successful this time.
Mendes cracks James with a nasty head shot there - the crowd let out an audible gasp there, as the noise reverberated around the arena.
Mendes working for a submission but James is keeping him at bay.
James is squirming around, avoiding Mendes's attempts to control the action.
James wants to try and get back to his feet.
The ref warns both fighters not to hold the cage as they work up against the meshing.
That's three minutes gone in the round.
Roberto Mendes overall seems to be getting the better of the ground position in the fight so far.
Mendes looking for an armbar but decides to keep the dominant position instead.
Mendes looking to finish James with some ground and pound. This is bad for James!
Mendes trying to control but he's not successful this time.
James in a bad spot here, taking shots to the head.
James bucks Mendes off and manages to get back to his feet!
James lands a nice shot that snaps Mendes's head back.
Mendes tries to clinch there but James circles away.
The fight stays on the outside here - Mendes looks like he's thinking about clinching though.
Despite the aggression on James's face he doesn't fully commit to the counter.
That's four minutes gone in the round.
Mendes shoots in looking for a single leg takedown. James is trying to defend but Mendes finishes it well and ends up in half guard. Let's see if he can advance position further.
Fantastic stuff here - a very entertaining period of action, which has drawn cheers from the crowd.
James pushes Mendes off looking to stand but Mendes dives back in and keeps control.
Mendes is trying to control. James wants to improve his position but can't escape this time.
Mendes perhaps working for something from half guard, or maybe not. It looks like he's just sitting there.
James has managed to escape just enough to sneak back to his feet but Mendes is on him like a limpet, forcing James back against the cage.
Mendes misses with a punch to the body.
Mendes tries to score a body lock takedown but James shows good agility there to stay on his feet.
And that�s the end of the round � the fighters go back to their corners.
Jason James showed his class in that round. I'd imagine he'll take it on all the scorecards.
Well, the break between rounds is over. Let's get back to the scrappin! This is the final round!

James scores with a body shot.
Mendes closes the distance and scores a nice trip takedown into half guard. James did well to prevent Mendes getting side control.
James manages to create a bit of space in order to work his way back to his feet. Mendes keeps hold of his opponent and drives him back against the cage.
Mendes jumps guard but James turns him against the cage and keeps the fight standing.

James breaks the clinch.
James scores to the head and body with a nice combination!
This has been an exciting period of action!
James throws a wild combination but nothing lands.
Mendes keeping a good distance there, avoiding the body shot.
Mendes shoots in and gets a takedown into half guard. Mendes showed some decent athleticism there.
James pushes Mendes off looking to stand but Mendes dives back in and keeps control.
Mendes is trying to work for a kimura. This could be trouble! No, James has managed to free his arm - good work.
Both fighters are breathing heavily.
That's one minute gone in the round.
James manages to create a bit of space in order to work his way back to his feet. Mendes keeps hold of his opponent and drives him back against the cage.
James can't find room to land a body shot as Mendes controls the action.
Knees to the body from Mendes.
Mendes is trying to pull guard but James has him pressed against the cage.
James scores with a hook to the body.
Mendes stalls.
Mendes pushes off and circles away, back to the middle of the mat.
James closes the distance and lands a one-two.
James throws a combination but comes up with nothing but fresh air.
That's two minutes gone in the round.
Mendes looks for the body kick but James saw that one coming.
Mendes takes a shot right to the liver - Bas would have been proud of that punch.
No joy there for James, who threw a few shots but didn't land.
The crowd are loving this. Great action here.
Mendes is looking to clinch.
James now looks to counter with a shot at the body.
Mendes is looking to take this fight into the clinch.
Mendes avoids a punch combination nicely.
Mendes has managed to clinch.
James blocking some punches.
Mendes is trying to pull guard but James has him pressed against the cage.
That's three failed takedown attempts in the round for Roberto Mendes. That's going to take a lot out of him.
Mendes keeps the fight in the clinch, despite James's efforts to push away.
That's three minutes gone in the round.
James is trying to work out of this bad position, with his back against the cage.
Mendes tries to pull guard but James holds him up against the cage and eventually Mendes drops back down to his feet.
Mendes breaks from the clinch.
Mendes rushes James and pushes him back against the cage in a clinch.
Mendes escapes the clinch and we're back to striking.
A combination from James does no damage.
Jab by James.
Mendes takes the fight into the clinch.
James throws a blind hook that connects with the side of Mendess head.
That's four minutes gone in the round.
Mendes's corner calls for him to break the clinch, which he does.
Mendes throws a looping left and ducks down for a takedown. He's got his arms around James's waist but James gets an underhook and avoids the takedown by throwing Mendes off to one side.
James cracks Mendes with a good jab.
Mendes tries to clinch but is not successful on this occasion.
Mendes tries to clinch but is not successful on this occasion.
Mendes showing good head movement there, avoiding the strikes from James.
Sloppy strikes from James. Those never looked like landing.
Wooooo! Give it up for these two warriors! They are putting on a show!
Mendes tries to close the distance and clinch up but James swats him away and circles back towards the center.
Mendes tries to clinch up but James circles away and keeps his distance.
James misses with a wild combination.
Mendes fails in his attempt to clinch.
Roberto Mendes has stepped it up - he knows he needs a finish here!
Jason James is fighting for a decision here - he's started to take the cautious approach.
James misses with a jab, cross combination.
And that's the end of the fight!
Jason James comfortably won the final round on my scorecard.
I've got James winning every round here. Surely the decision will go his way and he'll pick up a well deserved decision victory. Over to the ring announcer for the scorecards.
Ladies and gentlemen, after 3 rounds of action, we go to the scorecards for a decision.
Judge Yuuki Gou scores the fight for Jason James!
Judge Shirou Masuda scores the fight for Jason James!
Judge Sosuke Kotani scores the fight for Jason James!
Jason James wins by unanimous decision!
Jason James made sure to give a little speech post fight, saying 'DEADLEAGUE fight team number one what!'.
|
|
|
|
|
|
|
|
|
|
|
|
|
|
|
|
|
|
|
|
|
|
|
| S |
C
A |
G |
S |
C
B |
G |
|
S |
C |
G |
|
energy
A | B |
|
hype
A | B |
|
pop
A | B |
|
mgr
A | B |
|
FIGHT
RATING
58% |
|
|
|
|
|
|
|
Undercard bout
|
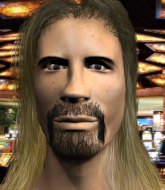
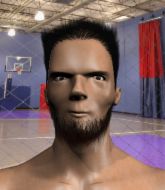
Coming up we have a heavyweight MMA rules bout between Perry Roscrow Jr (ranked 0 p4p, 0 weight class) and Francis Uwatuba (ranked 0 p4p, 0 weight class). I don't know about you partner, but I'm pumped for this one!
 |
|
 |
| 192 cm
19
240 lbs
3 - 0 - 0 |
|
191 cm
18
245 lbs
0 - 1 - 0 |
BJJ Purple Belt
Brawler
Good chin |
|
BJJ White Belt
Decent boxing
Solid chin |
|
| |
|
Ladies and gentlemen. This fight is 3 rounds, in the heavyweight division.
Introducing the fighter to my left, fighting out of the red corner.
With a record of
3 - 0 - 0, fighting out of London, Perry Roscrow Jr !
And introducing the fighter to my right, fighting out of the blue corner.
With a record of
0 - 1 - 0, fighting out of Amsterdam, Francis Uwatuba!
The judges for this bout are Shigeki Sano, Yuuki Gou and Taro Takaoka.
The bell rings for round one and we are underway!
Uwatuba gets caught on his heels momentarily as he allows Roscrow Jr to score an easy takedown into full guard.

Uwatuba has a loose triangle. He'll be looking to tighten that up but Roscrow Jr can see exactly what he's planning and manages to posture up and free himself.
Roscrow Jr postures up to throw the ground and pound strikes but they don't connect.
Roscrow Jr advances to half guard.
Ground and pound from Roscrow Jr .
Roscrow Jr with a momentary lay and pray from half guard.
Uwatuba looking to force a kimura from the bottom here. He's concentrating on that move too much though and Roscrow Jr pushes past his half guard into mount!
We've had a slow start to the round here - hopefully the action picks up.
Roscrow Jr swings around for an armbar and he's got it! Wow, that came out of nowhere! What a finish!
Ladies and gentlemen, after 1:58 of round 1, we have a winner by way of Submission (Armbar). Perry Roscrow Jr !
Perry Roscrow Jr decided to go for the less than humble approach in his post fight interview, telling everyone how he is going to conquer the world. The crowd seemed to like it when really that sort of approach could have gone either way.
|
|
|
|
|
|
|
|
|
|
|
|
|
|
|
|
|
|
|
|
|
|
|
| S |
C
A |
G |
S |
C
B |
G |
|
S |
C |
G |
|
energy
A | B |
|
hype
A | B |
|
pop
A | B |
|
mgr
A | B |
|
FIGHT
RATING
77% |
|
|
|
|
|
|
|
Undercard bout
|
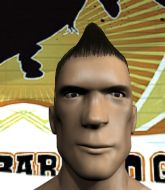
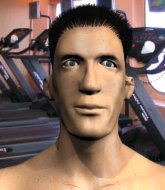
Coming up we have a lightweight MMA rules bout between Lord Frieza (ranked 0 p4p, 0 weight class) and Jonny Hendry (ranked 0 p4p, 0 weight class). Jonny Hendry is the more experienced fighter, so let's see if that makes a difference tonight.
 |
|
 |
| 175 cm
25
140 lbs
1 - 1 - 0 |
|
183 cm
19
160 lbs
2 - 1 - 0 |
BJJ Purple Belt
Excellent MT
KO power |
|
BJJ Blue Belt
Brawler
Can Moonwalk |
|
| |
|
Ladies and gentlemen. This fight is 3 rounds, in the lightweight division.
Introducing the fighter to my left, fighting out of the red corner.
With a record of
1 - 1 - 0, fighting out of Tokyo, Lord Frieza!
And introducing the fighter to my right, fighting out of the blue corner.
With a record of
2 - 1 - 0, fighting out of Amsterdam, Jonny Hendry!
The judges for this bout are Ren Mimura, Shigeki Fujiwara and Shirou Masuda.
The bell rings for round one and we are underway!
Hendry tries to clinch there but Frieza circles away.
Frieza scores with a nice strike.
Frieza tries to clinch but is not successful on this occasion.
Frieza throws a good cross that connects.
Frieza misses with a takedown attempt - Hendry sprawls well and throws a nice strike on the way out which just misses.
Hendry tries a counter takedown but it's more of a dummy move, and he uses it to push himself away.
Hendry misses with a double jab.
Frieza pushes Hendry up against the cage in a clinch.
Hendry goes for a takedown in the clinch but Frieza prevents it.
We've had a slow start to the round here - hopefully the action picks up.
Frieza cracks Hendry with a nice body shot.
Frieza trying to control the position but instead, Hendry has worked for underhooks and has pushed Frieza into the cage.
The referee calls for Frieza to work.
That's one minute gone in the round.
Frieza lands an elbow inside.
Hendry takes an elbow to the temple.
Frieza escapes the clinch and we're back to striking.
Hendry doesn't manage to clinch there - Frieza circles away.
Hendry connects with a leg kick. He turned his hip over nicely there.
Frieza tries to clinch but Hendry moves out of range.
Hendry is looking to clinch.
Frieza misses with a wild body shot.
Hendry fails with a rather predictable takedown attempt.
Frieza goes for a double leg but Hendry avoids the attempt and the two fighters end up clinched against the cage as Hendry continues to drive forward.
That's two minutes gone in the round.
Hendry misses with a jab, cross combination.
Frieza tries to close the distance and clinch up but Hendry swats him away and circles back towards the center.
A telegraphed takedown attempt from Frieza is defended easily by Hendry.
That's three failed takedown attempts in the round for Lord Frieza. That's going to take a lot out of him.
Frieza fakes a head punch and goes low to the body. Nicely done.
Hendry tries to clinch up.
Frieza takes a step back and watches a body kick go sailing past his mid section.
Hendry stuffs the takedown attempt from Frieza. Frieza gets slowly back to his feet.
Hendry tries a counter takedown but it's more of a dummy move, and he uses it to push himself away.
That's three minutes gone in the round.
Frieza shoots in for a takedown. "I don't think so" says Hendry as he avoids it easily.
Hendry tries a head kick but it misses.
Frieza shoots in looking for a takedown. Hendry tries to sprawl out of it but Frieza keeps driving through. The fighters are pinned against the cage. Hendry manages to get underhooks and after a bit of a struggle, circles away and we're back to standing.
Horrible takedown attempt by Hendry or perhaps it was just good defense by Frieza, which made it look bad.

Hendry closes the distance, clinches up and gets a nice trip takedown into side control. Very smooth.
That's four minutes gone in the round.
Hendry taking a breather here.
Frieza is trying to get back to his feet.
Frieza has improved his flexibility recently so we will have to see if he can use that to his advantage.
Hendry is trying to land an Americana. He has the arm isolated but Frieza is keeping cool and he's avoided the danger for now.
The crowd thankful this round is nearly over.
Frieza is working hard to escape and get back to his feet. After a battle for position, Hendry asserts his dominance and retains side control.
And that�s the end of the round � the fighters go back to their corners.
That was a close round but I would say that Lord Frieza will probably get the nod.
The minute break is over - no more time for sponges and pep talks - back to the action!
Hendry looks to land a combination but Frieza avoids it well.
Hendry chopped to the floor by a nice leg kick but he springs right back up before Frieza can pounce on him.
Frieza tries to clinch up but Hendry circles away and keeps his distance.
Hendry feints the counter takedown.
Frieza digs a good hook to Hendry's body.
Frieza scores with a punch to the gut of his opponent.
Frieza gets caught on his heels momentarily as he allows Hendry to score an easy takedown into full guard.
Frieza wants to get back to his feet but Hendry is in a dominant position and won't allow it.
We've had a slow start to the round here - hopefully the action picks up.
Hendry stays in close to Frieza's body and controls the position.
That's one minute gone in the round.
Hendry passes Frieza's right leg, so he's now in half guard.
Frieza is trying to stand.
We may be looking at a referee standup if the pace doesn't pick up soon.
Hendry controlling the action here.

The ref stands the fighters back up due to a lack of activity.
Frieza is looking to take this fight into the clinch.
That's two minutes gone in the round.
The crowd are hurling abuse towards the fighters... You can hardly blame them though because there isn't a lot going on in the fight.
Frieza ducks down and throws a hook to the body but Hendry moves away.
A telegraphed takedown attempt from Hendry is defended easily by Frieza.
Frieza throws a looping left and ducks down for a takedown. He's got his arms around Hendry's waist but Hendry gets an underhook and avoids the takedown by throwing Frieza off to one side.

The fight moves into the clinch position.
A real battle for position is taking place between these two warriors.
Frieza pushes off and circles away, back to the middle of the mat.
Hendry misses with a takedown attempt. He shot from a bit too far out.
That's three minutes gone in the round.
Frieza fails with a takedown attempt.
Hendry rushes forward with a series of wild hooks but Frieza moves out of range and avoids them all easily.
A left and a right from Frieza both land. Nice combination.
A solid leg kick lands there for Frieza.
Hendry misses with a takedown attempt
and Frieza counters nicely by changing levels and landing a hook to the body.
Lord Frieza has stuffed three takedown attempts in the round now. That's going to take a lot out of Jonny Hendry.
Hendry is breathing heavily.
Hendry looks to clinch
and Frieza counters with a straight punch to the midsection.
Jonny Hendry seems to be the more aggressive standup fighter in this bout.
Frieza's corner calls for a 1-2. Frieza obliges with the 1 part as he scores the single shot and moves back out of range.
Frieza catches Hendry with a nice straight right. He seems pissed - ooooh, it's on now! On like donkey kong!
That's four minutes gone in the round.
Frieza tries to close the distance and clinch but Hendry swats him to one side with an open hand palm strike and circles away.
Jonny Hendry is looking to throw some combinations by the looks of things.
Frieza shoots in for a takedown. "Ole!" shouts Hendry as he jumps to the side.
Frieza gets caught flat footed, as Hendry shoots in with a quick takedown into guard.
Fantastic stuff here - a very entertaining period of action, which has drawn cheers from the crowd.
Frieza is trying to stand up but he's not managed so far.
The crowd thankful this round is nearly over.
Hendry stands up and looks to throw the legs aside to pass to side control. Frieza swivels though and keeps the full guard.
And that�s the end of the round � the fighters go back to their corners.
Lord Frieza dominated that second round.
The fighters get back to their feet, the hooter sounds and we're back to the action! And we move into the final round!
Frieza tries to clinch
and Hendry counters with a shoot takedown. Frieza fights it but they end up in guard.
Frieza is looking to stand back up but Hendry counters by passing into half guard. Oops... bit sloppy there by Frieza.

Hendry controlling the action here.
The ref warns both fighters not to hold the cage as they work up against the meshing.
Frieza tries to push off, looking to stand up, but Hendry manages to move to mount!
We've had a slow start to the round here - hopefully the action picks up.
Frieza wants to try and get back to his feet.
That's one minute gone in the round.

Frieza bucks up and throws Hendry to the side - he's got back to his feet. Great escape!
Frieza rushes Hendry and presses him up against the cage.
It really doesn't seem like the step up in weight is hurting Frieza here at all. He's more than holding his own against the bigger man.
Hendry being controlled against the cage.
Hendry drops to a knee looking for a takedown but Frieza gets the underhooks and prevents it.
Frieza scores with an uppercut up the middle.
Hendry tries to pull guard but Frieza won't allow it.
Hendry tries to take the fight to the ground by pulling guard but can't manage it.
Lord Frieza has stuffed three takedown attempts in the round now. That's going to take a lot out of Jonny Hendry.
Hendry tries to pull guard but Frieza holds him up against the cage and eventually Hendry drops back down to his feet.
That's two minutes gone in the round.
Hendry tries to take the fight to the ground by pulling guard but can't manage it.
Frieza manages to pull guard. Let's see whether he can land a sub off his back.
Hendry prevents Frieza from getting back to his feet.
That's three minutes gone in the round.
Hendry sitting in guard here, content to control.
Frieza is looking to get back to his feet but can't, whilst Hendry is controlling him.
The referee has motioned to the fighters to stand back up. He just wasn't happy with the level of activity.
Frieza connects with a body shot.
Frieza cracks the inside of Hendry's front leg.
Frieza shoots for a takedown but Hendry saw that one coming a mile off and avoided it easily.
Both fighters are breathing heavily.
Hendry circles away from the clinch attempt.
Hendry feints the counter takedown.
That's four minutes gone in the round.
Frieza looks for a takedown here. Will he get it? Hendry is fending him off so far but Frieza persists. Nope, Hendry circles away and we're back to standing.
Hendry shoots in for a takedown - he's clinched up with Frieza but Frieza pushes him off and we're back to square one.
Frieza leaves Hendry with his face pressed against the mat as he sprawls beautifully, defending against a solid takedown attempt.
Lord Frieza is fighting for a decision here - he's started to take the cautious approach.
Lord Frieza is winning the standup battle so far.
Frieza fakes a head punch and goes low to the body. Nicely done.
The crowd thankful this round is nearly over.
Hendry closes this distance looking for a takedown but Frieza circles away.
Frieza is looking to clinch but Hendry is avoiding it.
Hendry drops down looking to force a counter takedown but Frieza defends it well.
Jonny Hendry has stepped it up - he knows he needs a finish here!
A low kick from Hendry misses
and Hendry takes a counter punch right on the button for his troubles.
And that's the end of the fight!
Lord Frieza showed his dominance in that final round.
Well I reckon that's a shut out for Frieza, winning every round. Will the judges agree? They are the ones who matter, even if they are often depressingly incompetent. Over to the ring announcer for the scorecards.
Ladies and gentlemen, after 3 rounds of action, we go to the scorecards for a decision.
Judge Ren Mimura scores the fight for Lord Frieza!
Judge Shigeki Fujiwara scores the fight for Lord Frieza!
Judge Shirou Masuda scores the fight for Lord Frieza!
Lord Frieza wins by unanimous decision!
A relieved looking Lord Frieza thanked the fans for their support and gave the usual line about them being amazing. They seemed to believe that he actually meant it.
|
|
|
|
|
|
|
|
|
|
|
|
|
|
|
|
|
|
|
|
|
|
|
| S |
C
A |
G |
S |
C
B |
G |
|
S |
C |
G |
|
energy
A | B |
|
hype
A | B |
|
pop
A | B |
|
mgr
A | B |
|
FIGHT
RATING
36% |
|
|
|
|
|
|
|
Undercard bout
|
|
|
|
Undercard bout
|
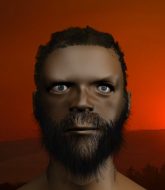
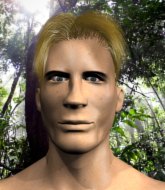
Coming up we have a lightweight MMA rules bout between Bane Longfellow (ranked 0 p4p, 0 weight class) and Kosei Date (ranked 0 p4p, 0 weight class). Kosei Date told me before the fight that he's been watching a lot of DVDs so let's see if that helps him in this one! I can't wait to find out!
 |
|
 |
| 175 cm
22
155 lbs
2 - 0 - 0 |
|
180 cm
21
165 lbs
1 - 0 - 0 |
Decent wrestler
Basic striking
Cuts easily |
|
BJJ White Belt
Solid Muay Thai
Solid chin |
|
| |
|
Ladies and gentlemen. This fight is 3 rounds, in the lightweight division.
Introducing the fighter to my left, fighting out of the red corner.
With a record of
2 - 0 - 0, fighting out of Tokyo, Bane Longfellow!
And introducing the fighter to my right, fighting out of the blue corner.
With a record of
1 - 0 - 0, fighting out of Tokyo, Kosei Date!
The judges for this bout are Shirou Masuda, Hirohito Nitta and Shigeki Fujiwara.
The bell rings for round one and we are underway!
Date tries to clinch up.
Longfellow was looking to counter that last move with a shot to the body but he didn't commit.
Date is looking to clinch.
Date closes the distance and clinches.
Date connects with a knee to the head.

It looks like Bane Longfellow has been cut.
Date escapes the clinch and we're back to striking.
Date gets in close and instigates a clinch.
Date misses with an elbow strike.
Longfellow just leaning against Date, taking a breather.
Date prevents the takedown attempt.
Longfellow blocks a punch to the side of the head.
Date tries a knee to the head but Longfellow blocks it.
Longfellow tries to pull guard but Date won't allow it.
Longfellow tries for a takedown but Date manages to get underhooks.
That's three failed takedown attempts in the round for Bane Longfellow. That's going to take a lot out of him.
We've had a slow start to the round here - hopefully the action picks up.
With the two fighters working up against the cage, Date just misses with a elbow thrown towards Longfellow's brow.
Date's corner calls for him to break the clinch, which he does.
Date throws a wild body kick that Longfellow sees coming a mile off.
Longfellow gets tackled into the cage by Date. Date maintains the clinch.
Longfellow missing with knees to the body.
Date is trying to slow down the pace of the fight but Longfellow is keeping busy.
That's one minute gone in the round.
A nice glancing elbow lands by Date.
Longfellow displaying some good clinch control by pressing Date up against the cage.
Date dodges an elbow strike from Longfellow.
Longfellow has hold of a leg and is looking for a trip takedown. Date avoids it nicely though and we remain in the clinch.
Date trying to control the position but instead, Longfellow has worked for underhooks and has pushed Date into the cage.
Date avoiding damage.
Date makes some space for himself and lands an uppercut.
Date crunches a lovely knee into Longfellow's ribcage.
Longfellow takes a shot to the head.
Date scores with a nice hook to the head.
Date stops a takedown attempt from Longfellow.
Date tries a knee to the head but Longfellow blocks it.
That's two minutes gone in the round.
Date manages to break the clinch.
Nice sprawl there from Date as Longfellow shoots in.
And Date responds with a good body kick, but Longfellow manages to step out the way in time.
Longfellow misses with a looping right.
Date tries to clinch but Longfellow moves out of range.
No luck with that takedown attempt from Longfellow.
Date thinks about the counter body kick.
Longfellow looks to be in better condition than last time we saw him fight. Obviously he's been working hard on his cardio.
Longfellow swats away the attempt to clinch by Date.
Date tries to clinch but Longfellow moves out of range.
Longfellow tries to drive through with a takedown attempt but Date defends well and Longfellow ends up having to push Date into the cage where they will battle it out in the clinch.
The crowd are loving this. Great action here.
Date tries to close the distance and clinch but Longfellow swats him to one side with an open hand palm strike and circles away.
Date rushes Longfellow and pushes him back against the cage in a clinch.
Date is defending well against a takedown attempt.
Longfellow dodges an elbow strike from Date.
Longfellow has Date pressed up against the cage and is working for takedown. Date manages to improve position though and keeps the fight standing.
Date misses with an elbow over the top.
That's three minutes gone in the round.
Date pushes off and circles away, back to the middle of the mat.
Date tries to clinch there but Longfellow circles away.
Longfellow misses with a wild combination.
Date tries to clinch but Longfellow is having none of it.
Longfellow scores a trip takedown into side control. Nice.
We get told so often about how wrestlers don't like to be on their backs. Let's see if Date can do anything to dispel that myth.
Longfellow is breathing heavily.
Date wants to escape from the position here - easier said than done!
Longfellow trying to control the position but Date is working away.
Longfellow wants to stand but Date is controlling his arm.
Date avoids any damage from the ground and pound of Longfellow.
Date wants to escape from the position here - easier said than done!
That's four minutes gone in the round.
The ground and pound from Longfellow seems to be hitting the mat more than his opponent.
Longfellow working the ground and pound from side control.
Longfellow is maintaining the dominant position - no doubt Date will start to get frustrated soon if he's not already.
Date wants to escape from the position here - easier said than done!
Longfellow is pausing for a moment. What's he doing? It looks like he's clearing his nose. Oh dude! He's shot a load of snot all down Date's shoulder. That is not cool.
Date is trying to get back to his feet.
Longfellow looking for an arm triangle but it's way too loose to do anything.
Longfellow is looking for a kimura. He might have it! No, Date has escaped the position, nice work there.
And that�s the end of the round � the fighters go back to their corners.
Kosei Date dominated that round.
The cut man is working on Bane Longfellow's cut.
The fighters' corners scream their final instructions, as the referee calls time. Here we go, back to the action!
Date tries to clinch up against the cage, rushing in to close the distance. Longfellow manages to break the clinch and circles back to the middle of the mat.
Date takes the fight into the clinch.
Date will no doubt start fighting again in a minute but for now he's just having a little rest, leaning Longfellow up against the cage.
A nice glancing elbow lands by Date.
Longfellow has clasped his hands together around Date's back... aaand, he's got a takedown into side control. Nicely done.
The strikes coming from Longfellow are missing the target in this wave of attacks.
The fighters are pressed up against the cage, both looking to find a bit of space to work.
Date wants to get back to his feet but Longfellow is dominant here and he's now got Date's back!
Longfellow landing with strikes.
Longfellow is landing with strikes. Date can't take much more of this.
This has been an exciting period of action!
Date covers up after taking a massive shot to the side of the head.
Date is taking damage to the body and head.
Date is trying to stand back up.
Bane Longfellow overall seems to be getting the better of the ground position in the fight so far.
That's one minute gone in the round.
Date prevents Longfellow from getting a body triangle.
Date is trying to get back to his feet but he's not managed it yet.
Longfellow lands with a big left hand that may well have hurt his opponent. Can Date hold on?!
Longfellow is staying calm and holding on to the back position, whilst working on a rear naked choke. Date is defending well though. Longfellow let's go of the attempt for now.
Longfellow is looking for the choke from the back position but Date is controlling his hands well.
Longfellow is staying calm and holding on to the back position, whilst working on a rear naked choke. Date is defending well though. Longfellow let's go of the attempt for now.
Longfellow softening up his opponent with strikes here.
That's two minutes gone in the round.
Longfellow is looking to finish with some ground and pound!
Longfellow lands a punch to the side of the head from the back.
Longfellow is looking to finish the fight by rear naked choke. Date knows exactly what he's got planned though, so he's defending well. Maybe a few strikes would soften Date for a finish.
Longfellow trying to secure his dominant position for a moment - making sure Date doesn't escape.
Date prevents Longfellow from getting a body triangle.
Longfellow scores with punches to the body.
Longfellow has been looking to land a fair amount of strikes on the ground. He might be looking to soften his opponent up in order to work for a submission.
That's three minutes gone in the round.
Longfellow lands punches and elbows.
Date is trying to stand back up.
Date really doesn't want to stay on the ground with Longfellow. If he can't get it back to his feet, it's only a matter of time before he'll be tapping out.
Date is taking damage to the body and head.
Date is trying to stand back up.
Longfellow lands with a hammerfist to the side of Date's head.
Date fending off the submission attempt from Longfellow.
Date trying to get back to his feet but Longfellow is in full control for now.
That's four minutes gone in the round.
Longfellow is remaining active here, looking for the choke. The more discerning members of the crowd will appreciate his efforts.
Date is trying to get back to his feet but he's not managed it yet.
Longfellow is looking to finish with some ground and pound!
Date is taking damage to the body and head.
Date is covering up but some of the strikes from Longfellow are getting through and doing damage.
Longfellow tries to keep control of the position but Date is staying busy.
And that�s the end of the round � the fighters go back to their corners.
Bane Longfellow dominated that second round.
The cut man is working on Bane Longfellow's cut.
That's time! Longfellow's corner gives him a slap on the ass as he gets ready to fight. This is the final round!
Date stuffs the takedown.
Longfellow changes levels and looks for a double leg takedown. Date tries to avoid it but Longfellow manages to keep hold of a leg and drag Date to the ground. Date escapes though and pops straight back up to his feet.
Longfellow scores a trip takedown into side control. Nice.
Longfellow scores with a couple of short elbows.
Date is working hard to escape and get back to his feet. After a battle for position, Longfellow asserts his dominance and retains side control.
Longfellow slows the pace down.
Longfellow is trying to get an arm triangle but Date is defending well.
We've had a slow start to the round here - hopefully the action picks up.
Longfellow scoring with punches and elbows.
Date is pushing Longfellow's head away, looking to escape. Longfellow manages to hold on to the position though.
That's one minute gone in the round.
Longfellow wants to control but Date is keeping him busy.
Date bucks up and manages to escape back to his feet!
Longfellow fails with a takedown attempt.
That's three failed takedown attempts in the round for Bane Longfellow. That's going to take a lot out of him.
Date connects with a single shot there.
Longfellow closes this distance looking for a takedown but Date circles away.
Longfellow checks the leg kick nicely there.
Date tries to close the distance and clinch up but Longfellow swats him away and circles back towards the center.
Longfellow half commits to a counter takedown before pushing away, out of range.
Date tries to clinch there but Longfellow circles away.
Date tries to clinch up but Longfellow circles away and keeps his distance.
That's two minutes gone in the round.
Longfellow closes this distance looking for a takedown but Date circles away.
Longfellow moves out of the way of the counter high kick fromDate.
Both fighters are breathing heavily.
Date tries to clinch but Longfellow moves out of range.
Date fails in his attempt to clinch.
Longfellow circles away from the clinch attempt.
Longfellow swats away the attempt to clinch by Date.
Longfellow drops down looking for a counter takedown but Date sprawls and moves away.
A leg kick checked by Longfellow.
Bane Longfellow is looking to throw some combinations by the looks of things.
Date moves into range and lands a nice body kick.
Date darts in and clinches Longfellow up against the cage.
Kosei Date seems to be working more effectively in the clinch in the fight so far.
Longfellow drops down for a takedown but doesn't get it.
Date connects with a nasty looking knee right to Longfellow's face.
The crowd cheering loudly, showing their appreciation for the quality fight we're seeing here.
Date putting his Muay Thai to good use. He has Longfellow in a tight clinch and is doing some damage with knees to the body.
Date just leaning against Longfellow, taking a breather.
That's three minutes gone in the round.
Longfellow avoids the elbow strike from Date, against the cage.
Date comes over the top with an elbow. That landed flush.
Date breaks the clinch and we're back to striking at distance.
Date throws a hook to the body but it doesn't connect.
Longfellow seemed to be looking to counter by closing the distance.
Date closes the distance and pushes Longfellow back into the cage.
Date breaks the clinch and we return to the middle of the mat.
Longfellow circles away from the clinch attempt.
Date throws a head kick that misses.
Date tries to close the distance and clinch up but Longfellow swats him away and circles back towards the center.
Longfellow gets in close and instigates a clinch.
Longfellow has hold of a leg and is looking for a trip takedown. Date avoids it nicely though and we remain in the clinch.
Date scores with a shot to the side of Longfellow's head.
Longfellow tries to land a knee to the head but misses.
Longfellow is working for takedown but Date is calmly controlling the position for now.
Longfellow tries to score a body lock takedown but Date shows good agility there to stay on his feet.
That's four minutes gone in the round.
Nice elbow from Date.
Date stalling against the cage.
Date lands an elbow just above Longfellow 's eye.
The crowd cheering loudly, showing their appreciation for the quality fight we're seeing here.
Longfellow looking for a takedown.
Date is stalling here. The referee will be looking to step in if he doesn't pick up the pace.
Date lands a nice elbow.
Date lands a nice elbow.
Date tried to land a shot to the body but connects with Longfellow's elbow.
Longfellow goes for a takedown attempt but Date pushes him away and we're back to fighting at a distance.
Kosei Date is looking to keep the fight on the feet at all costs.
Date fails in his attempt to clinch.
Date throws a nice head kick!
Date lands a head kick. Longfellow smiles back at him and beckons him forward.
Date is looking to clinch.
Date fails in his attempt to clinch.
And that's the end of the fight!
Kosei Date comfortably won the final round on my scorecard.
I think Date has won this one but let's see whether the judges agree with me. Over to the ring announcer for the scorecards.
Ladies and gentlemen, after 3 rounds of action, we go to the scorecards for a decision.
Judge Shirou Masuda scores the fight for Kosei Date!
Judge Hirohito Nitta scores the fight for Kosei Date!
Judge Shigeki Fujiwara scores the fight for Kosei Date!
Kosei Date wins by unanimous decision!
Bane Longfellow spoke after the fight, saying 'This guy ain't got shit on me. Let's run it back punk'.
|
|
|
|
|
|
|
|
|
|
|
|
|
|
|
|
|
|
|
|
|
|
|
| S |
C
A |
G |
S |
C
B |
G |
|
S |
C |
G |
|
energy
A | B |
|
hype
A | B |
|
pop
A | B |
|
mgr
A | B |
|
FIGHT
RATING
52% |
|
|
|
|
|
|
|
Undercard bout
|
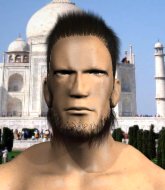
Coming up we have a middleweight MMA rules bout between Ouji Ichisake (ranked 0 p4p, 0 weight class) and Max Apollo (ranked 0 p4p, 0 weight class). Max Apollo is the more experienced fighter, so let's see if that makes a difference tonight.
 |
|
 |
| 181 cm
25
179 lbs
2 - 0 - 0 |
|
188 cm
19
188 lbs
3 - 0 - 0 |
BJJ Purple Belt
Counter fighter
Granite chin |
|
BJJ White Belt
Excellent MT
Powerful |
|
| |
|
Ladies and gentlemen. This fight is 3 rounds, in the middleweight division.
Introducing the fighter to my left, fighting out of the red corner.
With a record of
2 - 0 - 0, fighting out of Tokyo, Ouji Ichisake!
And introducing the fighter to my right, fighting out of the blue corner.
With a record of
3 - 0 - 0, fighting out of Las Vegas, Max Apollo!
The judges for this bout are Yukihiro Shimada, Yasuomi Hirokawa and Yukihiro Yamamoto.
The bell rings for round one and we are underway!
Apollo throws a mid kick that lands with a slap.
Apollo tries to clinch but is not successful on this occasion.
Ichisake keeping a good distance there, avoiding the body shot.
Ichisake takes a head kick and keeps coming.
It looks like Ouji Ichisake has been cut.
A good leg kick by Apollo.
Ichisake looks to have improved his striking defense since last time we saw him fight.
Ichisake looking to score a takedown here. Apollo is defending well but Ichisake drives through and ends up in Apollo's guard.
Apollo told us pre-fight that he has been working on his escapes in training. Let's see if he can call on some of his new skills to get back to his feet.
Ichisake is frustrating his opponent with some stalling tactics from top position.
Ichisake seems to have a rather negative gameplan on the ground. He seems keen to just score the takedown and hold down Apollo for as long as he can get away with.
Apollo looking for submissions off his back, moving his hips, looking for an opening.
That's one minute gone in the round.
Ichisake stays in close to Apollo's body and controls the position.
Apollo controls Ichisake momentarily but Ichisake frees himself.
Ichisake slips nicely into half guard.
Ichisake frees up his trapped foot and advances to mount.
Apollo wants to hold on but Ichisake pushes him away.
Ichisake controlling from the full mount.
That's two minutes gone in the round.
Ichisake continues to stall.
Apollo is desperately trying to improve his position but Ichisake has a good base and remains in mount.
Ichisake controlling the position easily from mount.
Ichisake takes Apollo's back.
Ichisake has the rear naked choke here! This is very bad for Apollo! Can he survive? No! He's out! Ichisake gets to his feet and celebrates with his cornermen. He looks absolutely delighted. In the post fight interviews he takes time to thank his parents and everyone who has believed in him from the start. How sweet.
Ladies and gentlemen, after 3:55 of round 1, we have a winner by way of Submission (RNC). Ouji Ichisake!
|
|
|
|
|
|
|
|
|
|
|
|
|
|
|
|
|
|
|
|
|
|
|
| S |
C
A |
G |
S |
C
B |
G |
|
S |
C |
G |
|
energy
A | B |
|
hype
A | B |
|
pop
A | B |
|
mgr
A | B |
|
FIGHT
RATING
34% |
|
|
|
|
|
|
|
Undercard bout
|
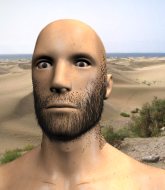
Coming up we have a lightweight MMA rules bout between Jordan Miller (ranked 0 p4p, 0 weight class) and Hoarg Ishan (ranked 0 p4p, 0 weight class). Both fighters look fresh as a daisy as they make their way towards the cage.
 |
|
 |
| 165 cm
23
135 lbs
1 - 2 - 0 |
|
177 cm
19
153 lbs
1 - 3 - 0 |
BJJ Blue Belt
Solid Muay Thai
Prefers standup |
|
BJJ Blue Belt
Brawler
Very confident |
|
| |
|
Ladies and gentlemen. This fight is 3 rounds, in the lightweight division.
Introducing the fighter to my left, fighting out of the red corner.
With a record of
1 - 2 - 0, fighting out of London, Jordan Miller!
And introducing the fighter to my right, fighting out of the blue corner.
With a record of
1 - 3 - 0, fighting out of New York, Hoarg Ishan!
The judges for this bout are Yuuki Gou, Sosuke Kotani and Tatsuya Matsuyama.
The bell rings for round one and we are underway!
Ishan throws out a token jab with nothing on it.
Miller tries to counter by moving into the clinch but Ishan manages to circle out of the way.
Miller uses good head movement to avoid the hook from Ishan.
Miller appears to be looking for a big counter.
The fight moves into the clinch position.
Ishan wants to take the fight to the mat but Miller manages to get underhooks and keep the fight in the clinch.
Ishan goes for a takedown in the clinch but Miller prevents it.
Ishan managing to block the knees to the body from Miller.
We've had a slow start to the round here - hopefully the action picks up.
Ishan tries for a takedown. No joy.
Jordan Miller has stuffed three takedown attempts in the round now. That's going to take a lot out of Hoarg Ishan.
That's one minute gone in the round.
Ishan tries for a takedown. No joy.
Miller misses with a punch on the inside.
Miller taking a breather.
Ishan ties up his opponent against the cage and manages to drag the fight down to the ground. Ishan no doubt will be looking to work submissions from his guard.
We could do with one of the fighters taking the initiative a bit more on the ground - they're both waiting to capitalize on a mistake.
Miller stopping the sweep attempt from Ishan.
Ishan trying to strike from the bottom but really, it's not the best position to be doing that from!
There's a bit of a scramble here and now Ishan is on top in guard.

Ishan throws a big elbow that misses.
That's two minutes gone in the round.
Miller is controlling Ishan's posture.
Ishan lands a nice shot whilst sitting in his opponent's guard.
There's a bit of a scramble here and now Miller is on top in guard.
Ishan looks more muscular than last time we saw him. He must have been on the weights.
Ishan is looking for a triangle but Miller pushes his legs off easily.
Ishan wants to improve his position but instead Miller has moved into half guard.
Ishan is trying to get back to full guard.
Miller wants to work for an arm triangle but Ishan is really keeping half guard well and defending the submission attempt.
Ishan is looking to regain full guard. Not this time though.
Ishan trying to control here.
That's three minutes gone in the round.
Ishan wants to improve his position but Miller is controlling well.
Miller is working for submissions here but there's nothing on.
Ishan striking from the bottom.
Ishan keeps control of the position for the meantime.
The ref warns both fighters not to hold the cage as they work up against the meshing.
Miller trying to pass the guard but Ishan defending well.
Ishan keeping hold of Miller's head, controlling as best he can.
Miller wants to get back to his feet.
That's four minutes gone in the round.
The crowd are starting to boo a lack of action.
Ishan wants to control but Miller is keeping busy and won't allow it.
Ishan wants to get back to full guard.
Miller perhaps working for something from half guard, or maybe not. It looks like he's just sitting there.
Ishan is trying to get back to full guard.
Ishan moves his hips nicely and gets into full guard.
Miller preventing the sweep.
Boooooooooooooooooooo!!! God, this has been a terrible round. Come on you two, sort yourselves out!
Ishan is doing well to control the posture of his opponent and prevent any damage.
Miller stopping the sweep attempt from Ishan.
The referee has decided to stand the fighters back up, so we'll restart on the feet.

Ishan drops Miller with a beautiful combination! Miller stares up at his opponent, who ushers him back to his feet - Ishan is looking for the KO!

Miller is rocked!
And that�s the end of the round � the fighters go back to their corners.
Hoarg Ishan dominated that round.
That's time! Back to the action!
Ishan lands with a right and another and another! Miller is in big trouble! Ishan lands again and this time it's lights out for Miller! A quality knockout there for Ishan.
Ladies and gentlemen, after 0:05 of round 2, we have a winner by way of KO (Strikes). Hoarg Ishan!
|
|
|
|
|
|
|
|
|
|
|
|
|
|
|
|
|
|
|
|
|
|
|
| S |
C
A |
G |
S |
C
B |
G |
|
S |
C |
G |
|
energy
A | B |
|
hype
A | B |
|
pop
A | B |
|
mgr
A | B |
|
FIGHT
RATING
28% |
|
|
|
|
|
|
|
Co-main event
|
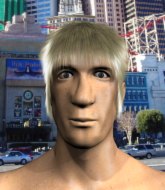
Coming up we have a light heavyweight MMA rules bout between Tickle McDickerson (ranked 0 p4p, 0 weight class) and Brandon Walker (ranked 0 p4p, 0 weight class). The atmosphere really building for this one as we go over to our ring announcer for the fighter introductions!
 |
|
 |
| 185 cm
25
195 lbs
4 - 1 - 0 |
|
188 cm
19
205 lbs
2 - 0 - 0 |
BJJ Blue Belt
Excellent MT
Good chin |
|
Good wrestler
Brawler
Experienced |
|
| |
|
Ladies and gentlemen. This fight is 5 rounds, for the light heavyweight championship of the world!
Introducing the champion to my left, fighting out of the red corner.
With a record of
4 - 1 - 0, fighting out of Tokyo, Tickle McDickerson!
And introducing the challenger to my right, fighting out of the blue corner.
With a record of
2 - 0 - 0, fighting out of Los Angeles, Brandon Walker!
The judges for this bout are Yasuomi Hirokawa, Yukihiro Yamamoto and Sosuke Kotani.
The bell rings for round one and we are underway!
Walker shoots in and drives through. McDickerson sprawls well.
McDickerson swung with a counter right hand that didn't connect.
Brandon Walker seems to be the more aggressive standup fighter in this bout.
McDickerson throws a jab when Walker was well out of range.
McDickerson throws a push kick but Walker slaps the foot to one side.
Walker feints the counter takedown.
Walker shoots in looking for a takedown but McDickerson manages to keep the fight standing, pushing Walker's face into the canvas for good measure before circling away.
It appears McDickerson was looking to counter with a kick there.
Walker walks straight into an uppercut. Luckily it didn't land flush.
McDickerson connects with a body shot that sends Walker's belly button to the back.
McDickerson looks to throw a body kick
and Walker counters with a driving takedown into guard. Nice work there by Walker.
McDickerson knows he needs to get back to his feet asap. He's simply no match for Walker on the ground.
Walker seems content to control from guard here. He's going to have to remain active though if he doesn't want to get stood back up.
Walker keeps in close for a moment and lands a decent shot to the side of McDickerson's head.
That's one minute gone in the round.
Walker postures up.
Hammerfist, elbow! yells Walker's corner. There ya go! There ya go!
Walker engaging in some classic timewasting tactics.
McDickerson wants to sweep here but Walker controlling him for the moment.
Walker chips away with some ground and pound.
Walker showing good wrestling skills to control the position.
Walker postures up and scores with a shot to the body and a follow up elbow to the head.
That's two minutes gone in the round.
The crowd are starting to boo a lack of action.
Walker postures up and lands some nice ground and pound.
Walker postures up.
The fighters are pressed up against the cage, both looking to find a bit of space to work.
Walker sitting in guard, not really doing much.
The ref warns both fighters not to hold the cage as they work up against the meshing.
Walker lands a couple of elbows.
Walker is frustrating his opponent with some stalling tactics from top position.
My spies in Schneebly's Circuit Training inform me that Walker has been getting involved in the gym's BJJ sparring sessions. Let's see whether that pays dividends!
Walker is working the ground and pound from guard. He might want to try advancing position though to get more of an impact.
Walker postures up and lands some nice ground and pound.
That's three minutes gone in the round.
McDickerson is trying to control the position from the bottom.
Walker content to stall in guard here.
The referee decides to stand the fighters back up.
Walker shoots in for a takedown and gets it. Let's see what he's got on the mat.
The fighters are starting to perspire pretty heavily.
McDickerson is looking to stand back up but Walker counters by passing into half guard. Oops... bit sloppy there by McDickerson.
Neither fighter is being very active at the moment, with Walker in particular looking to stall.
Walker's corner are shouting for him to control the position and he seems happy to oblige.
That's four minutes gone in the round.
Walker uses his free foot to push down on McDickerson's thigh. Eventually he works his other foot free and he's advanced to mount - this is trouble for McDickerson.
Walker has the superior BJJ but he's also working some ground strikes into his gameplan.
Walker controlling his opponent.
Walker with the ground and pound from mount.
Walker postures up and cracks his opponent a couple of times before moving back into close ground control. McDickerson looks a forlorn figure.
Walker is working to isolate an arm here. It's a telegraphed submission attempt but he's gone for it anyway - and he's got it! Walker extends the arm and McDickerson is forced to tap!
Ladies and gentlemen, after 4:59 of round 1, we have a winner by way of Submission (Armbar). Brandon Walker!
Brandon Walker is the new light heavyweight champion!
Brandon Walker thanked the fans post fight for their support.
Tickle McDickerson spoke after the fight, saying 'need a tickle?'.
|
|
|
|
|
|
|
|
|
|
|
|
|
|
|
|
|
|
|
|
|
|
|
| S |
C
A |
G |
S |
C
B |
G |
|
S |
C |
G |
|
energy
A | B |
|
hype
A | B |
|
pop
A | B |
|
mgr
A | B |
|
FIGHT
RATING
28% |
|
|
|
|
|
|
|
Main event
|
Coming up we have a middleweight MMA rules bout between Sinner Savage (ranked 0 p4p, 0 weight class) and Jared Mauck (ranked 0 p4p, 0 weight class). Over to our ring announcer for the fighter introductions!
 |
|
 |
| 183 cm
26
185 lbs
3 - 1 - 0 |
|
175 cm
25
186 lbs
3 - 0 - 0 |
BJJ White Belt
Excellent MT
Intelligent |
|
Good takedowns
Brawler
Determined |
|
| |
|
Ladies and gentlemen. This fight is 3 rounds, in the middleweight division.
Introducing the fighter to my left, fighting out of the red corner.
With a record of
3 - 1 - 0, fighting out of Las Vegas, Sinner Savage!
And introducing the fighter to my right, fighting out of the blue corner.
With a record of
3 - 0 - 0, fighting out of Tokyo, Jared Mauck!
The judges for this bout are Kenichi Hosakawa, Shirou Masuda and Hirohito Nitta.
The bell rings for round one and we are underway!
Mauck misses with a kick to the body.
Savage scores with a big left there. The judges will like that one.
Savage listening to his corner there, landing a nice uppercut.
Mauck doesn't react quick enough there as he takes a shot to the body.
Savage tests Mauck's chin there with a solid looking shot.
Savage connects with a right hand. Mauck shakes it off.

Mauck is rocked!

It looks like Jared Mauck has been cut.

Savage sends Mauck crashing to the mat with a devastating uppercut! Savage is motioning to the referee to let Mauck up. He wants to try and finish this one on the feet!
Mauck is still on wobbly legs! Can Savage finish him?
Wooooo! Give it up for these two warriors! They are putting on a show!
Savage darts in and lands a big hook, right on the button! Mauck's legs crumble underneath him as he falls to the canvas! The ref tackles Savage before he gets to land any more shots to his stricken foe.
Ladies and gentlemen, after 0:38 of round 1, we have a winner by way of KO (Punch). Sinner Savage!
|
|
|
|
|
|
|
|
|
|
|
|
|
|
|
|
|
|
|
|
|
|
|
| S |
C
A |
G |
S |
C
B |
G |
|
S |
C |
G |
|
energy
A | B |
|
hype
A | B |
|
pop
A | B |
|
mgr
A | B |
|
FIGHT
RATING
100% |
|
|
|
|
|
|
|
|
|
|
